Samsung SGH-A927 User Manual (user Manual) (ver.f7) (English) - Page 103
Using the Camcorder - reviews
 |
View all Samsung SGH-A927 manuals
Add to My Manuals
Save this manual to your list of manuals |
Page 103 highlights
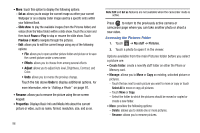
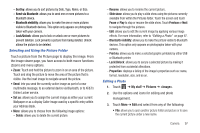
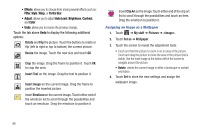
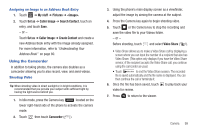
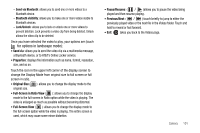
Assigning an Image to an Address Book Entry 1. Touch ➔ My stuff ➔ Pictures ➔ . 2. Touch Set as ➔ Caller Image ➔ Search Contact, touch an entry, and touch Save. - or - Touch Set as ➔ Caller Image ➔ Create Contact and create a new Address Book entry with the image already assigned. For more information, refer to "Understanding Your Address Book" on page 80. Using the Camcorder In addition to taking photos, the camera also doubles as a camcorder allowing you to also record, view, and send videos. Shooting Video Tip: When shooting video in direct sunlight or in bright conditions, it is recommended that you provide your subject with sufficient light by having the light source behind you. 1. In Idle mode, press the Camera key located on the lower right-hand side of the phone to activate the camera mode. 2. Touch then touch Camcorder ( ). 3. Using the phone's main display screen as a viewfinder, adjust the image by aiming the camera at the subject. 4. Press the Camera key again to begin shooting video. 5. Touch or the Camera key to stop the recording and save the video file to your Videos folder. - or - Before shooting, touch and select Video Share ( ). • Video Share allows you to make a Video Share call by displaying a screen where you can input the number of a recipient that also has Video Share. (This option only displays if you have the Video Share service.) If the recipient accepts the Video Share call, you continue using the camcorder as usual. • Touch Video Share to end the Video Share session. The recorded file is saved automatically and the file name is displayed. You can then continue the call or terminate it. 6. Once the file has been saved, touch to play back your video for review. 7. Press to return to the viewer. Camera 99
-
 1
1 -
2
-
3
-
4
-
5
-
6
-
7
-
8
-
9
-
10
-
11
-
12
-
13
-
14
-
15
-
16
-
17
-
18
-
19
-
20
-
21
-
22
-
23
-
24
-
25
-
26
-
27
-
28
-
29
-
30
-
31
-
32
-
33
-
34
-
35
-
36
-
37
-
38
-
39
-
40
-
41
-
42
-
43
-
44
-
45
-
46
-
47
-
48
-
49
-
50
-
51
-
52
-
53
-
54
-
55
-
56
-
57
-
58
-
59
-
60
-
61
-
62
-
63
-
64
-
65
-
66
-
67
-
68
-
69
-
70
-
71
-
72
-
73
-
74
-
75
-
76
-
77
-
78
-
79
-
80
-
81
-
82
-
83
-
84
-
85
-
86
-
87
-
88
-
89
-
90
-
91
-
92
-
93
-
94
-
95
-
96
-
97
-
 98
98 -
 99
99 -
 100
100 -
 101
101 -
 102
102 -
 103
103 -
 104
104 -
 105
105 -
 106
106 -
 107
107 -
 108
108 -
109
-
110
-
111
-
112
-
113
-
114
-
115
-
116
-
117
-
118
-
119
-
120
-
121
-
122
-
123
-
124
-
125
-
126
-
127
-
128
-
129
-
130
-
131
-
132
-
133
-
134
-
135
-
136
-
137
-
138
-
139
-
140
-
141
-
142
-
143
-
144
-
145
-
146
-
147
-
148
-
149
-
150
-
151
-
152
-
153
-
154
-
155
-
156
-
157
-
158
-
159
-
160
-
161
-
162
-
163
-
164
-
165
-
166
-
167
-
168
-
169
-
170
-
171
-
172
-
173
-
174
-
175
-
176
-
177
-
178
-
179
-
180
-
181
-
182
-
183
-
184
-
185
-
186
-
187
-
188
-
189
-
190
-
191
-
192
-
193
-
194
-
195
-
196
-
197
 |
 |