Samsung SGH-A927 User Manual (user Manual) (ver.f7) (English) - Page 114
Contact Info, Insert, Slide Options, Attach Files, Add subject, Remove subject, Save to Drafts
 |
View all Samsung SGH-A927 manuals
Add to My Manuals
Save this manual to your list of manuals |
Page 114 highlights
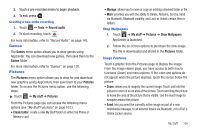
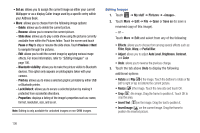
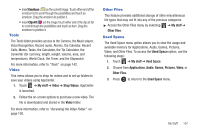
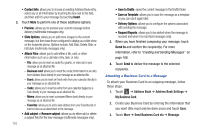
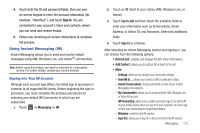
• Contact Info: allows you to choose an existing Address Book entry, select any or all information by touching the box next to the field, and then add it to your message by touching Insert. 2. Touch More to perform one of these additional options: • Preview: allows you to preview your current message before delivery (multimedia messages only). • Slide Options: allows you to add more images to the current message, but then have those configured to display as a slide show on the recipients phone. Options include: Add Slide, Delete Slide, or Edit style (multimedia messages only). • Attach Files: allows you to add either a file, card, or other information such as a calendar entry, task, or note. - File: allows you to insert an audio file, graphic, or video clip to your message as an attached file. - Business card: allows you to insert the contact information for an entry from Address Book directly to your message as an attached file. - Event: allows you to insert an Event entry from your calendar directly to your message as an attached file. - Tasks: allows you to insert an entry from your calendar tagged as a Task directly to your message as an attached file. - Memo: allows you to insert a presaved Memo (text) directly to your message as an attached file. - Favorites: allows you to add a web address from your Favorites list of Internet sites as an attachment to the message. • Add subject or Remove subject: allows you to either add or delete a subject field for the new message (multimedia messages only). 110 • Save to Drafts: saves the current message to the Drafts folder. • Save as Template: allows you to save the message as a template so you can use it again later. • Delivery Options: allows you to configure the options associated with sending the message. • Request Reports: allows you to be alerted when the message is received and when it is read (text messages only). 3. When you have finished composing your message, touch Send to and confirm the recipient(s). For more information, refer to "Creating and Sending Messages" on page 108. 4. Touch Send to deliver the message to the selected recipients. Attaching a Business Card to a Message To attach your Business Card to an outgoing message, follow these steps: 1. Touch ➔ Address Book ➔ Address Book Settings ➔ My Business Card. 2. Create your Business Card by entering the information that you want (this must only be done once) and touch Save. 3. Touch More ➔ Send Business Card via ➔ Message.
-
 1
1 -
2
-
3
-
4
-
5
-
6
-
7
-
8
-
9
-
10
-
11
-
12
-
13
-
14
-
15
-
16
-
17
-
18
-
19
-
20
-
21
-
22
-
23
-
24
-
25
-
26
-
27
-
28
-
29
-
30
-
31
-
32
-
33
-
34
-
35
-
36
-
37
-
38
-
39
-
40
-
41
-
42
-
43
-
44
-
45
-
46
-
47
-
48
-
49
-
50
-
51
-
52
-
53
-
54
-
55
-
56
-
57
-
58
-
59
-
60
-
61
-
62
-
63
-
64
-
65
-
66
-
67
-
68
-
69
-
70
-
71
-
72
-
73
-
74
-
75
-
76
-
77
-
78
-
79
-
80
-
81
-
82
-
83
-
84
-
85
-
86
-
87
-
88
-
89
-
90
-
91
-
92
-
93
-
94
-
95
-
96
-
97
-
98
-
99
-
100
-
101
-
102
-
103
-
104
-
105
-
106
-
107
-
108
-
 109
109 -
 110
110 -
 111
111 -
 112
112 -
 113
113 -
 114
114 -
 115
115 -
 116
116 -
 117
117 -
 118
118 -
 119
119 -
120
-
121
-
122
-
123
-
124
-
125
-
126
-
127
-
128
-
129
-
130
-
131
-
132
-
133
-
134
-
135
-
136
-
137
-
138
-
139
-
140
-
141
-
142
-
143
-
144
-
145
-
146
-
147
-
148
-
149
-
150
-
151
-
152
-
153
-
154
-
155
-
156
-
157
-
158
-
159
-
160
-
161
-
162
-
163
-
164
-
165
-
166
-
167
-
168
-
169
-
170
-
171
-
172
-
173
-
174
-
175
-
176
-
177
-
178
-
179
-
180
-
181
-
182
-
183
-
184
-
185
-
186
-
187
-
188
-
189
-
190
-
191
-
192
-
193
-
194
-
195
-
196
-
197
 |
 |