Samsung SGH-A927 User Manual (user Manual) (ver.f7) (English) - Page 97
Camera and Camcorder Options
 |
View all Samsung SGH-A927 manuals
Add to My Manuals
Save this manual to your list of manuals |
Page 97 highlights
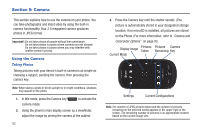
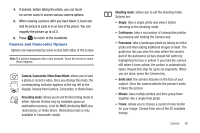
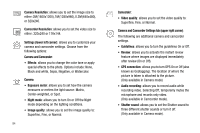
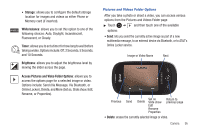
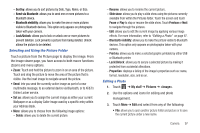
4. If desired, before taking the photo, you can touch on-screen icons to access various camera options. 5. When viewing a picture after you have taken it, touch and hold the picture to zoom in on an area of the picture. You can magnify the picture up to x2.0. 6. Press to return to the viewfinder. Camera and Camcorder Options Options are represented by icons across both sides of the screen. Note: The options disappear after a few seconds. Touch the screen to make them reappear. Camera, Camcorder, Video Share Mode: allows you to take a photo or record a video. Once you change the mode, the corresponding indicator appears at the top left of the display. Choose from Camera, Camcorder, or Video Share. Recording mode: allows you to set the Recording mode to either: Normal (limited only by available space on destination location), Limit for MMS (limited by MMS size restrictions), or Video Share. (Recording mode is only available in Camcorder mode). Shooting mode: allows you to set the shooting mode. Options are: • Single: take a single photo and view it before returning to the shooting mode. • Continuous: take a succession of consecutive photos by pressing and holding the Camera key. • Panorama: take a landscape photo by taking an initial photo and then adding additional images to itself. The guide box lets you view the area where the second part of the panoramic picture should fall within by highlighting the box in yellow. If you hold the camera still when it turns yellow, the picture is automatically taken. Repeat this step for up to six segments. When you are done, press the Camera key. • Smile shot: the camera focuses on the face of your subject. Once the camera detects the person's smile, it takes the picture. • Mosaic: take multiple photos and then group them together into a single final photo. • Frame: allows you to choose a custom frame border for your image. Choose from one of the 20 available frames. Camera 93
-
 1
1 -
2
-
3
-
4
-
5
-
6
-
7
-
8
-
9
-
10
-
11
-
12
-
13
-
14
-
15
-
16
-
17
-
18
-
19
-
20
-
21
-
22
-
23
-
24
-
25
-
26
-
27
-
28
-
29
-
30
-
31
-
32
-
33
-
34
-
35
-
36
-
37
-
38
-
39
-
40
-
41
-
42
-
43
-
44
-
45
-
46
-
47
-
48
-
49
-
50
-
51
-
52
-
53
-
54
-
55
-
56
-
57
-
58
-
59
-
60
-
61
-
62
-
63
-
64
-
65
-
66
-
67
-
68
-
69
-
70
-
71
-
72
-
73
-
74
-
75
-
76
-
77
-
78
-
79
-
80
-
81
-
82
-
83
-
84
-
85
-
86
-
87
-
88
-
89
-
90
-
91
-
 92
92 -
 93
93 -
 94
94 -
 95
95 -
 96
96 -
 97
97 -
 98
98 -
 99
99 -
 100
100 -
 101
101 -
 102
102 -
103
-
104
-
105
-
106
-
107
-
108
-
109
-
110
-
111
-
112
-
113
-
114
-
115
-
116
-
117
-
118
-
119
-
120
-
121
-
122
-
123
-
124
-
125
-
126
-
127
-
128
-
129
-
130
-
131
-
132
-
133
-
134
-
135
-
136
-
137
-
138
-
139
-
140
-
141
-
142
-
143
-
144
-
145
-
146
-
147
-
148
-
149
-
150
-
151
-
152
-
153
-
154
-
155
-
156
-
157
-
158
-
159
-
160
-
161
-
162
-
163
-
164
-
165
-
166
-
167
-
168
-
169
-
170
-
171
-
172
-
173
-
174
-
175
-
176
-
177
-
178
-
179
-
180
-
181
-
182
-
183
-
184
-
185
-
186
-
187
-
188
-
189
-
190
-
191
-
192
-
193
-
194
-
195
-
196
-
197
 |
 |
