Samsung SGH-I917 User Manual (user Manual) (ver.f6) (English) - Page 14
The Sign In With a Windows Live ID screen is displayed., Read the Windows Phone Terms of Use and tap - apps for
 |
UPC - 635753486537
View all Samsung SGH-I917 manuals
Add to My Manuals
Save this manual to your list of manuals |
Page 14 highlights
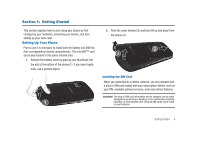
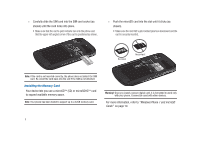
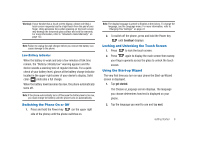
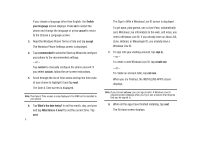
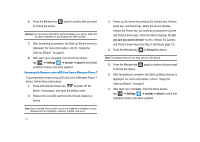
If you choose a language other than English, the Switch your language screen displays. Press ok to restart the phone and change the language or press cancel to return to the Choose a Language screen. 3. Read the Windows Phone Terms of Use and tap accept. The Windows Phone Settings screen is displayed. 4. Tap recommended to allow the Start-up Wizard to configure your phone to the recommended settings. - or - Tap custom to manually configure the phone yourself. If you select custom, follow the on-screen instructions. 5. Scroll through the list of time zones and tap the time zone of your choice to highlight it and tap next. The Date & Time screen is displayed. Note: The Date & Time screen is only displayed if no SIM card is installed in your phone. 6. Tap What's the date today? to set the month, day, and year and tap What time is it now? to set the current time. Tap next. 9 The Sign In With a Windows Live ID screen is displayed. To get apps, play games, use a Zune Pass, automatically sync Windows Live information to the web, and more, you need a Windows Live ID. If you already have an Xbox LIVE, Zune, Hotmail, or Messenger ID, you already have a Windows Live ID. 7. To sign into your existing account, tap sign in. - or - To create a new Windows Live ID, tap create one. - or - To create an account later, tap not now. When you are finished, the INSTALLING APPS screen displays. Note: If you choose not now, you can sign in later. A Windows Live ID required screen displays when you try to use a feature that requires that you be signed in. 8. When all the apps have finished installing, tap next. The All done screen displays.
-
 1
1 -
2
-
3
-
4
-
5
-
6
-
7
-
8
-
 9
9 -
 10
10 -
 11
11 -
 12
12 -
 13
13 -
 14
14 -
 15
15 -
 16
16 -
 17
17 -
 18
18 -
 19
19 -
20
-
21
-
22
-
23
-
24
-
25
-
26
-
27
-
28
-
29
-
30
-
31
-
32
-
33
-
34
-
35
-
36
-
37
-
38
-
39
-
40
-
41
-
42
-
43
-
44
-
45
-
46
-
47
-
48
-
49
-
50
-
51
-
52
-
53
-
54
-
55
-
56
-
57
-
58
-
59
-
60
-
61
-
62
-
63
-
64
-
65
-
66
-
67
-
68
-
69
-
70
-
71
-
72
-
73
-
74
-
75
-
76
-
77
-
78
-
79
-
80
-
81
-
82
-
83
-
84
-
85
-
86
-
87
-
88
-
89
-
90
-
91
-
92
-
93
-
94
-
95
-
96
-
97
-
98
-
99
-
100
-
101
-
102
-
103
-
104
-
105
-
106
-
107
-
108
-
109
-
110
-
111
-
112
-
113
-
114
-
115
-
116
-
117
-
118
-
119
-
120
-
121
-
122
-
123
-
124
-
125
-
126
-
127
-
128
-
129
-
130
-
131
-
132
-
133
-
134
-
135
-
136
-
137
-
138
-
139
-
140
-
141
-
142
-
143
-
144
-
145
-
146
-
147
-
148
 |
 |