Samsung SGH-T528G User Manual (user Manual) (ver.f9) (English) - Page 68
Connected, Finish, Library, entry you named - update
 |
View all Samsung SGH-T528G manuals
Add to My Manuals
Save this manual to your list of manuals |
Page 68 highlights
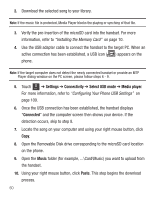
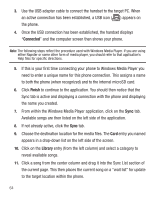
3. Use the USB adapter cable to connect the handset to the target PC. When an active connection has been established, a USB icon ( ) appears on the phone. 4. Once the USB connection has been established, the handset displays "Connected" and the computer screen then shows your phone. Note: The following steps reflect the procedure used with Windows Media Player. If you are using either Napster or some other form of media player, you should refer to that application's Help files for specific directions. 5. If this is your first time connecting your phone to Windows Media Player you need to enter a unique name for this phone connection. This assigns a name to both the phone (when recognized) and to the internal microSD card. 6. Click Finish to continue to the application. You should then notice that the Sync tab is active and displaying a connection with the phone and displaying the name you created. 7. From within the Windows Media Player application, click on the Sync tab. Available songs are then listed on the left side of the application. 8. If not already active, click the Sync tab. 9. Choose the destination location for the media files. The Card entry you named appears in a drop-down list on the left side of the screen. 10. Click on the Library entry (from the left column) and select a category to reveal available songs. 11. Click a song from the center column and drag it into the Sync List section of the current page. This then places the current song on a "wait list" for update to the target location within the phone. 64
-
 1
1 -
2
-
3
-
4
-
5
-
6
-
7
-
8
-
9
-
10
-
11
-
12
-
13
-
14
-
15
-
16
-
17
-
18
-
19
-
20
-
21
-
22
-
23
-
24
-
25
-
26
-
27
-
28
-
29
-
30
-
31
-
32
-
33
-
34
-
35
-
36
-
37
-
38
-
39
-
40
-
41
-
42
-
43
-
44
-
45
-
46
-
47
-
48
-
49
-
50
-
51
-
52
-
53
-
54
-
55
-
56
-
57
-
58
-
59
-
60
-
61
-
62
-
 63
63 -
 64
64 -
 65
65 -
 66
66 -
 67
67 -
 68
68 -
 69
69 -
 70
70 -
 71
71 -
 72
72 -
 73
73 -
74
-
75
-
76
-
77
-
78
-
79
-
80
-
81
-
82
-
83
-
84
-
85
-
86
-
87
-
88
-
89
-
90
-
91
-
92
-
93
-
94
-
95
-
96
-
97
-
98
-
99
-
100
-
101
-
102
-
103
-
104
-
105
-
106
-
107
-
108
-
109
-
110
-
111
-
112
-
113
-
114
-
115
-
116
-
117
-
118
-
119
-
120
-
121
-
122
-
123
-
124
-
125
-
126
-
127
-
128
-
129
-
130
-
131
-
132
-
133
-
134
-
135
-
136
-
137
-
138
-
139
-
140
-
141
-
142
-
143
-
144
-
145
-
146
-
147
-
148
-
149
-
150
-
151
-
152
-
153
-
154
-
155
-
156
-
157
 |
 |