Samsung SGH-T959 This Document Is For The T-mobile Sgh-t959 (vibrant) Only. ( - Page 72
Finding a Contact
 |
UPC - 610214622631
View all Samsung SGH-T959 manuals
Add to My Manuals
Save this manual to your list of manuals |
Page 72 highlights
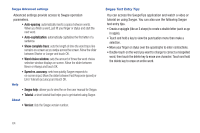
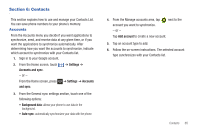
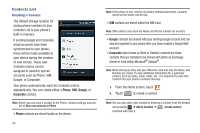
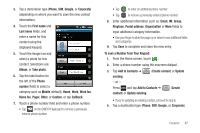
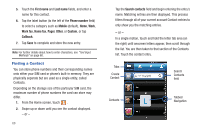
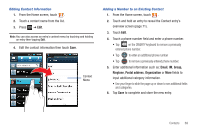
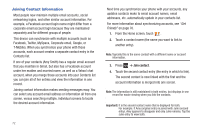
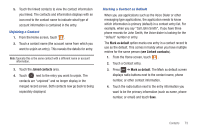
5. Touch the First name and Last name fields, and enter a name for this contact. 6. Tap the label button (to the left of the Phone number field) to select a category such as Mobile (default), Home, Work, Work fax, Home fax, Pager, Other, or Custom, or tap Callback. 7. Tap Save to complete and store the new entry. Note: For further details about how to enter characters, see "Text Input Methods" on page 60. Finding a Contact You can store phone numbers and their corresponding names onto either your SIM card or phone's built-in memory. They are physically separate but are used as a single entity, called Contacts. Depending on the storage size of the particular SIM card, the maximum number of phone numbers the card can store may differ. 1. From the Home screen, touch . 2. Swipe up or down until you see the contact displayed. - or - 68 Tap the Search contacts field and begin entering the entry's name. Matching entries are then displayed. This process filters through all of your current account Contact entries to only show you the matching entries. - or - In a single motion, touch and hold the letter tab area (on the right) until onscreen letters appear, then scroll through the list. You are then taken to that section of the Contacts list. Touch the contact entry. Tabs Create Contact Search Contacts field Contacts Tabbed Navigation
-
 1
1 -
2
-
3
-
4
-
5
-
6
-
7
-
8
-
9
-
10
-
11
-
12
-
13
-
14
-
15
-
16
-
17
-
18
-
19
-
20
-
21
-
22
-
23
-
24
-
25
-
26
-
27
-
28
-
29
-
30
-
31
-
32
-
33
-
34
-
35
-
36
-
37
-
38
-
39
-
40
-
41
-
42
-
43
-
44
-
45
-
46
-
47
-
48
-
49
-
50
-
51
-
52
-
53
-
54
-
55
-
56
-
57
-
58
-
59
-
60
-
61
-
62
-
63
-
64
-
65
-
66
-
 67
67 -
 68
68 -
 69
69 -
 70
70 -
 71
71 -
 72
72 -
 73
73 -
 74
74 -
 75
75 -
 76
76 -
 77
77 -
78
-
79
-
80
-
81
-
82
-
83
-
84
-
85
-
86
-
87
-
88
-
89
-
90
-
91
-
92
-
93
-
94
-
95
-
96
-
97
-
98
-
99
-
100
-
101
-
102
-
103
-
104
-
105
-
106
-
107
-
108
-
109
-
110
-
111
-
112
-
113
-
114
-
115
-
116
-
117
-
118
-
119
-
120
-
121
-
122
-
123
-
124
-
125
-
126
-
127
-
128
-
129
-
130
-
131
-
132
-
133
-
134
-
135
-
136
-
137
-
138
-
139
-
140
-
141
-
142
-
143
-
144
-
145
-
146
-
147
-
148
-
149
-
150
-
151
-
152
-
153
-
154
-
155
-
156
-
157
-
158
-
159
-
160
-
161
-
162
-
163
-
164
-
165
-
166
-
167
-
168
-
169
-
170
-
171
-
172
-
173
-
174
-
175
-
176
-
177
-
178
-
179
-
180
-
181
-
182
-
183
-
184
-
185
-
186
-
187
-
188
-
189
-
190
-
191
-
192
-
193
-
194
-
195
-
196
-
197
-
198
-
199
-
200
-
201
-
202
-
203
-
204
-
205
-
206
-
207
-
208
-
209
-
210
-
211
-
212
-
213
-
214
-
215
-
216
-
217
-
218
 |
 |
