Samsung SGH-T959 This Document Is For The T-mobile Sgh-t959 (vibrant) Only. ( - Page 79
Copying Contact Information, Synchronizing Contacts
 |
UPC - 610214622631
View all Samsung SGH-T959 manuals
Add to My Manuals
Save this manual to your list of manuals |
Page 79 highlights
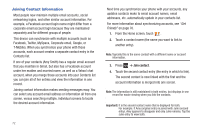
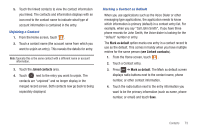
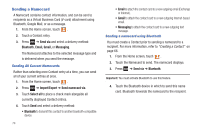
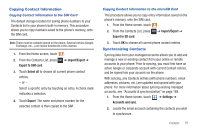
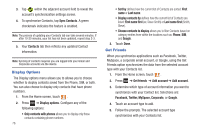
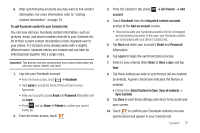
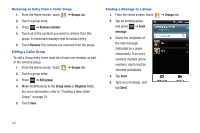
Copying Contact Information Copying Contact Information to the SIM Card The default storage location for saving phone numbers to your Contacts list is your phone's built-in memory. This procedure allows you to copy numbers saved to the phone's memory, onto the SIM card. Note: These must be contacts stored on the phone. External entries (Google, Exchange, etc...) can not be transferred in this manner. 1. From the Home screen, touch . 2. From the Contacts List, press Export to SIM card. ➔ Import/Export ➔ 3. Touch Select all to choose all current phone contact entries. - or - Select a specific entry by touching an entry. A check mark indicates a selection. 4. Touch Export. The name and phone number for the selected contact is then copied to the SIM. Copying Contact Information to the microSD Card This procedure allows you to copy entry information saved on the phone's memory, onto the SIM card. 1. From the Home screen, touch . 2. From the Contacts List, press Export to SD card. ➔ Import/Export ➔ 3. Touch OK to choose all current phone contact entries. Synchronizing Contacts Syncing data from your managed accounts allows you to add and manage a new or existing contact from your online or remote accounts to your phone. Prior to syncing, you must first have an active Google or Corporate account with current Contact entries, and be signed into your account via the phone. With syncing, any Contacts entries (with phone numbers, email addresses, pictures, etc.) are updated and synced with your phone. For more information about syncing existing managed accounts, see "Accounts & synchronization" on page 169. 1. From the Home screen, touch ➔ Settings ➔ Accounts and sync. 2. Locate the email account containing the contacts you wish to synchronize. Contacts 75
-
 1
1 -
2
-
3
-
4
-
5
-
6
-
7
-
8
-
9
-
10
-
11
-
12
-
13
-
14
-
15
-
16
-
17
-
18
-
19
-
20
-
21
-
22
-
23
-
24
-
25
-
26
-
27
-
28
-
29
-
30
-
31
-
32
-
33
-
34
-
35
-
36
-
37
-
38
-
39
-
40
-
41
-
42
-
43
-
44
-
45
-
46
-
47
-
48
-
49
-
50
-
51
-
52
-
53
-
54
-
55
-
56
-
57
-
58
-
59
-
60
-
61
-
62
-
63
-
64
-
65
-
66
-
67
-
68
-
69
-
70
-
71
-
72
-
73
-
 74
74 -
 75
75 -
 76
76 -
 77
77 -
 78
78 -
 79
79 -
 80
80 -
 81
81 -
 82
82 -
 83
83 -
 84
84 -
85
-
86
-
87
-
88
-
89
-
90
-
91
-
92
-
93
-
94
-
95
-
96
-
97
-
98
-
99
-
100
-
101
-
102
-
103
-
104
-
105
-
106
-
107
-
108
-
109
-
110
-
111
-
112
-
113
-
114
-
115
-
116
-
117
-
118
-
119
-
120
-
121
-
122
-
123
-
124
-
125
-
126
-
127
-
128
-
129
-
130
-
131
-
132
-
133
-
134
-
135
-
136
-
137
-
138
-
139
-
140
-
141
-
142
-
143
-
144
-
145
-
146
-
147
-
148
-
149
-
150
-
151
-
152
-
153
-
154
-
155
-
156
-
157
-
158
-
159
-
160
-
161
-
162
-
163
-
164
-
165
-
166
-
167
-
168
-
169
-
170
-
171
-
172
-
173
-
174
-
175
-
176
-
177
-
178
-
179
-
180
-
181
-
182
-
183
-
184
-
185
-
186
-
187
-
188
-
189
-
190
-
191
-
192
-
193
-
194
-
195
-
196
-
197
-
198
-
199
-
200
-
201
-
202
-
203
-
204
-
205
-
206
-
207
-
208
-
209
-
210
-
211
-
212
-
213
-
214
-
215
-
216
-
217
-
218
 |
 |