Samsung SL-M3870FW User Manual Ver.1.0 (English) - Page 63
Basic faxing
 |
View all Samsung SL-M3870FW manuals
Add to My Manuals
Save this manual to your list of manuals |
Page 63 highlights
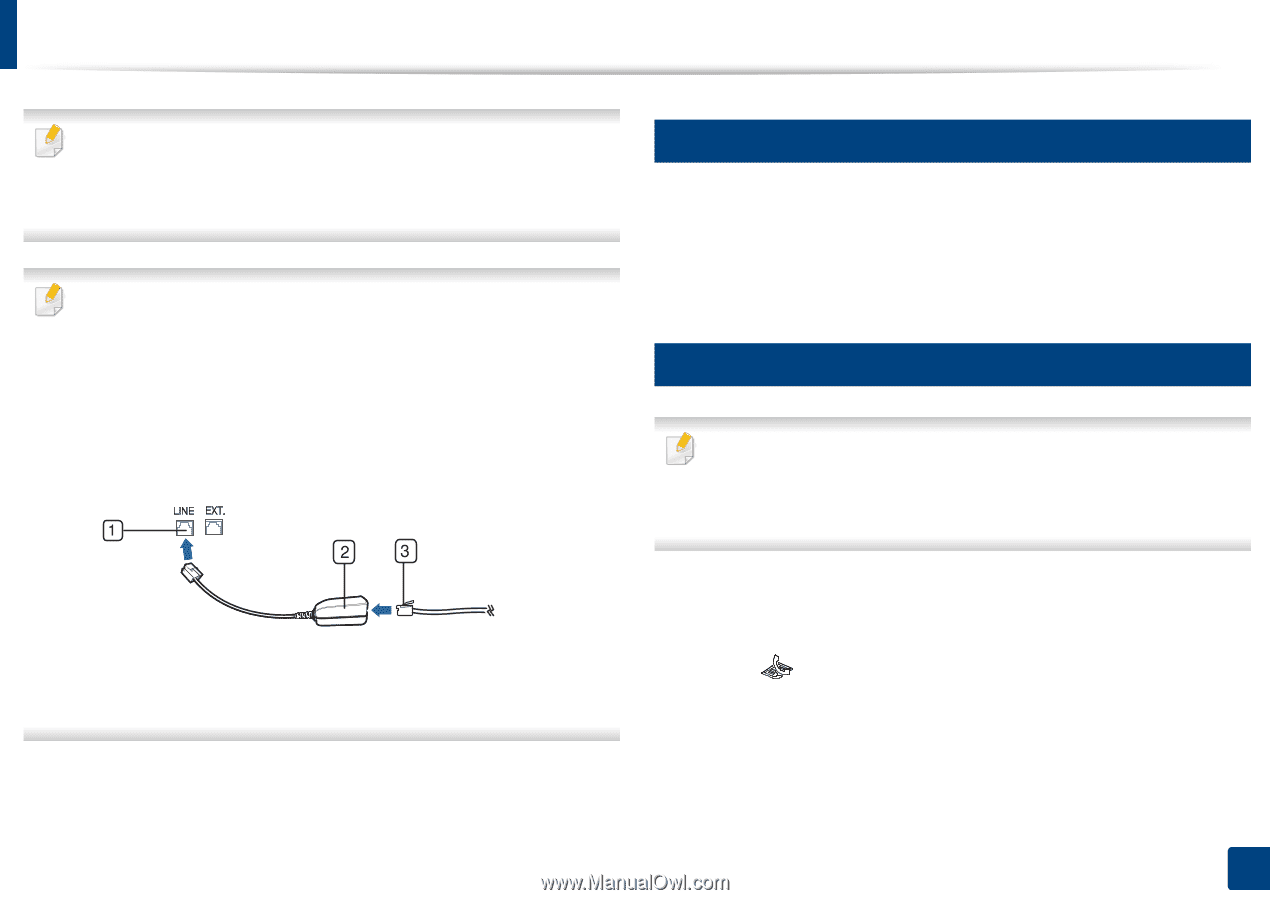
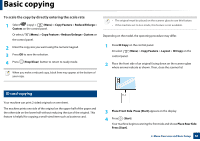
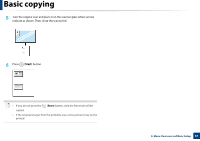
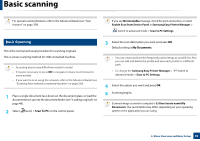
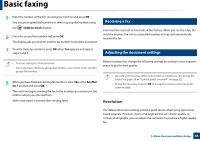
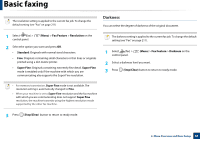
Basic faxing • For special faxing features, refer to the Advanced Guide (see "Fax features" on page 269). • Accessing menus may differ from model to model (see "Accessing the menu" on page 30 or "Control panel overview" on page 22). • You cannot use this machine as a fax via the internet phone. For more information ask your internet service provider. • We recommend using traditional analog phone services (PSTN: Public Switched Telephone Network) when connecting telephone lines to use a fax machine. If you use other Internet services (DSL, ISDN, VolP), you can improve the connection quality by using the Micro-filter. The Micro-filter eliminates unnecessary noise signals and improves connection quality or Internet quality. Since the DSL Micro-filter is not provided with the machine, contact your Internet service provider for use on DSL Micro-filter. 19 Preparing to fax Before you send or receive a fax, you need to connect the supplied line cord to your telephone wall jack (see "Rear view" on page 21). Refer to the Quick Installation Guide how to make a connection. The method of making a telephone connection is different from one country to another. 20 Sending a fax When you place the originals, you can use either the document feeder or the scanner glass. If the originals are placed on both the document feeder and the scanner glass, the machine will read the originals on the document feeder first, which has higher priority in scanning. 1 Line port 2 Micro filter 3 DSL modem / Telephone line (see "Rear view" on page 21). 1 Place a single document face down on the document glass, or load the documents face up into the document feeder (see "Loading originals" on page 49). 2 Select (fax) on the control panel. 3 Adjust the resolution and the darkness to suit your fax needs (see "Adjusting the document settings" on page 65). 4 Enter the destination fax number (see "Keypad letters and numbers" on page 236). 2. Menu Overview and Basic Setup 63
-
 1
1 -
2
-
3
-
4
-
5
-
6
-
7
-
8
-
9
-
10
-
11
-
12
-
13
-
14
-
15
-
16
-
17
-
18
-
19
-
20
-
21
-
22
-
23
-
24
-
25
-
26
-
27
-
28
-
29
-
30
-
31
-
32
-
33
-
34
-
35
-
36
-
37
-
38
-
39
-
40
-
41
-
42
-
43
-
44
-
45
-
46
-
47
-
48
-
49
-
50
-
51
-
52
-
53
-
54
-
55
-
56
-
57
-
 58
58 -
 59
59 -
 60
60 -
 61
61 -
 62
62 -
 63
63 -
 64
64 -
 65
65 -
 66
66 -
 67
67 -
 68
68 -
69
-
70
-
71
-
72
-
73
-
74
-
75
-
76
-
77
-
78
-
79
-
80
-
81
-
82
-
83
-
84
-
85
-
86
-
87
-
88
-
89
-
90
-
91
-
92
-
93
-
94
-
95
-
96
-
97
-
98
-
99
-
100
-
101
-
102
-
103
-
104
-
105
-
106
-
107
-
108
-
109
-
110
-
111
-
112
-
113
-
114
-
115
-
116
-
117
-
118
-
119
-
120
-
121
-
122
-
123
-
124
-
125
-
126
-
127
-
128
-
129
-
130
-
131
-
132
-
133
-
134
-
135
-
136
-
137
-
138
-
139
-
140
-
141
-
142
-
143
-
144
-
145
-
146
-
147
-
148
-
149
-
150
-
151
-
152
-
153
-
154
-
155
-
156
-
157
-
158
-
159
-
160
-
161
-
162
-
163
-
164
-
165
-
166
-
167
-
168
-
169
-
170
-
171
-
172
-
173
-
174
-
175
-
176
-
177
-
178
-
179
-
180
-
181
-
182
-
183
-
184
-
185
-
186
-
187
-
188
-
189
-
190
-
191
-
192
-
193
-
194
-
195
-
196
-
197
-
198
-
199
-
200
-
201
-
202
-
203
-
204
-
205
-
206
-
207
-
208
-
209
-
210
-
211
-
212
-
213
-
214
-
215
-
216
-
217
-
218
-
219
-
220
-
221
-
222
-
223
-
224
-
225
-
226
-
227
-
228
-
229
-
230
-
231
-
232
-
233
-
234
-
235
-
236
-
237
-
238
-
239
-
240
-
241
-
242
-
243
-
244
-
245
-
246
-
247
-
248
-
249
-
250
-
251
-
252
-
253
-
254
-
255
-
256
-
257
-
258
-
259
-
260
-
261
-
262
-
263
-
264
-
265
-
266
-
267
-
268
-
269
-
270
-
271
-
272
-
273
-
274
-
275
-
276
-
277
-
278
-
279
-
280
-
281
-
282
-
283
-
284
-
285
-
286
-
287
-
288
-
289
-
290
-
291
-
292
-
293
-
294
-
295
-
296
-
297
-
298
-
299
-
300
-
301
-
302
-
303
-
304
-
305
-
306
-
307
-
308
-
309
-
310
-
311
-
312
-
313
-
314
-
315
-
316
-
317
-
318
-
319
-
320
-
321
-
322
-
323
-
324
-
325
-
326
-
327
-
328
-
329
-
330
-
331
-
332
-
333
-
334
-
335
-
336
-
337
-
338
-
339
-
340
-
341
-
342
-
343
-
344
-
345
-
346
-
347
-
348
-
349
-
350
-
351
 |
 |