Samsung SM-R765V Quick Start Guide
Samsung SM-R765V Manual
 |
View all Samsung SM-R765V manuals
Add to My Manuals
Save this manual to your list of manuals |
Samsung SM-R765V manual content summary:
- Samsung SM-R765V | Quick Start Guide - Page 1
Quick Start Guide - Samsung SM-R765V | Quick Start Guide - Page 2
Table of Contents 3 Device layout 4 Charge device 7 Pair 9 Navigation 10 Customization 13 Status panel 14 Apps screen 15 Widgets 16 Notifications 17 Phone 20 Messages - Samsung SM-R765V | Quick Start Guide - Page 3
23 S Health 25 Find my device 26 Samsung Pay - Samsung SM-R765V | Quick Start Guide - Page 4
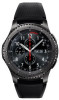
Device layout To turn on the Gear S3, press and hold the Home/Power button. Touchscreen Bezel Back button Microphone Home/Power button Heart rate sensor Speaker 3 - Samsung SM-R765V | Quick Start Guide - Page 5
Charge device Fully charge the Gear S3 before using it. Wireless charging dock Note: Before charging the Gear S3, remove the rubber cover from the charging dock. 4 - Samsung SM-R765V | Quick Start Guide - Page 6
Charging stand Use the Gear S3 box as a charging stand. 1. Remove the lid of the box. 2. Remove the plastic tray from the box and remove the charger, documents and packaging materials. 3. Insert the charger cable through the hole in the tray (highlighted gray) and into the wireless charging dock. - Samsung SM-R765V | Quick Start Guide - Page 7
4. Place the wireless charging dock in the tray and place the Gear S3 on the dock. Caution: During normal operation and charging, the device and wireless charging dock may become warm. If the device, charging dock, or charging stand feels hot, stop using the device or stop charging until it cools. - Samsung SM-R765V | Quick Start Guide - Page 8
Manager app from Galaxy Apps or the Google Play™ store. Compatible with select devices using Android 4.4 and later with at least 1.5 GB RAM. Supported devices may vary by carrier and device. Some features may not be available. For best results, connect with compatible Samsung Galaxy smartphones. For - Samsung SM-R765V | Quick Start Guide - Page 9
Pair the Gear S3 to a smartphone 1. Ensure the Gear S3 is on. From the smartphone: 2. Turn Bluetooth® on. 3. Open the Samsung Gear app and tap CONNECT TO GEAR. 4. Confirm the passkey on both devices, and tap OK. 5. Follow the prompts to complete the setup. 8 - Samsung SM-R765V | Quick Start Guide - Page 10
Navigation ●● Rotate the bezel left to view notifications, or rotate it right to view widgets. Swipe left to view widgets or right to view notifications. ●● Rotate the bezel to highlight an application, and then tap the application to open it. ●● Rotate the bezel left or right to return to a - Samsung SM-R765V | Quick Start Guide - Page 11
Customization Always on Set the Gear S3 to always display the watch screen. ◆◆ From the Apps screen, tap Settings → Style, and then tap Watch always on. Change watch faces 1. From the Watch screen, touch and hold the screen. 10 - Samsung SM-R765V | Quick Start Guide - Page 12
2. Rotate the bezel or swipe to scroll through watch faces. 3. Tap a watch face to select it, and then tap OK. Note: Tap STYLIZE to customize the watch. To download additional watch faces directly from the Gear S3, tap Get more watch faces. 11 - Samsung SM-R765V | Quick Start Guide - Page 13
Change watch bands 1. To remove, push the pin tab inward to release the strap. 2. To connect, push the pin tab inward while aligning the strap with the pin holes. 12 1 2 - Samsung SM-R765V | Quick Start Guide - Page 14
Status panel View the current status and configure basic settings. ◆◆ From the Watch screen, swipe down from the top edge of the screen. Plays music saved on the Gear S3 or smartphone. Disconnects the device from all networks in Airplane mode. Turns off vibration, incoming calls, and alerts in Do - Samsung SM-R765V | Quick Start Guide - Page 15
Apps screen The Apps screen displays icons for all apps. 1. From the Watch screen, press the Home button to open the Apps screen. 2. To view additional panels, rotate the bezel, or swipe left or right. 14 - Samsung SM-R765V | Quick Start Guide - Page 16
Widgets Add widgets ◆◆ From the Widget screen, scroll to the end, tap , and then select a widget. Remove widgets ◆◆ Tap and hold a widget, and then tap . 15 - Samsung SM-R765V | Quick Start Guide - Page 17
Notifications Stay up to date with events, notifications, and messages. View a notification When a notification is received, tap the notification to view details. Delete a notification While viewing a notification, swipe up from the bottom edge of the screen to delete. 16 - Samsung SM-R765V | Quick Start Guide - Page 18
Phone Use the Gear S3 to make and answer calls. Make a call ◆◆ Tap Apps → Phone → enter a number using the keypad, and then tap . Note: To use calling features, the Gear S3 must be paired with a smartphone and connected using Bluetooth. 17 - Samsung SM-R765V | Quick Start Guide - Page 19
Answer a call ◆◆ To answer an incoming call, rotate the bezel right or swipe right to Answer . 18 - Samsung SM-R765V | Quick Start Guide - Page 20
Reject a call ◆◆ To reject an incoming call, rotate the bezel left or swipe left to Reject and send the caller to voice mail. 19 - Samsung SM-R765V | Quick Start Guide - Page 21
Messages View and reply to messages, or call the sender using the Gear S3. View message 1. From the Apps screen, tap Messages . 2. Scroll through the message list. Tap a message to view the conversation. Reply to a message Tap to reply with a preloaded quick response or tap one of the following - Samsung SM-R765V | Quick Start Guide - Page 22
Voice input Tap and speak to enter a message. To change the language recognized, tap Options → Input languages. Emoticons Tap and select the emoticon to send, or tap Doodle at the top of the screen to draw the message. 21 - Samsung SM-R765V | Quick Start Guide - Page 23
Handwriting and keyboarding Tap to open handwriting mode and write on the screen. Rotate the bezel to enter text using the keyboard. 22 - Samsung SM-R765V | Quick Start Guide - Page 24
S Health S Health helps you manage wellness and fitness. Steps Count the number of steps taken, and measure the distance traveled. 1. From the Apps screen, tap S Health . 2. Rotate the bezel clockwise to open the steps tracker. 3. Tap the screen to view a graph of the step count records. 23 - Samsung SM-R765V | Quick Start Guide - Page 25
Heart rate Measure and record your heart rate. 1. From the Apps screen, tap S Health . 2. Rotate the bezel clockwise and open the heart rate tracker screen. 3. Tap to begin measuring your heart rate. After a moment, your current heart rate will be displayed on the screen. 24 - Samsung SM-R765V | Quick Start Guide - Page 26
Find my device If the Gear S3 or the connected smartphone is misplaced, use the Gear Manager app to find it. Find my Gear S3 1. From the smartphone, tap Samsung Gear → Find my gear. 2. Tap Start . Find My Phone 1. From the Gear S3 Apps screen, tap Find My Phone . 2. Tap Start . 25 - Samsung SM-R765V | Quick Start Guide - Page 27
Samsung Pay Pay almost anywhere that accepts a debit, credit, or gift card. Set up 1. From the Gear S3, press and hold the Back button to launch Samsung Pay . 2. Rotate the bezel to the right and follow the prompts to complete the setup. Make a payment 1. From the Gear S3, press and hold the Back - Samsung SM-R765V | Quick Start Guide - Page 28
3. When the card is displayed, tap Pay and hold the Gear S3 near the terminal. Important: Use the Samsung Pay application for up to 5 transactions without the smartphone. This may vary depending on the bank/institution issuing the account. 27 - Samsung SM-R765V | Quick Start Guide - Page 29
©2016 Samsung Electronics America, Inc. Samsung and Samsung Gear S are trademarks of Samsung Electronics Co., Ltd. Other company names, product names and marks are the property of their respective owners. Screen images simulated. Appearance of devices may vary. Printed in Vietnam GH68-47069A
-
 1
1 -
 2
2 -
 3
3 -
 4
4 -
 5
5 -
 6
6 -
 7
7 -
8
-
9
-
10
-
11
-
12
-
13
-
14
-
15
-
16
-
17
-
18
-
19
-
20
-
21
-
22
-
23
-
24
-
25
-
26
-
27
-
28
-
29
 |
 |

Quick
Start
Guide