Samsung SPH-M350 User Manual (user Manual) (ver.f7) (English) - Page 141
Accessing the Add New Email
 |
View all Samsung SPH-M350 manuals
Add to My Manuals
Save this manual to your list of manuals |
Page 141 highlights
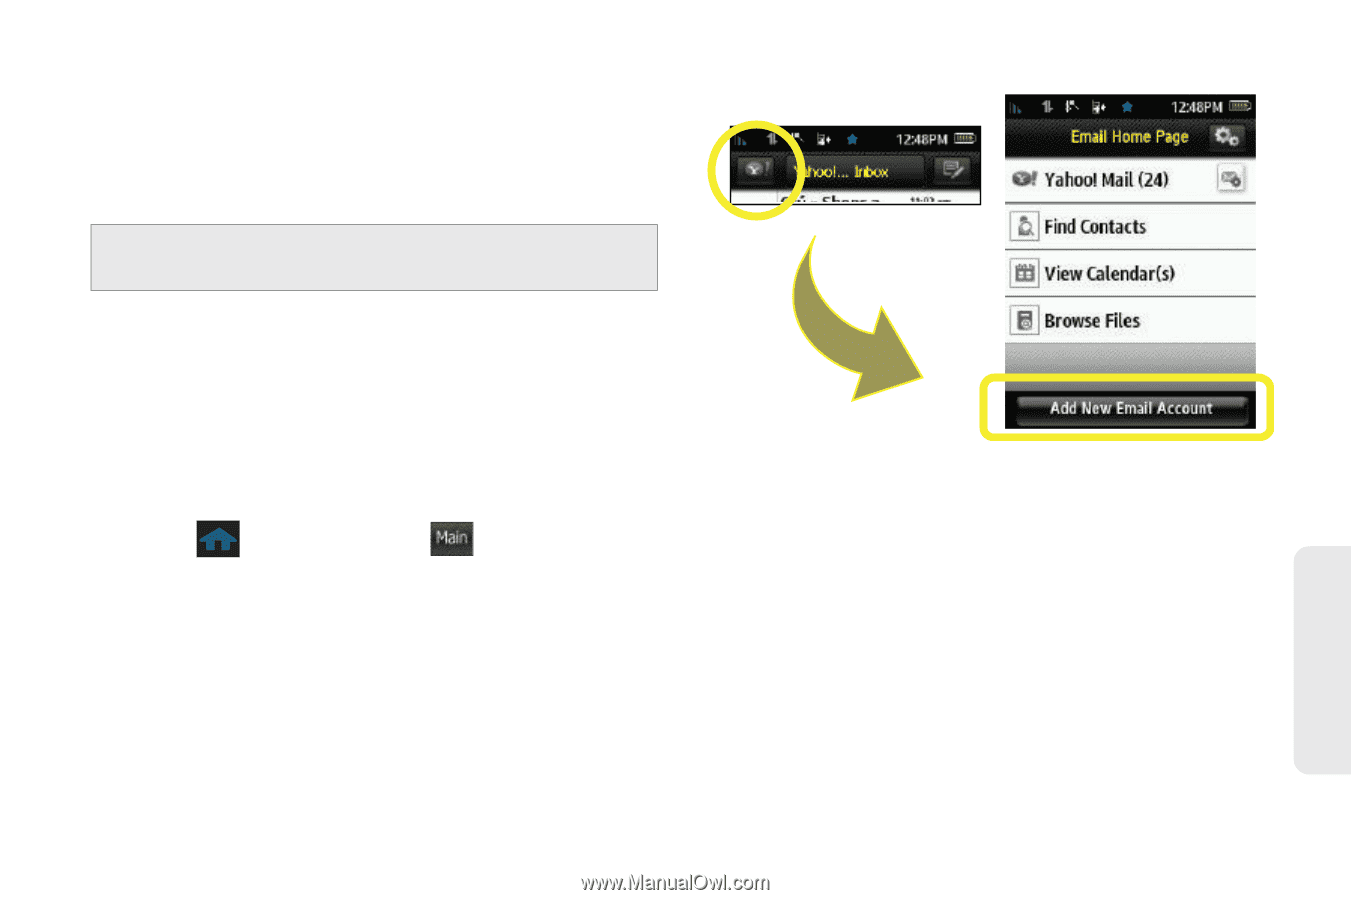
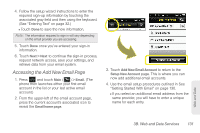
4. Follow the setup wizard instructions to enter the required sign-up information by touching the associated gray field and then using the keyboard. (See "Entering Text" on page 32.) Ⅲ Touch Done to save the new information. Note: The information required to sign in will vary depending on the email provider you are accessing. 5. Touch Done once you've entered your sign-in information. 6. Touch Next > Next to continue the sign-in process, request network access, save your settings, and retrieve data from your email system. Accessing the Add New Email Page 1. Press and touch Main ( Main ) > Email. (The phone then launches either your first email account in the list or your last active email account.) 2. From the upper-left of the email account page, press the current account's associated icon to reveal the Email home page. 3. Touch Add New Email Account to return to the Setup New Account page. This is where you can now add additional email accounts. 4. Use the email setup procedures outlined in See "Getting Started With Email" on page 130. Ⅲ If you select an additional email address from the same provider, you will have to enter a unique name for each entry. Web and Data 3B. Web and Data Services 131
-
 1
1 -
2
-
3
-
4
-
5
-
6
-
7
-
8
-
9
-
10
-
11
-
12
-
13
-
14
-
15
-
16
-
17
-
18
-
19
-
20
-
21
-
22
-
23
-
24
-
25
-
26
-
27
-
28
-
29
-
30
-
31
-
32
-
33
-
34
-
35
-
36
-
37
-
38
-
39
-
40
-
41
-
42
-
43
-
44
-
45
-
46
-
47
-
48
-
49
-
50
-
51
-
52
-
53
-
54
-
55
-
56
-
57
-
58
-
59
-
60
-
61
-
62
-
63
-
64
-
65
-
66
-
67
-
68
-
69
-
70
-
71
-
72
-
73
-
74
-
75
-
76
-
77
-
78
-
79
-
80
-
81
-
82
-
83
-
84
-
85
-
86
-
87
-
88
-
89
-
90
-
91
-
92
-
93
-
94
-
95
-
96
-
97
-
98
-
99
-
100
-
101
-
102
-
103
-
104
-
105
-
106
-
107
-
108
-
109
-
110
-
111
-
112
-
113
-
114
-
115
-
116
-
117
-
118
-
119
-
120
-
121
-
122
-
123
-
124
-
125
-
126
-
127
-
128
-
129
-
130
-
131
-
132
-
133
-
134
-
135
-
 136
136 -
 137
137 -
 138
138 -
 139
139 -
 140
140 -
 141
141 -
 142
142 -
 143
143 -
 144
144 -
 145
145 -
 146
146 -
147
-
148
-
149
-
150
-
151
-
152
-
153
-
154
-
155
-
156
-
157
-
158
-
159
-
160
-
161
-
162
-
163
-
164
-
165
-
166
-
167
-
168
-
169
-
170
-
171
-
172
-
173
-
174
-
175
-
176
-
177
-
178
-
179
-
180
-
181
-
182
-
183
-
184
-
185
-
186
-
187
-
188
-
189
-
190
-
191
-
192
 |
 |