Samsung SPH-M350 User Manual (user Manual) (ver.f7) (English) - Page 161
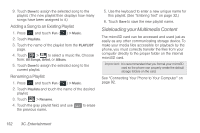
Creating a Playlist, Album, or Genre.
 |
View all Samsung SPH-M350 manuals
Add to My Manuals
Save this manual to your list of manuals |
Page 161 highlights
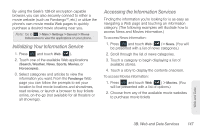
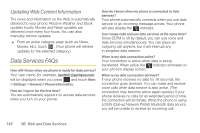
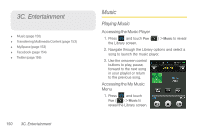
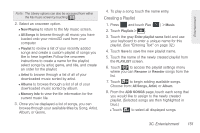
Entertainment Note: The Library options can also be accessed from within the My music screen by touching . 2. Select an onscreen option. Ⅲ Now Playing to return to the My music screen. Ⅲ All Songs to browse through all music you have loaded onto your microSD card from your computer. Ⅲ Playlist to review a list of your recently added songs and create a custom playlist of songs you like to hear together. Follow the onscreen instructions to create a name for the playlist, select songs by artist, genre, and title, and create an order for the playlist. Ⅲ Artist to browse through a list of all of your downloaded music sorted by artist. Ⅲ Albums to browse through a list of all of your downloaded music sorted by album. Ⅲ Memory Info to view the file information for the current music file. 3. Once you've displayed a list of songs, you can browse through your available titles by Song, Artist, Album, or Genre. 4. To play a song, touch the name entry. Creating a Playlist 1. Press and touch Fun ( Fun ) > Music. 2. Touch Playlists > . 3. Touch the gray Enter playlist name field and use your keyboard to enter a unique name for this playlist. (See "Entering Text" on page 32.) 4. Touch Save to save the new playlist name. 5. Touch the name of the newly created playlist from the PLAYLIST screen. 6. Touch to access the playlist settings menu where you can Rename or Reorder songs from the list. 7. Touch to begin adding available songs. Choose from: All Songs, Artist, or Album. 8. From the ADD SONGS page, touch each song that you would like to assign to the newly created playlist. (Selected songs are then highlighted in blue.) Ⅲ Touch to select all displayed songs. 3C. Entertainment 151
-
 1
1 -
2
-
3
-
4
-
5
-
6
-
7
-
8
-
9
-
10
-
11
-
12
-
13
-
14
-
15
-
16
-
17
-
18
-
19
-
20
-
21
-
22
-
23
-
24
-
25
-
26
-
27
-
28
-
29
-
30
-
31
-
32
-
33
-
34
-
35
-
36
-
37
-
38
-
39
-
40
-
41
-
42
-
43
-
44
-
45
-
46
-
47
-
48
-
49
-
50
-
51
-
52
-
53
-
54
-
55
-
56
-
57
-
58
-
59
-
60
-
61
-
62
-
63
-
64
-
65
-
66
-
67
-
68
-
69
-
70
-
71
-
72
-
73
-
74
-
75
-
76
-
77
-
78
-
79
-
80
-
81
-
82
-
83
-
84
-
85
-
86
-
87
-
88
-
89
-
90
-
91
-
92
-
93
-
94
-
95
-
96
-
97
-
98
-
99
-
100
-
101
-
102
-
103
-
104
-
105
-
106
-
107
-
108
-
109
-
110
-
111
-
112
-
113
-
114
-
115
-
116
-
117
-
118
-
119
-
120
-
121
-
122
-
123
-
124
-
125
-
126
-
127
-
128
-
129
-
130
-
131
-
132
-
133
-
134
-
135
-
136
-
137
-
138
-
139
-
140
-
141
-
142
-
143
-
144
-
145
-
146
-
147
-
148
-
149
-
150
-
151
-
152
-
153
-
154
-
155
-
 156
156 -
 157
157 -
 158
158 -
 159
159 -
 160
160 -
 161
161 -
 162
162 -
 163
163 -
 164
164 -
 165
165 -
 166
166 -
167
-
168
-
169
-
170
-
171
-
172
-
173
-
174
-
175
-
176
-
177
-
178
-
179
-
180
-
181
-
182
-
183
-
184
-
185
-
186
-
187
-
188
-
189
-
190
-
191
-
192
 |
 |