Samsung T240 User Manual (user Manual) (ver.1.0) (English)
Samsung T240 - SyncMaster - 24" LCD Monitor Manual
 |
UPC - 729507803951
View all Samsung T240 manuals
Add to My Manuals
Save this manual to your list of manuals |
Samsung T240 manual content summary:
- Samsung T240 | User Manual (user Manual) (ver.1.0) (English) - Page 1
SyncMaster T260/T240 LCD Monitor User Manual - Samsung T240 | User Manual (user Manual) (ver.1.0) (English) - Page 2
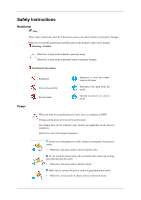
. Notational Conventions Power Prohibited Do not disassemble Do not touch Important to read and understand at all times Disconnect the plug from the outlet Ground to prevent an electric shock When not used for extended period of time, set your computer to DPM. If using screen saver, set it to - Samsung T240 | User Manual (user Manual) (ver.1.0) (English) - Page 3
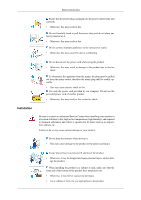
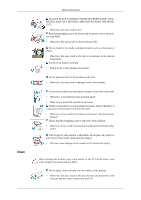
provided by our company. Do not use the provided power cord of another product. • Otherwise, this may result in fire or electric shock. Installation Be sure to contact an authorized Service Center when installing your monitor in a location with heavy dust, high or low temperatures, high humidity - Samsung T240 | User Manual (user Manual) (ver.1.0) (English) - Page 4
carefully. • Failing to do so may damage the monitor. Do not place the front of the product on the floor. • Otherwise, this may result in damage to the screen display. Ensure that an authorized installation company installs the wall mount. • Otherwise, it may fall and cause personal injury. • Make - Samsung T240 | User Manual (user Manual) (ver.1.0) (English) - Page 5
a malfunction. The product is a high voltage product. Ensure that users do not disassemble, repair or modify the product themselves. • Otherwise, this may result in electric shock or fire. If the product needs to be repaired, contact a Service Center. If there is a strange smell or a strange sound - Samsung T240 | User Manual (user Manual) (ver.1.0) (English) - Page 6
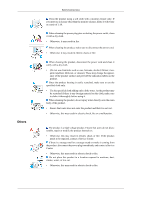
Safety Instructions When you drop the product or the case is broken, turn the power off and disconnect the power cord. Contact a Service Center. • Otherwise, this may result in electric shock or fire. If thunder or lightening is occurring, do not touch the power cord or antenna cable. • Otherwise, - Samsung T240 | User Manual (user Manual) (ver.1.0) (English) - Page 7
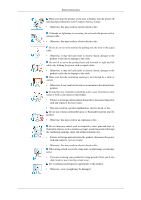
Instructions When using headphones or earphones, do not turn the volume too high. • Having the sound too loud may damage your hearing. If you continually move closer to the product screen for a long period of time, disconnect the power cord from the power outlet. • Otherwise, this may result in - Samsung T240 | User Manual (user Manual) (ver.1.0) (English) - Page 8
result in personal injury and/or damage to the product. Good Postures When Using the Monitor When using the product, use it in the correct position. • Keep your back straight while looking at the product. • The distance between your eyes and the screen should be between 45 to 50 cm. Look at the - Samsung T240 | User Manual (user Manual) (ver.1.0) (English) - Page 9
Safety Instructions • Keep your elbow at 90 degrees. • Keep your knees at greater than 90 degrees, and keep your heels firmly on the floor. Keep your arms lower than your heart. - Samsung T240 | User Manual (user Manual) (ver.1.0) (English) - Page 10
your monitor. If any items are missing, contact your dealer. Contact a local dealer to buy optional items. Unpacking Manuals Monitor Quick Setup Guide Cables Warranty Card (Not available in all locations) User's Guide D-Sub Cable Sold separately Power Cord DVI Cable HDMI Cable Headphones - Samsung T240 | User Manual (user Manual) (ver.1.0) (English) - Page 11
Base Note Cleaning Cloth is only provided for highly polished black products as a product feature. Your Monitor Initial Settings Select the language using the up or down key. The displayed content will disappear after 40 seconds. Turn the Power button off and on. It will be displayed again. It can - Samsung T240 | User Manual (user Manual) (ver.1.0) (English) - Page 12
return to the previous menu. Brightness button If an AV signal is input in HDMI/DVI mode, the Volume is adjusted. If a PC signal is input, the Brightness is adjusted. >> Click here to see an animation clip Volume button When OSD is not on the screen, push the button to adjust volume. >> Click here - Samsung T240 | User Manual (user Manual) (ver.1.0) (English) - Page 13
turning the monitor on and off. Note The button to the right of the monitor are touch-sensitive buttons. Touch a button lightly with your finger. Power Indicator This light is lit when operating normally, and blinks once when your adjustments are saved. Note See PowerSaver described in the manual - Samsung T240 | User Manual (user Manual) (ver.1.0) (English) - Page 14
your monitor to the POWER port on the back of the monitor. HDMI / DVI IN / RGB IN HDMI Connect the HDMI terminal at the back of your monitor to the HDMI terminal of your digital output device using a HDMI cable. DVI IN(HDCP) Connect the DVI cable to the DVI IN port on the back of your monitor. RGB - Samsung T240 | User Manual (user Manual) (ver.1.0) (English) - Page 15
Make sure to use the USB cable supplied with this monitor to connect the monitor's and your computer's USB port. on the manufacturer. Refer to the manual provided with the Kensington Lock for locking device into the Kensington slot on the Monitor and turn it in the locking direction . 2. Connect - Samsung T240 | User Manual (user Manual) (ver.1.0) (English) - Page 16
the DVI IN Port on the back of your Monitor. [DVI IN] Connected to a Macintosh. • Connect the monitor to the Macintosh computer using the D-sub connection cable. Note If the monitor and the computer are connected, you can turn them on and use them. Connecting HDMI Note You can connect digital output - Samsung T240 | User Manual (user Manual) (ver.1.0) (English) - Page 17
to sound via an external device, refer to the information in its user manual on how to connect the device. 3. When all the connections are completed, connect the power cords for the monitor and DVD (or the device connected to the digital output terminal). 4. Selet HDMI using the SOURCE button. - Samsung T240 | User Manual (user Manual) (ver.1.0) (English) - Page 18
monitor without connecting them to the PC. The USB port of the monitor supports High-Speed Certified USB 2.0. High speed Data Rate 480 Mbps Power cable supplied with this monitor to connect the monitor's and your computer's USB port. UP port 2. Connect the DOWN port of the USB monitor and - Samsung T240 | User Manual (user Manual) (ver.1.0) (English) - Page 19
device to the cable appropriate to the device. DOWN port of the monitor, connect the device using a (For the purchase of the cable and external devices, ask the service center of the corresponding product.) The company is not liable for problems or damages to an external device caused by using an - Samsung T240 | User Manual (user Manual) (ver.1.0) (English) - Page 20
connect the opposite jack to the [AUDIO OUT] terminal of the monitor. Note Because no sound is emitted from the monitor, you need to use an amplifier. Note For information on how to connect a speaker and amplifier, refer to the respective user manuals provided by their manufacturers. Connecting and - Samsung T240 | User Manual (user Manual) (ver.1.0) (English) - Page 21
the Volume button of your amplifier 3. If the connections are set up, power up your monitor and amplifier. Note Because no sound is emitted from the monitor, you need to use an amplifier. Note For information on how to connect a speaker and amplifier, refer to the respective user manuals provided by - Samsung T240 | User Manual (user Manual) (ver.1.0) (English) - Page 22
web site : http://www.samsung.com/ (Worldwide) Installing the Monitor Driver (Automatic) 1. Insert CD into the CD-ROM drive. 2. Click "Windows". 3. Choose your monitor model in the model list, then click the "OK" button. 4. If you can see following message window, then click the "Continue Anyway - Samsung T240 | User Manual (user Manual) (ver.1.0) (English) - Page 23
://www.samsung.com/ Installing the Monitor Driver (Manual) Microsoft® Windows Vista™, Operating System 1. Insert your Manual CD into your CD-ROM drive. 2. Click (Start) and "Control Panel". Then, double-click on "Appearance and Personalization". 3. Click "Personalization" and then "Display Settings - Samsung T240 | User Manual (user Manual) (ver.1.0) (English) - Page 24
is under certifying MS logo, and this installation doesn't damage your system. The certified driver will be posted on Samsung Monitor homepage. 6. Click "Update Driver..." in the "Driver" tab. 7. Check the "Browse my computer for driver software" checkbox and click "Let me pick from a list of device - Samsung T240 | User Manual (user Manual) (ver.1.0) (English) - Page 25
Using the Software 9. Select the model that matches your monitor from the list of monitor models on the screen, and click "Next". 10. Click "Close" → "Close" → "OK" → "OK" on the following screens displayed in sequence. Microsoft® Windows® XP Operating System - Samsung T240 | User Manual (user Manual) (ver.1.0) (English) - Page 26
Panel" then click the "Appearance and Themes" icon. 3. Click "Display" icon and choose the "Settings" tab then click "Advanced...". 4. Click the "Properties" button on the "Monitor" tab and select "Driver" tab. 5. Click "Update Driver..." and select "Install from a list or..." then click "Next - Samsung T240 | User Manual (user Manual) (ver.1.0) (English) - Page 27
see following message window, then click the "Continue Anyway" button. Then click "OK" button. Note This monitor driver is under certifying MS logo, and this installation doesn't damage your system. The certified driver will be posted on Samsung Monitor homepage. http://www.samsung.com/ 9. Click the - Samsung T240 | User Manual (user Manual) (ver.1.0) (English) - Page 28
Not Found" on your monitor, follow these steps. 1. Choose "OK" button on the "Insert disk" window. 2. Click the "Browse" button on the "File Needed" window. 3. Choose A:(D:\Driver) then click the "Open" button and then click "OK" button. How to install 1. Click "Start", "Setting", "Control Panel - Samsung T240 | User Manual (user Manual) (ver.1.0) (English) - Page 29
. 2. In Display Registration Information window, click Settings Tab and then click "All Display Modes". 3. Select a mode that you wish to use (Resolution, Number of colors and Vertical frequency) and then click "OK". 4. Click "Apply" button if you see the screen working normally after clicking "Test - Samsung T240 | User Manual (user Manual) (ver.1.0) (English) - Page 30
be executed. Click Natural Color on the initial screen to install the Natural Color software. To install the program manually, insert the CD included with the Samsung monitor into the CD-ROM Drive, click the [Start] button of Windows and then select [Run...]. Enter D:\color\NCProSetup.exe and then - Samsung T240 | User Manual (user Manual) (ver.1.0) (English) - Page 31
the MagicTune™ program. 7. Click "Install". 8. The "Installation Status" window appears. 9. Click "Finish". 10. When the installation is complete, not appear depending on specification of computer system or monitor. If that happens, press F5 Key. Installation Problems The installation of MagicTune™ - Samsung T240 | User Manual (user Manual) (ver.1.0) (English) - Page 32
the program runs on Windows® XP, go to [Control Panel] in the [Start] menu. 2. Click the "Add or Remove Programs" icon in Control Panel. 3. In the "Add or Remove Programs" screen, scroll down to find "MagicTune™." Click on it to highlight it. 4. Click the "Change/Remove" button to remove the program - Samsung T240 | User Manual (user Manual) (ver.1.0) (English) - Page 33
only by using the "Add or Remove Programs" option of the Windows® Control Panel. Perform the following steps remove Multiscreen. Select "Setting/Control Panel" on the "Start" menu and then double-click "Add/Delete a program". Select Multiscreen from the list and then click the "Add/Delete" button. - Samsung T240 | User Manual (user Manual) (ver.1.0) (English) - Page 34
Direct Functions AUTO When the 'AUTO' button is pressed, the Auto adjustment screen appears as shown in the animated screen on the center. Auto adjustment allows the monitor to self-adjust to the incoming Analog signal. The values of Fine, Coarse and Position are adjusted automatically. (Available - Samsung T240 | User Manual (user Manual) (ver.1.0) (English) - Page 35
key assignment for the Custom button according to your preferences. To view the operating screen displayed when pressing the [ tomized key for a function, click the name of each function. ] button after configuring the cus- (MagicBright - MagicColor - Color Effect - Image Size) Note You - Samsung T240 | User Manual (user Manual) (ver.1.0) (English) - Page 36
Adjusting the Monitor When OSD is not on the screen, push the Brightness ( Note ) button to adjust brightness. If an AV signal is input in HDMI/DVI mode, the Volume is adjusted. If a PC signal is input, the Brightness is adjusted. Volume When OSD is not on the screen, push the button to adjust - Samsung T240 | User Manual (user Manual) (ver.1.0) (English) - Page 37
Time cy Setup Reset Customized Auto Source Image Size AV Mode Key HDMI Black LED Bright- Level ness Information Picture Brightness (Not available in MagicBright mode of Dynamic Contrast.) You can use the on-screen menus to change the brightness according to personal preference. MENU MENU - Samsung T240 | User Manual (user Manual) (ver.1.0) (English) - Page 38
Monitor You can use the on-screen menus to change the contrast according to personal preference. ( Not available in MagicColor mode of Full and Intelligent. ) MENU MENU MagicBright Push the button select one of seven settings by simply pressing Customized Key control button. • Custom Although the - Samsung T240 | User Manual (user Manual) (ver.1.0) (English) - Page 39
when the surroundings are dark. This will save power and reduce eye fatigue. • Custom Select this mode when you want to adjust the image according to your preferences Note • It can only be selected if an external input is connected to the HDMI terminal and the 'AV Mode' is set to 'On'. MENU MENU - Samsung T240 | User Manual (user Manual) (ver.1.0) (English) - Page 40
right and the screen after applying MagicColor appears on the left. • Full - Displays not only vivid natural color but also more realistic natural skin color with clearness. • Intelligent - Displays vivid natural color with clearness. MENU MENU Color Tone The tone of the color can be changed and - Samsung T240 | User Manual (user Manual) (ver.1.0) (English) - Page 41
• Grayscale - The default colors of black and white are displayed. • Green - This applies the green color effect to a black and white screen. • Aqua - This applies the aqua color effect to a black and white screen. • Sepia - This applies the Sepia color effect to a black and white screen. MENU MENU - Samsung T240 | User Manual (user Manual) (ver.1.0) (English) - Page 42
Gamma Adjusting the Monitor Gamma correction changes the luminance of the colors with intermediate luminance. • Mode 1 • Mode 2 • Mode 3 MENU MENU Image Coarse Fine Removes noise such as vertical stripes. Coarse adjustment may move the screen image area. You may relocate it to the center - Samsung T240 | User Manual (user Manual) (ver.1.0) (English) - Page 43
Adjusting the Monitor If the noise persists even after Fine tuning, repeat it after adjusting the of Full and Intelligent. ) MENU MENU H-Position Changes the horizontal position of the monitor's entire display. (Available in Analog mode only) MENU MENU V-Position Changes the vertical position of - Samsung T240 | User Manual (user Manual) (ver.1.0) (English) - Page 44
Adjusting the Monitor (Available in Analog mode only) MENU → , → MENU OSD Language You can choose one of nine languages. Note The language chosen running on the computer. MENU MENU H-Position You can change the horizontal position where the OSD menu appears on your monitor. MENU MENU - Samsung T240 | User Manual (user Manual) (ver.1.0) (English) - Page 45
OSD menu appears on your monitor. MENU MENU Transparency Change the transparency of the background of the OSD. • Off • On MENU → , → Display Time → , → → , → MENU The menu will be automatically turned off if no adjustments are made for a certain time period. You can set the amount of time - Samsung T240 | User Manual (user Manual) (ver.1.0) (English) - Page 46
product settings to factory defaults. • No • Yes MENU → , → Customized Key MENU You can specify a function which will be activated when the Customized Key ( MENU MENU Auto Source )is pressed. Select Auto Source for the monitor to automatically select the signal source. • Auto • Manual - Samsung T240 | User Manual (user Manual) (ver.1.0) (English) - Page 47
the standard mode table are not supported. • If the wide screen which is the optimal resolution for the monitor is set on your PC, this function is not performed. MENU MENU HDMI/DVI Mode You can change the size of the screen displayed on your monitor. • 4 : 3 - Sets the picture to 4:3 normal mode - Samsung T240 | User Manual (user Manual) (ver.1.0) (English) - Page 48
only be selected if an external input is connected to the HDMI terminal and the 'AV Mode' is set to 'On'. • Signals not available in the standard mode table are not supported. • If the wide screen which is the optimal resolution for the monitor is set on your PC, this function is not performed. MENU - Samsung T240 | User Manual (user Manual) (ver.1.0) (English) - Page 49
Adjusting the Monitor When a DVD or set-top box is connected to your TV via HDMI, it may cause a degradation in the screen quality, such as an increase in the black level, a low contrast, or discoloration, etc., depending on the external device connected. In this case, adjust the screen quality of - Samsung T240 | User Manual (user Manual) (ver.1.0) (English) - Page 50
Troubleshooting Self-Test Feature Check Note Your monitor provides a self test feature that allows you to check whether your monitor is functioning properly. Self-Test Feature Check 1. Turn off both your computer and the monitor. 2. Unplug the video cable from the back of the computer. 3. Turn on - Samsung T240 | User Manual (user Manual) (ver.1.0) (English) - Page 51
to analog. If you still see an (error) message on the screen when the monitor is connected properly, check to see if the monitor status is set to analog. Press ' /SOURCE' button to have the monitor double-check the input signal source. Q: If the power is on, reboot the computer to see the initial - Samsung T240 | User Manual (user Manual) (ver.1.0) (English) - Page 52
A: Set the video card by referring to the video card manual. The screen suddenly has become unbalanced. Q: Have you changed the video card or the driver? A: Adjust screen image position and size using the OSD. Q: Have you adjusted the resolution or frequency to the monitor? A: Adjust the resolution - Samsung T240 | User Manual (user Manual) (ver.1.0) (English) - Page 53
video card manual to see if the Plug & Play (VESA DDC) function can be supported. A: Install the monitor driver according to the Driver Installation Instructions. Check when MagicTune™ does not function properly. Q: MagicTune™ feature is found only on PC (VGA) with Window OS that supports Plug and - Samsung T240 | User Manual (user Manual) (ver.1.0) (English) - Page 54
booting. (If it does, request an a service for the main board of the computer.) If you installed a new video card or if you assembled the PC, check if the installed the adapter(video) driver and the monitor driver. Check if the scanning ratio of the video screen is set to between 56 Hz ~ 75 Hz. (Do - Samsung T240 | User Manual (user Manual) (ver.1.0) (English) - Page 55
Manual). A: Windows ME/2000: Set the resolution at the Control Panel → Display → Screen Saver. Set the function in the BIOS-SETUP of the computer. (Refer to the Windows / Computer Manual). Q: How can I clean the outer case/LCD Panel? A: Disconnect the power cord and then clean the monitor with - Samsung T240 | User Manual (user Manual) (ver.1.0) (English) - Page 56
Specifications General General Model Name SyncMaster T260 LCD Panel Size Display area Pixel Pitch 25.5 inch (64 cm) 550.08 mm (H) x 343.8 mm (V) 0.2865 mm (H) x 0.2865 mm (V) Synchronization Horizontal Vertical 30 ~ 81 kHz 56 ~ 75 Hz Display Color 16.7M Resolution Optimum resolution Maximum - Samsung T240 | User Manual (user Manual) (ver.1.0) (English) - Page 57
the user wishes to select alternate settings. Dot Acceptable TFT-LCD panels manufactured by using advanced semiconductor technology with precision of 1ppm (one millionth) above are used for this product. But the pixels of RED, GREEN, BLUE and WHITE color appear to be bright sometimes or some black - Samsung T240 | User Manual (user Manual) (ver.1.0) (English) - Page 58
Vertical Frequency Like a fluorescent lamp, the screen has to repeat the same image many times per second to display an image to the user. The frequency of this repetition is called the Vertical Frequency or Refresh Rate. Unit: Hz General Model Name SyncMaster T240 LCD Panel Size 24 inch (61 cm) - Samsung T240 | User Manual (user Manual) (ver.1.0) (English) - Page 59
Specifications LCD Panel Display area Pixel Pitch 518.4 mm (H) x 324.0 mm (V) 0.270 mm (H) x 0.270 mm (V) Synchronization Horizontal Vertical 30 ~ 81 kHz 56 ~ 75 Hz Display Color 16.7M Resolution Optimum resolution Maximum resolution 1920 x 1200 @ 60 Hz 1920 x 1200 @ 60 Hz Input Signal, - Samsung T240 | User Manual (user Manual) (ver.1.0) (English) - Page 60
the user wishes to select alternate settings. Dot Acceptable TFT-LCD panels manufactured by using advanced semiconductor technology with precision of 1ppm (one millionth) above are used for this product. But the pixels of RED, GREEN, BLUE and WHITE color appear to be bright sometimes or some black - Samsung T240 | User Manual (user Manual) (ver.1.0) (English) - Page 61
Specifications Display Mode IBM, 640 x 480 IBM, 720 x 400 MAC, 640 x 480 MAC, 832 x 624 MAC, 1152 x 870 VESA, 640 x 480 VESA, 640 x 480 VESA, 800 x 600 VESA, 800 x 600 VESA, 800 x 600 VESA, 800 x 600 VESA, 1024 x 768 VESA, 1024 x 768 VESA, 1024 x 768 VESA, 1152 x 864 VESA, 1280 x 960 VESA, 1280 x - Samsung T240 | User Manual (user Manual) (ver.1.0) (English) - Page 62
, BLUE and WHITE color seem to be bright sometimes or some of black pixels could be seen. This is not from bad quality and you can use it without any problems. • For example, the number of TFT-LCD sub pixels contained in this product are 6,912,000. When cleaning the monitor and the panel outside - Samsung T240 | User Manual (user Manual) (ver.1.0) (English) - Page 63
hours in use • Turn the power off for 2 hours after 12 hours in use • Use a Screen saver if possible • Screen saver in one color or a moving image is recommended. • Set the Monitor to power off with the PC Display Properties Power Scheme. Suggestions for specific applications Ex) Airports, Transit - Samsung T240 | User Manual (user Manual) (ver.1.0) (English) - Page 64
the characters with movement. Ex) The best way to protect your monitor from Image retention is to set your PC or System to operate a Screen Saver program when you are not using it. Image retention may not occur when a LCD panel is operated under normal conditions. Normal conditions are defined as - Samsung T240 | User Manual (user Manual) (ver.1.0) (English) - Page 65
Information Our LCD Monitor satisfies ISO13406-2 Pixel fault Class II - Samsung T240 | User Manual (user Manual) (ver.1.0) (English) - Page 66
://www.samsung.com/latin http://www.samsung.com/latin http://www.samsung.com/latin http://www.samsung.com/latin http://www.samsung.com/latin http://www.samsung.com/latin http://www.samsung.com/latin http://www.samsung.com/latin Europe AUSTRIA 0800-SAMSUNG (726-7864) BELGIUM 0032 (0)2 201 24 18 - Samsung T240 | User Manual (user Manual) (ver.1.0) (English) - Page 67
-500-55-500 8-800-502-0000 8-10-800-500-55-500 http://www.samsung.ee http://www.samsung.com/lv http://www.samsung.lt http://www.samsung.kz http://www.samsung.ru http://www.samsung.com http://www.samsung.uz AUSTRALIA CHINA HONG KONG INDIA INDONESIA JAPAN MALAYSIA NEW ZEALAND PHILIPPINES SINGAPORE - Samsung T240 | User Manual (user Manual) (ver.1.0) (English) - Page 68
on a monitor is composed of red, green and blue dots. The closer the dots, the higher the resolution. The distance between two dots of the same color is called the 'Dot Pitch'. Unit: mm The screen must be redrawn several times per second in order to create and display an image for the user. The - Samsung T240 | User Manual (user Manual) (ver.1.0) (English) - Page 69
they can take this item for environmentally safe recycling. Business users should contact their supplier and check the terms and conditions Samsung is the registered trademark of Samsung Electronics Co., Ltd.; Microsoft, Windows and Windows NT are registered trademarks of Microsoft Corporation; VESA
-
 1
1 -
 2
2 -
 3
3 -
 4
4 -
 5
5 -
 6
6 -
 7
7 -
8
-
9
-
10
-
11
-
12
-
13
-
14
-
15
-
16
-
17
-
18
-
19
-
20
-
21
-
22
-
23
-
24
-
25
-
26
-
27
-
28
-
29
-
30
-
31
-
32
-
33
-
34
-
35
-
36
-
37
-
38
-
39
-
40
-
41
-
42
-
43
-
44
-
45
-
46
-
47
-
48
-
49
-
50
-
51
-
52
-
53
-
54
-
55
-
56
-
57
-
58
-
59
-
60
-
61
-
62
-
63
-
64
-
65
-
66
-
67
-
68
-
69
 |
 |

SyncMaster T260/T240
LCD Monitor
User Manual