Samsung UN60ES8000F User Manual Ver.1.0 (English)
Samsung UN60ES8000F Manual
 |
View all Samsung UN60ES8000F manuals
Add to My Manuals
Save this manual to your list of manuals |
Samsung UN60ES8000F manual content summary:
- Samsung UN60ES8000F | User Manual Ver.1.0 (English) - Page 1
E-MANUAL Thank you for purchasing this Samsung product. To receive more complete service, please register your product at www.samsung.com/register Model Serial No - Samsung UN60ES8000F | User Manual Ver.1.0 (English) - Page 2
185 • Changing the Picture Size 54 • Picture In Picture (PIP) 189 • Changing the Picture Options 63 • Using the TV • Using the TV with Your PC 82 with a Keyboard and a Mouse 194 • Changing the Preset Sound Mode 86 • Other Features 201 • Adjusting Sound Settings 88 • Support Menu 223 - Samsung UN60ES8000F | User Manual Ver.1.0 (English) - Page 3
Advanced Features • Using the 3D function • Smart Hub • Customizing the Home Screen • Using the Samsung Apps • Search • Your Video • Family Story • Fitness • Kids • Web Browser • Skype 245 • SMART Interaction 387 263 • Specification for SMART Interaction 428 285 • AllShare Play 437 - Samsung UN60ES8000F | User Manual Ver.1.0 (English) - Page 4
) 589 563 • Anynet+ (HDMI-CEC) (Troubleshooting) 591 570 • AllShare Play (Troubleshooting) 598 • Smart Hub (Troubleshooting) 599 574 • Web Browser (Troubleshooting) 601 577 • Using the Smart Touch Control 610 578 • Supported Subtitle 579 and AllShare Play file formats 641 - Samsung UN60ES8000F | User Manual Ver.1.0 (English) - Page 5
Channel Menu Using the Channel Menu Channel ™ → Channel Using this function, you can add or delete channels, set favorite channels, edit the channel name for analog broadcasts. NNThe American Academy of Pediatrics discourages television viewing for children younger than two years of age. - Samsung UN60ES8000F | User Manual Ver.1.0 (English) - Page 6
●● All Shows all channels. ●● Added Ch. Shows all added channels. These are the channels that appear when you select CH List for Smart Touch Control or press the CH LIST button. for Standard Remote Control ●● Favorites 1 - Favorites 5 Shows all favorite channels, in up to five groups. Each group has - Samsung UN60ES8000F | User Manual Ver.1.0 (English) - Page 7
channels. NNThe TV displays Favorites only if you have added favorites using Edit Favorites. NNIf the Highlight located in the Favorites 1 - Favorites 5 category, you can change the name of category by selecting b using your remote. ●● Recently Viewed Shows the most recently viewed channels. - Samsung UN60ES8000F | User Manual Ver.1.0 (English) - Page 8
●● Mostly Viewed Shows the most frequently viewed channels. Using the colored and function buttons with the Channel ●● When the Highlight located in the category, you can use these options: -- a Air / Cable Switches the mode and display between Air and Cable. NNAppears only if your TV stored - Samsung UN60ES8000F | User Manual Ver.1.0 (English) - Page 9
both Air and Cable. -- R Return Return to the previous menu. ●● When the Highlight located in the channel list, you can use these options: -- a Air / Cable Switches the mode and display between Air and Cable. NNAppears only if your TV stored both Air and Cable. -- b Delete - Samsung UN60ES8000F | User Manual Ver.1.0 (English) - Page 10
Delete the selected channel(s). -- ` Information Displays details of the selected channel. -- k Page Scrolls the channel list to the next or previous page. -- E Select / Deselect Select or deselect a channel. -- T Tools Displays the option menu. - Samsung UN60ES8000F | User Manual Ver.1.0 (English) - Page 11
-- R Return Return to the previous menu. Using the Tools menu with Channel ●● Add / Delete Delete a channel from or add a channel to the Channel list. To delete a channel in Channel, follow these steps: 1. If you want to delete a channel, select a category of the channel. 2. Select a channel in the - Samsung UN60ES8000F | User Manual Ver.1.0 (English) - Page 12
c mark appears to the left of the channel. NNYou can select more than one channel. NNIf you select the selected channel again, a c mark disappears. 3. Open the Tools menu using your remote. 4. Select the Delete. The message Deleted the selected channel(s). appears, and then select OK. - Samsung UN60ES8000F | User Manual Ver.1.0 (English) - Page 13
, the channel will disappear from the category list. But, the channel is not deleted. To add a channel in Channel, follow these steps: 1. On the Channel screen, select the All - Samsung UN60ES8000F | User Manual Ver.1.0 (English) - Page 14
category. 2. Select a grayed out channel in the All category. A c mark appears to the left of the channel. NNYou can select more than one channel. NNIf you select the selected channel again, a c mark disappears. NNA gray colored channel indicates the channel has been deleted. 3. Open the Tools menu - Samsung UN60ES8000F | User Manual Ver.1.0 (English) - Page 15
remote. 4. Select the Add. The message Added the selected channel(s). appears, and then select OK. NNThe Add menu option only appears for deleted channel. NNAll deleted channels will be shown on the All category. You add channels back to the Added Ch. category on the All category. ●● Edit Favorites - Samsung UN60ES8000F | User Manual Ver.1.0 (English) - Page 16
channels you watch frequently as favorites, or removes a channel from list of favorites using the Tools menu. To set channels as favorites, follow these steps: 1. Select the All or Added Ch. category. 2. Select a channel in the category. A c mark appears to the left of the - Samsung UN60ES8000F | User Manual Ver.1.0 (English) - Page 17
you select the selected channel again, a c mark disappears. 3. Open the Tools menu using your remote. 4. Select the Edit Favorites. The Edit Favorites screen appears. 5. Select a using your remote. The selected channel will be moved to the favorite group. NNAlso, you can select a channel in the Edit - Samsung UN60ES8000F | User Manual Ver.1.0 (English) - Page 18
}, a favorites group will be changed. 6. When done, select OK. The channel is made as a favorite and is assigned to the favorite group you selected. NNThe TV displays the " " symbol next to the channel, indicating it - Samsung UN60ES8000F | User Manual Ver.1.0 (English) - Page 19
is a favorite. Using the colored and function buttons with the Edit Favorites ●● When the Highlight located in the Added Ch., you can use these options: -- a Add Add selected channels to the favorites group. -- } Change Fav. Change the favorites group. Each - Samsung UN60ES8000F | User Manual Ver.1.0 (English) - Page 20
time you select } using your remote, a favorites group will be changed. -- Ÿ Go To Move to the Highlight to a channel number immediately by pressing the number button using your remote. -- R Return Return to the previous menu. ●● When the Highlight located in the - Samsung UN60ES8000F | User Manual Ver.1.0 (English) - Page 21
favorites group, you can use these options: -- a Delete Delete the selected channel. -- b Change order Change the favorites group list order. -- { Copy Copy a selected channel to other favorites groups. -- } Change Fav. - Samsung UN60ES8000F | User Manual Ver.1.0 (English) - Page 22
Change the favorites group. Each time you select } using your remote, a favorites group will be changed. -- Ÿ Go To Move to the Highlight to a channel number immediately by pressing the number button using your remote. -- R Return Return to the previous menu. - Samsung UN60ES8000F | User Manual Ver.1.0 (English) - Page 23
To remove a channel from the list of favorites, follow these steps: 1. Select the favorites group category. 2. Select a channel in the selected favorites group. A c mark appears to the left of the channel. NNYou can select more than one channel. NNIf you select the selected channel again, a c mark - Samsung UN60ES8000F | User Manual Ver.1.0 (English) - Page 24
remote. 4. Select Delete. The message Do you want to delete the selected item(s)? appears. 5. Select OK. The message Deleted the selected item(s). appears. NNYou can delete the selected channel from the list of favorites group immediately by selecting b using your remote. ●● Rename Channel - Samsung UN60ES8000F | User Manual Ver.1.0 (English) - Page 25
find and select a channel. ●● Select All / Deselect All Select all channels in the list. / Deselect all channels you selected. Display Icons Used in the Channel screens : An analog channel. - Samsung UN60ES8000F | User Manual Ver.1.0 (English) - Page 26
: A favorite channel. : A locked channel. Schedule Manager ™→ Schedule Manager Using this function, you can set the TV to display a desired channel automatically on a day and at a time of your choice. NNYou must set the current time first using the Time → Clock function in System menu to use this - Samsung UN60ES8000F | User Manual Ver.1.0 (English) - Page 27
To use the Schedule Viewing, follow these steps: 1. On the Schedule Manager screen, select a using your remote. 2. Set Antenna, Channel, Repeat, and Start Time. ●● Antenna You can view an antenna source. If your TV has digital broadcasts, you can change a source from analog to digital. - Samsung UN60ES8000F | User Manual Ver.1.0 (English) - Page 28
If you want to change an antenna source between Air and Cable, select an antenna source you want in Antenna menu (Channel → Antenna). ●● Channel Select the desired channel. NNYou can only select memorized channels. ●● Repeat Select Once, Manual, Sat~Sun, Mon~Fri or Everyday. If you select - Samsung UN60ES8000F | User Manual Ver.1.0 (English) - Page 29
Manual, you can set the day you want. NNThe c mark indicates a day you' ve selected. Date: You can set a desired date. NNThe Date is available only when you select Once in Repeat. ●● Start Time You can set the start time you want. 3. When done, select OK. The selected channel is scheduled for - Samsung UN60ES8000F | User Manual Ver.1.0 (English) - Page 30
, you can check a list of Schedule Viewing. To delete an item in a list of scheduled viewing, follow these step: 1. On the Schedule Manager screen, highlight an item you want to delete. 2. Open the Tools menu using your remote. 3. Select Cancel Schedule. The Cancel selected list(s)? message appears. - Samsung UN60ES8000F | User Manual Ver.1.0 (English) - Page 31
be canceled. NNIf you press the INFO button for Standard Remote Control or select Info for Smart Touch Control after highlighting an item, the Information screen appears. On the Information screen, you can change or cancel the Schedule Viewing. Cancel Schedule: Cancel the Schedule Viewing. - Samsung UN60ES8000F | User Manual Ver.1.0 (English) - Page 32
Edit Schedule: Change the Schedule Viewing. Return: Return to the previous screen. Channel List Using this function, you can view channel list, program information, favorite channel, and manage schedules of timer viewing. 1. Press the CH LIST button for Standard Remote Control or select CH List for - Samsung UN60ES8000F | User Manual Ver.1.0 (English) - Page 33
Smart Touch Control . The Channel List screen is displayed immediately. 2. Change a channel or channel list mode. ●● Added Ch. Shows all added channels. ●● Favorites 1 - Favorites 5 Shows all favorite channels, in up to five groups. Each group has a separate screen. NNThe TV displays favorite groups - Samsung UN60ES8000F | User Manual Ver.1.0 (English) - Page 34
and function buttons with the Channel List NNIf you press the INFO button for Standard Remote Control or select Info for Smart Touch Control , the TV displays details of the selected program. ●● a Antenna Switches the mode and display between Air and Cable. - Samsung UN60ES8000F | User Manual Ver.1.0 (English) - Page 35
NNAppears only if your TV stored both Air and Cable. ●● { Program View / Channel View For digital channels, switches the display between Program View and Channel View. When you select a digital - Samsung UN60ES8000F | User Manual Ver.1.0 (English) - Page 36
, Toggles between the Favorites list (if you have added favorites using Edit Favorites) and the Added Ch. list. / On Program View screen, change a channel. ●● E Watch / Information Displays the channel you selected. / Displays details of the selected channel. ●● k Page Scrolls the Channel List to - Samsung UN60ES8000F | User Manual Ver.1.0 (English) - Page 37
Used in the Channel List screens : An analog channel. : A reserved program. : A locked channel. Using the Schedule Viewing in Channel List (digital channels only) You can use the Schedule Viewing in Channel List to schedule a digital channel program for viewing. The TV will turn on and display the - Samsung UN60ES8000F | User Manual Ver.1.0 (English) - Page 38
begins. 1. Press the CH LIST button for Standard Remote Control or select CH List for Smart Touch Control . The Channel List screen appears. 2. Select a desired digital channel. 3. Select { using your remote. The TV displays program list of the selected channel. 4. Select a desired program in the - Samsung UN60ES8000F | User Manual Ver.1.0 (English) - Page 39
program list, and then select Information using your remote. 5. On the Information screen, select the Schedule Viewing. The selected program is set to Schedule Viewing. NNIf you want to cancel the Schedule Viewing, follow Steps 1 through 4, and then select the Cancel Schedule. - Samsung UN60ES8000F | User Manual Ver.1.0 (English) - Page 40
Memorizing Channels Antenna Menu → Channel → Antenna Before your television can memorize the available channels, you must select your TV's signal source, Air (using an antenna) or Cable. Select Air or Cable. After you have selected the signal source, go on to the Auto Program - Samsung UN60ES8000F | User Manual Ver.1.0 (English) - Page 41
Antenna function also determines the signal source the TV is tuned to. For example, if you receive your TV signal over the air, and you select Cable, you will see only snow. You must select Air to see a picture. Auto Program Menu → Channel → Auto - Samsung UN60ES8000F | User Manual Ver.1.0 (English) - Page 42
adds them to the Channel list. To start the Auto Program, follow these steps: 1. Go to the Auto Program menu. 2. Select Air or Cable or both, and then select Next. A c mark appears in the check box. NNIf you selected Air or Cable in the Antenna menu, your choice will already be selected. 3. If you - Samsung UN60ES8000F | User Manual Ver.1.0 (English) - Page 43
system screen appears. Select the Digital Cable System. NNIf you selected the Air only, the Auto Program starts. 4. Select the correct cable signal format - STD, HRC or IRC. NNMost cable systems use STD (Standard). 5. Repeat for Analog Cable System. 6. Select Next. The Auto Program starts. - Samsung UN60ES8000F | User Manual Ver.1.0 (English) - Page 44
NNAfter all the available channels are stored, the Auto Program removes scrambled channels. When done, the Auto Program menu then reappears. This process can take up to 30 minutes. - Samsung UN60ES8000F | User Manual Ver.1.0 (English) - Page 45
Other Features Clear Scrambled Channel Menu → Channel → Clear Scrambled Channel This function filters out scrambled channels after the Auto Program is completed. This process may take up to 30 minutes. NNThis function is only available in Cable mode. How to Stop the Clear Scrambled Channel - Samsung UN60ES8000F | User Manual Ver.1.0 (English) - Page 46
function 1. To stop the Clear Scrambled Channel function, select Stop. 2. The message Stop searching for scrambled channels? appears. Select Yes. 3. The Clear Scrambled Channel function will be stopped. Fine Tune Menu → Channel → Fine Tune (analog channels only) - Samsung UN60ES8000F | User Manual Ver.1.0 (English) - Page 47
tune the channel, as this is done automatically during the search and store operation. If the signal is weak or distorted, fine tune the channel manually. Scroll to the left or right until the image is clear. NNSelect the channel, and then select Fine Tune. NNFine tuned channels that have been - Samsung UN60ES8000F | User Manual Ver.1.0 (English) - Page 48
in the channel banner. NNTo reset fine-tuning, select the channel, select Fine Tune, and then select Reset on the Fine Tune screen. Crosstalk Noise Reduction Menu → Channel → Crosstalk Noise Reduction (analog channels only) This function reduce diagonal noise in picture caused by the crosstalk - Samsung UN60ES8000F | User Manual Ver.1.0 (English) - Page 49
signals. If your TV displays with a noise while watching TV, turns on this function. - Samsung UN60ES8000F | User Manual Ver.1.0 (English) - Page 50
Changing the Preset Picture Mode Picture Mode Menu → Picture → Picture Mode Picture modes apply preset adjustments to the picture. NNWhen your TV is connected to a PC via the HDMI to DVI cable, you can only select Entertain and Standard. ●● Dynamic Brightens the screen. Suitable for a bright room. - Samsung UN60ES8000F | User Manual Ver.1.0 (English) - Page 51
●● Standard Suitable for a normal environment. ●● Natural for LED TV / Relax for PDP TV Suitable for reducing eye strain. ●● Movie Darkens the screen, making it less glary. Suitable for watching movies in a darkened room. ●● Entertain Sharpens the picture. Suitable for games. - Samsung UN60ES8000F | User Manual Ver.1.0 (English) - Page 52
NNOnly available when the TV is connected to a PC via an HDMI to DVI and an HDMI to HDMI cables. - Samsung UN60ES8000F | User Manual Ver.1.0 (English) - Page 53
Adjusting Picture Settings Backlight for LED TV / Cell Light for PDP TV Menu → Picture → Backlight / Cell Light Adjusts the brightness of the screen by adjusting the brightness of the individual pixels. Contrast Menu → Picture → Contrast Increases or decreases the contrast between dark and light - Samsung UN60ES8000F | User Manual Ver.1.0 (English) - Page 54
picture. Brightness Menu → Picture → Brightness Adjusts the brightness of the screen. Not as effective as Backlight / Cell Light. Sharpness Menu → Picture → Sharpness Sharpens or dulls the edges of objects. - Samsung UN60ES8000F | User Manual Ver.1.0 (English) - Page 55
Color Menu → Picture → Color Adjusts the color saturation. The higher the Color setting, the more intense the color. Low settings remove color and the picture becomes black, white and gray. Tint (G/R) Menu → Picture → Tint (G/R) - Samsung UN60ES8000F | User Manual Ver.1.0 (English) - Page 56
red decreases and vice versa. To adjust picture quality, follow these steps: 1. Select an option you want to adjust. When you select an option, a slider screen appears. 2. Adjust the option value using your remote. NNWhen you make change to option - Samsung UN60ES8000F | User Manual Ver.1.0 (English) - Page 57
value, the OSD will be adjusted accordingly. NNWhen your TV is connected to a PC via the HDMI to DVI cable, Color and Tint (G/R) is not available. NNYou can adjust and store Settings for each external device connected to the TV. NNLowering picture brightness reduces power consumption. - Samsung UN60ES8000F | User Manual Ver.1.0 (English) - Page 58
Changing the Picture Size Screen Adjustment Menu → Picture → Screen Adjustment Using this function, you can make change to various picture size and aspect ratio options. ●● Picture Size If you have a cable box or satellite receiver, it may have its own set of screen sizes as well. However, we - Samsung UN60ES8000F | User Manual Ver.1.0 (English) - Page 59
highly recommend you use your TV's 16:9 mode most of the time. NNIf you have set Double (à, Œ) mode in PIP (Picture-in-Picture), you cannot adjust the Picture Size. 16:9: Sets the picture to the 16:9 wide screen format. Zoom1: Provides moderate magnification of the picture. Sides, top, and bottom - Samsung UN60ES8000F | User Manual Ver.1.0 (English) - Page 60
Sides, top, and bottom are cut off. Wide Fit: Enlarges the aspect ratio of the picture so it fits the entire screen. NNAvailable with HD 1080i / 720p signals in 16:9 mode. 4:3: Sets the picture to basic (4:3) mode. NNDo not set your TV to 4:3 format for a long time. The borders displayed on the left - Samsung UN60ES8000F | User Manual Ver.1.0 (English) - Page 61
burn) which is not covered by the warranty. Screen Fit: When your TV inputs HDMI (720p / 1080i / 1080p) or Component (1080i / 1080p) signals, displays the full image without any cut-off. Smart View 1: Reduces the 16:9 picture by 50%. for LED TV Smart View 2: Reduces the 16:9 picture by 25%. for - Samsung UN60ES8000F | User Manual Ver.1.0 (English) - Page 62
the input resolution when you play content from Videos in AllShare Play. ●● Position Adjusts the picture position. Position is only available if Picture Size is set to - Samsung UN60ES8000F | User Manual Ver.1.0 (English) - Page 63
. NNIn DTV mode, Position is not available when Picture Size is set to Screen Fit. To use the Position function after selecting Zoom1, Zoom2, Wide Fit or Screen Fit, follow these steps: 1. Select the Position. 2. On the Position screen, select Position, and then move the picture to position you want - Samsung UN60ES8000F | User Manual Ver.1.0 (English) - Page 64
Sizes available by Input Source: -- ATV, AV: 16:9, Zoom1, Zoom2, 4:3 -- Component (480i, 480p): 16:9, Zoom1, Zoom2, 4:3 -- DTV (720p): 16:9, Wide Fit, 4:3, Smart View 2 for LED TV - Samsung UN60ES8000F | User Manual Ver.1.0 (English) - Page 65
): 16:9, Wide Fit, 4:3, Screen Fit, Smart View 2 for LED TV -- Component(720p): 16:9, Wide Fit, 4:3 -- Component(1080i, 1080p): 16:9, Wide Fit, 4:3, Screen Fit -- HDMI (720p, 1080i, 1080p): 16:9, Wide Fit, 4:3, Screen Fit, Smart View 1 for LED TV , Smart View 2 for LED TV NNDepending on the input - Samsung UN60ES8000F | User Manual Ver.1.0 (English) - Page 66
NNThe available items may differ depending on the selected mode. NNHD (High Definition): 16:9 1080i/1080p (1920x1080), 720p (1280x720) NNYou can adjust and store settings for each external device you have connected to an input on the TV. - Samsung UN60ES8000F | User Manual Ver.1.0 (English) - Page 67
Changing the Picture Options Advanced Settings Menu → Picture → Advanced Settings Using this function, you can configure advanced picture settings to create your preferred picture. NNAdvanced Settings is available only when the Picture Mode is set to Standard or Movie mode. NNWhen connecting a PC - Samsung UN60ES8000F | User Manual Ver.1.0 (English) - Page 68
make changes to White Balance and Gamma. ●● Dynamic Contrast Adjusts the screen contrast. ●● Black Tone Darker settings make blacks look darker. ●● Flesh Tone Adjusts the amount of red in skin tones. ●● RGB Only Mode - Samsung UN60ES8000F | User Manual Ver.1.0 (English) - Page 69
saturation. ●● Color Space Adjusts the range and variety of colors (the color space) available to create images. NNTo adjust Color, Red, Green, Blue and Reset, set the Color Space to Custom. ●● White Balance Adjusts the color temperature of the - Samsung UN60ES8000F | User Manual Ver.1.0 (English) - Page 70
: Adjusts each color's (red, green, blue) darkness. R-Gain / G-Gain / B-Gain: Adjusts each color's (red, green, blue) brightness. Reset: Resets the White Balance to it's default settings. ●● 10p White Balance - Samsung UN60ES8000F | User Manual Ver.1.0 (English) - Page 71
intervals by adjusting the red, green, and blue brightness. NNAvailable when the Picture Mode is set to Movie and when the external input is set to all input. NNSome external devices may not support this function. Interval: Select interval to adjust. Red: Adjust the red level. Green: Adjust the - Samsung UN60ES8000F | User Manual Ver.1.0 (English) - Page 72
the 10p White Balance to its default settings. ●● Gamma Adjusts the primary color intensity. ●● Expert Pattern Use the Expert Pattern function to calibrate the picture. If the OSD menu disappears or a menu other than the Picture menu is opened, the TV saves the calibration and the Expert Pattern - Samsung UN60ES8000F | User Manual Ver.1.0 (English) - Page 73
disappears. Off: Turns the Expert Pattern function off. Pattern1: This test screen demonstrates the effect of the display settings on shades of grey and black. Pattern2: This test screen demonstrates the effect of the display settings on colors. NNAfter selecting Pattern1 or Pattern2, you can adjust - Samsung UN60ES8000F | User Manual Ver.1.0 (English) - Page 74
for desired effect. NNWhile the Expert Pattern is running, the TV does not output sound. NNOnly enabled in DTV, Component, and HDMI modes. ●● xvYCC Setting xvYCC on increases picture detail and enlarges the color space when you are watching movies input from an external device (e.g. BD/DVD player - Samsung UN60ES8000F | User Manual Ver.1.0 (English) - Page 75
Component IN jacks. NNAvailable only when you set the Picture Mode to Movie and the external input to HDMI or Component. NNSome external devices may not support this function. ●● Motion Lighting When on, the TV automatically adjusts the brightness of the screen in response to the brightness of the - Samsung UN60ES8000F | User Manual Ver.1.0 (English) - Page 76
In bright light, the screen brightens. In dim light, the screen dims. NNOnly available in Standard mode. NNThis feature is not supported in 3D mode. NNWhen you change the Backlight for LED TV / Cell Light for PDP TV , Contrast or Brightness, the TV sets the Motion Lighting to Off. ●● Black Enhancer - Samsung UN60ES8000F | User Manual Ver.1.0 (English) - Page 77
black color depth. NNAvailable only when Picture Mode is set to Movie. Picture Options Menu → Picture → Picture Options Using this function, you can configure additional picture settings to suit your preference. NNWhen your TV is connected to a PC via the HDMI to DVI cable, you can only make changes - Samsung UN60ES8000F | User Manual Ver.1.0 (English) - Page 78
Tone Cool makes the picture bluer (cooler). Warm1 and Warm2 make the picture redder (warmer). NNWarm1 and Warm2 are deactivated when the Picture Mode is set to Dynamic. NNYou can adjust and store settings for each external device connected to an input on the TV. ●● Digital Noise Filter - Samsung UN60ES8000F | User Manual Ver.1.0 (English) - Page 79
If the broadcast signal received by your TV is weak, you can activate the Digital Noise Filter feature to reduce any static and ghosting that may appear on the screen. Auto Visualization: When changing analog channels, displays signal strength. NNWhen the signal is weak, try all the options until - Samsung UN60ES8000F | User Manual Ver.1.0 (English) - Page 80
, you are receiving the best possible signal. ●● MPEG Noise Filter Reduces MPEG noise to provide improved picture quality. ●● HDMI Black Level Lets you adjust the screen depth by selecting a black level. NNAvailable only in HDMI mode. ●● Film Mode - Samsung UN60ES8000F | User Manual Ver.1.0 (English) - Page 81
Sets the TV so that it senses and then processes film signals from all sources automatically and adjusts the picture for optimum quality. NNAvailable in TV, AV, Component (480i / 1080i) and HDMI (1080i). ●● Auto Motion Plus for LED TV Removes blur and judder from scenes with larger amounts of rapid - Samsung UN60ES8000F | User Manual Ver.1.0 (English) - Page 82
Reduction: Adjusts the Judder reduction level for signals input from a video source through which you are playing a movie. Reset: Reset the custom settings. NNThe info screen on your TV displays the resolution and frequency of the incoming video signal (60 Hz). This displayed frequency is not the - Samsung UN60ES8000F | User Manual Ver.1.0 (English) - Page 83
frequency of the picture the TV is displaying when you have Auto Motion Plus on. NNIf noise occurs on the screen, please set the Auto Motion Plus to Off. If the Auto Motion Plus is set to Custom, you can control Blur Reduction and Judder Reduction manually and use Reset to reset both to their - Samsung UN60ES8000F | User Manual Ver.1.0 (English) - Page 84
between a picture with Auto Motion Plus On and Auto Motion Plus Off modes. ●● LED Motion Plus for LED TV Removes blur and judder from scenes with large amounts of rapid movement to provide a clearer picture. NNAvailable only when Picture Mode is set to Dynamic, Standard, or Movie. Reset Picture - Samsung UN60ES8000F | User Manual Ver.1.0 (English) - Page 85
Menu → Picture → Reset Picture Resets your current picture mode to its default settings. - Samsung UN60ES8000F | User Manual Ver.1.0 (English) - Page 86
Using the TV with Your PC Using Your TV as a Computer (PC) Display Entering the Video Settings (Based on Windows 7) For your TV to work properly as a computer display, you must enter the correct video settings. NNDepending on your version of Windows and your video card, the procedure on your PC will - Samsung UN60ES8000F | User Manual Ver.1.0 (English) - Page 87
from the procedure presented here. NNHowever, the same basic information will apply in most cases. (If not, contact your computer manufacturer or Samsung Dealer.) 1. Click "Control Panel" on the Windows start menu. 2. Click "Appearance and Themes" in the "Control Panel" window. A display dialog box - Samsung UN60ES8000F | User Manual Ver.1.0 (English) - Page 88
dialog box appears. 4. Click the "Settings" tab on the display dialog box. -- On the Settings tab, set the correct resolution (screen size). The optimal resolution for this TV is 1920 x 1080. -- If a vertical-frequency option exists on your display settings dialog box, select "60" or "60 Hz". - Samsung UN60ES8000F | User Manual Ver.1.0 (English) - Page 89
Otherwise, just click "OK" and exit the dialog box. - Samsung UN60ES8000F | User Manual Ver.1.0 (English) - Page 90
Changing the Preset Sound Mode Sound Mode Menu → Sound → Sound Mode Sound modes apply preset adjustments to the sound. NNIf Speaker Select is set to External Speaker, the Sound Mode is disabled. ●● Standard Selects the normal sound mode. ●● Music Emphasizes music over voices. - Samsung UN60ES8000F | User Manual Ver.1.0 (English) - Page 91
●● Movie Provides the best sound for movies. ●● Clear Voice Emphasizes voices over other sounds. ●● Amplify Increase the intensity of high-frequency sound to allow a better listening experience for the hearing impaired. - Samsung UN60ES8000F | User Manual Ver.1.0 (English) - Page 92
Sound Effect Menu → Sound → Sound Effect NNIf Speaker Select is set to External Speaker, the Sound Effect is disabled. NNAvailable only when the Sound Mode is set to Standard. ●● Virtual Surround This function provides a virtual 5.1 channel surround sound experience through a pair of speakers - Samsung UN60ES8000F | User Manual Ver.1.0 (English) - Page 93
(Head Related Transfer Function) technology. ●● Dialog Clarity This function allows you to increase the intensity of a voice over background music or sound effects so that dialog can be heard more clearly. ●● Equalizer The Equalizer displays a series of sliders. Use the arrow buttons to select a - Samsung UN60ES8000F | User Manual Ver.1.0 (English) - Page 94
To Reset the Equalizer, select the Reset. A pop-up appears asking if you want to reset, select Yes. To exit, select Close. Balance L/R: Adjusts the balance between the right and left speaker. 100Hz / 300Hz / 1kHz / 3kHz / 10kHz (Bandwidth Adjustment): Adjusts the loudness of specific bandwidth - Samsung UN60ES8000F | User Manual Ver.1.0 (English) - Page 95
settings. 3D Audio Menu → Sound → 3D Audio 3D audio technology provides the immersive sound corresponding to the pop-up effect of 3D video by audio depth control in perspective. NNAvailable only when watching 3D image. Broadcast Audio Options Menu → Sound → Broadcast Audio Options - Samsung UN60ES8000F | User Manual Ver.1.0 (English) - Page 96
●● Preferred Language (digital channels only) Digital-TV broadcasts can simultaneously transmit many audio tracks (for example, simultaneous translations of the program into foreign languages). You can only select a language from among the - Samsung UN60ES8000F | User Manual Ver.1.0 (English) - Page 97
more audio tracks. You can select a sound you want to listen from among the ones being broadcasted. NNWhile watching TV, open the Tools menu using your remote, you can select the Multi-Track Sound in Tools menu immediately. NNMulti-Track Sound may differ depending on - Samsung UN60ES8000F | User Manual Ver.1.0 (English) - Page 98
Menu → Sound → SPDIF Output SPDIF (Sony Philips Digital Interface) provides digital audio output to speakers and various digital devices such as A/V Receivers and Home Theaters which reduces interference and distortion. ●● Audio Format You can select the Digital Audio output (SPDIF) format. The - Samsung UN60ES8000F | User Manual Ver.1.0 (English) - Page 99
between the audio track and the video when you are watching the TV and listening to digital audio output from the TV through an external device such as an AV receiver. When you select the Audio Delay, a slider screen appears. Adjust the option value using your remote (0ms ~ 250ms). Speaker - Samsung UN60ES8000F | User Manual Ver.1.0 (English) - Page 100
the sound track of a broadcast or movie through an external receiver, you may hear a sound echo caused by the difference in decoding speed between the TV's speakers and the speakers attached to your audio receiver. If this occurs, set the TV to External Speaker. NNWhen the Speaker Select is - Samsung UN60ES8000F | User Manual Ver.1.0 (English) - Page 101
External Speaker, the TV's speakers are turned off. You will hear sound through the external speakers only. When the Speaker Select is set to TV Speaker, both the TV's speakers and the external speakers are on. You will hear sound through both. NNWhen the Speaker Select is set to External Speaker, - Samsung UN60ES8000F | User Manual Ver.1.0 (English) - Page 102
limited. NNIf there is no video signal, both the TV's speakers and the external speakers will be mute. ●● Auto Volume Because each station has its own broadcasting conditions, the volume may fluctuate each time you - Samsung UN60ES8000F | User Manual Ver.1.0 (English) - Page 103
high or by raising the sound output when the modulation signal is low. NNTo use the volume control of a connected source device, set Auto Volume to Off. A change to the volume control of the connected source device may not be applied if Auto Volume is set to Normal or Night. Reset Sound - Samsung UN60ES8000F | User Manual Ver.1.0 (English) - Page 104
Menu → Sound → Reset Sound Reset all sound settings to the factory defaults. - Samsung UN60ES8000F | User Manual Ver.1.0 (English) - Page 105
the Network Wired Network Connection There are three ways to attach your TV to your LAN using cable: NNIf you want to view a illustration, see your user's manual. The network connection illustrated in your user's manual. -- You can attach your TV to your LAN by connecting the LAN port on the back of - Samsung UN60ES8000F | User Manual Ver.1.0 (English) - Page 106
by connecting the LAN port on the back of your TV to an IP Sharer which is connected to an external modem. Use LAN cable for the connection. -- Depending on how your network is configured, you may be able to attach your TV to your LAN by connecting the LAN port on - Samsung UN60ES8000F | User Manual Ver.1.0 (English) - Page 107
of your TV directly to a network wall outlet using a LAN cable. Note that the wall outlet is attached to a modem or router elsewhere in your house. NNIf your network requires a Dynamic IP address, you should use an ADSL modem or router that supports the Dynamic Host Configuration Protocol (DHCP). - Samsung UN60ES8000F | User Manual Ver.1.0 (English) - Page 108
the IP address, subnet mask, gateway, and DNS values your TV needs to access the Internet so you do not have to enter them manually. Most home networks use a Dynamic IP address. NNSome networks require a Static IP address. If your network requires a Static IP address, you must enter the IP - Samsung UN60ES8000F | User Manual Ver.1.0 (English) - Page 109
set up the network connection. To get the IP address, subnet mask, gateway, and DNS values, contact your Internet Service Provider (ISP). If you have a Windows computer, you can also get these values through your computer. NNYou can use ADSL modems that support DHCP if your network requires a Static - Samsung UN60ES8000F | User Manual Ver.1.0 (English) - Page 110
. Wireless Network Connection NNIf you want to view a illustration, see your user's manual. The network connection illustrated in your user's manual. You can connect your TV to your LAN through a standard wireless router or modem. This TV supports the IEEE 802.11a/b/g and n communication protocols. - Samsung UN60ES8000F | User Manual Ver.1.0 (English) - Page 111
Samsung recommends using IEEE 802.11n. When you play video over a network connection, the video may not play smoothly. NNTo use a wireless network, your TV must be connected to a wireless IP sharer (either a router or a modem). If the wireless IP sharer supports DHCP, your TV can use a DHCP or - Samsung UN60ES8000F | User Manual Ver.1.0 (English) - Page 112
sharer that is not currently being used. If the channel set for the wireless IP sharer is currently being used by another device nearby, this will result in interference and communication failure. NNYour TV supports only the following wireless network security protocols: -- Authentication Mode : WEP - Samsung UN60ES8000F | User Manual Ver.1.0 (English) - Page 113
, AES NNIf you select the Pure Highthroughput (Greenfield) 802.11n mode and the Encryption type is set to WEP, TKIP or TKIP AES (WPS2Mixed) on your AP or wireless router, Samsung TVs will not support a connection in compliance with new Wi-Fi certification specifications. NNIf your wireless router - Samsung UN60ES8000F | User Manual Ver.1.0 (English) - Page 114
automatically configure the SSID and WPA key in either mode. NNIf your router, modem, or device is not certified, it may not connect to the TV. NNConnection Methods: You can set up the wireless network connection in four ways: - Samsung UN60ES8000F | User Manual Ver.1.0 (English) - Page 115
-- Auto Setup (Using the Auto Network Search function) -- Manual Setup -- WPS(PBC) -- Plug & Access - Samsung UN60ES8000F | User Manual Ver.1.0 (English) - Page 116
up the Wired Network Network Settings Menu → Network → Network Settings Set the wired or wireless network connection to use various Internet services such as Smart Hub, AllShare Play and perform software upgrades. Automatic Wired Network Setup You can configure your TV's wired network connection - Samsung UN60ES8000F | User Manual Ver.1.0 (English) - Page 117
supports DHCP. NNWhen connecting LAN cable, the screen pop-up appears directly to set wired network. To set up your TV's wired network connection automatically, follow these steps: 1. Go to the Network Settings screen. (Network → Network Settings) 2. Select Start. The network test screen appears and - Samsung UN60ES8000F | User Manual Ver.1.0 (English) - Page 118
connection. 3. When the connection has been verified, the You are connected to the Internet. If you have any problems using online services, please contact your Internet Service Provider. message appears. NNIf the connection process fails, check the LAN port connection. NNIf the automatic process - Samsung UN60ES8000F | User Manual Ver.1.0 (English) - Page 119
if you want to set the connection manually, go to the next section, "Manual Network Setup." Manual Wired Network Setup You can configure your TV's wired network connection manually when connecting your TV to a network that requires a Static IP address. NNTo get the IP address, subnet mask, gateway, - Samsung UN60ES8000F | User Manual Ver.1.0 (English) - Page 120
To set up your TV's wired network connection manually, follow these steps: 1. Go to the Network Settings screen. (Network → Network Settings) 2. Select Start. The network connection screen appears and the verification process starts. 3. Select Stop. The verification process stops. Select IP Settings - Samsung UN60ES8000F | User Manual Ver.1.0 (English) - Page 121
screen appears. 4. Select the IP Setting, and then set the IP Setting to Enter manually. 5. Go to the IP Address entry field, and then select the IP Address using remote. 6. Enter the first portion of the IP Address (for example, - Samsung UN60ES8000F | User Manual Ver.1.0 (English) - Page 122
Address. When done, go to the next field. 8. Repeat the entry process for each field in the IP Address. NNIf you make a mistake when entering a number, re-enter the number to correct it. 9. When done, go to the Subnet Mask fields. 10. Repeat the same entry process for Subnet Mask, Gateway, and DNS - Samsung UN60ES8000F | User Manual Ver.1.0 (English) - Page 123
When done, select OK. The network test screen appears and the verification process starts. When the connection has been verified, the You are connected to the Internet. If you have any problems using online services, please contact your Internet Service Provider. message appears. Network Status Menu - Samsung UN60ES8000F | User Manual Ver.1.0 (English) - Page 124
network connection failed... ●● No network cable found. Check that your network cable is plugged in. If it is connected, make sure that the router is turned on; if it is on, try turning if off and on again. ●● IP auto setting failed. Try the following to set your IP address automatically. Or - Samsung UN60ES8000F | User Manual Ver.1.0 (English) - Page 125
manually by selecting IP Settings. - Ensure DHCP server is enabled on router and unplug and re-plug-in the router. - Contact your Internet Service Provider for more information. ●● Unable to connect to the network. Try the following: check if your IP address is set correctly in IP Settings. Contact - Samsung UN60ES8000F | User Manual Ver.1.0 (English) - Page 126
cannot connect to the Internet. Check the DNS settings in IP Settings, or contact your Internet Service Provider to access the Internet. ●● Network setup complete, but cannot connect to the Internet. Contact your Internet Service Provider to access the Internet. - Samsung UN60ES8000F | User Manual Ver.1.0 (English) - Page 127
up the Wireless Network Network Settings Menu → Network → Network Settings Set the wired or wireless network connection to use various Internet services such as Smart Hub, AllShare Play and perform software upgrades. Automatic Wireless Network Setup Most wireless networks have an optional security - Samsung UN60ES8000F | User Manual Ver.1.0 (English) - Page 128
is based on a Pass Phrase, typically a word or a series of letters and numbers of a specified length you were asked to enter when you set up wireless security for your wireless network. If you use this method of setting up the network connection, and have a Security Key for your wireless network, - Samsung UN60ES8000F | User Manual Ver.1.0 (English) - Page 129
will have to enter the Pass Phrase during the automatic or manual setup process. To set up your TV's wireless network connection automatically, follow these steps: 1. Go to the Network Settings screen. (Network → Network Settings) 2. Select Start. The network function searches for available wireless - Samsung UN60ES8000F | User Manual Ver.1.0 (English) - Page 130
list of the available networks. 3. In the list of networks, select a network you want to connect, and then select Next. NNIf the wireless router is set to Hidden (Invisible), you have to select Add Network and enter the correct Network Name (SSID) and Security Key to establish the connection. 4. If - Samsung UN60ES8000F | User Manual Ver.1.0 (English) - Page 131
router that does not have wireless security, go to step 7. 5. To set wireless security for the router, enter the Security Key (Security key or PIN). NNYou can enter the Security Key (Security key or PIN) using a keyboard screen. Enter the Security Key using your remote. NNYou should be able to find - Samsung UN60ES8000F | User Manual Ver.1.0 (English) - Page 132
of the set up screens you used to set up your router or modem. 6. When done, select Next. The network connection screen appears and the verification process starts. 7. When the connection has been verified, the You are connected to the Internet. If you have any problems using online services, please - Samsung UN60ES8000F | User Manual Ver.1.0 (English) - Page 133
does not accept the Security Key (Security key or PIN), select Retry or select IP Settings to enter the settings manually. NNIf you want to set up the connection manually, select IP Settings. Then, go to the next section, "Manual Network Setup". Manual Wireless Network Setup You can configure your - Samsung UN60ES8000F | User Manual Ver.1.0 (English) - Page 134
manually when connecting your TV to a network that requires a Static IP address or if the automatic connection process has failed. NNTo get the IP address, subnet mask, gateway, and DNS values, contact your Internet Service Provider (ISP). To set up your TV's wireless network connection manually - Samsung UN60ES8000F | User Manual Ver.1.0 (English) - Page 135
1. Go to the Network Settings screen. (Network → Network Settings) 2. Select Start. The network function searches for available wireless networks. When done, it displays a list of the available networks. 3. In the list of networks, select a - Samsung UN60ES8000F | User Manual Ver.1.0 (English) - Page 136
Network Name (SSID) and Security Key to establish the connection. 4. If the Enter security key screen appears, go to step 5. If you select a wireless router that does not have wireless security, go to step 7. 5. To set wireless security for the router, enter the Security Key (Security key or PIN). - Samsung UN60ES8000F | User Manual Ver.1.0 (English) - Page 137
key or PIN) using a keyboard screen. Enter the Security Key using your remote. NNYou should be able to find the Pass Phrase on one of the set up screens you used to set up your router or modem. 6. When done, select Next. The network connection screen appears and the verification process starts. - Samsung UN60ES8000F | User Manual Ver.1.0 (English) - Page 138
7. Select Stop. The verification process stops. Select IP Settings on the network connection screen. The IP Settings screen appears. 8 Select IP Setting, and then set the IP Setting to Enter manually. 9. Go to the IP Address entry field, and then select the IP Address using remote. 10. Enter the - Samsung UN60ES8000F | User Manual Ver.1.0 (English) - Page 139
first entry field using your remote. When done, go to the next field. 11. Enter the next portion of the IP Address. When done, go to the next field. 12. Repeat the entry process for each field in the IP Address. NNIf you make a mistake when entering a number, re-enter the number to correct it. 13. - Samsung UN60ES8000F | User Manual Ver.1.0 (English) - Page 140
for Subnet Mask, Gateway, and DNS Server. 15. When done, select OK. The network connection screen appears and the verification process starts. When the connection has been verified, the You are connected to the Internet. If you have any problems using online services, please contact your Internet - Samsung UN60ES8000F | User Manual Ver.1.0 (English) - Page 141
. WPS(PBC) Network Setup If your router has a WPS(PBC) button, you can configure your TV's wireless network connection using the WPS(PBC) button more easily. To set up your TV's wireless network connection using WPS(PBC), follow these steps: 1. Go to Network Settings screen. (Network → Network - Samsung UN60ES8000F | User Manual Ver.1.0 (English) - Page 142
networks. When done, it displays a list of the available networks. 3. Select the WPS(PBC). 4. Press the WPS(PBC) button on your router within 2 minutes. Your TV automatically acquires all the network setting values it needs and connects to your network. 5. The network connection - Samsung UN60ES8000F | User Manual Ver.1.0 (English) - Page 143
Plug & Access function lets you easily connect your Samsung TV to your Samsung wireless router (sold separately) by using a USB memory stick to transfer the setup information from the router to the TV. If your non-Samsung wireless router does not support Plug & Access, you must connect using one of - Samsung UN60ES8000F | User Manual Ver.1.0 (English) - Page 144
methods. NNYou can check for equipment that supports Plug & Access on www. samsung.com. To set up your TV's wireless network connection using Plug & Access, follow these steps: 1. Turn on the Samsung wireless router and your TV. 2. Insert a USB memory stick into the USB port in your Samsung wireless - Samsung UN60ES8000F | User Manual Ver.1.0 (English) - Page 145
make sure it is on (Blinking → on). 3. Take the USB memory stick out of the router, and then insert it into a USB port on your Samsung TV. The memory stick downloads the connection information. 4. Wait until the connection is automatically established. NNIf Plug & Access does not connect your - Samsung UN60ES8000F | User Manual Ver.1.0 (English) - Page 146
appears on the screen notifying you of the failure. If you want to try using Plug & Access again, disconnect the USB memory stick, reset the AP, and then try again from Step 1. You can also choose one of the other connection setup methods. 5. The network connection screen appears, and the network - Samsung UN60ES8000F | User Manual Ver.1.0 (English) - Page 147
6. Place the wireless router in a desired location. NNIf the wireless router's settings change or you install a new wireless router, you must perform the Plug & Access procedure again, beginning from Step 1. Network Status Menu → Network → Network Status You can check the current network and - Samsung UN60ES8000F | User Manual Ver.1.0 (English) - Page 148
... ●● Wireless network connection failed. No wireless router selected. Go to Network Settings to select your router. ●● Unable to connect to wireless router. Try the following: check that the router is turned on, and if it is try turning it off and on again. Check if you need to enter a security - Samsung UN60ES8000F | User Manual Ver.1.0 (English) - Page 149
failed. Try the following to set your IP address automatically. Or set your IP address manually by selecting IP Settings. - Ensure DHCP server is enabled on router and unplug and re-plug-in the router. - Contact your Internet Service Provider for more information. ●● Unable to connect to the network - Samsung UN60ES8000F | User Manual Ver.1.0 (English) - Page 150
Connected to your local network, but cannot connect to the Internet. Check the DNS settings in IP Settings, or contact your Internet Service Provider to access the Internet. ●● Network setup complete, but cannot connect to the Internet. Contact your Internet Service Provider to access the Internet. - Samsung UN60ES8000F | User Manual Ver.1.0 (English) - Page 151
Wi-Fi Direct Menu → Network → Wi-Fi Direct Set to connect the TV to wireless mobile devices. Using this function, you can connect wireless mobile devices with your TV directly without a router. NNTo use this function, your mobile device should be supported by the Wi-Fi Direct. To connect your mobile - Samsung UN60ES8000F | User Manual Ver.1.0 (English) - Page 152
TV using Wi-Fi Direct, follow these steps: 1. Go to Wi-Fi Direct screen (Network → Wi-Fi Direct). The TV starts to search devices. 2. Turn on the Wi-Fi Direct function on your device. Select the desired Wi-Fi device. -- PBC: Press the WPS(PBC) button on your Wi-Fi device within 2 minutes. Your TV - Samsung UN60ES8000F | User Manual Ver.1.0 (English) - Page 153
acquires all the network setting values it needs and connects to your network. -- PIN: Input the displayed PIN on your device. NNIf you want to disconnect the device, select the - Samsung UN60ES8000F | User Manual Ver.1.0 (English) - Page 154
if your mobile devices do not support Wi-Fi Direct. Set the options for connection of Wi-Fi device. ●● Soft AP Turns on or off the Soft AP. When Soft AP is set to On, your mobile devices can find the TV name in Wi-Fi connection list. ●● Security key Set the Security key manually using the - Samsung UN60ES8000F | User Manual Ver.1.0 (English) - Page 155
the device you want to connect. -- If network does not operate normally, check the security key again. An incorrect security key may cause a malfunction. AllShare Settings - Samsung UN60ES8000F | User Manual Ver.1.0 (English) - Page 156
Selects whether to use media functions on the network. For details on set up options, refer to the "AllShare Settings" in the AllShare Play section. Device Name Menu → Network → Device Name Enter a name for this TV. This name will be shown on network remote controls and devices using AllShare - Samsung UN60ES8000F | User Manual Ver.1.0 (English) - Page 157
and you can key in a name for your TV manually using your remote control. For example, if you want to change the name to Samsung TV, select each character using your remote. When done, select Done. - Samsung UN60ES8000F | User Manual Ver.1.0 (English) - Page 158
Time Time Menu → System → Time NNThe time you set will appear when you press the INFO button for Standard Remote Control or select Info for Smart Touch Control . ●● Clock Set the clock to use the various timer features of the TV. NNIf you disconnect the power cord, you have to set the clock again. - Samsung UN60ES8000F | User Manual Ver.1.0 (English) - Page 159
To set the clock, follow these steps: 1. Go to Clock screen (System → Time → Clock). 2. Select Auto or Manual. ŒŒ If you selected Auto: The TV will automatically download the correct time from a digital channel. -- Select Time Zone, and then select your Time Zone. -- Select DST (Daylight Savings - Samsung UN60ES8000F | User Manual Ver.1.0 (English) - Page 160
the DST adjustment on and off manually. Select Off to turn off the DST adjustment. NNDST and Time Zone function are only available when the Clock Mode is set to Auto. ŒŒ If you selected Manual: -- The Clock Set screen appears. Set the Date and Time manually. You can set the current date and time - Samsung UN60ES8000F | User Manual Ver.1.0 (English) - Page 161
using your remote. NNAvailable only when Clock Mode is set to Manual. ●● Sleep Timer Automatically shuts off the TV after a preset period of time. (30, 60, 90, 120, 150 and 180 minutes). NNSelect a period of time using your remote. To cancel the Sleep Timer, select Off. ●● On Timer - Samsung UN60ES8000F | User Manual Ver.1.0 (English) - Page 162
your TV turns on automatically at a time and on a day of your choosing. You can set up three separate On Timer configurations. (On Timer 1, On Timer 2, On Timer 3) NNYou must set the clock before you can use the On Timer. Setup: Select Off, Once, Everyday, Mon~Fri, Mon~Sat, Sat~Sun or Manual. If - Samsung UN60ES8000F | User Manual Ver.1.0 (English) - Page 163
NNThe c mark indicates days you've selected. Time: Set the time that the TV turns on automatically. Volume: Set the desired loudness. Source: To select what will be turned on when the timer setting is activated. You can set the TV to turn on a specific channel or play back contents such as video, - Samsung UN60ES8000F | User Manual Ver.1.0 (English) - Page 164
you can select USB. Antenna (when the Source is set to TV): Select Air or Cable. Channel (when the Source is set to TV): Select the desired channel. Music / Photo (when the Source is set to USB): Select a folder in the USB device containing music or photo files you want played when the TV turns on - Samsung UN60ES8000F | User Manual Ver.1.0 (English) - Page 165
automatically. NNIf there is no music file on the USB device or you don't select a folder containing a music file, the Timer function does not operate correctly. NNIf there is only one photo file in the USB, the slide show will not play. NNIf a folder name is too long, the folder cannot be selected. - Samsung UN60ES8000F | User Manual Ver.1.0 (English) - Page 166
Timer. The On Timer function may not work with USB devices with a built-in battery, MP3 players, or PMPs made by some manufacturers because the TV can take too long to recognize - Samsung UN60ES8000F | User Manual Ver.1.0 (English) - Page 167
a USB HDD, it may take up to 40 seconds or more to play the file after the TV is turned on. ●● Off Timer Set Off Timer so that your TV turns off automatically at a time and on a day of your choosing. You can set up three separate Off Timer configurations. (Off Timer 1, Off Timer 2, Off Timer 3) - Samsung UN60ES8000F | User Manual Ver.1.0 (English) - Page 168
must set the clock before you can use the Off Timer. Setup: Select Off, Once, Everyday, Mon~Fri, Mon~Sat, Sat~Sun or Manual. If you select Manual, you can choose the days you want Off Timer to turn off your TV. NNThe c mark indicates days you've selected. Time: Set the time that the TV turns off - Samsung UN60ES8000F | User Manual Ver.1.0 (English) - Page 169
→ Security Using this function, you can configure channel related security options. Every time you access the Security functions, the PIN screen will appear and you must enter that PIN. The PIN screen closes and the Security menu appears. ●● Program Rating Lock The Program Rating Lock feature lets - Samsung UN60ES8000F | User Manual Ver.1.0 (English) - Page 170
program, you must also enter the same PIN. NNThe Program Rating Lock is not available in HDMI, Component mode. NNThe default PIN number for a new TV - Samsung UN60ES8000F | User Manual Ver.1.0 (English) - Page 171
set is "0-0-0-0". TV Rating: You can block TV programs based on their ratings. This function allows you to control what your children can watch. The TV Rating displays a grid with locks. The following categories are on the left side: -- TV-Y: Young children -- TV-Y7: Children 7 and over -- TV-G: - Samsung UN60ES8000F | User Manual Ver.1.0 (English) - Page 172
-- TV-PG: Parental guidance -- TV-14: Viewers 14 and over -- TV-MA: Mature audience The following categories are on top: -- ALL: Lock all TV ratings. -- FV: Fantasy violence -- V: Violence -- S: Sexual situation -- L: Adult Language -- D: Sexually Suggestive Dialog NNTo block certain content, select - Samsung UN60ES8000F | User Manual Ver.1.0 (English) - Page 173
entry field to lock (That is, you "click it".). For example, click the lock at the intersection of V and TV-MA, and you block all programs that are rated violent and for mature adults. NNTo unblock a category, click the lock icon. To unblock all the - Samsung UN60ES8000F | User Manual Ver.1.0 (English) - Page 174
Movie Rating (MPAA): You can block movies based on their MPAA rating. The Motion Picture Association of America (MPAA) has implemented a rating system that provides parents or guardians with advanced information on which films are appropriate for children. Movie Rating (MPAA) displays a column with - Samsung UN60ES8000F | User Manual Ver.1.0 (English) - Page 175
-- G: General audience (no restrictions). -- PG: Parental guidance suggested. -- PG-13: Parents strongly cautioned. -- R: Restricted. Children under 17 should be accompanied by an adult. -- NC-17: No children under age 17. -- X: Adults only. -- NR: Not rated. NNTo block certain content, select an - Samsung UN60ES8000F | User Manual Ver.1.0 (English) - Page 176
and you block all X-rated movies. NNThe rating categories are also grouped so that clicking one category blocks all the categories a parent would block along with it. For example, if you block the PG-13 category, then R, NC-17 and X will automatically be blocked also. NNTo unblock a category, click - Samsung UN60ES8000F | User Manual Ver.1.0 (English) - Page 177
block TV programs based on their Anglophone Canadian ratings. Canadian English Rating displays a column with locks and the following ratings categories: -- C: Programming intended for children under age 8. -- - Samsung UN60ES8000F | User Manual Ver.1.0 (English) - Page 178
. NNTo block certain content, select an entry field to lock (That is, you "click it".). For example, click the 18+ lock and you block all TV programs rated - Samsung UN60ES8000F | User Manual Ver.1.0 (English) - Page 179
18+. NNThe rating categories are also grouped so that clicking one category blocks all the categories a parent would block along with it. For example, if you block the G category, then PG, 14+ and 18+ will automatically be blocked. NNTo unblock a category, click the lock icon. Canadian French Rating - Samsung UN60ES8000F | User Manual Ver.1.0 (English) - Page 180
TV programs based on their French Canadian ratings. Canadian French Rating displays a column with locks and the following ratings categories: -- G: General -- 8 ans+: Programming generally considered acceptable for children 8 years and over to watch on their own. -- 13 ans+: Programming may not be - Samsung UN60ES8000F | User Manual Ver.1.0 (English) - Page 181
block certain content, select an entry field to lock (That is, you "click it".). For example, click the 18 ans+ lock and you block all TV programs rated 18 ans+. - Samsung UN60ES8000F | User Manual Ver.1.0 (English) - Page 182
NNThe rating categories are also grouped so that clicking one category blocks all the categories a parent would block along with it. For example, if you block the 8 ans+ category, then 13 ans+, 16 ans+ and 18 ans+ will automatically be blocked also. NNTo unblock a category, click the lock icon. - Samsung UN60ES8000F | User Manual Ver.1.0 (English) - Page 183
restriction information you can use while watching DTV channels. NNIf information is not downloaded from the broadcasting station, the Downloadable U.S. Rating menu is deactivated. NNParental restriction information is automatically downloaded while you watch DTV channels. It may take several - Samsung UN60ES8000F | User Manual Ver.1.0 (English) - Page 184
is available for use after information is downloaded from the broadcasting station. However, depending on the information from the broadcasting station, it may not be available for use. NNParental restriction levels differ depending on the broadcasting station. The default menu name and the - Samsung UN60ES8000F | User Manual Ver.1.0 (English) - Page 185
NNEven if you set the on-screen display to another language, the Downloadable U.S. Rating menu will appear in English only. NNBlocking one rating level will automatically block other categories that deal with more sensitive material. NNThe rating titles (For example: Humor Level..etc) and TV ratings - Samsung UN60ES8000F | User Manual Ver.1.0 (English) - Page 186
depending on the broadcasting station. ●● Change PIN The Change PIN screen will appear. Choose any 4 digits for your PIN and enter them in Enter New PIN fields. Reenter the same 4 digits in Confirm New PIN fields. When the Confirm screen disappears, select Close. The TV has memorized your new PIN. - Samsung UN60ES8000F | User Manual Ver.1.0 (English) - Page 187
How to watch a restricted program or movie If the TV is tuned to a restricted program or movie, the Program Rating Lock will block it. The screen will go blank and a popup message appears. Enter the PIN to unblock the program or movie using your remote. NN The Smart Touch Control is - Samsung UN60ES8000F | User Manual Ver.1.0 (English) - Page 188
the remote control buttons in the following sequence in Standby mode, which resets the PIN to "00-0-0": MUTEM → 8 → 2 → 4 → P (power on). - Samsung UN60ES8000F | User Manual Ver.1.0 (English) - Page 189
Economical Solutions Eco Solution Menu → System → Eco Solution ●● Energy Saving Lets you adjusts the brightness of the TV in order to reduce power consumption. If you select Picture Off, the screen is turned off, but the sound remains on. Press any button except the volume button to turn on the - Samsung UN60ES8000F | User Manual Ver.1.0 (English) - Page 190
settings will automatically adapt to the light in the room. NNIf you adjust Backlight for LED TV / Cell Light for PDP TV in the Picture menu, the Eco Sensor will be set to Off automatically. Min. Backlight for LED TV / Min Cell Light for PDP TV : When the Eco Sensor is set to On, you can manually - Samsung UN60ES8000F | User Manual Ver.1.0 (English) - Page 191
the Eco Sensor is set to On, the display brightness may change (become slightly darker or brighter) depending on the light intensity in your room. You can control the screen's minimum brightness with the Min. Backlight / Min Cell Light function. ●● No Signal Power Off To avoid unnecessary energy - Samsung UN60ES8000F | User Manual Ver.1.0 (English) - Page 192
consumption, you can set how long you want the TV to remain on if it's not receiving a signal. NNDisabled when an attached PC is in power saving mode. ●● Auto Power Off The TV will automatically turned off when no user operation is detected for 4 hours. - Samsung UN60ES8000F | User Manual Ver.1.0 (English) - Page 193
Picture In Picture (PIP) PIP Menu → System → PIP You can watch a program whose signal has passed through the TV's tuner and video from one external video source simultaneously. For example, if you have a cable box connected to the Cable In jack, you can use - Samsung UN60ES8000F | User Manual Ver.1.0 (English) - Page 194
use the PIP. ●● PIP Activate or deactivate the PIP function. ●● Air/Cable Select either Air or Cable as the input source for the sub-picture screen. ●● Channel Select the channel for the sub-picture - Samsung UN60ES8000F | User Manual Ver.1.0 (English) - Page 195
●● Size Select a size for the sub-picture screen. ●● Position Select a position for the sub-picture screen. NNIn Double (à, Œ) mode, you cannot select Position. ●● Sound Select You can choose to listen to the sound from the main picture or the sub picture. - Samsung UN60ES8000F | User Manual Ver.1.0 (English) - Page 196
, the PIP function is reset to Off. When you turn your TV on, you must turn PIP on again to watch in the PIP mode. NNYou may notice that the picture in the PIP screen becomes slightly unnatural when you use the main screen to view a game or karaoke. NNThe PIP is not supported in 3D function. - Samsung UN60ES8000F | User Manual Ver.1.0 (English) - Page 197
NNPIP Settings: The picture from the external video source will be in the main screen and the picture from the TV's tuner will be in the PIP subpicture screen. -- Main picture: Component, HDMI -- Sub picture: TV - Samsung UN60ES8000F | User Manual Ver.1.0 (English) - Page 198
a Keyboard and a Mouse Device Manager Menu → System → Device Manager Using this function, you can set up input devices to use with the TV. You can check your device list and adjust the settings in this menu. NNDepending on the model of the USB HID keyboard and mouse may not be compatible with your - Samsung UN60ES8000F | User Manual Ver.1.0 (English) - Page 199
Lets you use a USB or Bluetooth keyboard with your TV. If you want to use a USB keyboard, connect it on the USB port. If you want to use a Bluetooth keyboard, connect it using the Bluetooth function. NNAvailable only when the QWERTY keypad screen appears in the Web Browser. Select Keyboard Select - Samsung UN60ES8000F | User Manual Ver.1.0 (English) - Page 200
, even if several are connected. Add Bluetooth Keyboard You can add the Bluetooth keyboard. Keyboard Options Sets the default options for the keyboard language and type. -- Keyboard Language: Set a language for your keyboard. -- Keyboard Type: Set what a type a keyboard you're using to enter text. - Samsung UN60ES8000F | User Manual Ver.1.0 (English) - Page 201
-- Switch Input Language: Select a key sequence to change switching input language. ●● Mouse Settings Lets you use a USB or Bluetooth mouse with your TV. If you want to use a USB mouse, connect it on the USB port. If you want to use a Bluetooth mouse, connect it using the Bluetooth - Samsung UN60ES8000F | User Manual Ver.1.0 (English) - Page 202
on a PC. Select Mouse Select which mouse to use from your mouse list. you can only use one mouse, even if several are connected. Add Bluetooth Mouse You can add the Bluetooth mouse. Mouse Options Sets the default options for the mouse buttons. -- Primary Button: Select the main - Samsung UN60ES8000F | User Manual Ver.1.0 (English) - Page 203
button you want to use click and select on screen. -- Pointer Size: Set the size of the onscreen mouse pointer. -- Pointer Speed: Select the speed of the mouse pointer. Using the TV's menu with a mouse 1. Connect a USB or Bluetooth mouse on your TV. 2. Click a primary button you selected. The Go To - Samsung UN60ES8000F | User Manual Ver.1.0 (English) - Page 204
3. Click a menu you wish, and then you can use the menu to same way as on a PC. - Samsung UN60ES8000F | User Manual Ver.1.0 (English) - Page 205
Other Features Menu Language Menu → System → Menu Language Set the menu language. 1. Select the Menu Language. 2. Choose a language you want to use. Caption (On-Screen Text Dialogue) Menu → System → Caption ●● Caption You can switch the caption function on - Samsung UN60ES8000F | User Manual Ver.1.0 (English) - Page 206
or off. If captions are not available, they will not be displayed on the screen. NNThe Caption feature does not work with devices connected to the TV through the Component, HDMI jacks. ●● Caption Mode You can select the desired caption mode. NNThe availability of captions depends on the program - Samsung UN60ES8000F | User Manual Ver.1.0 (English) - Page 207
(analog channels only) The analog caption function operates in either analog TV channel mode or when a signal is supplied from an external device to the TV. (Depending on the broadcasting signal, the analog caption function may or may not work with digital channels.) Default / Service1 - Service6 / - Samsung UN60ES8000F | User Manual Ver.1.0 (English) - Page 208
works with digital channels. NNService1 - Service6 may not be available in digital caption mode depending on the broadcast. ●● Digital Caption Options (Digital channels only) Adjusts the each option. Size: Options include Default, Small, Standard and Large. The default is Standard. Font Style: - Samsung UN60ES8000F | User Manual Ver.1.0 (English) - Page 209
Style0 to Style7. The default is Style0. Font Color: You can change the color of the letters. Options include Default, White, Black, Red, Green, Blue, Yellow, Magenta and Cyan. The default is White. Background Color: You can change the background color of the captions. Options include Default, White - Samsung UN60ES8000F | User Manual Ver.1.0 (English) - Page 210
and Flashing. Background Opacity: This adjusts the opacity of the caption background. Options include Default, Transparent, Translucent, Solid and Flashing. Return to Default: This option sets each Size, Font Style, Font Color, Background Color, Font Opacity and Background - Samsung UN60ES8000F | User Manual Ver.1.0 (English) - Page 211
available only when you can select Default and Service1 - Service6 in Caption mode. NNThe availability of captions depends on the program being broadcast. NNThe Default setting follows the standards set by the broadcaster. NNYou cannot set both the Font Color and the Background Color to the - Samsung UN60ES8000F | User Manual Ver.1.0 (English) - Page 212
. NNYou cannot set both the Font Opacity and the Background Opacity to the same color. Screen Burn Protection for PDP TV To reduce the possibility of screen burn, this unit is equipped with Pixel Shift screen burn prevention technology. Pixel Shift moves the picture slightly on the screen. The Pixel - Samsung UN60ES8000F | User Manual Ver.1.0 (English) - Page 213
you to program the time between movements of the picture in minutes. Your TV also has the following additional screen burn protection functions: -- Pixel Shift -- Auto Protection Time -- Scrolling -- Side Gray ●● Pixel Shift Using this function, you can set the - Samsung UN60ES8000F | User Manual Ver.1.0 (English) - Page 214
TV to move pixels minutely on the PDP screen in a horizontal or vertical direction to minimize after images on the screen. Available Pixel Shift settings and optimum settings: Horizontal -- Available Settings: 0 - 4 (pixels) -- Optimum settings for TV/AV/ Component/HDMI: 4 Vertical - Samsung UN60ES8000F | User Manual Ver.1.0 (English) - Page 215
-- Available Settings: 0 - 4 (pixels) -- Optimum settings for TV/AV/ Component/HDMI: 4 Time (minute) -- Available Settings: 1 - 4 min -- Optimum settings for TV/AV/ Component/HDMI: 4 min NNThe Pixel Shift value may differ depending on the monitor size (inches) and mode. NNThis function is not - Samsung UN60ES8000F | User Manual Ver.1.0 (English) - Page 216
Time If the screen displays a still image for a certain period of time you define, the TV activates the screen saver to prevent the formation of burnt in ghost images on the screen. ●● Scrolling This function removes after-images on the screen by illuminating all the pixels on the PDP according to - Samsung UN60ES8000F | User Manual Ver.1.0 (English) - Page 217
there are after images or symbols on the screen, especially when you displayed a still image on the screen for a long time. NNThe after-image removal function has to be executed for a long time (approximately 1 hour) to effectively remove after-images on the screen. If the after-image is not removed - Samsung UN60ES8000F | User Manual Ver.1.0 (English) - Page 218
Side Gray Lets you select the color of the sidebars your TV displays when you set the screen size to 4:3. Auto Protection Time for LED TV If the screen displays a still image for a certain period of time you define, the TV activates the screen saver to prevent the formation of burnt in ghost images - Samsung UN60ES8000F | User Manual Ver.1.0 (English) - Page 219
on the screen. General Menu → System → General ●● Game Mode When you have connected a game console such as a PlayStation™ or Xbox™ to the TV, you can enjoy a more realistic gaming experience by turning on the Game Mode function. Precautions and limitations for Game Mode - Samsung UN60ES8000F | User Manual Ver.1.0 (English) - Page 220
and connecting another external device, set Game Mode to Off. -- If you display the TV menu in Game Mode, the screen shakes slightly. NNGame Mode is not available when the input source is set to TV. NNSet Game Mode to On only after connecting a game console. If you turn Game Mode on before you have - Samsung UN60ES8000F | User Manual Ver.1.0 (English) - Page 221
game console, you may notice slightly reduced picture quality. NNIf the Game Mode is set to On, the Picture Mode is set to Standard and the Sound Mode is set to Movie automatically. ●● BD Wise Provides the optimal picture quality for Samsung DVD, Blu-ray and Home Theater products which support BD - Samsung UN60ES8000F | User Manual Ver.1.0 (English) - Page 222
the BD Wise is set to On, the picture mode is automatically changed to the optimal resolution. NNAvailable when you connect Samsung products that support BD Wise through an HDMI cable to the TV. ●● Menu Transparency Adjust transparency of menu box. ●● Sound Feedback Your TV gives sound feedback when - Samsung UN60ES8000F | User Manual Ver.1.0 (English) - Page 223
use TV. Sound Feedback is enabled by default. Turn off Sound Feedback or adjust its volume. ●● Panel Lock Lock or unlock all the keys on the front panel at once. When Panel Lock is on, none of the keys on the front panel operate. ●● Boot Logo Displays the Samsung logo when the TV is turned - Samsung UN60ES8000F | User Manual Ver.1.0 (English) - Page 224
●● Light Effect for LED TV You can turn the LED on the TV's front panel on or off. Turn it off to save power or if the LED is too bright for you. NNSet the Light Effect to Off to reduce the power consumption. NNThe color of light may vary depending on the model. Anynet+ (HDMI-CEC) Menu - Samsung UN60ES8000F | User Manual Ver.1.0 (English) - Page 225
to control all connected Samsung devices that support anynet+ with your Samsung TV's remote. For details on set up options, refer to the "Anynet+ (HDMI-CEC)" instructions. DivX® Video On Demand Menu → System → DivX® Video On Demand Shows the registration code authorized for the TV. If you connect to - Samsung UN60ES8000F | User Manual Ver.1.0 (English) - Page 226
registration code, you can download the VOD activation file. Once you play it using AllShare Play, the registration is completed. NNFor more information on DivX(R) VOD, visit http://vod.divx.com. - Samsung UN60ES8000F | User Manual Ver.1.0 (English) - Page 227
Support Menu e-Manual Menu → Support → e-Manual The e-Manual is built into your TV. Open the e-Manual to learn how to use your TV's many features. NNFor the detailed information about the e-Manual Screen, refer to "How to view the e-Manual" in the User's Manual. Self Diagnosis - Samsung UN60ES8000F | User Manual Ver.1.0 (English) - Page 228
Use to check for picture problems. Picture Test displays a high definition picture that you can examine for flaws or faults. Yes: Select Yes if the test picture does not appear or there is noise or distortion in the test picture. There may be a problem with the TV. Contact Samsung's Call Center for - Samsung UN60ES8000F | User Manual Ver.1.0 (English) - Page 229
properly. There may be a problem with your external equipment. Please check your connections. If the problem persists, refer to the external device's user manual. ●● Sound Test Use the built-in melody to check for sound problems. NNIf you hear no sound from the TV' s speakers, before performing the - Samsung UN60ES8000F | User Manual Ver.1.0 (English) - Page 230
sound test, make sure Speaker Select is set to TV Speaker in the Sound menu, and then try the speakers again. NNYou will hear the melody during the test even if you have set Speaker Select to External Speaker or have muted the sound. Yes: Select Yes if you can hear sound from only - Samsung UN60ES8000F | User Manual Ver.1.0 (English) - Page 231
may be a problem with the TV. Contact Samsung's Call Center for assistance. No: Select No if you can hear sound from the speakers. There may be a problem with your external equipment. Please check your connections. If the problem persists, refer to the external device's user manual. ●● Signal - Samsung UN60ES8000F | User Manual Ver.1.0 (English) - Page 232
unavailable. Signal Information displays HD channel signal strength so you can adjust your antenna to increase signal strength and receive HD channels. ●● Reset Reset all setting to factory defaults except for your network settings. To reset your TV to default setting, follow these steps: - Samsung UN60ES8000F | User Manual Ver.1.0 (English) - Page 233
menu. (Support → Self Diagnosis → Reset) 2. The PIN input screen appears. Enter the PIN using your remote. 3. When done, the PIN screen disappear automatically. The message All the settings will return to factory defaults. appears. 4. Select Yes. All settings have been reset. The TV will turn off - Samsung UN60ES8000F | User Manual Ver.1.0 (English) - Page 234
screen appears. For more information about Setup, see user manual. ●● Troubleshooting If your TV seems to be having a problem, access the troubleshooting guide for a solution. Software Update Menu → Support → Software Update The Software Update menu lets you upgrade your TV's software to the latest - Samsung UN60ES8000F | User Manual Ver.1.0 (English) - Page 235
Current Version: This is the software version already installed in the TV. Upgrading to the Latest Version You can upgrade in four ways: -- By USB -- Online -- Alternative Software -- Standby Mode Upgrade The four methods are explained in the following pages. NNBe careful not to turn off the power - Samsung UN60ES8000F | User Manual Ver.1.0 (English) - Page 236
until the upgrade is complete. The TV will turn off and on automatically after completing the software upgrade. When you upgrade software, all video and audio settings you have made will return to their default settings. We advise you to write down your settings so that you can easily reset them - Samsung UN60ES8000F | User Manual Ver.1.0 (English) - Page 237
To upgrade the By USB, follow these steps: 1. Visit www.samsung.com. 2. Download the latest USB software upgrade exe archive to your computer. 3. Extracts the exe archive to your computer. You should have a single folder with the same name as the exe file. 4. Copy the folder to a USB flash drive. - Samsung UN60ES8000F | User Manual Ver.1.0 (English) - Page 238
5. Turn on the TV, and then insert the USB flash drive into the USB port of the TV. 6. In the TV's menu, go to Support → Software Update. 7. Select By USB. NNPlease be careful not to remove the USB drive until the upgrade is complete. ●● Online The Online function lets you download - Samsung UN60ES8000F | User Manual Ver.1.0 (English) - Page 239
upgrade the software in one operation. To use Online, you must have configured your TV to connect to your network and the TV must be connected to the Internet. See the "Setting up the Wired or Wireless Network" instructions. To upgrade using the Online, follow these steps: 1. Select the Online. The - Samsung UN60ES8000F | User Manual Ver.1.0 (English) - Page 240
. 2. If there is a download available, the Download pop-up appears with a progress bar and the download starts. 3. When the download is complete, the Upgrade Query screen appears with three choices: Upgrade Now, Upgrade Later, or Don't Upgrade. -- If you select the Upgrade Now, the - Samsung UN60ES8000F | User Manual Ver.1.0 (English) - Page 241
turns off, and then turns on automatically. -- If you do not make a selection in one minute or select the Upgrade Later, the TV stores the new upgrade software. You can upgrade the software later using the Alternative Software function. -- If you select the Don't Upgrade, the TV cancels the upgrade. - Samsung UN60ES8000F | User Manual Ver.1.0 (English) - Page 242
The Alternative Software option lets you upgrade using a file the TV downloaded earlier, but you decided not to install immediately, or a file downloaded by the TV in Standby Mode (See Standby Mode Upgrade on the next section). To upgrade using Alternative Software, follow these steps: 1. If upgrade - Samsung UN60ES8000F | User Manual Ver.1.0 (English) - Page 243
of Alternative Software. 2. Select Alternative Software. 3. The TV displays a message asking if you want to upgrade. Select Yes. The TV begins the upgrade. 4. When the upgrade is complete, the TV turns off automatically, and then turns on. ●● Standby Mode Upgrade You can set the Standby Mode Upgrade - Samsung UN60ES8000F | User Manual Ver.1.0 (English) - Page 244
it is in Standby mode. In Standby mode, the TV is off, but its Internet connection is active. This allows the TV to download upgrade software automatically, when you are not using it. Because the TV is turned on internally, the screen may glow slightly. This phenomenon may continue for more than - Samsung UN60ES8000F | User Manual Ver.1.0 (English) - Page 245
download is complete. To set Standby Mode Upgrade, follow these steps: 1. Select the Standby Mode Upgrade. 2. Select On or Off. -- Off: If you select Off, the TV will notify you with a pop up message when new upgrade software is available. -- On: If you select On, the TV will automatically download - Samsung UN60ES8000F | User Manual Ver.1.0 (English) - Page 246
software when it is in Standby mode with the power off. If it downloads new upgrade software, the TV will ask you if you want to install it when you turn the TV on. NNTo use the Standby Mode Upgrade function, your TV must be connected to the Internet. Contact Samsung Menu → Support → Contact Samsung - Samsung UN60ES8000F | User Manual Ver.1.0 (English) - Page 247
information when your TV does not work properly or when you want to upgrade the software. You can find information regarding our call centers and how to download products and software. Remote Management Menu → Support → Remote Management The Call Center will access your Samsung Product remotely to - Samsung UN60ES8000F | User Manual Ver.1.0 (English) - Page 248
Management can control user settings and troubleshoot a problem. Smart Hub Menu → Support → Smart Hub Smart Hub lets you connect to the Internet and enjoy variety of Internet and multimedia contents. For more information on how to use the Smart Hub, see "Smart Hub" in the e-Manual. - Samsung UN60ES8000F | User Manual Ver.1.0 (English) - Page 249
Advanced Features Using the 3D function 3D Menu → Picture → 3D This exciting new feature enables you to view 3D content. To fully enjoy this feature, you must need a pair of Samsung 3D Active Glasses to view 3D video. IMPORTANT HEALTH AND SAFETY INFORMATION FOR 3D PICTURES. - Samsung UN60ES8000F | User Manual Ver.1.0 (English) - Page 250
understand the following safety information before using the TV's 3D function. [[Warning ŒŒ Some viewers may experience discomfort while viewing 3D TV such as dizziness, nausea and headaches. If you experience any such symptom, stop viewing 3D TV, remove the 3D Active Glasses and rest. ŒŒ Watching - Samsung UN60ES8000F | User Manual Ver.1.0 (English) - Page 251
children who are using the 3D function. If there are any reports of tired eyes, headaches, dizziness, or nausea, have the child stop viewing 3D TV and rest. ŒŒ Do not use the 3D Active Glasses for other purposes (such as general - Samsung UN60ES8000F | User Manual Ver.1.0 (English) - Page 252
eyeglasses, sunglasses, protective goggles, etc.) ŒŒ Do not use the 3D function or 3D Active Glasses while walking or moving around. If you use the 3D function or 3D Active Glasses while walking or moving around you can injure yourself by running into objects, tripping, or falling. ●● 3D Mode - Samsung UN60ES8000F | User Manual Ver.1.0 (English) - Page 253
, put the 3D Active Glasses on first, and then select the 3D Mode from the list below that provides the best 3D viewing experience. Off : Turns the 3D function off. : Changes a 2D image to 3D. : Displays two images next to each other. : Displays one image above another. - Samsung UN60ES8000F | User Manual Ver.1.0 (English) - Page 254
for the left and right eye alternately in rows. for LED TV : Displays the images for the left and right eye alternately in columns. for LED TV : Displays the images for the left and right eye alternately in pixels. for LED TV : Displays the images for the left and right eye alternately in - Samsung UN60ES8000F | User Manual Ver.1.0 (English) - Page 255
on the input signal. NNSome file formats may not support the . NNThe , and are available when your PC is connected through an HDMI/DVI cable. NNThe displays the frequency (60Hz only) when the TV's resolution is 1920 x 1080. ●● 3D Effect for LED TV Adjust 3D effects like perspective and - Samsung UN60ES8000F | User Manual Ver.1.0 (English) - Page 256
preferred 3D viewing experience. 3D Effect: Adjust the perspective and depth settings. If you select Auto, adjust the perspective and depth settings automatically in accordance with the 3D input source. If you select Manual, you can adjust the perspective and depth you want. 3D Perspective: Adjust - Samsung UN60ES8000F | User Manual Ver.1.0 (English) - Page 257
Depth: Adjust the overall depth. ●● 3D Perspective for PDP TV Adjust the overall 3D perspective of the on-screen image. ●● Depth for PDP TV Adjust the overall depth. ●● L/R Change Swap the left and right pictures. ●● 3D → 2D Displays the image for the left eye only. NNThis function is deactivated - Samsung UN60ES8000F | User Manual Ver.1.0 (English) - Page 258
or . Off ●● 3D Auto View for LED TV If you set the 3D Auto View to On, TV will switches the TV to 3D automatically. If you set the 3D Auto View to Message Notice, a message screen appears when the TV receives a 3D signal. Then you can view a 3D image by selecting 3D using your remote. NNWhen - Samsung UN60ES8000F | User Manual Ver.1.0 (English) - Page 259
(such as Smart Hub, etc.), TV will do not switch to 3D. In this case, you should to use the 3D, after exiting the application. ●● 3D Optimize for LED TV Automatically adjusts the picture overall to provide an optimal 3D effect. Support resolution (16:9 only) HDMI - Samsung UN60ES8000F | User Manual Ver.1.0 (English) - Page 260
1280 x 720p 1920 x 1080i 1920 x 1080p 1280 x 720p 1920 x 1080i 1920 x 1080p Frequency (Hz) 59.94 / 60 Hz 59.94 / 60 Hz 23.98 / 24 / 29.97 / 30 / 59.94 / 60 Hz 59.94 / 60 Hz 59.94 / 60 Hz 23.98 / 24 / 29.97 / 30 Hz Component Resolution 1280 x 720p 1920 x 1080i 1920 x 1080p - Samsung UN60ES8000F | User Manual Ver.1.0 (English) - Page 261
Resolution 1280 x 720p 1920 x 1080i Frequency (Hz) 59.94 / 60 Hz 59.94 / 60 Hz Videos / Photos (In AllShare Play) NNRefer to "Supported Subtitle and AllShare Play file formats" in the Other Information section. Resolution supported for HDMI PC mode for LED 7500 series and above The optimal - Samsung UN60ES8000F | User Manual Ver.1.0 (English) - Page 262
TV may not display images properly in 3D display or full screen mode. How to watch the 3D images Some 3D modes may not be available depending on the format of the image source. To watch in 3D, you must wear 3D Active Glasses and turn the glasses on by pressing the power button - Samsung UN60ES8000F | User Manual Ver.1.0 (English) - Page 263
2. Select the 3D Mode. The 3D Mode screen appears. 3. Set the 3D Mode of the image you want to view. Read These Notes Before Using the 3D Function... ŒŒ The 3D Mode is set to Off automatically when you access Smart Hub function. ŒŒ The 3D Mode is set to its memorized - Samsung UN60ES8000F | User Manual Ver.1.0 (English) - Page 264
source. ŒŒ Some Picture functions are disabled in 3D mode. ŒŒ PIP is not supported in 3D mode. ŒŒ 3D Active Glasses from Samsung' s previous product (IR type) or other manufacturers are not be supported. ŒŒ When the TV is initially powered on, it may take some time until the 3D display is optimized. - Samsung UN60ES8000F | User Manual Ver.1.0 (English) - Page 265
is any other 3D product or electronic devices turned on near the glasses or TV. If there is a problem, keep other electronic devices as far away as possible from the 3D Active Glasses. ŒŒ Be sure to stay within the viewing angle and optimum TV viewing distance when watching 3D pictures. Otherwise - Samsung UN60ES8000F | User Manual Ver.1.0 (English) - Page 266
see 3D effects properly. ŒŒ The ideal 3D viewing distance is three times or more the height of the screen. For example, if your screen is two feet high, you should sit at least six feet from the screen. We recommend sitting so that your eyes are level with the screen. - Samsung UN60ES8000F | User Manual Ver.1.0 (English) - Page 267
Smart Hub Menu → Support → Smart Hub Using this function, you can stream movies, videos, and music from the Internet, access various for pay or freeof-charge applications and view them on your TV. Application content includes news, sports, weather forecasts, stock market quotes, maps, photos, and - Samsung UN60ES8000F | User Manual Ver.1.0 (English) - Page 268
pressing the ™ button on the remote control. Notice ŒŒ Samsung Electronics takes no legal responsibility for any interruption of the Smart Hub service caused by the service provider for any reason. ŒŒ Application services may be provided in English only and the contents available may vary, depending - Samsung UN60ES8000F | User Manual Ver.1.0 (English) - Page 269
the applicable service provider. ŒŒ The Smart Hub service downloads and processes data via the Internet so that you can enjoy the Internet contents on your TV screen. If the Internet connection is unstable, the service may be delayed or interrupted. Furthermore, the player may turn off automatically - Samsung UN60ES8000F | User Manual Ver.1.0 (English) - Page 270
on the Internet. If this occurs, check the Internet connection and try again. ŒŒ The services provided are subject to change by the Smart Hub service provider without notice. ŒŒ The Smart Hub service contents may differ depending on the player's firmware version. ŒŒ For pay DivX contents with copy - Samsung UN60ES8000F | User Manual Ver.1.0 (English) - Page 271
through a composite, a component or an HDMI cable. ŒŒ If the TV displays these icons at the bottom left of the screen, you can use corresponding functions: : Voice Control (System → Voice and Motion Control → Voice Control) : Motion Control (System → Voice and Motion Control → Motion Control) : An - Samsung UN60ES8000F | User Manual Ver.1.0 (English) - Page 272
must connected to the TV). (System → Device Manager → Mouse Settings) To start Smart Hub for the first time, follow these steps: 1. Press the ™ button. 2. The Smart Hub screen appears. In a few cases, the Country screen appears immediately after. 3. If the Country screen has appeared, select your - Samsung UN60ES8000F | User Manual Ver.1.0 (English) - Page 273
remote. NNSome applications are available only in certain countries. 4. The General Disclaimer screen appears. Select Agree. NNScreens can take a few seconds to appear. 5. The Privacy Policy screen appears. Select Agree. 6. The Service Update screen appears and installs a number of services - Samsung UN60ES8000F | User Manual Ver.1.0 (English) - Page 274
and applications. When done, it closes. The applications and services downloaded are displayed on the Smart Hub screen. This may take some time. NNSmart Hub may close momentarily during the installation process. NNA number of screens may appear after installation. You can close them or let them - Samsung UN60ES8000F | User Manual Ver.1.0 (English) - Page 275
. Using the Numeric Keypad Selecting - using your remote while you are using the Screen Keypad enables you to change the text fields to lower case, capitalized case, upper case, numbers and icons. You can use this Screen Keypad in a several Smart Hub applications. Method 1: Using the keypad of ABC - Samsung UN60ES8000F | User Manual Ver.1.0 (English) - Page 276
type. 1. For example, suppose that you want to input "105Chang". 2. Select - 3 times using your remote to change the input mode from lower case to numbers. 3. Select 1, 0 and 5 in numerical order. 4. Select - 3 times using your remote to change the input mode from numbers to upper case. 5. Select 2 - Samsung UN60ES8000F | User Manual Ver.1.0 (English) - Page 277
to input C. 6. Select - 3 times using your remote to change the input mode from upper case to lower case. 7. Input the rest of "Chang" using your remote in the same way. When done, select OK. Method 2: Using the Keypad of XT9 type. 1. For example, suppose that you want to input "105Chang" - Samsung UN60ES8000F | User Manual Ver.1.0 (English) - Page 278
2. Select - 3 times using your remote to change the input mode from lower case to numbers. 3. Select 1, 0 and 5 in numerical order. 4. Select - 3 times using your remote to change the input mode from numbers to capitalized case. 5. Select in sequence: 2, 4, 2, 6, 4. A window will appear displaying a - Samsung UN60ES8000F | User Manual Ver.1.0 (English) - Page 279
found in the list, select + to create your own dictionary. Add your own word to your dictionary. Using the QWERTY Keypad You can use this Screen Keypad in a several Smart Hub applications in same way as a keyboard. Using the colored and function buttons - Samsung UN60ES8000F | User Manual Ver.1.0 (English) - Page 280
with the QWERTY Keypad ●● a Delete All Delete all inputted character. ●● b Numeric / QWERTY Toggles the keypad mode between Numeric mode and QWERTY mode. NNWhen the keypad is set to QWERTY mode, you can input a character using a USB or Bluetooth keyboard connected on the TV. - Samsung UN60ES8000F | User Manual Ver.1.0 (English) - Page 281
●● T Settings Displays the options menu. Input Language: select a input language. XT9 Text Input: Turns on or off the recommended word function. ●● E Enter Enter the selected character. ●● R Return Return to the previous menu. ●● π Prev Page - Samsung UN60ES8000F | User Manual Ver.1.0 (English) - Page 282
Move to the previous keypad. NNAvailable only when the keypad screen is icon mode. ●● µ Next Page Move to the next keypad. NNAvailable only when the keypad screen is icon mode. Creating an Account To establish your own, exclusive, configuration of Smart Hub, create your own Samsung account. - Samsung UN60ES8000F | User Manual Ver.1.0 (English) - Page 283
NNYou must use an e-mail address as an ID. NNYou can register up to 10 User Accounts. NNYou do not need an account to use the Smart Hub. To create an account, follow these steps: 1. On the Smart Hub screen, select a using your remote. The Login screen appears. - Samsung UN60ES8000F | User Manual Ver.1.0 (English) - Page 284
your remote. The Create Account screen appears. 3. Select Samsung Account. An entry screen and keypad appear. 4. Use the keypad to enter your e-mail address. This will serve as your ID. 5. When done, select OK. The Login screen reappears. 6. Select Password. The Password screen and a keypad appear. - Samsung UN60ES8000F | User Manual Ver.1.0 (English) - Page 285
7. Use the keypad to enter a password. The password can be any combination of letters, numbers, and symbols. NNIf you select a using your remote, the TV show or hide the password as you enter it. 8. When done, select OK. 9. Select Confirm password. The Password screen and a keypad reappear. - Samsung UN60ES8000F | User Manual Ver.1.0 (English) - Page 286
10. Repeat Steps 7 and 8. 11. When done, select Create Account. The Confirmation window appears. 12. Select OK. The Continue to register service ID window appears. 13. Select OK. NNIf you don't have existing provider accounts or do not want to register existing accounts at this time, select - Samsung UN60ES8000F | User Manual Ver.1.0 (English) - Page 287
Register Service Account window appears. NNIf you have existing accounts with any of the listed providers, you can associate the provider account and the provider account password with your Samsung account. Registration makes it easier to access the providers web site. For registration instructions, - Samsung UN60ES8000F | User Manual Ver.1.0 (English) - Page 288
go to Step 2 in Account Manager under Settings in the "Configuring the Smart Hub with Settings" section of this manual. - Samsung UN60ES8000F | User Manual Ver.1.0 (English) - Page 289
Customizing the Home Screen ●● a Login / Logout To log in to your Samsung account, follow these steps: 1. With the Smart Hub main screen displayed on your TV, select a using your remote. The Login screen appears. 2. Select the ^ next to the Samsung Account. NNIf you want to input the Samsung - Samsung UN60ES8000F | User Manual Ver.1.0 (English) - Page 290
Account. The keypad screen appears. Then you can input your Samsung Account manually. NNWhen you select Face Recognition Mode, you can log in to the Samsung account using the Face recognition function without input your account. For more detailed information about the Face recognition, refer to " - Samsung UN60ES8000F | User Manual Ver.1.0 (English) - Page 291
e-Manual. 3. Select your ID from the list that appears. The Login screen reappears. 4. Select Password. The Password window and a keypad appears. 5. Enter your password using your remote. When done, select OK. NNIf you want Smart Hub to - Samsung UN60ES8000F | User Manual Ver.1.0 (English) - Page 292
the Smart Hub automatically when the Smart Hub function starts, select Sign me in automatically. A c mark appears. NNWhen you forgot password, you can reset your Samsung account - Samsung UN60ES8000F | User Manual Ver.1.0 (English) - Page 293
your remote. A pop-up message appears, and the select OK. The guide to resetting your password will be sent to your e-mail. ●● b WallPaper You can change a background image the Smart Hub home screen. ●● { Account Manager Lets you register your service provider accounts, delete or deactivate your - Samsung UN60ES8000F | User Manual Ver.1.0 (English) - Page 294
register or reset your face recognition. For more information about Account Manager, refer to "Configuring the Smart Hub with Settings" in this section. NNAvailable only when you logged in the Smart Hub. Using the Tools menu with Smart Hub ●● Login / Logout Log in or log out to your Samsung account. - Samsung UN60ES8000F | User Manual Ver.1.0 (English) - Page 295
●● WallPaper You can change a background image the Smart Hub home screen. ●● Move The Move function lets you change the screen position of an application or a folder. To use the Move function, follow these steps: 1. Select an application or a folder, and then open the Tools menu using your - Samsung UN60ES8000F | User Manual Ver.1.0 (English) - Page 296
remote. 2. Select Move. A position change screen appears. 3. Move the icon using your remote. When the icon is in the position of your choice, select the icon. The application moves to its new location. ●● Move to Folder The Move to Folder function lets you move an application to a folder. - Samsung UN60ES8000F | User Manual Ver.1.0 (English) - Page 297
To use the Move to Folder function, follow these steps: 1. Select an application, and then open the Tools menu using your remote. 2. Select the Move to Folder. The Move to Folder window opens. 3. Select a folder using your remote. A move finished message appears, and then closes. The application has - Samsung UN60ES8000F | User Manual Ver.1.0 (English) - Page 298
folder, the application can be moved to the Smart Hub screen. To access an application in a Folder 1. On the Smart Hub screen, select a folder. The folder opens. 2. Select an application you want to execute. The application service starts. ●● Delete The Delete function lets you delete application - Samsung UN60ES8000F | User Manual Ver.1.0 (English) - Page 299
To use the Delete function, follow these steps: 1. Select an application, and then open the Tools menu using your remote. 2. Select Delete. The message Do you want to delete selected item(s)? appears. 3. Select OK. The application is deleted. ●● New Folder The New Folder function lets you create and - Samsung UN60ES8000F | User Manual Ver.1.0 (English) - Page 300
have created a folder, you can move applications into it. To use the New Folder function, follow these steps: 1. Open the Tools menu using your remote. 2. Select New Folder. The New Folder window and a keypad screen appears. 3. Enter the name of the folder using your remote. - Samsung UN60ES8000F | User Manual Ver.1.0 (English) - Page 301
4. When done, select OK. The New Folder screen closes and the New Folder appears on the Smart Hub screen. ●● Rename Folder The Rename Folder function lets you rename folders. To use the Rename Folder function, follow these steps: 1. Select a folder, and then open the - Samsung UN60ES8000F | User Manual Ver.1.0 (English) - Page 302
2. Select Rename Folder. The Rename Folder window and a keypad screen appears. 3. Enter a new name using your remote. 4. When done, select OK. The Rename Folder window closes and the new name appears below the folder. ●● Lock - Samsung UN60ES8000F | User Manual Ver.1.0 (English) - Page 303
password. NNDepending on the application, this function may not be supported. To use the Lock function, follow these steps: 1. Select an application, and then open the Tools menu using your remote. 2. Select Lock. The Security window - Samsung UN60ES8000F | User Manual Ver.1.0 (English) - Page 304
password, enter "0-0-0-0". 4. A confirming message screen appears. A lock symbol appears left to the application. ●● Unlock NNDepending on the application, this function may not be supported. To use the Unlock function, follow these steps: 1. Select an application, and then open the Tools menu using - Samsung UN60ES8000F | User Manual Ver.1.0 (English) - Page 305
Security window appears. 3. Enter your password using your remote. If you do not changed a password, enter "0-0-0-0". 4. A confirming message screen appears. A lock symbol disappears. ●● Information You can view the detailed information about the selected application. NNDepending on the application, - Samsung UN60ES8000F | User Manual Ver.1.0 (English) - Page 306
also lock or unlock the application in the Detailed Information screen. Configuring the Smart Hub with Settings The Settings menu gives you access to Account Manager, Service Manager, Reset, and About Smart Hub functions. To access the Settings menu, and then select a menu item, follow these steps - Samsung UN60ES8000F | User Manual Ver.1.0 (English) - Page 307
2. Select Settings. The Settings window appears. 3. Select a menu item using your remote. ●● Account Manager The Account Manager menu contains functions that let you register your service provider accounts, change your Smart Hub password, and delete or deactivate your Samsung account. Link to other - Samsung UN60ES8000F | User Manual Ver.1.0 (English) - Page 308
any of the providers listed by the Link to other accounts function, you can associate the provider account and the provider account password with your Samsung account. If you associate the account, you will be able to log onto the account through Smart Hub easily, without entering your account name - Samsung UN60ES8000F | User Manual Ver.1.0 (English) - Page 309
Account Manager menu, select the Link to other accounts. The Link to other accounts window appears. 2. Select an application you want to associate with your Samsung account. 3. Enter your site ID and password - Samsung UN60ES8000F | User Manual Ver.1.0 (English) - Page 310
access your account on this application. 4. If you have entered the ID and password correctly, the Registered successfully. message appears. 5. If want to add another service application, and then repeat Steps 2 through 4 to associate another - Samsung UN60ES8000F | User Manual Ver.1.0 (English) - Page 311
. 6. When done, select OK. Remove from TV Account List: Cancels all your current registered Service Accounts that you registered on the Register Service Account screen. Deactivate Account: Deactivates your Samsung Account and deletes it and all your account settings entirely from the Smart Hub. - Samsung UN60ES8000F | User Manual Ver.1.0 (English) - Page 312
recognition: Register your face in your Samsung account. For more information about Face registration, refer to "Face recognition" in the SMART Interaction section. Remove recognized face: Delete registered your face in your Samsung account. ●● Service Manager Auto Ticker: You can set Auto Ticker to - Samsung UN60ES8000F | User Manual Ver.1.0 (English) - Page 313
the TV. NNThe Ticker application provides useful News, Weather, and Stock Market information. The Ticker application on Smart Hub must be downloaded to use this feature. NNDepending on your country, the Ticker application may have a different service or not be supported. Push Notification Settings - Samsung UN60ES8000F | User Manual Ver.1.0 (English) - Page 314
application installed on Smart Hub. The TV will display the notification message and allow you to view details of the event even while you are viewing TV. ●● Reset The Reset function initializes all downloaded applications, erases all user accounts and settings from the TV, and resets all Smart Hub - Samsung UN60ES8000F | User Manual Ver.1.0 (English) - Page 315
the first time. Your account, however, remains on the Smart Hub server. To log into your account, enter your ID and password on the Login screen. To use the Reset function, follow these steps: 1. In the Settings menu, select Reset. The Reset - Samsung UN60ES8000F | User Manual Ver.1.0 (English) - Page 316
2. Enter the your security password using your remote. NNThe default password set is "0-00-0." NN The Smart Touch Control is not available. If you forget the PIN code, press the remote control buttons in the following sequence - Samsung UN60ES8000F | User Manual Ver.1.0 (English) - Page 317
Hub automatically resets. The screen may go black, then Smart Hub reappears. In a few moments, it starts the reinitialization procedure. 4. To complete the re-initialization, go to Step 2 in "To start Smart Hub for the first time, follow these steps:" section of this manual. ●● About Smart Hub The - Samsung UN60ES8000F | User Manual Ver.1.0 (English) - Page 318
functions that display information about Smart Hub. Detail: Lists information about Smart Hub including version number, memory usage, and the unique product ID. Terms of Service Agreement: Display the Terms of Service Agreement. - Samsung UN60ES8000F | User Manual Ver.1.0 (English) - Page 319
Using the Samsung Apps Samsung Apps ™ → Samsung Apps Samsung Apps is a store from which you can download applications to use on Samsung TV/AV equipment. You can enjoy a variety of contents such as videos, music, photos, games, useful information etc. using the downloaded applications. New - Samsung UN60ES8000F | User Manual Ver.1.0 (English) - Page 320
Using the colored and function buttons with the Samsung Apps ●● a Login / Logout Log in or log out to your Samsung account. ●● b Filter by Price To toggle the view between All, Paid and Free. ●● { Sort To sort the applications by Recommended, Name, Date, or - Samsung UN60ES8000F | User Manual Ver.1.0 (English) - Page 321
Downloaded. NNYou can sort all categories except Most Popular. ●● } View Mode Each time you select } using your remote, the View Mode toggles between basic mode and thumbnail mode. ●● π Previous Move to previous page. ●● µ Next - Samsung UN60ES8000F | User Manual Ver.1.0 (English) - Page 322
Move to next page. ●● T Tools Displays the option menu. ●● R Return Moves to previous menu. Using the Samsung Apps by category The following categories are available: ●● What's New? User can easily find newly (latest) registered application. ●● Most Popular - Samsung UN60ES8000F | User Manual Ver.1.0 (English) - Page 323
Displays the most popular applications for users. ●● Videos Includes apps that provide video media such as movies, TV shows and short length videos. ●● Games Includes various game apps such as sudoku and chess. ●● Sports Includes apps that provide sports - Samsung UN60ES8000F | User Manual Ver.1.0 (English) - Page 324
content such as game results, images and short length video. ●● Lifestyle Includes apps that provide lifestyle media services such as music, personal photo management tools, and social networking such as Facebook and Twitter. ●● Information Includes apps that provide information content such as news - Samsung UN60ES8000F | User Manual Ver.1.0 (English) - Page 325
Demand) for kids etc. ●● My Apps My Apps offers information about your available App cash coupon, purchased app list or already installed applications on your TV like detailed information, download contents etc. - Samsung UN60ES8000F | User Manual Ver.1.0 (English) - Page 326
cash that you can use to buy applications through tv.samsungapps.com. ●● Help If you have questions about the Samsung Apps, check this section first. To search an application in Samsung Apps, follow these steps: 1. On the Samsung Apps screen, select Search Samsung Apps. The Search window appears. - Samsung UN60ES8000F | User Manual Ver.1.0 (English) - Page 327
2. Enter a keyword you want to search using your remote. 3. When done, select an entry field. 4. Wait until the search result screen displays. Then you can select an application you want in the search result screen. NNYou can find the keyword in the search history If you searched a keyword before. - Samsung UN60ES8000F | User Manual Ver.1.0 (English) - Page 328
Search ™ → Search (May not be available, depending on your country.) Easily search for and access content from diverse sources (e.g. applications, Your Video, AllShare Play) 1. On the Smart Hub screen, select Search. 2. If you want to input a search term directly, select an entry field. A - Samsung UN60ES8000F | User Manual Ver.1.0 (English) - Page 329
keypad screen appears. Enter the search term using your remote. NNIf you want to search by category, select a category using your remote. Using the Search function by category ●● Your Video Personalize your movie-watching with a customized video on demand (VOD) recommendation service. ●● Most - Samsung UN60ES8000F | User Manual Ver.1.0 (English) - Page 330
in the key word list. The key word list displays words you frequently use for searches. ●● Top Application You can search applications and services in the application list. The application list displays apps that users download frequently. ●● Search History You can find the keyword in the search - Samsung UN60ES8000F | User Manual Ver.1.0 (English) - Page 331
history if you searched a keyword before. Using the colored and function buttons with the Search ●● b Refresh Refresh the Search function. ●● T Tools You can set a general setting for Search function or delete the search history. ●● R Return Return to the previous menu. - Samsung UN60ES8000F | User Manual Ver.1.0 (English) - Page 332
menu with Search ●● General Settings Keyword Recommendation: Turns on or off the Keyword Recommendation function. Search Scope: Sets a search scope. The default is allowed all application. To customize a search scope you want, follow these steps: 1. On the Search screen, open the Tools menu using - Samsung UN60ES8000F | User Manual Ver.1.0 (English) - Page 333
2. Select General Settings. 3. Select an application in the Search Scope. A c mark disappears in the check box. 4. When done, Press the RETURNR button. ●● Search History You can delete the keyword in the search history. Also, If you select Delete All, delete all your search history. - Samsung UN60ES8000F | User Manual Ver.1.0 (English) - Page 334
Your Video ™ → Your Video (May not be available, depending on your country.) Using this service from the Smart Hub, you can get video recommendation and search for movies from multiple providers. Using the Your Video 1. On the Smart Hub screen, select Your Video. - Samsung UN60ES8000F | User Manual Ver.1.0 (English) - Page 335
2. Enjoy your movie watching with a customized video on demand (VOD) recommendation service. - Samsung UN60ES8000F | User Manual Ver.1.0 (English) - Page 336
Family Story ™ → Family Story Family Story feature allows you to share photos, messages, and events with your family. ●● Create Group If you are starting Family Story for the first time among your family members, you can create a group and invite members. ●● Invite Members - Samsung UN60ES8000F | User Manual Ver.1.0 (English) - Page 337
After creating a group, you can invite your family members who you want to share your family's photos and events with. ●● Join Group If you were invited to this service from your family member, you can select Join Group to enjoy Family Story service. To create a family group, follow these steps: - Samsung UN60ES8000F | User Manual Ver.1.0 (English) - Page 338
1. On the Smart Hub screen, select Family Story. The Family Story screen appears. 2. Select Create Group. The Create Group screen appears. 3. Select AGREE. It is required to agree with the terms prior to using Family Story. 4. Enter a Group Name, Your Name and Your Phone Number using your remote. - Samsung UN60ES8000F | User Manual Ver.1.0 (English) - Page 339
NNIf you want to add a group image, select an image box. (An external device containing photos must be connected to your TV via USB.) NN* Fields marked with an asterisk are required. 5. When done, select Done. The group creation is completed. NNIf you want to invite members - Samsung UN60ES8000F | User Manual Ver.1.0 (English) - Page 340
, follow these steps: 1. From the starting menu of Family Story, open the Tools menu using your remote, and then select Group Members. The Group Members screen appears. 2. Select Invite Members. The Invite Members for your Family Story - Samsung UN60ES8000F | User Manual Ver.1.0 (English) - Page 341
3. Select Select to enter Name.. The keypad screen appears. 4. Enter member's name using your remote. When done, select Done. 5. Select Phone number or Samsung account ID. The keypad screen reappears. 6. Enter member's phone number or Samsung account ID using your remote. When done, select Done. 7. - Samsung UN60ES8000F | User Manual Ver.1.0 (English) - Page 342
completed. 9. If invited by phone number, 4-digit invite code will be generated and the code need to be shared with the member. If invited by Samsung Account, the member will be notified about the invitation via e-mail. Select - Samsung UN60ES8000F | User Manual Ver.1.0 (English) - Page 343
see a pop-up message asking about invitation type. If you were invited by phone number, please select Invite Code, or if you were invited by Samsung account, please select - Samsung UN60ES8000F | User Manual Ver.1.0 (English) - Page 344
3. If joining by Samsung Account, a list of invitation from your family groups will be displayed. Select Accept to join. You can select Deny if you don't want to join - Samsung UN60ES8000F | User Manual Ver.1.0 (English) - Page 345
if you don't want to join the invited group. Enter the 4-digit invite code shared by your family member, and then select Done to finish. 5. Select OK. Joining your family group has been completed. - Samsung UN60ES8000F | User Manual Ver.1.0 (English) - Page 346
Fitness ™ → Fitness Using this function provided by Smart Hub, Lets you manage Fitness using the exercise-related application downloaded in the Samsung Apps. NNTo use the Fitness, you should be logged in Smart Hub. Read these note before exercising... NNPlease do a warm-up or stretch before - Samsung UN60ES8000F | User Manual Ver.1.0 (English) - Page 347
dizzy, exhausted, or short of breath. Create Your Profile When you start Fitness for the first time, you should create your own profile. On Fitness screen, select Create Your Profile. A pop-up message appears. Select Create Your Profile. NNTo go to next step, move to right side using your remote - Samsung UN60ES8000F | User Manual Ver.1.0 (English) - Page 348
1. Name: Select First Name and Last Name to put in a new user name. The keypad screen appears. Enter your name using the remote. When done, select OK. 2. Gender: Select your gender. 3. Birthdate: Enter your birthdate using your remote. It will be - Samsung UN60ES8000F | User Manual Ver.1.0 (English) - Page 349
index (BMI). 6. Weight: Enter your weight. This will be used to calculate your body max index (BMI). 7. Complete: Creation of your profile is finished. The TV displays the information of your profile and BMI. To start the Fitness, select Enjoy - Samsung UN60ES8000F | User Manual Ver.1.0 (English) - Page 350
Fitness. Using the Fitness with categories ●● Exercise Provide information on your exercise goal, current status and recommended contents. ●● Progress Provide information on your basic body profile, exercise progress, achievements for your goals, etc.. - Samsung UN60ES8000F | User Manual Ver.1.0 (English) - Page 351
Kids ™ → Kids Using this function provided by Smart Hub, lets you provides a quick launcher and the recommended list to access the kids or education-related application or contents easily and quickly. Also, it helps user (parents) to manage your kids. Using the Kids with categories ●● Playground - Samsung UN60ES8000F | User Manual Ver.1.0 (English) - Page 352
Displays recommended contents and applications. When you select an application or content, the TV executes an application or contents immediately. NNThe maximum number of contents list is 40. NNThe contents list can be edited by user (parents). For more - Samsung UN60ES8000F | User Manual Ver.1.0 (English) - Page 353
Displays the Sticker Books collected stickers which your kids received. Also, it can be share with your Family Story. Your kids can receive the sticker through these methods: -- By User (parent): Presents a sticker using the Present Sticker function in the Parents menu. -- Automatically: Presents a - Samsung UN60ES8000F | User Manual Ver.1.0 (English) - Page 354
1. If you want to create a new Sticker Book, select Create a New Sticker Book. The Create a New Sticker Book screen appears. 2. Enter the Sticker Book's name using your remote. When done, select Next. 3. Select a color of the Sticker Book. When done, select Next. 4. Check the - Samsung UN60ES8000F | User Manual Ver.1.0 (English) - Page 355
Edit. If you want to change a color, select Back. 5. When done, select Done. A new Story Book is created. NNYou can create a new sticker book. Maximum number of books is 10. NNYou can check arrived stickers in the Get New Stickers. A new sticker will be saved only 10 stickers which recently received - Samsung UN60ES8000F | User Manual Ver.1.0 (English) - Page 356
-related applications list and all contents list. NNWhen you select an application or contents, if the application or contents were not installed to the TV, the TV displays the corresponding download screen in the Samsung Apps screen. To use the Browse All, follow these steps: 1. On the Browse All - Samsung UN60ES8000F | User Manual Ver.1.0 (English) - Page 357
character you wish. The selected character screen appears. 2. Select a contents you want play. Videos: Displays the video contents of the character. Stories: Displays the e-book contents of the corresponding character. 3. The detailed information screen of the selected contents appears. You - Samsung UN60ES8000F | User Manual Ver.1.0 (English) - Page 358
, and give a rating. NNIf you were purchased already, you can play the contents. If you are not purchased, you can download the contents in the Samsung Apps. ●● Parents Lets you can edit the Playground, give stickers to your kids, check a usage time, and - Samsung UN60ES8000F | User Manual Ver.1.0 (English) - Page 359
in the Playground. The Playground displays the added contents only. To add or delete the contents in the Playground, follow these steps: 1. On the Parents screen, select My Choice. The My Choice screen appears. 2. Select contents you want to add or delete in the list. A pop-up message - Samsung UN60ES8000F | User Manual Ver.1.0 (English) - Page 360
appears. 3. Select Yes. 4. The selected contents will be added or deleted. Present Sticker When your kids did a good job today, you can present a sticker to your kids. To present a sticker to your kids, follow these steps: 1. On the Parents screen, select Present - Samsung UN60ES8000F | User Manual Ver.1.0 (English) - Page 361
Sticker. The Present Sticker screen appears. 2. Select a sticker you want to present. A pop-up message appears. 3. Select Yes. 4. Select a sticker book you want to present, and then select Present. NNIf - Samsung UN60ES8000F | User Manual Ver.1.0 (English) - Page 362
5. The selected sticker will be presented to your kids. History Lets you check a usage time of the application of your kids through a graph. Also, you can check a usage time of the each contents of your kids. Change a date or content title using your remote. Set Alarm - Samsung UN60ES8000F | User Manual Ver.1.0 (English) - Page 363
Lets you can set the watching time of your kids. When the time is ended, the alarm window appears. To set the watching time, follow these steps: 1. On the Parents screen, select Set Alarm. The Set Alarm screen appears. 2. Select Timer. 3. Select time you wish. The alarm will be set. - Samsung UN60ES8000F | User Manual Ver.1.0 (English) - Page 364
Web Browser ™ → Web Browser (May not be available, depending on your country.) Using this function provided by the Smart Hub, you can surf the Internet on your TV. 1. On the Smart Hub screen, select Web Browser. The Web Browser screen appears. 2. Surf the Internet in the same way as - Samsung UN60ES8000F | User Manual Ver.1.0 (English) - Page 365
on a PC. Using the colored and function buttons with the Web Browser ●● b Control Panel Shows or hides the control panel in the top of the screen. ●● { Link Browsing / Pointer Browsing You can change the cursor to Link Browsing mode or Pointer Browsing mode. ●● } PIP - Samsung UN60ES8000F | User Manual Ver.1.0 (English) - Page 366
PIP on, you can watch TV while using the Web Browser. ●● T Tools Displays the Tools menu. Control Panel: Shows or hides the control panel in the top of the screen. Link Browsing / Pointer Browsing: You can change the cursor to Link Browsing mode or Pointer Browsing mode. PIP: Turns PIP on or off. - Samsung UN60ES8000F | User Manual Ver.1.0 (English) - Page 367
want a current web page. To move a web page, select a web page. Then move to direction you wish using your remote. NNAvailable only when cursor is set to Pointer Browsing. ●● πµ Scroll up/down You can scroll the page up or down. - Samsung UN60ES8000F | User Manual Ver.1.0 (English) - Page 368
NNAvailable only when cursor is set to Link Browsing. ●● R Return Close the Web Browser. Using the Control Panel with Web Browser The Web Browser has a series of icons across the top of the screen. With these icons, you can easily use the Web Browser. The icons are described below, starting with the - Samsung UN60ES8000F | User Manual Ver.1.0 (English) - Page 369
●● Back Moves to the previous web page. NNIf there is no saved previous web page, this icon will not work. ●● Forward Moves to the next web page if there are saved URLs. NNIf there is no saved next web page, this icon will not work. ●● Refresh / Stop Refreshes the current page or stops the - Samsung UN60ES8000F | User Manual Ver.1.0 (English) - Page 370
current connection from loading. ●● Home Page Goes to the URL you specified as your the home page. ●● Zoom You can select a zoom level of 50%, 75%, 100%, 125%, 150%, 200%, 300%, and Fit to screen. ●● Bookmarks Displays the Bookmarks screen. You can set the current page as a bookmark - Samsung UN60ES8000F | User Manual Ver.1.0 (English) - Page 371
or select a favorite page to visit from the bookmark list. You can also sort by Date, Name, or Times Visited. To sort, select the Sort. When you select Enter URL, you can enter in a new URL address directly using your remote. When you highlight a page, the Option appears on the right. In the Option - Samsung UN60ES8000F | User Manual Ver.1.0 (English) - Page 372
the Tools menu with Bookmarks ●● Delete All Delete all bookmark lists. ●● Add to Bookmark Sets the current page as a bookmark. ●● Import bookmarks You can import a bookmark file saved in the other device like a PC. ●● Export bookmarks You can export a bookmark file from your TV to the other device - Samsung UN60ES8000F | User Manual Ver.1.0 (English) - Page 373
connected your TV. ●● History Displays the History screen. You can select a web page to visit in the History list. You can also sort by Date, Name, or Times Visited. To sort, select the - Samsung UN60ES8000F | User Manual Ver.1.0 (English) - Page 374
pop-up you can delete the selected page from the history list or add the selected page to bookmark. NNIf you want to delete all history list, open the Tools menu using your remote, and then select Delete All. ●● URL Field Shows the URL of the current page. If you select the URL field, the URL popup - Samsung UN60ES8000F | User Manual Ver.1.0 (English) - Page 375
●● Windows List Displays list or images of open windows (the Windows List). You can open a new page to the list (using Open new window), select and access a page in the list, select and close a page in the list, or close all pages. When you select Enter URL, you can enter in a new URL address - Samsung UN60ES8000F | User Manual Ver.1.0 (English) - Page 376
web browser. A new web browser automatically displays the home page. ●● Close all windows Close the currently opened all Windows List. After closing all Windows List, TV opens a new web browser automatically. A new web browser automatically displays the home page. - Samsung UN60ES8000F | User Manual Ver.1.0 (English) - Page 377
●● Search Lets you search the web. When you select the Search entry field, the Search screen appears. To search the web by word input, follow these steps: 1. On the Search screen, select the search engine. Also, you can select a different search engine. 2. Select Please enter a keyword.. The keypad - Samsung UN60ES8000F | User Manual Ver.1.0 (English) - Page 378
3. Enter the word you want to search using your remote. The TV searches the word by search engine. ●● Share Share the current web page to your Family Story. ●● Options You can configure the Web Browser settings. Setting up the Web Browser - Samsung UN60ES8000F | User Manual Ver.1.0 (English) - Page 379
Move the cursor to the top of the screen, and then select the Options icon. ●● Reading Tools Provides an easy-to-read page by enlarging the main text. ●● Approved Sites Allows to restrict your children's access to inappropriate web pages. Therefore, this function allows access of only the registered - Samsung UN60ES8000F | User Manual Ver.1.0 (English) - Page 380
NNEvery time you access the Approved Sites, the PIN screen appears and you should enter the PIN. Approved Sites Feature: Turns on or off the Approved Sites. Reset password for Approved Sites: Change the Approved Sites password. Add current site: Lets you add the currently displayed - Samsung UN60ES8000F | User Manual Ver.1.0 (English) - Page 381
in URLs to add to the Approved Sites List and delete sites from the Approved Sites list. NNIf you turn Approved Sites on and have not added any sites to the Clean site list, you will not be able to access any Internet sites. ●● Private - Samsung UN60ES8000F | User Manual Ver.1.0 (English) - Page 382
enable Privacy mode, select Yes. If the Privacy mode is running, the "Stop" icon appears in front of the URL at the top of the screen. To disable Privacy mode, select it again when Privacy mode is enabled. ●● PIP Settings Lets you configure the PIP function. PIP Position: Select a position for the - Samsung UN60ES8000F | User Manual Ver.1.0 (English) - Page 383
. Sound: Select the audio source you will hear - Main or Sub - when PIP is on. ●● Web Browser Setting You can configure Web Browser options. Set as homepage: You can set the home page. -- Most visited: Set the most frequently visited URL as the home page. -- Current Page: Sets the current page - Samsung UN60ES8000F | User Manual Ver.1.0 (English) - Page 384
home page. -- Bookmarks: Sets the bookmarks URL as the home page. -- Enter URL: Lets you key in the URL of the page you want for your home page. The keyboard works like a cell phone texting keyboard. Pop-up Block settings: Turns the Popup Block on or off. Ad Block Settings: You can determine whether - Samsung UN60ES8000F | User Manual Ver.1.0 (English) - Page 385
and select the URLs for which advertisements are blocked. -- Ad Blocker: Turns the Ad Blocker on or off. -- Block current page: Adds the current page to the blocked list. -- Manage blocked sites: You can add a website for - Samsung UN60ES8000F | User Manual Ver.1.0 (English) - Page 386
General: You can delete your personal information. -- Delete history: Deletes the website history. -- Delete browsing data: Deletes Internet access information such as cookies. -- Reset Settings: Reset all web browser settings to the factory defaults. -- Hide Menu: Turns on or off the - Samsung UN60ES8000F | User Manual Ver.1.0 (English) - Page 387
control panel auto-hide. Encoding: You can set the Encoding setting for web pages to Automatic or Manual. -- Auto select: Turns on or off the Encoding setting for web pages automatically. -- Setting: Select the Encoding settings for web pages manually. Select an encoding format from the encoding - Samsung UN60ES8000F | User Manual Ver.1.0 (English) - Page 388
Pointer: You can set the speed of the cursor when the cursor is set to Pointer Mode. -- Pointer Speed: Select a pointer speed. Browser Information: You can check the version information about the Web Browser. - Samsung UN60ES8000F | User Manual Ver.1.0 (English) - Page 389
Skype ™ → Skype Skype created a little piece of software that makes communicating with people around the world easy and fun. With Skype you can say hello or share a laugh with anyone, anywhere. And if both of you are on Skype, it's free. Communicate with people around the world! NNFor more - Samsung UN60ES8000F | User Manual Ver.1.0 (English) - Page 390
Skype user's manual from "www. samsung.com." [Legal Statement] Due to the various capabilities of products featuring the Samsung Smart Hub - Content Service, as well as limitations in the available content, certain features, applications, and services may not be available on all devices or in all - Samsung UN60ES8000F | User Manual Ver.1.0 (English) - Page 391
SMART Interaction for LED 7500 series and above, PDP 8000 series Using this function, you can access and control menu options and functions using speech, motions or face recognition. INFORMATION BOOKLET DISCLAIMER ●● Face recognition - Samsung UN60ES8000F | User Manual Ver.1.0 (English) - Page 392
purposes. Logging into the Smart Hub using Face recognition does not provide as high a level of security as logging in with an ID and password. ●● TV Camera Usage Before using the TV Camera, you should be aware that under some circumstances and under certain legal conditions your use/misuse of the - Samsung UN60ES8000F | User Manual Ver.1.0 (English) - Page 393
Camera can result in legal liability for you. By using the TV Camera, you agree that you will not use the camera (i) in locations where cameras are generally prohibited (such a person's privacy or (iii) in violation of any applicable laws, regulations or statutes. When you use a TV camera, you should - Samsung UN60ES8000F | User Manual Ver.1.0 (English) - Page 394
check whether a tape attached or not in rear of the TV camera, and then you can use a TV camera after adjust a camera angle. When you don't want to use a TV camera, we recommend to use after a camera lens fixes to upwards. In this case, Face recognition and Motion Control are not available. Voice - Samsung UN60ES8000F | User Manual Ver.1.0 (English) - Page 395
function. Lets you access and control menu options and functions using speech. NNFor accurate voice recognition, refer to the Standard Voice Command list at the Samsung web site (www. samsung.com → support → Manuals & Downloads). NNVoice Control function can be affected recognition by unclear - Samsung UN60ES8000F | User Manual Ver.1.0 (English) - Page 396
phrases clearly and correctly in the language you selected in Language. NNAmbient noise may cause Voice Control to malfunction. (Appropriate surrounding noise: Below 40dB) Your TV can "hear" your voice commands in two ways: - Samsung UN60ES8000F | User Manual Ver.1.0 (English) - Page 397
. (Distant Recognition) NNWe are recommended using Voice Control function within about 13 ft with your TV. You can check the usable distance by using Voice Control Environment Test (System → Voice and Motion Control → Voice Control → Voice Control Environment Test). -- Using the - Samsung UN60ES8000F | User Manual Ver.1.0 (English) - Page 398
your remote. (Close Proximity Recognition) NNWhen you use the TV's microphone, the words may not be recognized because of ambient noise. If this occurs, try using the VOICE˜ button on your remote. The TV will be able to recognize a voice command more easily. NNThe VOICE˜ button on your remote is - Samsung UN60ES8000F | User Manual Ver.1.0 (English) - Page 399
, turn on Voice Control (System → Voice and Motion Control → Voice Control). NNSay a voice command to proper volume into the microphone of your remote within 0.3 ― 0.4 feet. If voice level is too small or large, voice command may not be recognized. NNIf a menu option or function is not supported by - Samsung UN60ES8000F | User Manual Ver.1.0 (English) - Page 400
, raise your hand while opening it toward the screen, hold it for a moment and then wave it 3~4 time to the left and right. Motion Control starts. If the Motion Control starts, the cursor is displayed at the center of the screen and the Motion Guide Bar Size is at the bottom of the - Samsung UN60ES8000F | User Manual Ver.1.0 (English) - Page 401
Turns the Voice Control function on or off. NNThe VOICE˜ button on your remote is always activated. ●● Language Select the recognition language you want to use. ●● Trigger Words You can select the trigger words that start the Voice Control function. Alternatively you can turn on your TV - Samsung UN60ES8000F | User Manual Ver.1.0 (English) - Page 402
using the Trigger Words if Voice Control function is set to On. -- If Trigger Words is set to Hi TV, say Hi TV Power On. -- If Trigger Words is set to Smart TV, say Smart TV Power On. ●● Voice Command Bar Size Set the Voice Command Bar Size mode to Minimum or Full. Minimum displays the least number - Samsung UN60ES8000F | User Manual Ver.1.0 (English) - Page 403
. Recognition responsiveness: Select the responsiveness level of Voice recognition. ●● Voice Control Environment Test You can test the amount of ambient noise level detected by the TV - Samsung UN60ES8000F | User Manual Ver.1.0 (English) - Page 404
microphone. -- Noise Test: This test checks the amount of ambient noise detected by the TV microphone. Too much ambient noise will prevent Voice Command from functioning. To run, select Next using your remote. The test starts and takes a few seconds. - Samsung UN60ES8000F | User Manual Ver.1.0 (English) - Page 405
using your remote. The test starts and takes a few seconds. Please keep as quiet as possible during the test. NNAvailable only when Speaker Select is set to TV Speaker. -- Voice Control Test: This test checks the volume level and clarity of your - Samsung UN60ES8000F | User Manual Ver.1.0 (English) - Page 406
voice for use with Voice Control. Select Start using your remote. After the test starts, say the test words listed in the instructions as loudly and clearly as you can. NNIf the test is not successful, select Retest, and then say the words loudly and clearly again. To - Samsung UN60ES8000F | User Manual Ver.1.0 (English) - Page 407
be turned on automatically by effect of the ambient environment. 1. Say the Trigger Words that you selected into the microphone embedded in the TV or press the VOICE˜ button on your Smart Touch Control. The TV displays the Voice Command Bar Size. NNWhen you use Voice Control, the TV's volume is set - Samsung UN60ES8000F | User Manual Ver.1.0 (English) - Page 408
2. Say a word or phrase listed in the Voice Command Bar Size. NNPronounce the word or phrase clearly and correctly in the language you selected in Language. 3. Wait until recognition is complete, and then say the next command in the same fashion. NNTo exit the Voice Control mode, say the Trigger - Samsung UN60ES8000F | User Manual Ver.1.0 (English) - Page 409
the RETURNR button. Using the Voice Text Input Mode 1. Say "Search All" while in the Voice Control mode. NNWhen you use a QWERTY keypad screen, you can use the Voice Text Input Mode. Say the Trigger Words that you selected into the microphone embedded in the TV or press the VOICE˜ button on - Samsung UN60ES8000F | User Manual Ver.1.0 (English) - Page 410
Touch Control. You cannot use it for some UIs such as URL input boxes. 2. Say the word or phrase you wish to search for. 3. The TV executes the spoken function. NNVoice Control performance levels will vary based on the language spoken. Motion Control Menu → System → Voice and Motion Control → Motion - Samsung UN60ES8000F | User Manual Ver.1.0 (English) - Page 411
the Motion Control function. Lets you control your TV by moving the TV cursor using specific motions. NNMotion Control function can be affected recognition by motion posture, or ambient brightness conditions. NNSome applications may not support Motion Control. NNYou may experience physical fatigue - Samsung UN60ES8000F | User Manual Ver.1.0 (English) - Page 412
for a long time. NNTo use the Motion Control, please avoid direct sunlight. NNWe are recommended using Motion Control function within about 5 - 13 ft with your TV. TV Camera's recognition range may differ depending on the angle of camera or other conditions. You can check the recognition range of - Samsung UN60ES8000F | User Manual Ver.1.0 (English) - Page 413
Motion Control Environment Test (System → Voice and Motion Control → Motion Control → Motion Control Environment Test). ●● Motion Control Turns the Motion Control function on or off. ●● Motion Guide Bar Size Set the Motion Guide Bar Size mode to Minimum or Full. ●● Motion Control Environment Test - Samsung UN60ES8000F | User Manual Ver.1.0 (English) - Page 414
You can test the brightness of room and the camera angle. -- Brightness Test: This test checks to see if your room is bright enough for Motion Control to work properly. Select Start using your remote. The test starts and takes a few seconds. (Appropriate ambient brightness: 50 - 500 Lux) NNDo not - Samsung UN60ES8000F | User Manual Ver.1.0 (English) - Page 415
NNMake sure that the camera lens is cloaked by an object. -- Camera Angle Test: On the Camera Angle Test screen, select Start using your remote. A rectangle appears on the screen. Move yourself into the rectangle by adjusting the camera or moving yourself in front of the camera. If you are not - Samsung UN60ES8000F | User Manual Ver.1.0 (English) - Page 416
body with the TV, raise your hand while opening it toward the screen, hold it for a moment and then wave it 3~4 times to the left and right. To use the Motion Control function, follow these steps: 1. To use the Motion Control, raise your hand while opening it toward the screen, hold it for a moment - Samsung UN60ES8000F | User Manual Ver.1.0 (English) - Page 417
Motion Control starts, the cursor is displayed at the center of the screen and the Motion Guide Bar Size is at the bottom of the screen. 2. Control the TV using your hands. For the useable motions, see below. NNNote that the Motion Control function closes if your hands go out of the camera range. - Samsung UN60ES8000F | User Manual Ver.1.0 (English) - Page 418
remote control, keyboard, etc.), Motion Control closes. Controlling the TV with your hands using motions ●● Access Motion Control -- Action: Spread your hand in the direction of the camera, and shake it three or four times - Samsung UN60ES8000F | User Manual Ver.1.0 (English) - Page 419
want. -- Action: Spread your hand and guide the cursor to position you want. ●● Run Selects an item or executes a command that is indicated by the cursor or is highlighted. -- Action: Clench your - Samsung UN60ES8000F | User Manual Ver.1.0 (English) - Page 420
keep it clenched, and then move it in the direction you want the page to move. Note that not all pages can be moved. ●● Return Return to the previous menu. -- Action: Spread your hand and rotate it counterclockwise. ●● Channel / Volume Control Changes the channel or adjust the volume. - Samsung UN60ES8000F | User Manual Ver.1.0 (English) - Page 421
NNIf you use the Motion Control function while watching a channel, the channel / volume control screen appears. -- Action: Use the Pointing Navigation motion to move the cursor to the channel or volume controller, and then uses the Run motion to adjust - Samsung UN60ES8000F | User Manual Ver.1.0 (English) - Page 422
on your remote. ● ● Scroll Scroll the page in the direction you want. For example, suppose that you want to scroll down. NNSome applications may not support this function. 1. Move the cursor to the bottom of the - Samsung UN60ES8000F | User Manual Ver.1.0 (English) - Page 423
screen (page scroll zone) using the Pointing Navigation motion. 2. Move the cursor to the center of the screen using the Pointing Navigation motion. 3. The page will move down. Face recognition ™ → Tools → Settings → Account Manager → Face recognition Enable or disable the Face recognition - Samsung UN60ES8000F | User Manual Ver.1.0 (English) - Page 424
account. Also, you can log in to the Samsung account using the Face recognition function without inputting your account ID or your account password. NNYou can register your face in only one account. To register your face in your Samsung account, follow these steps: NNTo use this function, you - Samsung UN60ES8000F | User Manual Ver.1.0 (English) - Page 425
before using this function. To create your Samsung account, refer to "Creating an Account" in Smart Hub. 1. On the Smart Hub screen, open the Tools menu using your remote, and then select Settings. 2. Select Account Manager. The Account Manager screen appears. 3. Select Face recognition. The Face - Samsung UN60ES8000F | User Manual Ver.1.0 (English) - Page 426
screen appears. 4. Move your face into the square in the center of the screen, and then wait until a square changes from red to green. NNIf Face recognition fails, select Retry, and then try again. 5. When done, your face is now registered in your Samsung account. The Continue to Register Service - Samsung UN60ES8000F | User Manual Ver.1.0 (English) - Page 427
NNIf you want to register service later, select OK. You can register services later using the Link to other accounts in the Smart Hub menu (Tools → Settings → Account Manager → Link to other accounts). To log in to your Samsung account using Face recognition, follow these steps: NNIf you use Face - Samsung UN60ES8000F | User Manual Ver.1.0 (English) - Page 428
, select a using your remote. The Samsung Account screen appears. 2. Select Face Recognition Mode. The Face recognition screen appears. NNTo return to the Samsung Account screen, select Password mode. 3. The TV starts Face recognition. Face the front of the TV screen. The TV will recognize your face - Samsung UN60ES8000F | User Manual Ver.1.0 (English) - Page 429
Green square indicates a registered face. A red-square indicates an unregistered face. NNIf the TV fails to recognize your face, try again. 4. The TV logs you into your Samsung account automatically. NNIf the TV recognizes two or more, the Samsung account list appears. Select your account to log in. - Samsung UN60ES8000F | User Manual Ver.1.0 (English) - Page 430
NNIf your face is unregistered, you can register your face in your Samsung account. Follow steps 4 through 5 in the "To register your face to your Samsung account, follow these steps:" procedure above. NNIf you have no account, you can create one, you can create an account. For more detailed - Samsung UN60ES8000F | User Manual Ver.1.0 (English) - Page 431
Account" in Smart Hub section. - Samsung UN60ES8000F | User Manual Ver.1.0 (English) - Page 432
Surrounding Noise Required Voice Level TV Volume(dB) Supported Languages Condition ~ 40dB 60 dB or higher Step 0 3 languages Evaluation Item Distance Angle Management Specifications 1M ― 4M ±30˚ Supported languages may differ depending on the model or Voice Control setting. ●● Magic Word - Samsung UN60ES8000F | User Manual Ver.1.0 (English) - Page 433
Condition ~ 40dB Evaluation Item Distance Management Specifications 1M ― 4M Required Voice Level 60 dB or higher Angle ±30˚ TV Volume(dB) Step 10 Supported Languages 3 languages Supported languages may differ depending on the model or Voice Control setting. ●● Embedded Voice Recognition - Samsung UN60ES8000F | User Manual Ver.1.0 (English) - Page 434
60 dB or higher Angle ±30˚ TV Volume(dB) Step 5 Supported Languages 3 languages Supported languages may differ depending on the model or Voice Control setting. NNTo view all commands list of desired language, refer to the Guide at the Samsung web site (www.samsung.com → Support → Manuals - Samsung UN60ES8000F | User Manual Ver.1.0 (English) - Page 435
Motion Control ●● Conditions for Recognition Environmental and Evaluation Criteria Condition Evaluation Item Operating Speed Slow / Fast Distance Management Specifications 1.5M ― 4M Environment [Illumination] 50Lux ― 500Lux Horizontal Angle Background Recognition White or Grey Vertical - Samsung UN60ES8000F | User Manual Ver.1.0 (English) - Page 436
Environmental and Evaluation Criteria Condition Skin Color White, Yellow, Black, Indian, Hispanic Evaluation Item Distance Management Specifications 1.5M ― 4M Environment [Illumination] 50Lux ― 500Lux Horizontal Angle ±15˚ Background Recognition White or Grey Vertical Angle ±10˚ - Samsung UN60ES8000F | User Manual Ver.1.0 (English) - Page 437
˚ 0˚ ― 85˚ ●● Server Voice Environmental and Evaluation Criteria Surrounding Noise Condition 45 ― 50dB Required Voice Level TV Volume (dB) Supported Languages Response Time 60 dB or higher Step 50 3 languages ~ 5 sec Evaluation Item Voice Recognition Distance Remote Control Operating Distance - Samsung UN60ES8000F | User Manual Ver.1.0 (English) - Page 438
●● Hot Keys Environmental and Evaluation Criteria Condition Connected State Disconnected State (IR) Evaluation Item Distance Management Specifications 30cm 4M Vertical Angle 0˚ ― 20˚ Horizontal Angle 0˚ ― 85˚ ●● Pairing - Samsung UN60ES8000F | User Manual Ver.1.0 (English) - Page 439
Environmental and Evaluation Criteria Distance Condition 30cm Angle Environment Response Time 0˚ The operation should not be effected. 1min. Evaluation Item Distance Angle Management Specifications 30cm 4M 0˚ 45˚ Panel Key ●● Usability Environmental and Evaluation Criteria Temperature/ - Samsung UN60ES8000F | User Manual Ver.1.0 (English) - Page 440
TV Camera ●● Internal Environmental and Evaluation Criteria Surrounding Noise Environment [Illumination] Temperature/Humidity Condition ~ 40dB 30Lux ― 500Lux 0℃ ― 50℃ 50% ― 75% Evaluation Item Distance (AF Operation) Angle ( - Samsung UN60ES8000F | User Manual Ver.1.0 (English) - Page 441
Mass Storage Class (MSC) device and/or your PC. NNTo view content on a USB device, you should plug the device into a USB port on the TV. NNIf you want to use a USB HDD, we recommend to use a USB HDD that has - Samsung UN60ES8000F | User Manual Ver.1.0 (English) - Page 442
USB Device 1. Turn on your TV. 2. Connect a USB device containing photo, music and/or movie files to the USB port on the TV. 3. When a USB device is connected to the TV, the New device connected. window appears. Select a category you want to play among Videos, Photos and Music. NNThe TV may display - Samsung UN60ES8000F | User Manual Ver.1.0 (English) - Page 443
USB device automatically if it is the only device connected. Disconnecting a USB Device Method 1: Using the SOURCEs button. 1. Press the SOURCEs button for Standard Remote Control or select a Source for Smart Touch Control . 2. Select a desired USB device, and then press the TOOLST button for - Samsung UN60ES8000F | User Manual Ver.1.0 (English) - Page 444
Touch Control button. The Tools menu appears. 3. Select Safely Remove USB, and then wait until the selected USB device is disconnected. You can remove a USB device from the TV. Method 2: Using the AllShare Play home screen. 1. Go to AllShare Play home screen. (™ → AllShare Play) - Samsung UN60ES8000F | User Manual Ver.1.0 (English) - Page 445
2. Select any category except My List, and then press the E button for Standard Remote Control or press the Touch Pad for Smart Touch Control . 3. Select a desired USB device, and then press the TOOLST button for Standard Remote Control or T for Smart Touch Control button. The Tools menu appears. 4. - Samsung UN60ES8000F | User Manual Ver.1.0 (English) - Page 446
. You can remove a USB device from the TV. NNTo remove a USB device from the TV, we recommend use Safely Remove USB function. Read this information before using AllShare Play with a USB device. Restriction and Caution ŒŒ Before connecting your device to the TV, please back up your files to - Samsung UN60ES8000F | User Manual Ver.1.0 (English) - Page 447
prevent them from damage or loss of data. SAMSUNG is not responsible for any data file damage or data loss. ŒŒ Connect a USB HDD to the dedicated USB (HDD 5V 1A) port. ŒŒ Do not disconnect the USB device while it is loading. ŒŒ If you connect a USB device with a USB extension cable, the TV may not - Samsung UN60ES8000F | User Manual Ver.1.0 (English) - Page 448
files on the device. ŒŒ If a USB device you connect to the TV is not recognized, the files on the device are corrupted, or a file in the list is not played, connect the USB device to a PC, format - Samsung UN60ES8000F | User Manual Ver.1.0 (English) - Page 449
space on the USB device, you may not be able to view a new file even if you have added the file to the USB device. Supported Devices ŒŒ Certain types of USB Digital camera and audio devices may not be compatible with this - Samsung UN60ES8000F | User Manual Ver.1.0 (English) - Page 450
ŒŒ AllShare Play supports only USB Mass Storage Class (MSC) devices. MSC is a Mass Storage Class BulkOnly Transport device. Examples of MSC are Thumb drives, Flash Card Readers and USB HDD (USB HUB are not supported). Devices should be connected directly to the TV's USB port. ŒŒ More than 3TB USB - Samsung UN60ES8000F | User Manual Ver.1.0 (English) - Page 451
only use one at a time. ŒŒ If more than two MSC devices are connected, some of them may not be recognized. A USB device that requires high power (more than 500mA or 5V) may not be supported. ŒŒ If the TV has no input during the time set in Auto Protection Time, the Screensaver will run. - Samsung UN60ES8000F | User Manual Ver.1.0 (English) - Page 452
The power-saving mode of some external hard disk drives may be released automatically when you connect them to the TV. File system and formats ŒŒ The USB function might not work properly with unlicensed multimedia files. ŒŒ MTP (Media Transfer Protocol) is not supported. ŒŒ The file system supports - Samsung UN60ES8000F | User Manual Ver.1.0 (English) - Page 453
jpeg format. It does not support the Progressive jpeg format. ŒŒ The higher the resolution of the image, the longer it takes to display on the screen. ŒŒ The maximum supported JPEG resolution is 15360 X 8640 pixels. ŒŒ If a file is corrupted or the TV does not support the file type, the Not - Samsung UN60ES8000F | User Manual Ver.1.0 (English) - Page 454
Supported File Format. message appears. ŒŒ If the files are sorted by Folder view, the TV can display the names of up to 1000 files in each folder. ŒŒ If the number of files and folders saved on a USB storage device is - Samsung UN60ES8000F | User Manual Ver.1.0 (English) - Page 455
DRM that have been downloaded from a for pay site. Digital Rights Management (DRM) is a technology that supports the creation, distribution, and management of digital content in an integrated and comprehensive way, including protecting the rights and interests of content providers, preventing - Samsung UN60ES8000F | User Manual Ver.1.0 (English) - Page 456
a supported format, an error message may appear due to a sub container or profile problem. Connecting to a PC through a network You can play pictures, music, and videos saved in your PC through a network connection in the AllShare Play mode. NNFor more information on how to configure your TV - Samsung UN60ES8000F | User Manual Ver.1.0 (English) - Page 457
"Setting up the Network" in this manual. NNTo view content located on your PC, you must have connected your TV and your PC to your LAN and downloaded and installed AllShare PC Software on your PC. NNWe recommend you locate both your TV and PC in the same network subnet. IP addresses have four parts - Samsung UN60ES8000F | User Manual Ver.1.0 (English) - Page 458
PC are in the same subnet, the first 3 parts of the TV IP address and the PC IP address (111.222.333) will be the same and only the last part (the host address) will be different. The following AllShare Play functions are not supported when you are playing media from a PC connected through - Samsung UN60ES8000F | User Manual Ver.1.0 (English) - Page 459
Background Music Setting functions. NNSorting files by preference in the Photos, Music, and Videos folders. -- The † or ... function while a movie is playing. NNDivX DRM are not supported. NNSet your PC firewall program so that AllShare PC Software is a permitted program. NNDepending on the Internet - Samsung UN60ES8000F | User Manual Ver.1.0 (English) - Page 460
connection: -- The sorting method may vary. -- The Scene Search function may not be supported. -- The Resume function, which resumes playing of a video, may not be supported. -- The Resume function does not support multiple users. (It memorizes only the point where the most recent user stopped - Samsung UN60ES8000F | User Manual Ver.1.0 (English) - Page 461
playing a video.) -- The search function may not work depending on the content information. NNYou may experience file stuttering while playing a video in AllShare Play through a network connection. - Samsung UN60ES8000F | User Manual Ver.1.0 (English) - Page 462
Using the AllShare Play AllShare Play enables you to enjoy the following services. You need to log in to your Samsung account to use web storage or social services. AllShare Play can play various contents in three ways: -- Using USB Device: You can play videos, photos, or music from a connected USB - Samsung UN60ES8000F | User Manual Ver.1.0 (English) - Page 463
play various contents from devices connected to your home network or web storage. -- Using Social Services: You can play some content from social services such as Family Story, Facebook or Picasa. NNBefore using Facebook or Picasa, it should be installed in the Smart Hub. NNTo use SugarSync, - Samsung UN60ES8000F | User Manual Ver.1.0 (English) - Page 464
, you can register your application account in to your Samsung account. To register your application account, refer to "Configuring the Smart Hub with Settings" in the Smart Hub section. NNTo use Family Story, you should log in to your Samsung account. Before using Family Story, you should join - Samsung UN60ES8000F | User Manual Ver.1.0 (English) - Page 465
NNYou can transfer a desired content to other device connected to the TV. Contents Type USB Camera DLNA SugarSync Family Story Picasa Facebook Mobile device Supported transfer device DLNA, SugarSync, Family Story, Picasa, Facebook DLNA USB USB USB USB USB USB - Samsung UN60ES8000F | User Manual Ver.1.0 (English) - Page 466
My List (In AllShare Play) ™ → AllShare Play → My List Using this function, you can access the content easily and quickly. ●● Recently Played Displays the videos, photos or music file list of recently played. If you have a file you want to play again, use this category. NNWhen you play a file from - Samsung UN60ES8000F | User Manual Ver.1.0 (English) - Page 467
looking for." message appears. NNUp to 48 files are listed in descending order of playing time on the basis of the time configured on the TV so that the last played file comes first. NNWhen you try to play a file on a mobile phone, the file may not be - Samsung UN60ES8000F | User Manual Ver.1.0 (English) - Page 468
played. ●● What's New Displays the newly updated videos, photos or music file saved on the USB device or your PC. If you have a newly updated file you want to play, use this category. ●● Playlist Displays the Playlist files saved on the USB device or your PC. If you want to play a playlist, select - Samsung UN60ES8000F | User Manual Ver.1.0 (English) - Page 469
selected playlist will play immediately. NNYou can create up to 12 playlists. NNYou can add up to 100 files to a single playlist. NNYou can only add one type of content to a single playlist. For example, you can only add music files to a playlist that includes music files. Creating the Playlist 1. - Samsung UN60ES8000F | User Manual Ver.1.0 (English) - Page 470
Photos, or Music file list. 2. Open the Tools menu using your remote, and then select Add to Playlist. 3. Select a file you want to add. The c mark appears in the check box. 4. Repeat Step 3 to select additional files. NNTo select all the files in the list, select Select All. To cancel a selection, - Samsung UN60ES8000F | User Manual Ver.1.0 (English) - Page 471
5. When done, select Add. The Add to Playlist screen appears. 6. Select Create New. The Create a new playlist screen appears. 7. Enter playlist name using your remote. 8. When done, select Done. The newly playlist is created. To add files to playlist, follow these steps: 1. Follow - Samsung UN60ES8000F | User Manual Ver.1.0 (English) - Page 472
Playlist, follow these steps: 1. Select a playlist you want to edit. 2. Open the Tools menu using your remote, and then select Edit Playlist. The Edit Playlist screen appears. 3. Select a file you want to delete. The - Samsung UN60ES8000F | User Manual Ver.1.0 (English) - Page 473
c mark appears in the check box. 4. Repeat Step 3 to select additional files. NNTo select all the files in the list, select Select All. To cancel a selection, select the file again. 5. When done, select Remove. A popup message appears. 6. Select Yes. The selected file(s) be removed in the Playlist. - Samsung UN60ES8000F | User Manual Ver.1.0 (English) - Page 474
You can play video files saved on USB device and/or your PC. NNFor more information about the subtitle formats and codec formats, refer to "Supported Subtitle and AllShare Play file formats" in the Other Information section. Playing a Video 1. On the AllShare Play - Samsung UN60ES8000F | User Manual Ver.1.0 (English) - Page 475
Videos. 2. Select the device you want to play. 3. Select the desired video in the file list. NNIf you stop the playing, you can play the video later from the point where you stopped it. NNThe file name appears on the top with its playing time. NNIf video time information is unknown, the playing time - Samsung UN60ES8000F | User Manual Ver.1.0 (English) - Page 476
progress bar are not displayed. Playback control button with Videos Each time you select † or ... using your remote, the playback speed change as follows. († 1 / † 2 / † 3 / ... 1 / ... 2 / ... 3) ●● l, r Standard remote control / Slide to left or right direction Smart Touch Control Jump to - Samsung UN60ES8000F | User Manual Ver.1.0 (English) - Page 477
current position. ●● ∑ Pause the scene. -- In pause mode, select .... Each time you select ... using your remote, the playback speed is reduced to „ 1/8 / „1/4 / „1/2. -- In pause mode, select ∑. Each time you select ∑ using your remote, a new frame will be appear. NNTo return to normal speed - Samsung UN60ES8000F | User Manual Ver.1.0 (English) - Page 478
playback, select ∂ using your remote. NNThe product does not play sound in stop mode. NNStop motion operates only in the forward direction. Using the Tools menu with Videos ●● On the file list screen, you can use the following these options: -- View You can sort the file list by selecting - Samsung UN60ES8000F | User Manual Ver.1.0 (English) - Page 479
a sort criteria you want. -- Selection Play You can play by selecting the desired music file in the file list. -- Send Lets you send your video files to your Web storage or other devices. NNIf you want to use this function, you should log in the Smart Hub. -- Login / Logout You can login or logout - Samsung UN60ES8000F | User Manual Ver.1.0 (English) - Page 480
Hub account. -- Add to Playlist Lets you make your own playlist. When you use the playlist, you can play music you want to listen easily and quickly. -- Go to playlist Moves to Playlist screen. -- Information Displays detailed information about the selected file. - Samsung UN60ES8000F | User Manual Ver.1.0 (English) - Page 481
●● During playback, you can use the following these options: -- Go to Videos List Moves to the file list screen. -- Play from the Beginning You can restart a video file from the beginning. -- Scene Search You can use the Scene Search function during playback to view - Samsung UN60ES8000F | User Manual Ver.1.0 (English) - Page 482
choice. NNIf the index information is damaged or unsupported, you will not be able to use the Scene Search function. -- Title Search You can move directly to another title. -- Time Search Search the video or input the play time directly using your remote. - Samsung UN60ES8000F | User Manual Ver.1.0 (English) - Page 483
-- Repeat Mode You can play movie files repeatedly. -- Picture Size You can adjust the picture size to your preference. -- Picture Mode You can change the Picture Mode. -- Sound Mode You can change the Sound Mode. -- Audio Language You can enjoy video in one of - Samsung UN60ES8000F | User Manual Ver.1.0 (English) - Page 484
supported languages. The function is enabled only when you play streamtype files which support multiple audio formats. -- Subtitle You can view a subtitle. You can select a specific language if the subtitle file contains multiple languages. -- Subtitle Settings Displays the Subtitle Settings. You - Samsung UN60ES8000F | User Manual Ver.1.0 (English) - Page 485
can set up a subtitle option. -- Information Displays detailed information about the selected file. Viewing the file lists NNWhen you use the AllShare Play function with your Web storage rather than a USB device, View is not supported. 1. To sort files in the file lists, select } using your remote. - Samsung UN60ES8000F | User Manual Ver.1.0 (English) - Page 486
appears. 2. Select a sort criteria you want. ●● Folder view Displays the whole folder. You can view the file name and thumbnail by selecting the folder. ●● Title Sorts and displays the file title in Symbol / Number / Alphabet / Special order. ●● Latest Date - Samsung UN60ES8000F | User Manual Ver.1.0 (English) - Page 487
Sorts and shows files by the latest date. ●● Earliest Date Sorts and shows files by the earliest date. Send your video files Lets you send your video files to your Web storage or other devices. NNIf you want to use this function, you should log in the Smart Hub. 1. To send video files in the file - Samsung UN60ES8000F | User Manual Ver.1.0 (English) - Page 488
open the Tools menu using your remote, and then select Send. 2. Select a video file you want to send. The c mark appears in the check box. 3. Repeat Step 2 to select additional files. NNTo select all the files in the list, select Select All. To cancel a selection, select the file again. 4. When done - Samsung UN60ES8000F | User Manual Ver.1.0 (English) - Page 489
screen appears. 5. Choose the destination device to send, and then select Send. 6. From these steps, please follow the instructions on the screen. - Samsung UN60ES8000F | User Manual Ver.1.0 (English) - Page 490
→ AllShare Play → Photos Viewing a photo (or slide show) NNFor more information about the supported image file formats, refer to "Supported Subtitle and AllShare Play file formats" in the Other Information section. 1. On the AllShare Play screen, select Photos. 2. Select the device you want to play. - Samsung UN60ES8000F | User Manual Ver.1.0 (English) - Page 491
Select the desired photo file in the file list. The TV displays the selected photo file. 4. To start the slide show, select ∂ using your remote. NNTo change a photo manually, press the l or r button. Standard remote control / To change a photo manually, slide to left or right direction in the Touch - Samsung UN60ES8000F | User Manual Ver.1.0 (English) - Page 492
NNDuring the slide show, all files in the file list are displayed in order, starting from the file you selected. NNWhen watching a photo file or slide show, you can add background music if you have music files on same device. NNThe background music cannot be changed until the BGM has finished - Samsung UN60ES8000F | User Manual Ver.1.0 (English) - Page 493
The slide show speed change as follow (Slow, Normal, Fast). ●● l, r Standard remote control / Slide to left or right direction Smart Touch Control Change a previous or next photo. ●● ∫ Return to the file list screen. ●● ∂ Start the slide show. - Samsung UN60ES8000F | User Manual Ver.1.0 (English) - Page 494
●● ∑ Pause the slide show. Using the Tools menu with Photos ●● On the file list screen, you can use the following these options: -- View You can sort the file list by selecting a sort criteria you want. -- Selection Play You can play by selecting the desired music file in the file list. - Samsung UN60ES8000F | User Manual Ver.1.0 (English) - Page 495
-- Send Lets you send your photos with your Family Story or photo-related applications. NNIf you want to use this function, you should log in the Smart Hub. -- Login / Logout You can login or logout your Smart Hub account. -- Add to Playlist Lets you make your own playlist. - Samsung UN60ES8000F | User Manual Ver.1.0 (English) - Page 496
When you use the playlist, you can play music you want to listen easily and quickly. -- Go to playlist Moves to Playlist screen. -- Information Displays detailed information about the selected file. ●● When playing a photo file, you can use the following these options: -- Go to Photos List - Samsung UN60ES8000F | User Manual Ver.1.0 (English) - Page 497
list screen. -- Start Slide Show / Stop Slide Show You can start or stop a slide show. Alternatively, select ∂ or ∑ using your remote. -- Slide Show Speed You can select the slide show speed during the slide show. Alternatively, select † or ... using your remote. -- Slide Show Effect You can set - Samsung UN60ES8000F | User Manual Ver.1.0 (English) - Page 498
effects. -- Background Music On / Background Music Off You can start or stop background music. -- Background Music Setting You can set and select background music when watching a photo file or slide show. -- Picture Mode You can change the Picture Mode. - Samsung UN60ES8000F | User Manual Ver.1.0 (English) - Page 499
-- Sound Mode You can change the Sound Mode. NNAvailable only when the background music is set to on. -- Zoom You can zoom into images in full screen mode. -- Rotate you can rotate images. -- Information Displays detailed information about - Samsung UN60ES8000F | User Manual Ver.1.0 (English) - Page 500
file. Viewing the file lists NNWhen you use the AllShare Play function with Family Story, Facebook or Picasa rather than a USB device, View is not supported. 1. To sort files in the file lists, select } using your remote. The View screen appears. 2. Select a sort criteria you want. ●● Folder view - Samsung UN60ES8000F | User Manual Ver.1.0 (English) - Page 501
Displays the whole folder. You can view the file name and thumbnail by selecting the folder. ●● Title Sorts and displays the file title in Symbol / Number / Alphabet / Special order. ●● Latest Date Sorts and shows files by the latest date. ●● Earliest Date - Samsung UN60ES8000F | User Manual Ver.1.0 (English) - Page 502
Sorts and shows files by the earliest date. ●● Monthly Sorts and shows photo files by month. Send your photos Lets you send your photos with your Family Story or photo-related application. NNIf you want to use this function, you should log in the Smart Hub. - Samsung UN60ES8000F | User Manual Ver.1.0 (English) - Page 503
1. For example, suppose that you want to send with your Family Story. 2. To send photo files in the file list, open the Tools menu using your remote, and then select Send. 3. Select a photo file you want to send. The c mark appears in the check box. 4. Repeat Step 3 to select additional tracks. NNTo - Samsung UN60ES8000F | User Manual Ver.1.0 (English) - Page 504
select Select All. To cancel a selection, select the file again. 5. When done, select Send. The Send screen appears. 6. Choose the destination device to send. 7. Choose the family group to share. A pop-up window appears. 8. Enter a message to send to family group you - Samsung UN60ES8000F | User Manual Ver.1.0 (English) - Page 505
you can use the keyboard connected to the TV. 9. When done, select Send. - Samsung UN60ES8000F | User Manual Ver.1.0 (English) - Page 506
In AllShare Play) ™ → AllShare Play → Music Playing Music NNFor more information about the supported music file formats, refer to "Supported Subtitle and AllShare Play file formats" in the Other Information section. 1. On the AllShare Play screen, select Music. 2. Select the device you want to play. - Samsung UN60ES8000F | User Manual Ver.1.0 (English) - Page 507
3. Select the desired music file in the file list or select ∂ using your remote. NNTo move a previous page, select b using your remote. To move a next page, select { using your remote. NNWhen the music is playing, you can search the music file by selecting † or ... using your remote. NNIf the sound - Samsung UN60ES8000F | User Manual Ver.1.0 (English) - Page 508
, adjust the Equalizer in the Sound menu. (An overmodulated MP3 file may cause a sound problem.) Playback control button with Music During playback, you can use additional functions at the bottom right of the screen. ●● Play / Pause You can start or pause a music file. Alternatively, you can select - Samsung UN60ES8000F | User Manual Ver.1.0 (English) - Page 509
using your remote. ●● Repeat Mode You can play movie files repeatedly. ●● Shuffle Mode You can play the music sequentially or randomly. ●● Sound Mode You can change the Sound Mode. Using the Tools menu with Music ●● You can use the following these options: - Samsung UN60ES8000F | User Manual Ver.1.0 (English) - Page 510
-- View You can sort the file list by selecting a sort criteria you want. -- Selection Play You can play by selecting the desired music file in the file list. -- Send Lets you send your music files to your Web storage or other devices. NNIf you want to use this function, you should log in the Smart - Samsung UN60ES8000F | User Manual Ver.1.0 (English) - Page 511
-- Login / Logout You can login or logout your Smart Hub account. -- Add to Playlist Lets you make your own playlist. When you use the playlist, you can play music you want to listen easily and quickly. -- Go to playlist Moves to Playlist screen. -- Encoding - Samsung UN60ES8000F | User Manual Ver.1.0 (English) - Page 512
You can select an encoding format from the encoding format list. -- Information Displays detailed information about the selected file. Playing selected music files using Music 1. Select the desired music file in the file list. 2. Open the Tools menu using your remote, and then select Selection Play. - Samsung UN60ES8000F | User Manual Ver.1.0 (English) - Page 513
3. Select the tracks you want to add. The c mark appears in the check box. 4. Repeat Step 3 to select additional tracks. NNTo select all the files in the list, select Select All. To cancel a selection, select the file again. 5. When done, select Play. The selected music files will play. Viewing the - Samsung UN60ES8000F | User Manual Ver.1.0 (English) - Page 514
you use the AllShare Play function with your Web storage rather than a USB device, View is not supported. 1. To sort files in the file lists, select } using your remote. The View screen appears. 2. Select a sort criteria you want. ●● Folder view Displays the whole folder. You can view the file - Samsung UN60ES8000F | User Manual Ver.1.0 (English) - Page 515
selecting the folder. ●● Title Sorts and displays the file title in Symbol / Number / Alphabet / Special order. ●● Artist Sorts the music file by artist in alphabetical order. ●● Album Sorts the music file by album in alphabetical order. - Samsung UN60ES8000F | User Manual Ver.1.0 (English) - Page 516
●● Genre Sorts music files by the genre. Send your music files Lets you send your music files to your Web storage or other devices. NNIf you want to use this function, you should log in the Smart Hub. 1. To send music files in the file list, open the Tools menu using your remote, and then select - Samsung UN60ES8000F | User Manual Ver.1.0 (English) - Page 517
tracks. NNTo select all the files in the list, select Select All. To cancel a selection, select the file again. 4. When done, select Send. The Send screen appears. 5. Choose the destination device to send, and then select Send. - Samsung UN60ES8000F | User Manual Ver.1.0 (English) - Page 518
6. From these steps, please follow the instructions on the screen. - Samsung UN60ES8000F | User Manual Ver.1.0 (English) - Page 519
media contents including videos, photos, and music saved on your mobile phones or the other devices (such as your PC) by controlling them on the TV via the network. For more information, visit "www.samsung.com" or contact the Samsung call center. Mobile devices may need additional software - Samsung UN60ES8000F | User Manual Ver.1.0 (English) - Page 520
. For details, refer to each device's user's guide. NNIf your Samsung TV connects to a non-Samsung DLNA server, a compatibility issue may occur during video playback. NNBy connecting your Samsung TV to a network via AllShare Play, you can use Samsung's original functions as follows: -- Playback of - Samsung UN60ES8000F | User Manual Ver.1.0 (English) - Page 521
(DivX, MP4, 3GPP, AVI, ASF, MKV, etc.) -- Video thumbnail feature -- Bookmark function (to resume video playback) -- Auto-chaptering (scene navigation) -- Digital content management -- Compatibility with various subtitle formats (SRT, SMI, SUB, TXT, TTXT) - Samsung UN60ES8000F | User Manual Ver.1.0 (English) - Page 522
names -- And many others NNTo use the original DLNA functions of Samsung fully, it is recommended that you use the AllShare™ software provided with your TV. AllShare Settings Menu → Network → AllShare Settings Shows a list of mobile phones or connected devices which have been set up to use AllShare - Samsung UN60ES8000F | User Manual Ver.1.0 (English) - Page 523
TV. NNThe AllShare Settings function is available in all devices which support DLNA DMC. ●● Allowed / Denied: Allows/Blocks the devices. ●● Delete: Deletes the devices from the list. NNThis function only deletes the name of the device from the list. If the deleted device is turned on or tries to - Samsung UN60ES8000F | User Manual Ver.1.0 (English) - Page 524
connect to the TV, it may appear on the list again. To play the media contents of the devices connected to DLNA function, follow these steps: 1. On the AllShare Play screen, select desired menu (Videos, Photos, Music). 2. Select DLNA. The TV displays the file list of the connected device using the - Samsung UN60ES8000F | User Manual Ver.1.0 (English) - Page 525
list. The selected file will play. Playing the media contents saved on the devices 1. Connect the mobile phone or other devices which support AllShare Play function, and then play the media contents of each device. The popup screen appears on the bottom of your TV. 2. Select the Allow to accept the - Samsung UN60ES8000F | User Manual Ver.1.0 (English) - Page 526
of the devices can be playing on your TV. NNYou can find the allowed devices on the AllShare Settings. NNAn alarm window appears informing you that media contents (videos, photos, music) sent from a mobile phone will be displayed on your TV. The contents are played automatically 3 seconds after the - Samsung UN60ES8000F | User Manual Ver.1.0 (English) - Page 527
window using your remote when the alarm window appears, the media contents are not played. NNThe first time a device accesses your TV through the media function, a warning pop up window appears. Select Allow. This permits the phone to access the TV freely and use the Media function to play content. - Samsung UN60ES8000F | User Manual Ver.1.0 (English) - Page 528
NNTo turn off media contents transmissions from a mobile phone, set a device to Denied in the AllShare Settings. NNContents may not play on your TV depending on their resolution and format. NNThe some buttons may not work depending on the type of media content. NNUsing the mobile device, you can - Samsung UN60ES8000F | User Manual Ver.1.0 (English) - Page 529
control the media play. For details, refer to each mobile's user's guide. - Samsung UN60ES8000F | User Manual Ver.1.0 (English) - Page 530
Using the MHL function You can enjoy videos, photos and music files on your TV when connecting it with a mobile device that supports Mobile High-Definition Link (MHL) function. NNTo use the MHL function, you need an MHL-certified mobile device. You can check if your mobile device - Samsung UN60ES8000F | User Manual Ver.1.0 (English) - Page 531
MHL function, follow these steps: 1. With an MHL cable, connect the USB port of the mobile device and the HDMI IN 3 (MHL) port of the TV. NNYou can also connect the HDTV adapter. 2. Select Source using your remote. - Samsung UN60ES8000F | User Manual Ver.1.0 (English) - Page 532
The Source screen appears. 3. Select HDMI3. NNTo use the MHL function, you must upgrade the software to the latest version. NNWhen you use a MHL cable, only the HDMI IN 3 (MHL) port of the TV supports the MHL function. NNThis product is officially MHLcertified. If you encounter any problem when - Samsung UN60ES8000F | User Manual Ver.1.0 (English) - Page 533
contact the manufacturer of the mobile device. NNSome mobile devices (products) may not support the function depending on the performance or the function of the device. NNSince the TV screen is wider than the mobile device screen, the visual quality may seem degraded. NNWhen you use a MHL cable, you - Samsung UN60ES8000F | User Manual Ver.1.0 (English) - Page 534
is in standby state. NNThe TV remote control supports the following buttons: for Standard Remote Control u / d / l / r (Menu navigation) † (REW), ... (FF), E (select) ∂ (play), ∑ (pause), ∫ (stop) e (Move to previous menu) for Smart Touch Control Menu navigation: - Samsung UN60ES8000F | User Manual Ver.1.0 (English) - Page 535
the opposite direction. Press the button in the top center of Touch Pad. The TV displays these control functions: -- † (REW), ... (FF), E (select), ∂ (play), ∑ (pause), ∫ (stop), e (Move to previous menu) - Samsung UN60ES8000F | User Manual Ver.1.0 (English) - Page 536
) Anynet+ is a function that enables you to control all connected Samsung devices that support Anynet+ with your Samsung TV's remote. The Anynet+ system can be used only with Samsung devices that have the Anynet+ feature. To be sure your Samsung device has this feature, check if there is an Anynet - Samsung UN60ES8000F | User Manual Ver.1.0 (English) - Page 537
's remote control, not the buttons on the TV. NNThe TV remote control may not work under certain conditions. If this occurs, reselect the Anynet+ device. NNThe Anynet+ functions do not operate with other manufacturers' products. NNFor instructions explaining how to connect Anynet+ external devices, - Samsung UN60ES8000F | User Manual Ver.1.0 (English) - Page 538
refer to the device's user manual. You must connect an Anynet+ device using an HDMI cable. Some HDMI cables may not support Anynet+ functions. NNAnynet+ works when the AV device supporting Anynet+ is in the standby or on status. NNAnynet+ supports up to 12 AV devices in total. Note that you can - Samsung UN60ES8000F | User Manual Ver.1.0 (English) - Page 539
type. NNHowever, you can connect only one Anynet+ Home Theater. To connect an Anynet+ Home Theater, connect the Home Theater to the TV using an HDMI cable then: -- To hear sound from the Home Theater's front, left and right speakers and the subwoofer only, connect a digital optical cable - Samsung UN60ES8000F | User Manual Ver.1.0 (English) - Page 540
(OPTICAL) port on your TV and the Digital Audio Input on the Home Theater. -- To hear 5.1 channel audio, connect HDMI cables to your Anynet+ DVD player, satellite AUDIO OUT (OPTICAL) port on your DVD player, Satellite Box, etc. (i.e. Anynet + Device 1 or 2) directly to the Home Theater, not the TV. - Samsung UN60ES8000F | User Manual Ver.1.0 (English) - Page 541
Anynet+ (HDMI-CEC) Menu The Anynet+ menu changes depending on the type and status of the Anynet+ devices connected to the TV. ●● View TV Changes Anynet+ mode to TV broadcast mode. ●● Device List Shows the Anynet+ device list. ●● (device_name) Menu Shows the menu of the connected - Samsung UN60ES8000F | User Manual Ver.1.0 (English) - Page 542
device menus. E.g. if a DVD player is connected, the disc menu of the DVD player will appear. ●● (device_name) Tools Shows the tools menu of the connected device. E.g. if a DVD player is connected, the tools menu of the DVD player will appear. NNDepending on the device, this menu may not be - Samsung UN60ES8000F | User Manual Ver.1.0 (English) - Page 543
the movie in the DVD player will appear. NNDepending on the device, this menu may not be available. ●● Receiver Sound is played through the receiver. Setting up Anynet+ (HDMI-CEC) ●● Anynet+ (HDMI-CEC) - Samsung UN60ES8000F | User Manual Ver.1.0 (English) - Page 544
Anynet+ (HDMI-CEC) must be set to On. NNWhen the Anynet+ (HDMI-CEC) function is disabled, all the Anynet+ related operations are deactivated ●● Auto Turn Off Set an Anynet+ Device to turn off automatically when the TV is turned off. NNIf the Auto Turn Off is set to Yes, running external devices will - Samsung UN60ES8000F | User Manual Ver.1.0 (English) - Page 545
at the same time as the TV powers off. NNMay not be enabled depending on the device. ●● Receiver You can listen to sound through a receiver (i.e. Home Theater) instead of the TV Speaker. Switching between Anynet+ Devices 1. Open the Tools menu using your remote, and then select Anynet+ - Samsung UN60ES8000F | User Manual Ver.1.0 (English) - Page 546
HDMI-CEC). 2. Select Device List. The Device List screen appears. NNIf you cannot find a device you want, select Refresh to refresh the list. 3. Select a device, and then wait until switch to the selected device. NNThe Device List menu appears only when you set Anynet+ (HDMI-CEC) to On in the System - Samsung UN60ES8000F | User Manual Ver.1.0 (English) - Page 547
menu. NNSwitching to the selected device may take up to 2 minutes. You cannot cancel the switching operation while switching is in progress. NNIf you have selected an Anynet+ device using Source function and then selecting its input source, you cannot use the Anynet+ function. Make sure to switch to - Samsung UN60ES8000F | User Manual Ver.1.0 (English) - Page 548
. Listening through a Receiver You can listen to sound through a receiver (i.e. Home Theater) instead of the TV Speaker. To listen to sound through a receiver, go to Receiver screen (System → Anynet+ (HDMICEC) → Receiver). Then select Receiver and set to On. NNIf your receiver supports audio only, - Samsung UN60ES8000F | User Manual Ver.1.0 (English) - Page 549
optical in jack of the receiver to the DIGITAL AUDIO OUT (OPTICAL) port of the TV. NNWhen the receiver (i.e. Home Theater) is set to On, you can hear sound output from the TV's Optical jack. When the TV is displaying a DTV (air) signal, the TV will send out 5.1 channel sound to the receiver. When - Samsung UN60ES8000F | User Manual Ver.1.0 (English) - Page 550
the source is a digital component such as a DVD player and it is connected to the TV via HDMI, you will hear only 2 channel sound from the receiver. Using the ARC function You can listen to sound through a receiver connected using an - Samsung UN60ES8000F | User Manual Ver.1.0 (English) - Page 551
Receiver screen (System → Anynet+ (HDMI-CEC) → Receiver). Then select Receiver and set to On. NNTo use the ARC function, a receiver which supports the HDMI-CEC and ARC features must be connected to the HDMI IN 2 (ARC) port. NNTo disable the ARC function, set the Receiver to Off. Even if the TV - Samsung UN60ES8000F | User Manual Ver.1.0 (English) - Page 552
blocked from receiving the signal. - Samsung UN60ES8000F | User Manual Ver.1.0 (English) - Page 553
of all troubleshooting items, go to e-Manual home screen (Menu → Support → e-Manual → Other Information) or press the SUPPORT button, and then search a desired item by selecting a chapter. Menu → Support → Self Diagnosis → Troubleshooting If the TV seems to have a problem, first review this list - Samsung UN60ES8000F | User Manual Ver.1.0 (English) - Page 554
problems and solution. Also review the Troubleshooting Section in the e-Manual. If none of the troubleshooting tips apply, visit www.samsung.com/ support or call Samsung customer Service at 1-800-SAMSUNG (1-800726-7864). SMART Interaction When you use a SMART Interaction function, check whether the - Samsung UN60ES8000F | User Manual Ver.1.0 (English) - Page 555
be affected recognition by unclear pronunciation, voice level, or surrounding noise. For accurate voice recognition, refer to the Standard Voice Command list at the Samsung web site (www.samsung.com → support → Manuals & Downloads). ŒŒ Voice Control performance may vary depending on the language. - Samsung UN60ES8000F | User Manual Ver.1.0 (English) - Page 556
and brightness of recognized face. Alternatively, recognition rate of Motion Control may differ depending on the TV camera's angle or the operating speed. Therefore, we recommend to adjust an ambient brightness and TV camera's angle before using Motion Control. ŒŒ If you have other questions, visit - Samsung UN60ES8000F | User Manual Ver.1.0 (English) - Page 557
www.samsung.com/support or call Samsung customer Service at 1-800-SAMSUNG (1-800-726-7864). Flickering and Dimming If your Samsung Television is flickering or dimming sporadically, you may need to disable some of its energy efficient features such as the Eco Sensor or the Energy - Samsung UN60ES8000F | User Manual Ver.1.0 (English) - Page 558
→ Energy Saving ŒŒ Eco Sensor: System → Eco Solution → Eco Sensor Component Connections / Screen Color If you find that the color on your Samsung television's screen is not correct or black and white, first run a Self Diagnosis on the TV to make sure there are no device issues. ŒŒ Self Diagnosis - Samsung UN60ES8000F | User Manual Ver.1.0 (English) - Page 559
Diagnosis → Picture Test If the problem does not appear in the Picture test, make sure: ŒŒ Your connections are all consistent. For example, if you've used the AV In jack on your TV, make sure you have used the AV Out jack on your video source. ŒŒ You have connected to your devices to - Samsung UN60ES8000F | User Manual Ver.1.0 (English) - Page 560
the video source to the blue Pb jack on the TV, the red Pr jack on the source to the red Pr jack on the TV. Screen Brightness If you find that the colors on your Samsung TV are correct but just a little too dark or bright, try adjusting the following settings in the Picture option - Samsung UN60ES8000F | User Manual Ver.1.0 (English) - Page 561
Backlight for LED TV / Cell Light for PDP TV , Contrast, Brightness, Sharpness, Color, Tint (G/R) and so on. Go in to Picture on user Menu then try adjusting options mentioned above. Blur If you find that there is a blur or "ghostlike" appearance to the images on your television's screen, you might - Samsung UN60ES8000F | User Manual Ver.1.0 (English) - Page 562
Plus. ●● Auto Motion Plus: Picture → Picture Options → Auto Motion Plus Unwanted Powering Off If your Samsung TV appears to turn off by itself, there may be an issue with either your Timer settings or your Eco friendly No Signal Power Off feature. First make sure Sleep Timer is not accidentally - Samsung UN60ES8000F | User Manual Ver.1.0 (English) - Page 563
off the TV automatically after a certain period of time has passed. ŒŒ Sleep Timer: System → Time → Sleep Timer If the Sleep Timer is not activated, you may have engaged the No Signal Power Off or Auto Power Off feature. ŒŒ No Signal Power Off: System → Eco Solution → No Signal Power Off ŒŒ Auto - Samsung UN60ES8000F | User Manual Ver.1.0 (English) - Page 564
and the light should blink about 5 times before the TV turns on. If you find that you are having trouble powering on your Samsung television, there are a number of things to check before making a call to the service department. If you're sure your power cord, remote control, and PC are functioning - Samsung UN60ES8000F | User Manual Ver.1.0 (English) - Page 565
, your TV may appear to be off because the cable or satellite box is not outputting a signal. To test the signal output of your cable or satellite box, press the guide or info button on the cable or satellite box remote control. If the screen displays the guide or info data, the problem is caused - Samsung UN60ES8000F | User Manual Ver.1.0 (English) - Page 566
If you have any trouble assembling the stand, visit www.samsung.com/spsn. Cannot Find a Channel Re-run Setup (Go to System → Setup) or run Auto Program. (Go to Channel → Auto Program). NNWatch these troubleshooting on video at www.samsung.com/spsn - Samsung UN60ES8000F | User Manual Ver.1.0 (English) - Page 567
Picture (Troubleshooting) First, perform the Picture Test and to see if your TV is properly displaying the test image (go to Support → Self Diagnosis → Picture Test). If the test image is properly displayed, the poor picture may be caused by the source or signal. The TV image does not look as good - Samsung UN60ES8000F | User Manual Ver.1.0 (English) - Page 568
HD (high definition) channels. If you have an analog cable/set top box, upgrade to a digital set top box. Use HDMI or Component cables to deliver HD (high definition) picture quality. NNMany HD channels are up scaled from SD (Standard Definition) contents. - Samsung UN60ES8000F | User Manual Ver.1.0 (English) - Page 569
channels from the channel line up. ŒŒ Air/Cable Antenna connection: Try HD channels after performing an Auto Program. Adjust the Cable/Sat box video output resolution to 1080i or 720p. The picture is distorted: macro block error, small block, dots, pixelization The compression of video contents may - Samsung UN60ES8000F | User Manual Ver.1.0 (English) - Page 570
and action movies. A weak or bad quality signal can cause picture distortion. This is not a TV issue. Mobile phones used close to the TV (within 3.3 ft) may cause noise in the picture on analog and digital channels. Color is wrong or missing. If you're using a Component connection, make - Samsung UN60ES8000F | User Manual Ver.1.0 (English) - Page 571
or loose connections may cause color problems or a blank screen. The color is poor or the picture is not bright enough. Adjust the Picture options in the TV menu (go to Picture Mode / Color / Brightness / Sharpness) Adjust the Energy Saving option in the TV menu (go to System → Eco Solution - Samsung UN60ES8000F | User Manual Ver.1.0 (English) - Page 572
Try resetting the picture to view the default picture settings (go to Picture → Reset Picture). There is a dotted line on the edge of the screen. If the Picture Size is set to Screen Fit, change it to 16:9. Change the cable/satellite box resolution. The picture is black and white. If you are using - Samsung UN60ES8000F | User Manual Ver.1.0 (English) - Page 573
picture freezes or is distorted or delayed. If the TV is connected to a cable box, try to reset the box. (Disconnect and then reconnect the AC cord and wait until the cable box reboots. It may take up to 20 minutes.) Set the output resolution of the cable box to 1080i or - Samsung UN60ES8000F | User Manual Ver.1.0 (English) - Page 574
Sound (Troubleshooting) First, perform the Sound Test to determine if your TV audio is operating properly. (Go to Support → Self Diagnosis → Sound Test). If the audio is OK, the sound problem may be caused by the source or signal. There is no sound or the sound is too low at maximum volume. Please - Samsung UN60ES8000F | User Manual Ver.1.0 (English) - Page 575
picture is good but there is no sound. Set the Speaker Select option to TV Speaker in the Sound menu. If you are using an external device, check the device's your cable box's audio option to HDMI if you have the box connected to your TV using an HDMI cable.) If you are using a DVI to HDMI cable, a - Samsung UN60ES8000F | User Manual Ver.1.0 (English) - Page 576
separate audio cable is required. If your TV has a headphone jack, make sure there is nothing plugged into it. Reboot the connected device by disconnecting, and then reconnecting device's power cable. The speakers are making an inappropriate noise. Check cable connections. Make sure a video cable is - Samsung UN60ES8000F | User Manual Ver.1.0 (English) - Page 577
For antenna or cable connections, check the signal information. A low signal level may cause sound distortion. Perform the Sound Test feature. (Support → Self Diagnosis → Sound Test) - Samsung UN60ES8000F | User Manual Ver.1.0 (English) - Page 578
Cable) Connection (Troubleshooting) The TV is not receiving all channels. Make sure the coaxial cable is connected securely. Run Auto Program to add available channels to the channel list. Go to Channel → Auto Program then select Cable and make sure to select the correct Cable TV signal type. There - Samsung UN60ES8000F | User Manual Ver.1.0 (English) - Page 579
Verify the antenna is positioned correctly. No caption on digital channels. Check the Caption Setup menu. Try changing Caption Mode Service1 to CC1. Some channels may not have caption data. The picture is distorted: macro block error, small block, dots, pixelization. The compression of video - Samsung UN60ES8000F | User Manual Ver.1.0 (English) - Page 580
cause picture distortion, especially with fast moving pictures such as sports and action movies. A weak signal can cause picture distortion. This is not a TV problem. - Samsung UN60ES8000F | User Manual Ver.1.0 (English) - Page 581
PC Connection (Troubleshooting) A Mode Not Supported message appears. Set your PC's output resolution so it matches a resolution supported by the TV. The video is OK but there is no audio. If you are using an HDMI connection, check the audio output setting on your PC. - Samsung UN60ES8000F | User Manual Ver.1.0 (English) - Page 582
Network Connection (Troubleshooting) The wireless network connection failed. Make sure the TV is connected to a wireless IP sharer (router). Software Update over the network fails. Run Network Status in Network menu to confirm the connection. If you - Samsung UN60ES8000F | User Manual Ver.1.0 (English) - Page 583
Others (Troubleshooting) Purple/green rolling horizontal bars and buzzing noise from the TV speakers with a Component cable connection. Remove the left and right audio connections from the Set-Top box. If the buzzing stops, this indicates that the Set-Top box has a grounding issue. Replace the - Samsung UN60ES8000F | User Manual Ver.1.0 (English) - Page 584
contents. Black bars will appear on the top and bottom of the screen when you watch movies that have aspect ratios different from your TV. Adjust the picture size options on your external device or the TV to full screen. A Mode Not Supported message appears. Check the supported resolution of the - Samsung UN60ES8000F | User Manual Ver.1.0 (English) - Page 585
adjust the external device's output resolution accordingly. Refer to the resolution settings on User manual. Caption on TV menu is grayed out. You cannot select the Caption menu if you have selected a source connected to the TV via HDMI or Component. The external device's Caption function must also - Samsung UN60ES8000F | User Manual Ver.1.0 (English) - Page 586
Signal Information is unavailable in the Self Diagnosis menu. This function is only available for digital channels the TV receives from an Antenna / RF /Coax connection. The TV is tilted to the side. Remove the base stand from the TV and reassemble it. The channel menu is grayed out (unavailable). - Samsung UN60ES8000F | User Manual Ver.1.0 (English) - Page 587
Channel menu is only available when you select the TV source. Your settings are lost after 30 minutes or every time the TV is turned off. If the TV is in the Store Demo mode, it will reset audio and picture settings every 30 minutes. Change the settings from Store Demo mode to Home Use mode using - Samsung UN60ES8000F | User Manual Ver.1.0 (English) - Page 588
video can be caused by using overly rigid or thick cables. Make sure the cables are flexible enough for long term use. If mounting the TV to a wall, we recommend using cables with 90 degree connectors. You see small particles when you look - Samsung UN60ES8000F | User Manual Ver.1.0 (English) - Page 589
the edge of the frame of the TV. This is part of the product's design and is not a defect. The PIP menu is not available. PIP functionality is only available when you are using an HDMI, or Component source. POP (TV's internal banner ad) appears on the screen. Select Home Use under Setup mode - Samsung UN60ES8000F | User Manual Ver.1.0 (English) - Page 590
Plasma TV is making humming noise. for PDP TV Plasma TVs typically make a soft humming sound. This is normal. It's caused by the electrical charges that are used to create the images on the screen. If the humming sound is loud, you may have set the brightness on the TV too high. Try setting the - Samsung UN60ES8000F | User Manual Ver.1.0 (English) - Page 591
wall mount can also create excessive noise. Image Retention (Burn In) Issue. for PDP TV To minimize the possibility of screen burn, this unit is equipped with Pixel Shift screen burn reduction technology. Pixel Shift lets you set the picture so it moves slightly up and down (Vertical Line) and side - Samsung UN60ES8000F | User Manual Ver.1.0 (English) - Page 592
(Horizontal Dot). The regular, slight movement of the picture reduces screen burn in. - Samsung UN60ES8000F | User Manual Ver.1.0 (English) - Page 593
3D (Troubleshooting) The 3D Active Glasses are not working correctly Make sure the glasses are turned on. The 3D Active Glasses may not work properly if there is any other 3D product or electronic devices turned on near the glasses or TV. If there is a problem, keep other electronic devices as far - Samsung UN60ES8000F | User Manual Ver.1.0 (English) - Page 594
't look quite right. The ideal viewing distance is three times or more the height of the screen. We also recommend sitting with viewer's eyes on a level with the screen. The batteries in the 3D glasses don't last Turn off 3D glasses while not using them. If you leave 3D glasses on, battery lifespan - Samsung UN60ES8000F | User Manual Ver.1.0 (English) - Page 595
Anynet+ (HDMI-CEC) (Troubleshooting) Anynet+ does not work. Check if the device is an Anynet+ device. The Anynet+ system supports Anynet+ devices only. You can connect only one receiver (home theater). Check if the Anynet+ device power cord is properly connected. Check the Anynet+ device's Video/ - Samsung UN60ES8000F | User Manual Ver.1.0 (English) - Page 596
Check whether Anynet+ (HDMI-CEC) is set to On in the Anynet+ setup menu. Check whether the TV remote control is in TV mode. Check whether the remote control is Anynet+ compatible. Anynet+ doesn't work in certain situations. (Searching channels, operating Smart Hub or Setup, etc.) If you - Samsung UN60ES8000F | User Manual Ver.1.0 (English) - Page 597
make sure to search devices again or turn your TV off and on again. I want to start Anynet+. Check if the Anynet+ device is properly connected to the TV and check if the Anynet+ (HDMI-CEC) is set to On. (System → Anynet+ (HDMI-CEC)) Open the Tools menu using your remote and then select Anynet - Samsung UN60ES8000F | User Manual Ver.1.0 (English) - Page 598
a non-Anynet+ device. The message Connecting to Anynet+ device ... appears on the screen. You cannot use the remote control when you are configuring Anynet+ or switching to a view mode. Use the remote control after the TV has completed Anynet+ configuration or has finished switching to Anynet+. - Samsung UN60ES8000F | User Manual Ver.1.0 (English) - Page 599
play. You cannot use the play function when Setup is in progress. The connected device is not displayed. Check whether or not the device supports Anynet+ functions. Check whether or not the HDMI cable is properly connected. Check whether Anynet+ (HDMI-CEC) is set to On. (System → Anynet+ (HDMICEC)) - Samsung UN60ES8000F | User Manual Ver.1.0 (English) - Page 600
. Anynet+ requires an HDMI connection. Make sure the device is connected to your TV with an HDMI cable. Some HDMI cables may not support Anynet+ functions. If the connection is terminated because there has been a power failure or the HDMI cable has been disconnected, please repeat the device scan - Samsung UN60ES8000F | User Manual Ver.1.0 (English) - Page 601
receiver. Connect the optical cable between TV and the receiver. The ARC function enables digital output of sound using the HDMI IN 2(ARC) port and can only be operated when the TV is connected to an audio receiver that supports the ARC function. - Samsung UN60ES8000F | User Manual Ver.1.0 (English) - Page 602
AllShare Play (Troubleshooting) This file may not be playable properly. This may appear because of high bit rate of content. Content generally will play but could experience some playability issue. - Samsung UN60ES8000F | User Manual Ver.1.0 (English) - Page 603
Hub (Troubleshooting) Some application contents only appear in English. How can I change the language? The Application content language may be different from the application user interface language. The ability to change the language depends on the service provider. Some application services do not - Samsung UN60ES8000F | User Manual Ver.1.0 (English) - Page 604
service provider information. When a network error occurs, I can only use the setting menu. If network connection doesn't work, your service might be limited, as all functions except the setting menu are needed to connect to the internet. - Samsung UN60ES8000F | User Manual Ver.1.0 (English) - Page 605
Web Browser (Troubleshooting) 1. To open Web Browser, select Web Browser in the Smart Hub. Unlike a PC, the Web Browser may be displayed differently. 2. The Web Browser is not - Samsung UN60ES8000F | User Manual Ver.1.0 (English) - Page 606
web browsers operated by certain businesses. 5. Playback of Flash video may be restricted. 6. E-commerce, for purchasing products online, is not supported. 7. Scrolling a web page that allows only part (and not the whole) of the page to be scrolled may cause corrupted characters. 8. ActiveX is not - Samsung UN60ES8000F | User Manual Ver.1.0 (English) - Page 607
. (To access such options, switch to Pointer mode.) 10. Some text may appear corrupted because the number of supported fonts is limited. 11. The response to a command on the remote or the screen display may be delayed temporarily if a web page is currently loading. 12. The loading of a web page may - Samsung UN60ES8000F | User Manual Ver.1.0 (English) - Page 608
delay or stop with some operating systems. 13. Copy and Paste are not supported. 14. When writing emails or posting messages, some functions (Such as changing the size or colors.) may not be supported. 15. The number of bookmarks and logs that can be saved is limited. 16. The maximum number of - Samsung UN60ES8000F | User Manual Ver.1.0 (English) - Page 609
vary depending on the browsing condition or TV model. 17. The web browsing speed depends on the network conditions. 18. PIP will automatically be deactivated if a video is played in the browser. Videos may - Samsung UN60ES8000F | User Manual Ver.1.0 (English) - Page 610
import or export the bookmark, the folder tree is not included. 22. If you export the bookmark file to an USB device connected to the TV, the bookmark file will be saved - Samsung UN60ES8000F | User Manual Ver.1.0 (English) - Page 611
in "Samsung SmartTV Bookmark" folder. 23. If the time is not set in the menu (System → Time → Clock), the history information may not be saved. 24. Visited web site history is saved in chronological order and It - Samsung UN60ES8000F | User Manual Ver.1.0 (English) - Page 612
during Flash playback depending on the video/audio codec supported. 26. A sudden change in the picture brightness inside the video window may affect the brightness of the surrounding stationary picture. for PDP TV 27. If you use QWERTY keyboard screen when you use Web Browser with PIP function, the - Samsung UN60ES8000F | User Manual Ver.1.0 (English) - Page 613
automatically except inputting a URL address. - Samsung UN60ES8000F | User Manual Ver.1.0 (English) - Page 614
and above, PDP 8000 series Improved user convenience has been provided so that you can switch the channel and adjust the volume with just your fingertips while focusing on the TV screen. In addition, the built-in touch pad removes the need for a mouse when you change the menu settings and search - Samsung UN60ES8000F | User Manual Ver.1.0 (English) - Page 615
●● P: Turns the TV on and off. ●● w / v: Adjusts the Volume Changes channels. ●● RETURNR: Returns to the previous menu. - Samsung UN60ES8000F | User Manual Ver.1.0 (English) - Page 616
you press the button, the TV displays the command list. You can speak using the microphone embedded in your remote. NNFor more detailed information about the Voice Control function, see "SMART Interaction" in the e-manual. ●● NUMBERš: Displays the Number button screen. You can select a number using - Samsung UN60ES8000F | User Manual Ver.1.0 (English) - Page 617
Pad. ●● ™: Brings up the Smart Hub applications. See e-Manual chapter Advanced Features → Smart Hub. To exit an application that is running easily, press the ™ button. NNIf you don't press any button within 30 seconds, the Smart Touch Control is set to Sleep mode automatically. To wake up the Smart - Samsung UN60ES8000F | User Manual Ver.1.0 (English) - Page 618
After you have run the Initial Setup on your TV, you should connect your Smart Touch Control to your TV. 1. Point the Smart Touch Control toward the IR sensor of the TV and press any key on the Smart Touch Control. 2. The connection icon appears at the bottom left of the screen and the - Samsung UN60ES8000F | User Manual Ver.1.0 (English) - Page 619
connected to the TV. NNIf you want to perform the pairing process again, press the reset button in the center of the back cover using a pin or the tip of an unbent paper clip. The Smart Touch Control will be initialized. Smart Touch Control PAIRING Reset button. Calibrating the Touch Pad - Samsung UN60ES8000F | User Manual Ver.1.0 (English) - Page 620
Smart Touch Control, follow these steps: 1. Press the NUMBERš button for 3 seconds. The calibration starts. 2. When done, all the LEDs on the top of the Smart Touch Control blink twice simultaneously. NNWhile calibrating, don't touch the touch pad. NNIf the touch pad looses accuracy, recalibrate the - Samsung UN60ES8000F | User Manual Ver.1.0 (English) - Page 621
1 and 2. Using the Touch Pad To display the shortcut functions list on the bottom of the screen, press the ‹ button at the bottom of the touch pad. This list includes Menu, Source, CH List, 3D, Support, and a number of other functions. To display the color and playing control functions on the top - Samsung UN60ES8000F | User Manual Ver.1.0 (English) - Page 622
pad. ●● To Move the Highlight Rest your finger on the touch pad, and then slide it from one side to the other, from top to bottom, or bottom to top. NNTo move the Highlight continuously, flick your finger across the touch pad from right to left, left to right, - Samsung UN60ES8000F | User Manual Ver.1.0 (English) - Page 623
top to bottom, or bottom to top. ●● To Select an item Press the Touch Pad. ●● Open the History screen. - Samsung UN60ES8000F | User Manual Ver.1.0 (English) - Page 624
Press the Š button in the left of the Touch Pad. Displays a list of recently used functions. You can select a function again using the Touch Pad easily and quickly. ●● Open the Tools menu. Press the T button in the right of the Touch Pad. Quickly select frequently - Samsung UN60ES8000F | User Manual Ver.1.0 (English) - Page 625
used functions. ●● Open the color, playing control and exit buttons. To display the color, exit and play control buttons at the top of the screen, press the button at the top of the touch pad. - Samsung UN60ES8000F | User Manual Ver.1.0 (English) - Page 626
e: Close all menus shown on the screen. ●● Open the shortcut functions screen. Press the ‹ button in the bottom center of the Touch Pad. You can select a desired function (e.g. Menu(m), Source(s), Info(`), etc.) easily. - Samsung UN60ES8000F | User Manual Ver.1.0 (English) - Page 627
●● Using the Mute function -- If you press and hold the Touch Pad, it has same effect as pressing the MUTEM button on your remote. -- However, if you press and hold the touch pad when using Web Browser, the Touch Pad switches to the Scroll mode. When you press the Touch Pad again, the Scroll mode - Samsung UN60ES8000F | User Manual Ver.1.0 (English) - Page 628
to the general mode. To Enter a channel number through Smart Touch Control 1. While watching a broadcast, press the NUMBERš button on the Smart Touch Control. The TV displays the number button screen. 2. Using the touch pad, highlight a number, and then press the touch - Samsung UN60ES8000F | User Manual Ver.1.0 (English) - Page 629
pad. The TV displays a list of channels that start with the number you selected. 3. Using the touch pad, highlight the channel in the list you want the channel by touching the up or down channel icon on the touch pad. If you touch the touch pad immediately after, the TV displays the list of memorized - Samsung UN60ES8000F | User Manual Ver.1.0 (English) - Page 630
channels. Select a channel by moving or flicking your finger up or down, and then pressing the touch pad. NNIf you change a channel by entering the channel number, that channel number is memorized and added to the Added Ch. list automatically. You can change the channels using a memorized channel - Samsung UN60ES8000F | User Manual Ver.1.0 (English) - Page 631
with your TV using the Smart Touch Control. IR Blaster Pairing 1. When you turn the IR Blaster on, the LED blinks. 2. Briefly point the IR Blaster toward the IR sensor of the TV and press the PAIRING button at the bottom. 3. The connection icons appear on the bottom left of the screen, and the - Samsung UN60ES8000F | User Manual Ver.1.0 (English) - Page 632
, please turn off and on the IR Blaster, try again from step 2. NNTo set a Universal Remote Control after pairing an IR Blaster, select Yes. Precautions for Using an IR Blaster NNTo use an IR Blaster, the IR Blaster must be located nearby with external devices connected to the TV - Samsung UN60ES8000F | User Manual Ver.1.0 (English) - Page 633
external device. NNIf you control an external device by using the Smart Touch Control, the IR Blaster sends an IR signal into a corresponding external device. Setting up Universal Remote Control - Samsung UN60ES8000F | User Manual Ver.1.0 (English) - Page 634
Lets you control a Set-Top Box (STB) or a BD player or both connected to the TV using your Smart Touch Control. After you connect the device to the TV, the Smart Touch Control can control the navigation, number, and other keys needed to operate and control the device. NNThe Universal Remote Control - Samsung UN60ES8000F | User Manual Ver.1.0 (English) - Page 635
STB's volume to appropriate level. NNDepending on the version of an application, the Universal Remote Setup instructions may differ. In this case, please follow the instructions on the screen. To connect the external device to your Smart Touch Control, follow these steps: 1. Select Add a device - Samsung UN60ES8000F | User Manual Ver.1.0 (English) - Page 636
the port used to connect the external device, and then press the touch pad. NNMake sure that the selected device is on. If it is turned off, turn the power on and press Refresh. 4. Select Search Brands, and then press - Samsung UN60ES8000F | User Manual Ver.1.0 (English) - Page 637
the entry field, select the brand name of your device, and then press the touch pad. NNIf you want to search the brand of STB (Set-Top box), you can - Samsung UN60ES8000F | User Manual Ver.1.0 (English) - Page 638
then press the touch pad. A keyboard and an entry field appear. Enter the first few letters and numbers of the model name of your device using the Smart Touch Control, and then select Done at the bottom of the keyboard. In the list that appears below - Samsung UN60ES8000F | User Manual Ver.1.0 (English) - Page 639
pad. NNIf the search for model name does not work properly, search with a part of the model name or use the search for recommended model code. 6. Select Download, and then press the touch pad. Download the configuration data for the IR Blaster in the same way. 7. When all the settings are complete, - Samsung UN60ES8000F | User Manual Ver.1.0 (English) - Page 640
and press the touch pad. NNTo reset IR Blaster and Smart Touch Control, press the ‹ button on Smart Touch Control, and then select Set Up Universal Remote. Using the Search for Recommended Model Code 1. In the Search Model step in the integrated remote control setup, select the Recommended and press - Samsung UN60ES8000F | User Manual Ver.1.0 (English) - Page 641
the touch pad. 2. Select Download to download the recommended model code. 3. Point the Smart Touch Control forward to the IR sensor of the external device and press the touch pad to test if the device works. 4. If the downloaded recommended model code does not work, repeat the steps from step 3. - Samsung UN60ES8000F | User Manual Ver.1.0 (English) - Page 642
by using Universal Remote, some buttons may not be supported. In this case, we recommend to use Anynet+ (HDMI-CEC) function. LED Indicator Status ●● Watch TV (TV + STB) You can control the TV and Set-Top box using universal remote for viewing the Set-Top box. (e.g. Volume button: - Samsung UN60ES8000F | User Manual Ver.1.0 (English) - Page 643
Adjust the TV volume. / Channel button: Change the STB channels.) ●● Watch Movie (TV + BD Player) You can control the TV and BD player using universal remote for viewing the BD player. (e.g. Volume button: Adjust the TV volume. / TOOLS button: Open the BD players option menu.) ●● TV - Samsung UN60ES8000F | User Manual Ver.1.0 (English) - Page 644
You can only control the TV using universal remote. - Samsung UN60ES8000F | User Manual Ver.1.0 (English) - Page 645
Supported Subtitle and AllShare Play file formats Subtitle External -- MPEG-4 timed text (.ttxt) -- SAMI (.smi) -- SubRip (.srt) -- SubViewer (.sub) -- Micro DVD (.sub or .txt) -- SubStation Alpha (.ssa) -- Advanced SubStation Alpha (.ass) - Samsung UN60ES8000F | User Manual Ver.1.0 (English) - Page 646
-- Powerdivx (.psb) Internal -- Xsub Container: AVI -- SubStation Alpha Container: MKV -- Advanced SubStation Alpha Container: MKV -- SubRip Container: MKV -- MPEG-4 timed text - Samsung UN60ES8000F | User Manual Ver.1.0 (English) - Page 647
image resolutions File Extension *.jpg *.png *.bmp *.mpo Type JPG PNG BMP MPO Resolution 15360 x 8640 1920 x 1080 1920 x 1080 15360 x 8640 Supported music file formats File Extension *.mp3 *.m4a *.mpa *.aac *.3ga *.flac *.ogg *.wma Type MP3 MPEG4 FLAC OGG WMA Codec MPEG1 Audio Layer 3 AAC - Samsung UN60ES8000F | User Manual Ver.1.0 (English) - Page 648
Video Codec File Extension *.avi *.mkv *.asf *.wmv *.mp4 *.mov *.3gp *.vro *.mpg *.mpeg *.ts *.tp *.trp *.mov *.flv *.vob *.svi *.m2ts *.mts *.divx *.webm Container AVI MKV ASF MP4 3GP VRO VOB PS TS WebM Video Codec DIVX 3.11/4.x/5.x/6.1 MPEG4 SP/ASP H.264 BP/MP/HP Motion JPEG Window Media Video - Samsung UN60ES8000F | User Manual Ver.1.0 (English) - Page 649
/ frame rate above the compatible Frame/sec listed in the table above. NNIf the Index Table is in error, the Seek (Jump) function is not supported. NNWhen you play video over a network connection, the video may not be played smoothly. - Samsung UN60ES8000F | User Manual Ver.1.0 (English) - Page 650
take longer to appear if the video's bit rate exceeds 10Mbps. NNSome USB/digital camera devices may not be compatible with the player. Video decoder ●● Supports up to H.264, Level 4.1 ●● H.264 FMO / ASO / RS, VC1 SP / MP / AP L4 and AVCHD are not supported. ●● For all Video codecs except MVC, VP8, - Samsung UN60ES8000F | User Manual Ver.1.0 (English) - Page 651
VP6: -- Below 1280 x 720: 60 frame max -- Above 1280 x 720: 30 frame max -- GMC 2 over is not supported. ●● Supports only SVAF Top/Bottom and Side by Side. ●● Supports only BD MVC Spec. Audio decoder ●● WMA 10 Pro supports up to 5.1 channel. WMA lossless audio is not supported. ●● QCELP, AMR NB/WB - Samsung UN60ES8000F | User Manual Ver.1.0 (English) - Page 652
●● If Vorbis is only in Webm container, supports up to 2 channel. - Samsung UN60ES8000F | User Manual Ver.1.0 (English) - Page 653
Anti-theft Kensington Lock 1 A Kensington Lock is a device you can use to physically fix your TV in place when using it in a public place. You wrap the Kensington Lock's cable around a large, immobile object and - Samsung UN60ES8000F | User Manual Ver.1.0 (English) - Page 654
on the back of the TV. The appearance and locking method may differ from the illustration below depending on the manufacturer. Refer to the manual provided with the Kensington Lock for additional information on proper use. The Kensington Lock is not supplied by Samsung. NNPlease find a "K" icon on - Samsung UN60ES8000F | User Manual Ver.1.0 (English) - Page 655
the TV. The Kensington slot is beside the "K" icon. To lock the product, follow these steps: 1. Wrap the Kensington Lock cable around a large, stationary object such as - Samsung UN60ES8000F | User Manual Ver.1.0 (English) - Page 656
4. Lock the lock. NNThese are general instructions. For exact instructions, see the User manual supplied with the locking device. NNThe locking device has to be purchased separately. NNThe location of the Kensington slot may be different depending on the TV model. - Samsung UN60ES8000F | User Manual Ver.1.0 (English) - Page 657
Licenses DivX Certified® to play DivX® video up to HD 1080p, including premium content. DivX®, DivX Certified® and associated logos are trademarks of Rovi Corporation or its subsidiaries and are used under license. ABOUT DIVX VIDEO: DivX® is a digital video format created by DivX, LLC, a subsidiary - Samsung UN60ES8000F | User Manual Ver.1.0 (English) - Page 658
Manufactured under license from DTS Licensing Limited. DTS, the Symbol, and DTS and the Symbol together are registered trademarks of DTS, Inc. © 2011 DTS, Inc. All Rights Reserved. The terms HDMI and HDMI High-Definition Multimedia Interface, and the HDMI Logo are trademarks or registered trademarks
-
 1
1 -
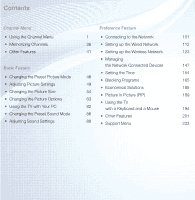 2
2 -
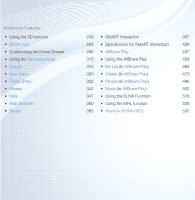 3
3 -
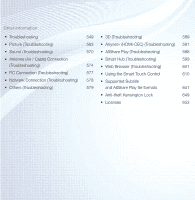 4
4 -
 5
5 -
 6
6 -
 7
7 -
8
-
9
-
10
-
11
-
12
-
13
-
14
-
15
-
16
-
17
-
18
-
19
-
20
-
21
-
22
-
23
-
24
-
25
-
26
-
27
-
28
-
29
-
30
-
31
-
32
-
33
-
34
-
35
-
36
-
37
-
38
-
39
-
40
-
41
-
42
-
43
-
44
-
45
-
46
-
47
-
48
-
49
-
50
-
51
-
52
-
53
-
54
-
55
-
56
-
57
-
58
-
59
-
60
-
61
-
62
-
63
-
64
-
65
-
66
-
67
-
68
-
69
-
70
-
71
-
72
-
73
-
74
-
75
-
76
-
77
-
78
-
79
-
80
-
81
-
82
-
83
-
84
-
85
-
86
-
87
-
88
-
89
-
90
-
91
-
92
-
93
-
94
-
95
-
96
-
97
-
98
-
99
-
100
-
101
-
102
-
103
-
104
-
105
-
106
-
107
-
108
-
109
-
110
-
111
-
112
-
113
-
114
-
115
-
116
-
117
-
118
-
119
-
120
-
121
-
122
-
123
-
124
-
125
-
126
-
127
-
128
-
129
-
130
-
131
-
132
-
133
-
134
-
135
-
136
-
137
-
138
-
139
-
140
-
141
-
142
-
143
-
144
-
145
-
146
-
147
-
148
-
149
-
150
-
151
-
152
-
153
-
154
-
155
-
156
-
157
-
158
-
159
-
160
-
161
-
162
-
163
-
164
-
165
-
166
-
167
-
168
-
169
-
170
-
171
-
172
-
173
-
174
-
175
-
176
-
177
-
178
-
179
-
180
-
181
-
182
-
183
-
184
-
185
-
186
-
187
-
188
-
189
-
190
-
191
-
192
-
193
-
194
-
195
-
196
-
197
-
198
-
199
-
200
-
201
-
202
-
203
-
204
-
205
-
206
-
207
-
208
-
209
-
210
-
211
-
212
-
213
-
214
-
215
-
216
-
217
-
218
-
219
-
220
-
221
-
222
-
223
-
224
-
225
-
226
-
227
-
228
-
229
-
230
-
231
-
232
-
233
-
234
-
235
-
236
-
237
-
238
-
239
-
240
-
241
-
242
-
243
-
244
-
245
-
246
-
247
-
248
-
249
-
250
-
251
-
252
-
253
-
254
-
255
-
256
-
257
-
258
-
259
-
260
-
261
-
262
-
263
-
264
-
265
-
266
-
267
-
268
-
269
-
270
-
271
-
272
-
273
-
274
-
275
-
276
-
277
-
278
-
279
-
280
-
281
-
282
-
283
-
284
-
285
-
286
-
287
-
288
-
289
-
290
-
291
-
292
-
293
-
294
-
295
-
296
-
297
-
298
-
299
-
300
-
301
-
302
-
303
-
304
-
305
-
306
-
307
-
308
-
309
-
310
-
311
-
312
-
313
-
314
-
315
-
316
-
317
-
318
-
319
-
320
-
321
-
322
-
323
-
324
-
325
-
326
-
327
-
328
-
329
-
330
-
331
-
332
-
333
-
334
-
335
-
336
-
337
-
338
-
339
-
340
-
341
-
342
-
343
-
344
-
345
-
346
-
347
-
348
-
349
-
350
-
351
-
352
-
353
-
354
-
355
-
356
-
357
-
358
-
359
-
360
-
361
-
362
-
363
-
364
-
365
-
366
-
367
-
368
-
369
-
370
-
371
-
372
-
373
-
374
-
375
-
376
-
377
-
378
-
379
-
380
-
381
-
382
-
383
-
384
-
385
-
386
-
387
-
388
-
389
-
390
-
391
-
392
-
393
-
394
-
395
-
396
-
397
-
398
-
399
-
400
-
401
-
402
-
403
-
404
-
405
-
406
-
407
-
408
-
409
-
410
-
411
-
412
-
413
-
414
-
415
-
416
-
417
-
418
-
419
-
420
-
421
-
422
-
423
-
424
-
425
-
426
-
427
-
428
-
429
-
430
-
431
-
432
-
433
-
434
-
435
-
436
-
437
-
438
-
439
-
440
-
441
-
442
-
443
-
444
-
445
-
446
-
447
-
448
-
449
-
450
-
451
-
452
-
453
-
454
-
455
-
456
-
457
-
458
-
459
-
460
-
461
-
462
-
463
-
464
-
465
-
466
-
467
-
468
-
469
-
470
-
471
-
472
-
473
-
474
-
475
-
476
-
477
-
478
-
479
-
480
-
481
-
482
-
483
-
484
-
485
-
486
-
487
-
488
-
489
-
490
-
491
-
492
-
493
-
494
-
495
-
496
-
497
-
498
-
499
-
500
-
501
-
502
-
503
-
504
-
505
-
506
-
507
-
508
-
509
-
510
-
511
-
512
-
513
-
514
-
515
-
516
-
517
-
518
-
519
-
520
-
521
-
522
-
523
-
524
-
525
-
526
-
527
-
528
-
529
-
530
-
531
-
532
-
533
-
534
-
535
-
536
-
537
-
538
-
539
-
540
-
541
-
542
-
543
-
544
-
545
-
546
-
547
-
548
-
549
-
550
-
551
-
552
-
553
-
554
-
555
-
556
-
557
-
558
-
559
-
560
-
561
-
562
-
563
-
564
-
565
-
566
-
567
-
568
-
569
-
570
-
571
-
572
-
573
-
574
-
575
-
576
-
577
-
578
-
579
-
580
-
581
-
582
-
583
-
584
-
585
-
586
-
587
-
588
-
589
-
590
-
591
-
592
-
593
-
594
-
595
-
596
-
597
-
598
-
599
-
600
-
601
-
602
-
603
-
604
-
605
-
606
-
607
-
608
-
609
-
610
-
611
-
612
-
613
-
614
-
615
-
616
-
617
-
618
-
619
-
620
-
621
-
622
-
623
-
624
-
625
-
626
-
627
-
628
-
629
-
630
-
631
-
632
-
633
-
634
-
635
-
636
-
637
-
638
-
639
-
640
-
641
-
642
-
643
-
644
-
645
-
646
-
647
-
648
-
649
-
650
-
651
-
652
-
653
-
654
-
655
-
656
-
657
-
658
 |
 |

E-MANUAL
Thank you for purchasing this Samsung product.
To receive more complete service, please register
your product at
www.samsung.com/register
Model______________ Serial No.______________