Sanyo DP55441 Owners Manual
Sanyo DP55441 Manual
 |
View all Sanyo DP55441 manuals
Add to My Manuals
Save this manual to your list of manuals |
Sanyo DP55441 manual content summary:
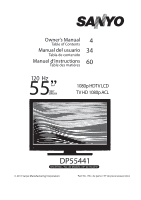
- Sanyo DP55441 | Owners Manual - Page 1
- Sanyo DP55441 | Owners Manual - Page 2
CO U RECYC IN F O ee NYO TE EVI I N c e 9 e ca g CO TIE E MP R DE MER URIO DE E H R O RECIC AJE DE TE EVISORES S NYO ee c ec 9 ee CO JT E e eq re e a e 70 - Sanyo DP55441 | Owners Manual - Page 3
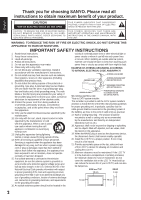
THE OWNER'S MANUAL WITH THIS UNIT. WARNING: TO REDUCE THE RISK OF FIRE OR ELECTRIC SHOCK, DO NOT EXPOSE THIS APPLIANCE TO RAIN OR MOISTURE. IMPORTANT SAFETY INSTRUCTIONS 1. Read these instructions. vicinity of overhead power lines or other electrical light or 2. Keep these instructions. power - Sanyo DP55441 | Owners Manual - Page 4
." This symbol on the nameplate means the product is Listed by Intertek Testing Services Taiwan Ltd. It is designed and manufactured to meet rigid U.L. safety standards against risk of fire, casualty and electrical hazards. PROTECTING THE LCD SCREEN The screen can be damaged if it is not maintained - Sanyo DP55441 | Owners Manual - Page 5
SIGNAL CONNECTIONS-HDMI TO HDMI.......12 DVI TO HDMI 12 DIGITAL AUDIO 12 AUDIO OUT JACKS 12 PC CONNECTIONS 13 PC MONITOR OPERATION 13 SPORTS MODE 14 ON-SCREEN MENU OPERATION 15 MENU NAVIGATION MAP 15 CHANNEL ADJUSTMENT 15 CHANNEL LIST OPERATION 16 PARENT ADJUSTMENT 17 PICTURE/ AUDIO - Sanyo DP55441 | Owners Manual - Page 6
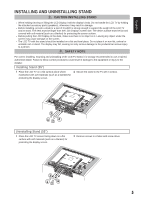
with soft materials (such as a blanket) for protecting the display screen. 3 12 4 Uninstalling Stand (55") 1 Place the LCD TV screen facing down on a flat surface with soft materials (such as a blanket) for protecting the display screen. 2 Remove screws in 4 holes with screw driver. 3 12 4 5 - Sanyo DP55441 | Owners Manual - Page 7
kit. NOTE: 1. Wall Mounting kit is not supplied. 2. Wall mounting kit shall be able to sustain at least 3 times of set weight. VESA standard interface: TV 200 x 400mm Wall Mounting Inserts Mounting screws measurements: 55" TV M8 Diameter, Length - 13mm (min.); 16mm (max.) Wall • (60mm) 6 - Sanyo DP55441 | Owners Manual - Page 8
from a direct Cable TV connection. NOTES: You must use the on-screen MENU to Search for Clear QAM Cable channels. (see page 11) For the best picture, connect your Cable box or Satellite receiver to HDMI or component (VIDEO3) jacks. This HDTV can receive ANY unscrambled RF signal being broadcast. 7 - Sanyo DP55441 | Owners Manual - Page 9
INPUT (INPUT1, INPUT2 or INPUT3), PAGE 12 - A digital AV interface that accepts uncompressed video signals for the best picture. This HDMI input supports HDCP copy protection and allows transmission of copy-protected digital contents. PC AUDIO INPUT, PAGE 12, 20 - This terminal is not only using - Sanyo DP55441 | Owners Manual - Page 10
current channel on your HDTV screen.( only for digital channels). INFO Button- Press to display channel information banner. Digital Banner may contain: Channel Number, CC State, Channel Title, Video Resolution, Video Ratio, Signal Strength, Digital Sound information and Program Rating. Analog Banner - Sanyo DP55441 | Owners Manual - Page 11
such as a VCR. (Cables are not supplied) 1 Connect an AV cable to the VIDEO1 or VIDEO2 jack on the HDTV and to your analog AV equipment as shown. Match the connector colors to jack colors. 2 Press the INPUT button to step through the signal inputs to select Video1 or Video2. 3 Press the INPUT - Sanyo DP55441 | Owners Manual - Page 12
the POWER button, (Follow the on-screen instructions). To 120V AC outlet. INITIAL setup 7 Use the CURSOR ▲ and ▼ buttons to highlight Store or Home. Press the OK button. TVs will enter INITIAL CHANNEL SCAN automatically. Store : This mode is for the retail display setup. Home : This mode qualifies - Sanyo DP55441 | Owners Manual - Page 13
is a digital AV interface that accepts uncompressed video signals for the best picture quality possible. It supports HDCP copy protection and allows transmission of copy-protected digital content. The signal can also include Dolby® Digital or PCM audio when available. 1 Connect the HDMI input and - Sanyo DP55441 | Owners Manual - Page 14
the HDTV VOLUME + / - buttons. 3 Select Auto Adjustment from the PC Setup Menu. NOTE: Power on the HDTV and any other peripheral equipment before powering on the computer. PC MENU NAVIGATION MAP PC MENU- AUTO ADJUSTMENTS OPERATION 1 Use the CURSOR ▲ and ▼ buttons on the remote control to highlight - Sanyo DP55441 | Owners Manual - Page 15
MODE By simply pressing the " SPORTS" button on the remote control, the TV will automatically optimize both picture and sound settings for the programs shown. ■■ Off ■■ Football −− For golf, football programs etc. −− Fresh greenness of the lawn −− Enfolding cheering voices, ball hitting sounds - Sanyo DP55441 | Owners Manual - Page 16
English ON-SCREEN MENU OPERATION MENU NAVIGATION MAP MAIN MENU SUB-MENU OPTIONS CHANNEL ADJUSTMENT SIGNAL SOURCE OPERATION There are QAM) digital cable channels. 1 Press the MENU button on the remote control to display the Main menu. Use the CURSOR ◄ and ► buttons to highlight CHANNEL. Press - Sanyo DP55441 | Owners Manual - Page 17
English ON-SCREEN MENU OPERATION (CONTINUED) CHANNEL LIST OPERATION The Channel List is a database of active channels you can scan through using the CURSOR ▲ and ▼ buttons. Customize it by deleting or adding channels. 1 Press the MENU button on the remote control to display the Main menu. 2 Use - Sanyo DP55441 | Owners Manual - Page 18
This SANYO television is equipped with an electronic V-Chip to interpret MPAA (Motion Picture Association of America) and TV Parental Guidelines rating codes. When these codes are detected, the HDTV will automatically display or block the program, depending upon choices you make when setting up - Sanyo DP55441 | Owners Manual - Page 19
SCREEN MENU OPERATION (CONTINUED) MPAA OPERATION MPAA- Decides which kind of classified movie rating signal the CURSOR ▲ and ▼ buttons to select the setting you want to adjust and press the OK antenna. When the HDTV detects compatible RRT5 ). NOTE : If current program stream is without RRT5 data, - Sanyo DP55441 | Owners Manual - Page 20
the OK button. NOTE : Press the MENU button to return to the PICTURE mode menu. AUDIO SOUND MODE OPERATION 1 Press the MENU button on the remote control to display the Main menu. 2 Use the CURSOR ◄ and ► buttons to highlight AUDIO. Press the OK button. 3 Use the CURSOR ▲ and ▼ buttons to select - Sanyo DP55441 | Owners Manual - Page 21
will be no sound output. Analog- During this setting, the audio input signal will be fixed to PC AUDIO INPUT port. NOTE : Even though the HDMI is pure HDMI type, the audio still is selected from the PC AUDIO INPUT port. 1 Press the MENU button on the remote control to display the Main menu. 2 Use - Sanyo DP55441 | Owners Manual - Page 22
button. NOTE: • The initial setting of Light sensor in the Home mode is High. • Change this setting to Middle, Low or Off if a picture is too dark in your home. OSD DISPLAY TIME OPERATION OSD Display Time 1 Press the MENU button on the remote control to display the Main menu. 2 Use the CURSOR ◄ and - Sanyo DP55441 | Owners Manual - Page 23
location, U.S.A. of Eastern, Central, Mountain, Pacific, Alaska, and Hawaii, for your choice of setting all displayed time zone on all ON- Screen Menu. 1 Press the MENU button on the remote control to display the Main menu. 2 Use the CURSOR ◄ and ► buttons to highlight SYSTEM. Press the OK button - Sanyo DP55441 | Owners Manual - Page 24
CC- Choose from eight types of captions for Analog TV signal for your choice of setting the desired caption type to be displayed with Analog TV signal programs on your HDTV. 1 Press the MENU button on the remote control to display the Main menu. 2 Use the CURSOR ◄ and ► buttons to highlight SYSTEM - Sanyo DP55441 | Owners Manual - Page 25
CC STYLE SETTING OPERATION CC Style Setting- Caption is a textual information transmitted along with the picture and sound. Turning captioning ON causes the HDTV to open these captions (Digital or Analog) and superimpose them on the screen (Local broadcasters decide which caption signals to transmit - Sanyo DP55441 | Owners Manual - Page 26
buttons can scroll over the screen only in Zoom mode(x2,x4) English MEDIA BROWSER OPERATION 1 Press the INPUT button on the remote control and use the CURSOR ▲ EXIT button can minify the image and press exit again can to original size. 3 If the JPEG file more than 15 files. Use the CURSOR - Sanyo DP55441 | Owners Manual - Page 27
(for Slideshow function) OPERATION 1 Use the CURSOR ▲ and ▼ buttons to highlight Settings. Press the OK button. 2 Use the CURSOR ▲ and ▼ buttons to highlight Slideshow Interval. . • Use the CURSOR ◄ and ► buttons to view Next or Previous picture . • Use the INFO button to close OSD information 26 - Sanyo DP55441 | Owners Manual - Page 28
x Height): x1/64 Symbol Number: 0 1 2 3 4 5 6 7 8 9 Character code supported in file system library Alphabet: TV directly. • Do not use a USB Hub. • You must obtain any required permission from copyright owners to use copyright content. SANYO Udi idendebit omnistia volum consequam qui acid - Sanyo DP55441 | Owners Manual - Page 29
on the remote control to change settings. 7, 11, 15 - 16 9, 23 9, 21 Poor Picture/ Sound (watching Analog) "No Signal" message appears on screen Pixilation of Digital image Cannot select or scan some channels No Cable channels above number 13 • Check if the program is in color. • Try a different - Sanyo DP55441 | Owners Manual - Page 30
to 90% (non-condensing) ■■ Specifications are subject to change without notice. ■■ The On-Screen Menu and figures in this manual may differ slightly from the product. Input terminals VGA 1 PC AUDIO JACK 1 HDMI/DVI 3 ANT 1 Video 1 Video 2/3 USB AV AV Audio YPbPr YPbPr Audio 1 1 2 2 1 29 - Sanyo DP55441 | Owners Manual - Page 31
No Support" caution message will display. But in some case, the LCD TV will still display the PC signal though the signal mode doesn't exist on the list above. Under this condition, the display position may not correct and the quality may not be admitted also. When input signal is digital from HDMI - Sanyo DP55441 | Owners Manual - Page 32
-
 1
1 -
 2
2 -
 3
3 -
 4
4 -
 5
5 -
 6
6 -
 7
7 -
8
-
9
-
10
-
11
-
12
-
13
-
14
-
15
-
16
-
17
-
18
-
19
-
20
-
21
-
22
-
23
-
24
-
25
-
26
-
27
-
28
-
29
-
30
-
31
-
32
 |
 |
