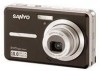
Sanyo E1075 VPC-E1075 Owners Manual English
Sanyo E1075 - VPC Digital Camera Manual
 |
View all Sanyo E1075 manuals
Add to My Manuals
Save this manual to your list of manuals |
Sanyo E1075 manual content summary:
- Sanyo E1075 | VPC-E1075 Owners Manual English - Page 1
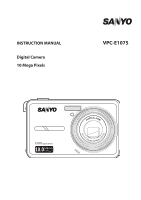
INSTRUCTION MANUAL Digital Camera 10 Mega Pixels VPC-E1075 - Sanyo E1075 | VPC-E1075 Owners Manual English - Page 2
- Sanyo E1075 | VPC-E1075 Owners Manual English - Page 3
Manual This manual is designed to assist you in using your new digital camera. All information presented is as accurate as possible but is subject to change without notice. Copyright This manual instructions, turning the equipment off and on, the user shielded cable to warranty and service agreement. - Sanyo E1075 | VPC-E1075 Owners Manual English - Page 4
• Turn off the camera before installing or removing the battery. • Use only the type of battery. Using other types of battery may damage the equipment and invalidate the warranty. • Inserting the battery upside down can cause damage to the product and possibly start a fire. • Download all - Sanyo E1075 | VPC-E1075 Owners Manual English - Page 5
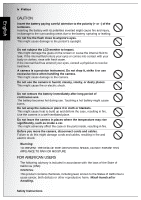
the reach of children. Swallowing battery might cause poisoning. If the battery is accidentally swallowed, immediately consult a physician. Do not use the camera while you are walking, driving or riding a vehicle. This might cause you to fall over or result in traffic accident. Safety Instructions - Sanyo E1075 | VPC-E1075 Owners Manual English - Page 6
a car. This might adversely affect the case or the parts inside, resulting in fire. Before you move the camera, disconnect cords and cables. Failure to do this might damage cords and cables, resulting in fire and electric shock. Warning: TO PREVENT THE RISK OF FIRE OR ELECTRIC SHOCK, DO NOT EXPOSE - Sanyo E1075 | VPC-E1075 Owners Manual English - Page 7
radio or television reception, which can be determined by turning the equipment off and on, the user is encouraged to try to correct the interference by the user's authority to operate the equipment. FOR CANADIAN USERS This Class B digital apparatus complies with Canadian ICES-003 Safety Instructions - Sanyo E1075 | VPC-E1075 Owners Manual English - Page 8
SANYO FISHER Sales (Europe) GmbH Stahlgruberring 4, D-81829 Munich, Germany Symbols used in this manual Points giving some extended instructions or special points to pay attention to. You many find the answers to questions or problems concerning camera operation in the sections "Troubleshooting - Sanyo E1075 | VPC-E1075 Owners Manual English - Page 9
HOME OR OFFICE USE Declaration of Conformity Model number: VPC-E1075 Trade Name: SANYO Responsible party: SANYO FISHER COMPANY Address: 21605 Plummer Street Chatsworth, California . Canadian ICES-003 Information This class B digital apparatus complies with Canadian ICES-003. Safety Instructions - Sanyo E1075 | VPC-E1075 Owners Manual English - Page 10
are subject to change without notice. This includes primary product specifications, software, software drivers, and user's manual. This User Manual is a general reference guide for the product. • The product and accessories that come with your camera may be different from those described in this - Sanyo E1075 | VPC-E1075 Owners Manual English - Page 11
Recognition ...ii Safety and Handling Precautions ii Camera Information ...ii Battery Information ...ii Safety Instructions iii WARNING ...iii CAUTION ...iv FOR AMERICAN USERS iv FOR CANADIAN USERS v FOR EU USERS ...vi Symbols used in this manual vi FCC Information ...vii Declaration of - Sanyo E1075 | VPC-E1075 Owners Manual English - Page 12
English Charging the Battery 16 Turning On ...16 First Time Use 17 Getting Started 18 Taking your First Photo 18 Anti-Shake Function ...18 Using Macro Mode ...18 Setting the Flash - Sanyo E1075 | VPC-E1075 Owners Manual English - Page 13
...44 USB Mode ...44 Date Stamp ...45 Date and Time ...45 Language ...45 Image Storage ...46 Format ...46 Reset ...46 Voice Memo ...47 About ...47 PictBridge Print (PTP 47 Image Storage ...48 This Image ...49 Index Print ...50 DPOF Image ...50 All Images ...51 Specifications 52 Troubleshooting 56 - Sanyo E1075 | VPC-E1075 Owners Manual English - Page 14
English - Sanyo E1075 | VPC-E1075 Owners Manual English - Page 15
Check the contents of your camera package. It should contain: • Digital camera • USB/AV 3-in-1 cable • Wrist strap • One Li-ion battery • Battery charger and power cord • Camera pouch • Quick start guide for all regions • Bundled CD-ROM (Application Software and User's Manual for all regions) Main - Sanyo E1075 | VPC-E1075 Owners Manual English - Page 16
English 2 Introduction Camera Views Front View Wrist strap loop Back View LCD screen Top View Zoom Lens Power button 3X OPTICAL ZOOM ON / OFF Camera Views Flash Self-timer LED Zoom Lens Microphone Zoom button Playback button Menu button 4-way navigation buttons OK button Scene button Shutter - Sanyo E1075 | VPC-E1075 Owners Manual English - Page 17
Left / Right View Wrist strap loop Battery/SD card compartment Speaker USB/AV port DC-in port LED Indicators LED Power/Flash LED LED Status Off Blue (steady) Blue (blinking) Off Self-timer LED Red (blinking) (10 sec) Red (blinking) (2 sec) Camera Status Power Off. Ready to take picture - Sanyo E1075 | VPC-E1075 Owners Manual English - Page 18
English 4 Introduction Camera Buttons Navigation Buttons The 4-way navigation buttons and the OK to play and pause the audio playback • Press to stop the voice memo playback 4. In USB mode: • MSDC: N/A • PTP: Press to confirm the selection 5. In Video mode: • Press to enable/disable the - Sanyo E1075 | VPC-E1075 Owners Manual English - Page 19
up in zoom in mode • Press to move up in the thumbnail display • Press to delete images 4. In USB mode: • MSDC: N/A • PTP: Press to scroll up through a menu Right/Self-timer/ Burst mode 1. during Pause mode 5. In USB mode: • MSDC: N/A • PTP: Press to select the next image in This Image submenu - Sanyo E1075 | VPC-E1075 Owners Manual English - Page 20
smile detection,press again to turn off extra icons on the LCD screen,then press to turn all icons back on the turn all icons back on the LCD screen 4. In Playback mode: • Press to pan down in zoom in mode • Press to move down in the thumbnail display • Press to show the file information 5. In USB - Sanyo E1075 | VPC-E1075 Owners Manual English - Page 21
English Introduction 7 The Scene Button The camera is equipped with a convenient SCENE button that takes you to the Scene Menu where you can scroll between Scroll to Snow mode. Sunset Scroll to Sunset mode. Fireworks Scroll to Fireworks mode. Beach Scroll to Beach mode. Camera Buttons - Sanyo E1075 | VPC-E1075 Owners Manual English - Page 22
. Scroll to Audio mode. Function Press to display the Menu options Press to review photos/videos clips saved in the internal memory or on the memory card In Capture mode: • Press to zoom in on subject to be taken In saved photos • Press to view thumbnails of all current saved media Camera Buttons - Sanyo E1075 | VPC-E1075 Owners Manual English - Page 23
English Introduction 9 LCD screen The high resolution 2.7" TFT LCD screen shows all important information regarding camera settings as well as the visual image for your photo or video. Use the SCENE button to switch between screen modes. Press the Down / Screen / - Sanyo E1075 | VPC-E1075 Owners Manual English - Page 24
English 10 Introduction No. Name 1 Scene indicator Auto Scene P-Mode Av (Aperture Priority) Tv (Shutter Priority) Panorama Video Sport Landscape Night Landscape Portrait Night Portrait Museum Snow Sunset Fireworks Beach Party Foliage Aquarium Kids & Pets LCD screen Icon - Sanyo E1075 | VPC-E1075 Owners Manual English - Page 25
Copy Backlight Audio 2 Image Resolution 10M 8.9M 3:2 8M 5M 3M 2.1M 16:9 2M 3 Image Quality VGA Best Better 4 Flash Good Auto Flash Flash Off 5 Self-timer/ Burst mode Fill Flash Anti Red-eye Self Timer 6 AEB Burst Mode M-Burst AEB Bracket Exit Introduction 11 10 Seconds 2 Seconds - Sanyo E1075 | VPC-E1075 Owners Manual English - Page 26
Mode 8 Image Counter Capture Mode Video Mode 9 Memory Interface SD Card Internal Memory 10 Date Stamp - 11 Anti-Shake - 12 Zoom Bar Quantity Time - 13 EV Compensation - 14 Aperture Value - 15 Shutter Speed - 16 Battery Indicator Battery Full Battery Low 17 AF Frame 18 ISO Speed - Sanyo E1075 | VPC-E1075 Owners Manual English - Page 27
19 Focus Zone 20 Continuous AF 21 Sharpness 22 Contrast 23 Saturation 24 White Balance 25 AE Metering Multi-Zone Center Selected Area High Normal Low High Normal Low High Normal Low Auto Sunny Tungsten Fluorescent Cloudy Matrix Spot Average Introduction 13 LCD screen English - Sanyo E1075 | VPC-E1075 Owners Manual English - Page 28
14 Introduction 26 Camera Steady Warning - English LCD screen - Sanyo E1075 | VPC-E1075 Owners Manual English - Page 29
and pull tight to attach the strap to the camera. Inserting the Battery Follow these instructions to insert one Li-ion battery into the battery compartment. 1. Open the battery compartment on the left of the camera. 2. Insert the battery into the compartment observing the correct polarity. (Label - Sanyo E1075 | VPC-E1075 Owners Manual English - Page 30
Battery Insert the battery into the battery charger as shown (Label side down). Connect the power supply to the charging unit and the mains supply. Turning On Press and hold the Power button to turn on the camera. To turn off the camera, press the Power button again. Inserting an SD/MMC Memory Card - Sanyo E1075 | VPC-E1075 Owners Manual English - Page 31
LCD screen. Camera Setup 17 If the camera is turned on for the first time, the Language menu pops up automatically after powering on the camera. Press the Date and Time is reset (when running out the battery and not in use for a long period), the Date and Time setup screen displays automatically. - Sanyo E1075 | VPC-E1075 Owners Manual English - Page 32
Getting Started Getting Started Now that you are familiar with the layout of your camera, you are ready to start taking photos and movies. Taking your First Photo Taking a photo with the camera is very simple. Turn the camera on and press the SCENE button to access the Auto mode. 1. Frame the shot - Sanyo E1075 | VPC-E1075 Owners Manual English - Page 33
red-eye effect. Using the Zoom in/out Function The camera comes equipped with 3x optical zoom and 5x digital zoom that allows you to zoom in on your subject. . Note: : Burst Mode Take photos until all free memory space is used. : Multi-Burst Mode 16 photos continuously by 1 press of the - Sanyo E1075 | VPC-E1075 Owners Manual English - Page 34
English 20 Getting Started Using the Av Mode 8M 9999 Aperture priority mode allows you to manually select the aperture and the camera automatically decides adequate exposure time. Use large aperture to get images with soft background, small aperture to get images with clear depth of field (DOF - Sanyo E1075 | VPC-E1075 Owners Manual English - Page 35
the Shutter button once. For example, when the current EV compensation value is +0.3 EV and the AEB bracket interval value is set to ±0.3, the camera takes shots of the same scene with 3 varying levels of exposure: 0 EV, +0.3 EV, and -0.3 EV. This function is only available in Auto, P-Mode, Av - Sanyo E1075 | VPC-E1075 Owners Manual English - Page 36
English 22 Getting Started Setting the Scene Mode The camera supports various preset modes for shooting in different environments and conditions. Each setting is configured automatically by the camera. To select scene modes: Press the SCENE button to access Scene menu which displays the Scene - Sanyo E1075 | VPC-E1075 Owners Manual English - Page 37
/Screen navigation button in most capture modes. When the subject's face/ smile is detected, the white bracket appears to track faces/ smiles while the camera or people are moving. When the Shutter button is pressed halfway, the green focus frames appear on the LCD screen. 1/125 F3.5 Then the - Sanyo E1075 | VPC-E1075 Owners Manual English - Page 38
Playback button to enter Playback mode to view the result. Recording your First Video You can also record video clips with the camera. To record a video clip: 1. Turn the camera on and press the SCENE button. Use the 4-way navigation buttons to locate Video mode. Press the OK button to select - Sanyo E1075 | VPC-E1075 Owners Manual English - Page 39
English Getting Started 25 4. In playback mode (press the button), press the OK button to playback the audio. Press the Up/Flash/Delete recording if needed. navigation button to delete the Recording Voice Memos The voice memo should be activated (ON) on the VOICE MEMO submenu of SETUP menu at - Sanyo E1075 | VPC-E1075 Owners Manual English - Page 40
English 26 Capture Settings Capture Settings This section describes the various settings you can modify to get better results when taking photos and video clips. The Capture Menu To access the Capture menu: 1. Press the SCENE button. Use the 4-way navigation buttons to select the capture mode - Sanyo E1075 | VPC-E1075 Owners Manual English - Page 41
the compression ratio of the JPG. The higher image quality, more memory space is required. Use the Up/Down navigation buttons to select from Auto Mode The Focus Zone setting allows you to select the number of zones the camera will focus on when taking a photo. Use the Up/ Down navigation buttons to - Sanyo E1075 | VPC-E1075 Owners Manual English - Page 42
1/30 Sec (default) • 1/15 Sec • 1/7.5 Sec 1/30 SEC 1/15 SEC 1/7.5 SEC M-BURST INTERVAL White Balance The White Balance setting allows you to adjust the camera setting according to the ambient white light when shooting. White balance represents the degree of coolness of the light. If the light has - Sanyo E1075 | VPC-E1075 Owners Manual English - Page 43
for evaluating 16 zones of objects with intelligent weighting in the frame. AE METERING • Spot: Camera metering is set for the brightness of a single object in the center of the frame. • Average: Camera metering is set for the average brightness of objects in the frame. Color The Color setting - Sanyo E1075 | VPC-E1075 Owners Manual English - Page 44
English 30 Capture Settings Contrast The Contrast setting allows you to adjust the contrast of your photos. Use the Up/Down navigation buttons to select from the options. 3 contrast settings are available: • High • Normal (default) • Low HIGH NORMAL LOW CONTRAST Setup See "The Setup Menu" on page - Sanyo E1075 | VPC-E1075 Owners Manual English - Page 45
English Capture Settings 31 Contrast See "Contrast" on page 30 for more details on the setup menu options. Setup See "The Setup Menu" on page 42 for more details on the setup menu options . Note: All the options in the Capture Menu may vary according to the different modes. Video Capture Menu - Sanyo E1075 | VPC-E1075 Owners Manual English - Page 46
English 32 Photo & Video Playback Photo & Video Playback Playback Mode Display Press the Down navigation button at Playback mode. Photo Playback 1 2 34 5 6 78 10M 25 24 F3.5 23 1/125 22 -1.0EV 21 20 19 18 17 1/140 9 SANY0123.JPG 10 2008/01/01 00:00:00 11 16 15 14 13 12 Video Playback 1 - Sanyo E1075 | VPC-E1075 Owners Manual English - Page 47
English No. Name 1 Playback mode 2 Image resolution 3 Protect 4 Sharpness 5 Flash mode 6 Color mode 7 Quantity 8 SD card / Internal memory 9 Histogram 10 File Name 11 Date and Time 12 Next 13 Battery status 14 Previous 15 Voice memo 16 Mode icons 17 ISO Speed 18 Contrast Photo & Video - Sanyo E1075 | VPC-E1075 Owners Manual English - Page 48
1. Press the Playback button . The most recent photo or video clip is displayed. 2. Use the Left/Right navigation buttons to scroll through photos. 3. When reviewing a multi-burst image, it will be displayed from the 1st frame to the 16th frame at 2 frames per second like a slideshow. 4. To stop the - Sanyo E1075 | VPC-E1075 Owners Manual English - Page 49
saved image with voice memo. To stop a voice memo while reviewing an image, press the OK button. To skip to previous/ USB/AV 3-in-1 cable to the port on the camera. 3. Connect the other end of the cable to the TV's AV input sockets. Video Audio ON / OFF 3X OPTICAL ZOOM 4. The LCD screen turns - Sanyo E1075 | VPC-E1075 Owners Manual English - Page 50
Photo & Video Playback Zooming In/Out During Playback The camera's zoom feature can also be used during playback. This Photos/Videos The Delete function allows you to remove unwanted files stored on internal memory or a memory card. To delete a photo/video: 1. In Playback mode, press the Up/Flash - Sanyo E1075 | VPC-E1075 Owners Manual English - Page 51
English Photo & Video Playback 37 DPOF DPOF (Digital Print Order Format) allows you to specify the number of copies of a certain image that you want to print at a later date. Use this function to tag pictures stored in your memory card with print information. You can tag all pictures to be - Sanyo E1075 | VPC-E1075 Owners Manual English - Page 52
is VGA, this menu item is disabled in the Resize submenu. The ratio of the image (3:2 or 16:9) remains unchanged after resizing. • This function only supports native pictures • Cropped images cannot be resized • If there is not sufficient storage space, images cannot be resized • If the SD/MMC - Sanyo E1075 | VPC-E1075 Owners Manual English - Page 53
English Photo & Video Playback 39 Rotate The Rotate function allows you to change the orientation of a saved photo. To rotate an image: 1. Press the MENU button to select Rotate from the menu. Press the OK button to enter. 2. Press the Left/Right navigation buttons and OK the OK button to - Sanyo E1075 | VPC-E1075 Owners Manual English - Page 54
Images: Select to move all images to a memory card. • Exit: Select to exit to the main menu. Note: The Move function is only available when you choose internal memory as the storage media and an SD card has been inserted into the camera. Back to AUTO memory mode: 1. Press the MENU button. Select - Sanyo E1075 | VPC-E1075 Owners Manual English - Page 55
/Videos to your PC To transfer photos and videos to your PC: Connect the camera's cable. port to a free USB port on your PC using the USB ON / OFF 3X OPTICAL ZOOM The camera's internal memory and/or SD/MMC card appear as removable drives in the file manager. Copy the files from the drives - Sanyo E1075 | VPC-E1075 Owners Manual English - Page 56
, available in capture and playback modes, allows you to configure the camera's general settings according to your preferences. To access the setup menu: you to reset all file numbers assigned to each of the files on your camera. Press the OK button to confirm. Select RESET to reset or CONTINUE to - Sanyo E1075 | VPC-E1075 Owners Manual English - Page 57
English Digital Zoom The Digital Zoom setting allows you to turn the digital zoom function on or off. Press the OK button to confirm. Select ON to enable the function or OFF (default) to disable it. Camera Settings 43 ON OFF Quick View The Quick View setting allows you to view the photo that you - Sanyo E1075 | VPC-E1075 Owners Manual English - Page 58
Mode setting allows you to select the transfer method between your camera and your PC. 2 options are available: • PTP (PictBridge Print): When the camera is connected to a printer by a USB cable which supports Pictbridge, it can directly print images stored on the media. For details on PTP function - Sanyo E1075 | VPC-E1075 Owners Manual English - Page 59
MM DD YYYY: month-date-year format • DD MM YYYY: date-month-year format Camera Settings 45 OFF YYYY MM DD MM DD YYYY DD MM YYYY DATE STAMP Date and and Time setting allows you to set or adjust the date and time on your camera. To set or adjust the date and time: (Year) Press OK when done Press - Sanyo E1075 | VPC-E1075 Owners Manual English - Page 60
): All data on the SD/ MMC will be formatted. • Internal Memory: All data in the internal memory will be formatted. • Exit: Cancel format action. MEMORY CARD INTERNAL MEMORY EXIT FORMAT Reset The Reset setting allows you to reset the camera to the original factory default settings. This means all - Sanyo E1075 | VPC-E1075 Owners Manual English - Page 61
on the LCD screen.To enable PTP function, see "USB Mode" on page 44 for detailed information. If the USB mode is not set at PTP, an error message displays on the LCD screen. Connecting fail! When a PTP compliant printer is connected to the camera, the Printer Connecting screen displays on the LCD - Sanyo E1075 | VPC-E1075 Owners Manual English - Page 62
English 48 Camera Settings Use the Up/Down navigation buttons to select an option and press the OK button to confirm. 1/140 AUTO INTERNAL MEMORY IMAGE STORAGE Image Storage See "Image Storage" on page 46 for detailed information. PictBridge Print (PTP) - Sanyo E1075 | VPC-E1075 Owners Manual English - Page 63
to select THIS IMAGE from the options and press the OK button to confirm. Use the Left/Right navigation buttons to select previous/next file. Camera Settings 49 THIS IMAGE ALL IMAGES EXIT DPOF IMAGE 1/140 2. Press the Up/Down navigation buttons to set the number of copies. 1/140 Number of - Sanyo E1075 | VPC-E1075 Owners Manual English - Page 64
English 50 Camera Settings Index Print Use this function to print all images in index format. 1. Press the Up/Down navigation buttons to select the Paper size. • DEFAULT - Sanyo E1075 | VPC-E1075 Owners Manual English - Page 65
English All Images Print all images saved in memory. 1. Use the Up/Down navigation buttons to select ALL IMAGES from the options and press the OK button to confirm. 2. Press the Up/Down navigation buttons to set the number of copies. Camera Settings 51 10M THIS IMAGE ALL IMAGES EXIT DPOF 1/140 - Sanyo E1075 | VPC-E1075 Owners Manual English - Page 66
52 Specifications Specifications English General Optics Resolution / Image Type LCD Dimensions Exterior Casing Aperture Optical Zoom Digital Zoom Wide), 35 ~ 70 cm (Tele) Landscape: 0.1 m ~ infinity Support seamless AF in Auto/ P/ Av/ Tv/ Panorama/ Macro/ Foliage modes 2 ~ 1/2000 Sec. None 99% - Sanyo E1075 | VPC-E1075 Owners Manual English - Page 67
Specifications 53 English Camera Features Image Resolution Auto Power Off / Time Out Yes ISO Equivalent Auto, ISO80/100/200/400/800/ 1600 External Memory Support SD/MMC card from 32MB to 16GB Flash Modes Auto, Off, Fill, Red-eye Shooting Mode Auto, P-Mode, Av, Tv, Panorama, Video, Sport, - Sanyo E1075 | VPC-E1075 Owners Manual English - Page 68
Aperture Priority Shutter Priority Drive Mode Quick Delete Quick View Quick Review Self Timer Playback Magnify White Balance Video Out Stream to SD/MMC Speaker Movie File Format Movie Length Microphone Battery Battery Life Version 1.1 Yes Selectable +/-2.0EV with 0.3/0.4 EV steps High, Normal, Low - Sanyo E1075 | VPC-E1075 Owners Manual English - Page 69
Capability Standards Specifications 55 Camera Interface Host Platform Operating Temperature Language USB 2.0 high speed Windows 2000/XP/Vista 0°C ~ 40°C English, German, French, Italian, Spanish, Portuguese, Simplified Chinese, Traditional Chinese, Russian, Turkish, Thai, Korean, Dutch English - Sanyo E1075 | VPC-E1075 Owners Manual English - Page 70
button again to turn on the camera. Press any button to turn on the LCD, when AUTO LCD ON mode (30 SEC or 1 MIN) is achieved. Battery is exhausted. Charge or replace the battery. Memory card format not recognized. Re-format the memory card. Memory card is full. Replace the memory card with a new one - Sanyo E1075 | VPC-E1075 Owners Manual English - Page 71
SANYO Electric Co., Ltd. Printed in China
-
 1
1 -
 2
2 -
 3
3 -
 4
4 -
 5
5 -
 6
6 -
 7
7 -
8
-
9
-
10
-
11
-
12
-
13
-
14
-
15
-
16
-
17
-
18
-
19
-
20
-
21
-
22
-
23
-
24
-
25
-
26
-
27
-
28
-
29
-
30
-
31
-
32
-
33
-
34
-
35
-
36
-
37
-
38
-
39
-
40
-
41
-
42
-
43
-
44
-
45
-
46
-
47
-
48
-
49
-
50
-
51
-
52
-
53
-
54
-
55
-
56
-
57
-
58
-
59
-
60
-
61
-
62
-
63
-
64
-
65
-
66
-
67
-
68
-
69
-
70
-
71
 |
 |

10 Mega Pixels
Digital Camera
INSTRUCTION MANUAL
VPC-E1075