Sanyo PLC-EF31NL Owners Manual
Sanyo PLC-EF31NL - SXGA LCD Projector Manual
 |
UPC - 086483047268
View all Sanyo PLC-EF31NL manuals
Add to My Manuals
Save this manual to your list of manuals |
Sanyo PLC-EF31NL manual content summary:
- Sanyo PLC-EF31NL | Owners Manual - Page 1
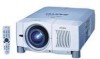
Multimedia Projector MODEL PLC-EF31/EF31NL PLC-EF31N Owner's Manual - Sanyo PLC-EF31NL | Owners Manual - Page 2
operate improperly, read this manual again, check operations and cable connections and try the solutions in the "Trouble-shooting" section of the end of this booklet. If the problem still persists, contact the sales dealer where you purchased the projector or the service center. SAFETY PRECAUTIONS - Sanyo PLC-EF31NL | Owners Manual - Page 3
operated. Read all of the instructions given here and retain them for later use. Unplug this projector from AC power supply before cleaning. Do not use liquid or aerosol cleaners. Use a damp cloth for cleaning. Follow all warnings and instructions marked on the projector. For added protection to the - Sanyo PLC-EF31NL | Owners Manual - Page 4
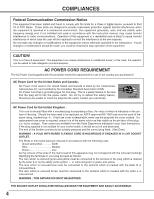
used in accordance with the instruction manual, may cause harmful interference to radio communications. Operation of this equipment in a residential area is likely to cause harmful interference in which case the user Cord supplied with this projector meets the requirement for use in the country you - Sanyo PLC-EF31NL | Owners Manual - Page 5
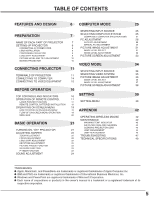
42 AIR FILTER CARE AND CLEANING 43 CLEANING PROJECTION LENS 43 TURNING ON / OFF PROJECTOR 21 LAMP MANAGEMENT 44 ADJUSTING SCREEN 22 LAMP REPLACEMENT 45 ZOOM ADJUSTMENT 22 TROUBLESHOOTING 47 FOCUS ADJUSTMENT LENS SHIFT ADJUSTMENT 22 TECHNICAL SPECIFICATIONS 49 22 KEYSTONE - Sanyo PLC-EF31NL | Owners Manual - Page 6
portability, durability, and ease of use. This projector utilizes built-in multimedia features, a palette of 16.77 million colors, and matrix liquid crystal display (LCD) technology. N Compatibility This projector widely accepts various video and computer input signals including; G Computers IBM - Sanyo PLC-EF31NL | Owners Manual - Page 7
this area, especially screws and metallic parts. This area will become hot while a projector is used. This projector detects internal temperature and automatically controls operating power of Cooling Fans. LAMP COVER MAIN ON / OFF SWITCH EXHAUST VENT POWER CORD CONNECTOR BOTTOM AIR INTAKE VENTS - Sanyo PLC-EF31NL | Owners Manual - Page 8
CORD This projector uses nominal input voltages of 100-120 V or 200-240 V AC. This projector automatically selects correct input voltage. dealer or service station if you are not sure of type of power supply being in use. Connect a projector with a peripheral equipment before turning a projector on. - Sanyo PLC-EF31NL | Owners Manual - Page 9
, check where a projector is used and prepare suitable lens. For specifications of a Projection Lens, refer to manual separately attached or contact sales dealer where you purchased a projector. 2. For installation, refer to installation manual supplied to a Projector. NOTE; PLC-EF31N is equipped - Sanyo PLC-EF31NL | Owners Manual - Page 10
lens cap and retract adjustable feet. CAUTION IN CARRYING OR TRANSPORTING A PROJECTOR G Do not drop or bump a projector, otherwise damages or malfunctions may result. G When carrying a projector, use a suitable carrying case. G Do not transport a projector by using a courier or transport service - Sanyo PLC-EF31NL | Owners Manual - Page 11
contact sales dealer where you purchased a projector. NOTE; DVI Terminal is unavailable for INPUT 3 slot. INPUT/OUTPUT TERMINALS 3 TERMINAL SLOTS (Factory secure terminal. Screws Guide NOTES ON ORDERING OR USING Socket OPTIONAL INTERFACE BOARD When ordering or using Optional Interface Board - Sanyo PLC-EF31NL | Owners Manual - Page 12
R L SERIAL PORT IN R/C JACK SERIAL PORT OUT (MONO) AUDIO OUT R L RESET (MONO) USB INPUT 3 INPUT 2 INPUT 1 INPUT 1, 2 CONTROL PORT CONNECTORS When controlling computer with Remote Control of this projector, connect mouse port of your personal computer to these connectors. (Refer to P14 - Sanyo PLC-EF31NL | Owners Manual - Page 13
IN SERIAL PORT OUT (MONO) AUDIO OUT R L RESET (MONO) USB INPUT 3 INPUT 2 INPUT 1 USB PORT (Series B) This port is used to control a projector with computer. It is also used to control computer with Remote Control of this projector. (Refer to P40-42.) Connect USB port of computer to this - Sanyo PLC-EF31NL | Owners Manual - Page 14
projector and peripheral equipment on before computer is switched on. IBM-compatible computers or Macintosh computers (VGA / SVGA / XGA / SXGA USB INPUT 3 AUDIO OUT Audio Cable (stereo) ✽ Use one MODE that you want to use before your turn on a projector and computer MODE SWITCHES 1 - Sanyo PLC-EF31NL | Owners Manual - Page 15
R L (MONO) R/C JACK RESET SERIAL PORT IN SERIAL PORT OUT AUDIO OUT R L (MONO) USB INPUT 3 INPUT 2 INPUT 1 Audio Cable (Stereo) ✽ AV AUDIO IN Terminals of a Projector AUDIO OUT Audio Cable (Stereo) ✽ Audio Input External Audio Equipment Audio Amplifier Audio Speaker (stereo) 15 - Sanyo PLC-EF31NL | Owners Manual - Page 16
Used to adjust volume. Used to select input (P24) source. (P25) POWER ON-OFF BUTTON Used to turn a projector on or off. (P21) ZOOM BUTTONS Used to adjust zoom. (P22) AUTO PC ADJ. BUTTON Use to operate AUTO PC Adjustment function. (P28) IMAGE BUTTON Used to select image level. (P31, 36) LENS - Sanyo PLC-EF31NL | Owners Manual - Page 17
MUTE D.ZOOM INPUT 1/2 MENU INPUT 3 LASER LENS SHIFT KEYSTONE NO SHOW FREEZE AUTO PC ADJ. IMAGE P-TIMER POWER ON-OFF BUTTON Used to turn projector on or off. (P21) INPUT 1/2 BUTTON Used to select input source either INPUT 1 or INPUT 2. (P25) INPUT 3 BUTTON Used to select input source (INPUT - Sanyo PLC-EF31NL | Owners Manual - Page 18
and 60° in front and rear of a projector. 60° LENS SHIFT BUTTON Used to select LENS SHIFT function. (P22) 16.4' (5 m) FREEZE BUTTON Used to freeze picture. (P23) IMAGE BUTTON Used to select image level. (P31, 36) KEYSTONE BUTTON 16.4' Used to correct (5 m) keystone distortion. 60° (P22, 39 - Sanyo PLC-EF31NL | Owners Manual - Page 19
TO OPERATE ON-SCREEN MENU You can control and adjust this projector through ON-SCREEN MENU. Refer to following pages to operate each INPUT SELECT BUTTON Used to select item. POINT BUTTONS Used to move Pointer UP/ DOWN/ RIGHT/ LEFT. UTO C ADJ. IMAGE LENS SHIFT MENU SELECT SELECT BUTTON Used - Sanyo PLC-EF31NL | Owners Manual - Page 20
+/-] (Refer to P33) SETTING MENU Used to change settings of projector or reset Lamp Replace Counter. (Refer to P39-41) INPUT MENU Used to select input source (Input 1, Input 2 or Input 3). Refer to P25 PC ADJUST MENU Used to adjust parameters to match with input signal format. (Refer to P28-30 - Sanyo PLC-EF31NL | Owners Manual - Page 21
Input position and Lamp status are also displayed on screen for 5 seconds. (Refer to "LAMP MANAGEMENT" on page 44.) Preparation Display disappears after 30 seconds. TURNING OFF PROJECTOR projector. LAMP indicator lights bright OFF. 2. Turn a projector on again. When WARNING a projector on again. If - Sanyo PLC-EF31NL | Owners Manual - Page 22
displayed. 2 Adjust focus of image by pressing FOCUS L/M button(s) . Focus Message disappears after 4 seconds. LENS SHIFT ADJUSTMENT 1 Press LENS SHIFT button on Top Control or on Remote Control Unit. Message "Lens shift" is displayed. 2 Press POINT UP button to move image up, press POINT DOWN - Sanyo PLC-EF31NL | Owners Manual - Page 23
BASIC OPERATION PICTURE FREEZE FUNCTION Press FREEZE button on Remote Control Unit to freeze picture on-screen. To cancel FREEZE function, press FREEZE button again or press any other button except POINT / SELECT / RIGHT CLICK / LASER button. NO SHOW FUNCTION Press NO SHOW button on Remote - Sanyo PLC-EF31NL | Owners Manual - Page 24
BASIC OPERATION SOUND ADJUSTMENT DIRECT OPERATION Volume Press VOLUME (+/-) button(s) on Top Control or on Remote Control Unit to adjust volume. Volume dialog box appears on screen for a few seconds. (+) button to increase volume, and (-) button for decreasing. Mute Press MUTE button on Remote - Sanyo PLC-EF31NL | Owners Manual - Page 25
source that you want to select, and then press SELECT button. INPUT 1/2 button INPUT 1 INPUT 2 INPUT 3 button INPUT 3 INPUT L/M buttons INPUT 1 INPUT 2 INPUT 3 INPUT Menu icon SELECTING COMPUTER SYSTEM WHEN SELECT INPUT 1 (DVI INPUT TERMINAL ) 1 Press MENU button and ON-SCREEN MENU will appear - Sanyo PLC-EF31NL | Owners Manual - Page 26
Menu icon. (Refer to P28.) When image is not provided properly, manual adjustment is required. (Refer to P29 and 30.) There is no signal input from computer. Make sure connection of computer and a projector is set correctly. (Refer to TROUBLESHOOTING on page 47.) PC SYSTEM MENU PC SYSTEM Menu icon - Sanyo PLC-EF31NL | Owners Manual - Page 27
COMPUTER INPUT COMPATIBLE COMPUTER SPECIFICATIONS Basically this projector can accept a signal from all computers with .00 30.00 30.00 25.00 When a input signal is digital from DVI terminal, refer to chart below. ON-SCREEN DISPLAY D-VGA D-SVGA D-XGA D-SXGA 1 RESOLUTION 640 x 480 800 x 600 1024 - Sanyo PLC-EF31NL | Owners Manual - Page 28
parameters from Auto PC Adjustment can be memorized in this projector. Once parameters are memorized, setting can be done just by selecting Mode this function, manual adjustments are required. (Refer to page 29, 30.) G Auto PC Adjustment function cannot be operated in Digital Signal input on DVI terminal - Sanyo PLC-EF31NL | Owners Manual - Page 29
those special signal formats. This projector has 5 independent memory areas to memorize those parameters manually adjusted. This enables you to recall setting for a specific computer whenever you use it. Note : This PC ADJUST Menu cannot be operated in Digital Signal input on DVI terminal and "RGB - Sanyo PLC-EF31NL | Owners Manual - Page 30
COMPUTER INPUT Display area Selects area displayed with this projector. Select resolution at Display area dialog box. Display area H Adjustment of horizontal area displayed with this projector. Press POINT LEFT/RIGHT button(s) to decrease/increase value and then press SELECT button. Press SELECT - Sanyo PLC-EF31NL | Owners Manual - Page 31
IMAGE button on Top Control or on Remote Control Unit. Standard Normal picture level preset on this projector. Real Picture level with improved halftone for graphics. IMAGE 1~4 User preset picture adjustment in IMAGE ADJUST Menu (P32). IMAGE button Standard Real Image 1 Image 2 Image 3 Image - Sanyo PLC-EF31NL | Owners Manual - Page 32
COMPUTER INPUT IMAGE LEVEL ADJUSTMENT 1 Press MENU button and ON-SCREEN MENU will mode to off. Press POINT LEFT/RIGHT button(s) again, progressive scan mode to on. 3 Store To store manually preset image, move a red frame pointer to Store icon and press SELECT button. Image Level Menu will appear - Sanyo PLC-EF31NL | Owners Manual - Page 33
INPUT PICTURE SCREEN ADJUSTMENT This projector 16 : 9) by expanding image width uniformly. This function can be used for providing a squeezed video signal at 16 : 9. Digital zoom 1200, reset resolution to lower before connecting projector. G Image data in other than SXGA (1280 x 1024) is modified to - Sanyo PLC-EF31NL | Owners Manual - Page 34
Press POINT DOWN button and a red-arrow icon will appear. Move arrow to "Y, Pb/Cb, Pr/Cr" and then press SELECT button. Input 2 INPUT Menu icon Move a pointer (red arrow) to Input 2 and press SELECT button. Source Select Menu Move a pointer to Y, Pb/Cb, Pr/Cr and press SELECT button. WHEN SELECT - Sanyo PLC-EF31NL | Owners Manual - Page 35
VIDEO INPUT SELECTING VIDEO SYSTEM 1 Press MENU button and ON-SCREEN MENU will appear. its performance. When Video System is 1035i, 1080i50 or 1080i60, select system manually first. COMPONENT VIDEO SIGNAL FORMAT If projector cannot reproduce proper video image, it is necessary to select a specific - Sanyo PLC-EF31NL | Owners Manual - Page 36
IMAGE button on Top Control or on Remote Control Unit. Standard Normal picture level preset on this projector. Cinema Picture level adjusted for picture with fine tone. IMAGE 1~4 User preset picture adjustment in IMAGE ADJUST Menu (P38). IMAGE button Standard Cinema Image 1 Image 2 Image 3 Image - Sanyo PLC-EF31NL | Owners Manual - Page 37
VIDEO INPUT IMAGE LEVEL ADJUSTMENT 1 Press MENU button and ON-SCREEN MENU will appear. Press POINT LEFT/RIGHT button(s) to move a red frame pointer to IMAGE ADJUST - Sanyo PLC-EF31NL | Owners Manual - Page 38
VIDEO INPUT 3 Store To store adjustment data, move a red frame pointer to Store pointer to image icon to be set and then press SELECT button. Store icon PICTURE SCREEN ADJUSTMENT This projector has a picture screen resize function, which enables you to display desirable image size. 1 Press MENU - Sanyo PLC-EF31NL | Owners Manual - Page 39
set and then press SELECT button. Setting dialog box appears. Language Language used in ON-SCREEN MENU is selectable from among English, German, French, this function is "On," this projector will produce a blue image instead of video noise on screen when any input source is unplugged or turned off - Sanyo PLC-EF31NL | Owners Manual - Page 40
detects signal interruption and is not used for a certain period in order to reduce power consumption and maintain Lamp-life. (This projector is shipped with this function ON.) Power Management function operates to turn Projection Lamp off when input signal is interrupted and any button is not - Sanyo PLC-EF31NL | Owners Manual - Page 41
a projector by computer, install USB driver (optionally sold parts) and set up computer following instruction in USB driver package. Contact your authorized dealer. Press SELECT button at this icon to display previous items. Move a pointer to item and then press POINT LEFT/RIGHT button(s). Lamp - Sanyo PLC-EF31NL | Owners Manual - Page 42
not only able to operate this projector but also usable as a wireless mouse for most Personal Computers. POINT buttons and two CLICK buttons are used for wireless mouse operation. This , Cooling Fans or Internal Circuits may be malfunctioning. Contact service personnel from an authorized dealer or - Sanyo PLC-EF31NL | Owners Manual - Page 43
projection lens: 1 Apply a non-abrasive camera lens cleaner to a soft, dry cleaning cloth. Avoid using an excessive amount of cleaner. Abrasive cleaners, solvents or other harsh chemicals might scratch lens. 2 Lightly wipe cleaning cloth over lens. 3 When a projector is not in use, replace lens - Sanyo PLC-EF31NL | Owners Manual - Page 44
Management Function automatically changes combination of lighting lamp (Lamp Mode) by detecting status of lamp. When any of 2 lamps becomes out, Lamp Mode is changed over from 2 lamps to 1 lamp. Lamp Mode can be switched to 2 lamps or 1 lamp manually. Refer to SETTING section on page 39, 40. 12 - Sanyo PLC-EF31NL | Owners Manual - Page 45
to cool, for at least 45 minutes before you open Lamp Cover. The inside of a projector can become very hot. CAUTION For continued safety, replace with a lamp assembly of the same type. Do not drop a lamp assembly or touch a glass bulb! The glass can shatter and may cause injury. Follow these - Sanyo PLC-EF31NL | Owners Manual - Page 46
following information to the dealer. G Model No. of your projector : G Replacement Lamp Type No. : PLC-EF31/EF31NL/EF31N POA-LMP39 (Service Parts No. 610 292 4848) LAMP HANDLING PRECAUTIONS This projector uses a high-pressure lamp which must be handled carefully and properly. Improper handling - Sanyo PLC-EF31NL | Owners Manual - Page 47
APPENDIX TROUBLESHOOTING Before calling your dealer or service center for assistance, check matters below once again. 1. Make sure you have connected a projector to your computer or video equipment as described in section "CONNECTING PROJECTOR" on pages 12 ~ 15. 2. Check cable connection. Verify - Sanyo PLC-EF31NL | Owners Manual - Page 48
far from a projector when using Remote Control Unit. problems yourself. If a projector fails to work properly, see "TROUBLESHOOTING" section on page 47, 48. To correct failure, try "Solutions". If after following all operating instructions, you find that service is necessary, contact Sanyo Service - Sanyo PLC-EF31NL | Owners Manual - Page 49
APPENDIX TECHNICAL SPECIFICATIONS Projector Type Dimensions (W x H x D) Net Weight LCD Panel System Panel Resolution Number of Pixels Color System High Definition TV Signal Motorized Lens Shift Scanning Frequency Horizontal Resolution Projection Lamp Input 1 Jacks Input 2 Jacks Input 3 Jacks Other - Sanyo PLC-EF31NL | Owners Manual - Page 50
13 14 15 16 17 18 19 20 21 22 23 24 C3 C4 C5 C1 Analog Red Input C2 Analog Green Input C3 Analog Blue Input C4 Analog Horiz. sync C5 Analog Ground (R/G/B) 1 T.M.D.S. Data2- 9 T.M.D.S. Data1- 17 T.M.D.S. Data0- 2 T.M.D.S. Data2+ 10 T.M.D.S. Data1+ 18 T.M.D.S. Data0+ 3 T.M.D.S. Data2 Shield - Sanyo PLC-EF31NL | Owners Manual - Page 51
APPENDIX USB PORT TERMINAL Pin Configuration Connect USB port output terminal of computer or peripheral equipment to this terminal with USB port Cable (not supplied). 1 Vcc 21 2 - Data 3 + Data 34 4 Ground 51 - Sanyo PLC-EF31NL | Owners Manual - Page 52
Printed in Japan Part No. 610 305 1437 (1AA6P1P3855-- ME7A) SANYO Electric Co., Ltd
-
 1
1 -
 2
2 -
 3
3 -
 4
4 -
 5
5 -
 6
6 -
 7
7 -
8
-
9
-
10
-
11
-
12
-
13
-
14
-
15
-
16
-
17
-
18
-
19
-
20
-
21
-
22
-
23
-
24
-
25
-
26
-
27
-
28
-
29
-
30
-
31
-
32
-
33
-
34
-
35
-
36
-
37
-
38
-
39
-
40
-
41
-
42
-
43
-
44
-
45
-
46
-
47
-
48
-
49
-
50
-
51
-
52
 |
 |

Owner’s Manual
PLC-EF31/EF31NL
Multimedia Projector
MODEL
PLC-EF31N