Sanyo PLV-75 Owners Manual
Sanyo PLV-75 - WXGA LCD Projector Manual
 |
View all Sanyo PLV-75 manuals
Add to My Manuals
Save this manual to your list of manuals |
Sanyo PLV-75 manual content summary:
- Sanyo PLV-75 | Owners Manual - Page 1
Multimedia Projector MODEL PLV-75/PLV-80 PLV75L/PLV-80L (Lensless) Owner's Manual - Sanyo PLV-75 | Owners Manual - Page 2
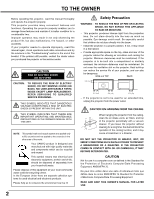
problem still persists, contact the dealer where you purchased the projector or the service center. CAUTION RISK OF ELECTRIC SHOCK DO NOT OPEN CAUTION : TO REDUCE THE RISK OF ELECTRIC SHOCK, DO NOT REMOVE COVER (OR BACK). NO USER-SERVICEABLE PARTS INSIDE EXCEPT LAMP REPLACEMENT. REFER SERVICING - Sanyo PLV-75 | Owners Manual - Page 3
Follow all warnings and instructions marked on the projector. For added protection to the projector during a lightning storm, projector exhibits a distinct change in performance-this indicates a need for service. When replacement parts are required, be sure the service technician has used replacement - Sanyo PLV-75 | Owners Manual - Page 4
unless otherwise specified in the instructions. If such changes or modifications should be made, you could be required to stop operation of the equipment. Model Number Trade Name Responsible party Address Telephone No. : PLV-75/PLV-80/PLV-75L/PLV-80L : Sanyo : SANYO FISHER COMPANY : 21605 Plummer - Sanyo PLV-75 | Owners Manual - Page 5
AND CLEANING 45 20 CLEANING PROJECTION LENS 45 20 LAMP REPLACEMENT 46 21 LAMP REPLACE COUNTER 47 22 TROUBLESHOOTING 48 22 MENU TREE 50 22 COMPATIBLE COMPUTER SPECIFICATIONS 52 22 22 23 INDICATORS AND PROJECTOR CONDITION TECHNICAL SPECIFICATIONS 53 55 23 PJ LINK NOTICE 56 23 - Sanyo PLV-75 | Owners Manual - Page 6
77 million colors, and matrix liquid crystal display (LCD) technology. ◆ Compact Design ◆ Keystone Correction This projector is extremely compact in size and weight. It of a projector may result in distorted image being displayed in a trapezoid shape. Keystone Correction solves this problem by - Sanyo PLV-75 | Owners Manual - Page 7
temperature and automatically controls operating power of Cooling Fans. LAMP COVER CARRYING HANDLE BOTTOM OF CABINET When attached the PJ-Net organizer (optional part) to the projector, remove the these parts. Refer to the owner's manual in the optional PJ-Net organizer. AIR INTAKE VENTS - Sanyo PLV-75 | Owners Manual - Page 8
plug into any other type of power system. Consult your authorized dealer or service station if you are not sure of type of power supply being in use. Connect a projector with a peripheral equipment before turning a projector on. (Refer to pages 12 ~ 14 for connection.) CAUTION For safety, unplug AC - Sanyo PLV-75 | Owners Manual - Page 9
ambient lighting in order to provide best image. 12.7'(3.9m) 5.0'(1.5m) 100" 40" 77" 25.6'(7.8m) 200" 154" 52.2'(15.9m) 38.4'(11.7m) Max. Zoom 400" 300" 231" Min. Zoom 308" 30" NOTE: The figures below are only for Model PLV-75/PLV-80. Projection lens is not provided with Model PLV-75L/PLV - Sanyo PLV-75 | Owners Manual - Page 10
. (Refer to P 22 and 38.) ADJUSTABLE FEET FEET LOCK LATCHES INSTALLING PROJECTOR IN PROPER POSITION Install the projector properly. Improper installation may reduce the lamp lifetime and cause a fire hazard. 10˚ Do not tilt the projector more than 10 degrees above and below. 10˚ NO UPWARD Do not - Sanyo PLV-75 | Owners Manual - Page 11
Use Carrying Handle when moving a Projector. When moving a projector, replace lens cover and retract feet to prevent damage to lens and cabinet. When this projector is not in use for an extended period, put it into case (not supplied with this projector). PREPARATION CAUTION IN CARRYING OR - Sanyo PLV-75 | Owners Manual - Page 12
Connect computer output (Digital DVI-D type) to this terminal. HD (HDCP Compatible) signal can also be connected. (Refer to P13.) RESET BUTTON This projector uses a micro processor to control this unit, and occasionally, this micro processor may malfunction and need to be reset. This can be done by - Sanyo PLV-75 | Owners Manual - Page 13
or Macintosh computer (VGA / SVGA / XGA / SXGA/SXGA+/WXGA/UXGA) Desktop type Laptop type Monitor Output Monitor Output Monitor Output INPUT TERMINAL (DIGITAL) CONTROL PORT 5 BNC (G/B/R/HV/V) Terminals of a Projector ANALOG INPUT 1 DIGITAL(DVI-D) R/C JACK AUDIO 1 RESET CONTROL PORT AUDIO - Sanyo PLV-75 | Owners Manual - Page 14
/Pb - Cr/Pr VIDEO Y - Cb/Pb - Cr/Pr INPUT TERMINAL AUDIO IN S-VIDEO (DIGITAL) Note: When connecting the cable, the power cords of both the projector and the external equipment should be disconnected from AC outlet. 14 ANALOG INPUT 1 DIGITAL(DVI-D) R/C JACK AUDIO 1 RESET CONTROL PORT AUDIO - Sanyo PLV-75 | Owners Manual - Page 15
34) LENS SHIFT BUTTON Used to select LENS SHIFT function. (P22) VOLUME- ON-OFF LIGHT AUTO PC - I AUTO MENU COLOR M. SELECT INPUT INPUT IMAGE 1 I SELECTION 2 as Wired Remote Control. VOLUME+ POWER ON-OFF BUTTON Used to turn projector on or off. (P20, 21) COLOR M. BUTTON Used to operate - Sanyo PLV-75 | Owners Manual - Page 16
batteries. ● Danger of explosion if battery is incorrectly replaced. ● Dispose of used batteries according to batteries manufacturers instructions and local rules. Operating Range Point Remote Control Unit toward projector (Infrared Remote Receiver) whenever pressing any button. 60° Maximum - Sanyo PLV-75 | Owners Manual - Page 17
BUTTONS (TOP CONTROLS) and INDICATORS on its top. LAMP REPLACE INDICATOR Turns to yellow when life of projection lamp draws to an end. Flashes yellow when the lamp cannot light up. (P46, 53-54) WARNING TEMP. INDICATOR Flashes red when internal projector temperature is too high. (P44, 53-54) READY - Sanyo PLV-75 | Owners Manual - Page 18
OPERATE ON-SCREEN MENU You can control and adjust this projector through ON-SCREEN MENU. Refer to following pages to pressing POINT buttons on Top Control or on Remote Control Unit. REMOTE CONTROL UNIT ON-OFF LIGHT AUTO PC - I AUTO MENU COLOR M. SELECT POINT BUTTONS Used to move a Pointer UP - Sanyo PLV-75 | Owners Manual - Page 19
Press MENU BUTTON while connecting to PC input source. GUIDE WINDOW Shows selected item of ONSCREEN MENU. PC / Digital zoom +/-] (Refer to P30) SETTING MENU Used to change settings of projector or reset Lamp Replace Counter. (Refer to P38-43) Input SVGA1 INPUT MENU Used to select input source - Sanyo PLV-75 | Owners Manual - Page 20
projector is locked with a PIN code, PIN code Input Dialog Box will appear. Enter the PIN code as instructed below. Lamp control status For model PLV-80/PLV-80L only. (See page 40 for Lamp the projector. Setting PIN code prevents others except the specific users from operating the projector. A - Sanyo PLV-75 | Owners Manual - Page 21
TURNING IT OFF. DO NOT DISCONNECT AC POWER CORD WHILE COOLING FANS ARE RUNNING OR BEFORE READY INDICATOR LIGHTS GREEN AGAIN. OTHERWISE IT WILL RESULT IN SHORTENING LAMP LIFE. NOTE; • The projector cannot be turned on during the cooling period with the READY indicator turned off. You can turn it - Sanyo PLV-75 | Owners Manual - Page 22
BASIC OPERATION ADJUSTING SCREEN ZOOM ADJUSTMENT 1 Press ZOOM button on Top Control or ZOOM ▲/▼ button on Remote Control Unit. Message "Zoom" is displayed. 2 Press ZOOM ▲ button or POINT UP button to make image larger, and press ZOOM ▼ button or POINT DOWN button to make image smaller. Message - Sanyo PLV-75 | Owners Manual - Page 23
BASIC OPERATION PICTURE FREEZE FUNCTION Press FREEZE button on Remote Control Unit to freeze picture on-screen. To cancel FREEZE function, press FREEZE button again or press any other button. NO SHOW FUNCTION Press NO SHOW button on Remote Control Unit to black out image. To restore to normal, press - Sanyo PLV-75 | Owners Manual - Page 24
digital entertainment content which is delivered by DVI (Digital Visual Interface) from being copied. The specification of HDCP is decided and controlled by Digital Content Protection, LLC. Should the specification be changed, this projector may not display the digital content protected by HDCP. 24 - Sanyo PLV-75 | Owners Manual - Page 25
from computer. Make sure connection of computer and a projector is set correctly. (Refer to TROUBLESHOOTING on page 48.) PC SYSTEM MENU System Mode 1 PC SYSTEM Menu icon Displays system being selected. Mode 1 User preset adjustment in MANUAL PC ADJUSTMENT. Adjustment data can be stored in the - Sanyo PLV-75 | Owners Manual - Page 26
Store adjustment parameters. Adjustment parameters from Auto PC Adjustment can be memorized in this projector. Once parameters are memorized, setting can be done just by selecting Mode in PC SYSTEM Menu (P25). Refer to MANUAL PC ADJUSTMENT section (P27-28). NOTE ● Fine sync, Total dots and Picture - Sanyo PLV-75 | Owners Manual - Page 27
you to precisely adjust several parameters to match with those special signal formats. This projector has 10 independent memory areas to memorize those parameters manually adjusted. This enables you to recall setting for a specific computer whenever you use it. Note : This PC ADJUST Menu cannot be - Sanyo PLV-75 | Owners Manual - Page 28
COMPUTER INPUT Other icons operates as follows. Reset Reset all adjust parameters on adjustment dialog box to previous figure. To store adjustment data. This Mode has parameters being stored. Mode free To clear adjustment parameters previously set, move a red frame pointer to Mode free icon and - Sanyo PLV-75 | Owners Manual - Page 29
Top Control or IMAGE SELECTION ▲/▼ button on Remote Control Unit. Standard Normal picture level preset on this projector. Real Picture level with improved halftone for graphics. IMAGE 1~10 User preset picture adjustment in IMAGE ADJUST Menu (P37). IMAGE button Standard Real Image 1 Image 10 IMAGE - Sanyo PLV-75 | Owners Manual - Page 30
(P25). ● True and Digital zoom +/- can not be selected when "480i", "575i", "480p" or "575p" is selected on PC SYSTEM Menu (P25). ● This projector cannot display any resolution higher than 1600 X 1200. If your computer's screen resolution is higher than 1600 X 1200, reset resolution to lower before - Sanyo PLV-75 | Owners Manual - Page 31
Top Control or on Remote Control Unit. Select INPUT source by pressing INPUT 1, INPUT 2 or INPUT 3 button on Remote Control Unit. If projector cannot reproduce proper image, select correct input source through MENU OPERATION (see below). INPUT button Input 1 Input 2 Input 3 SELECTING INPUT SOURCE - Sanyo PLV-75 | Owners Manual - Page 32
to optimize its performance. When Video System is 1035i or 1080i, select system manually first. COMPONENT VIDEO SIGNAL FORMAT If projector cannot reproduce proper video image, it is necessary to select a specific component video signal format among 480i, 575i, 480p, 575p, 720p, 1035i and 1080i - Sanyo PLV-75 | Owners Manual - Page 33
Control or IMAGE SELECTION ▲/▼ button on Remote Control Unit. Standard Normal picture level preset on this projector. Cinema Picture level adjusted for picture with fine tone. IMAGE 1~10 User preset picture adjustment in IMAGE ADJUST Menu (P37). IMAGE button Standard Cinema Image 1 Image 10 IMAGE - Sanyo PLV-75 | Owners Manual - Page 34
VIDEO INPUT PICTURE SCREEN ADJUSTMENT This projector has a picture screen resize function, which enables you to display desirable image size. PICTURE SCREEN SELECT (DIRECT) Select picture screen among Full, Normal, Zoom and - Sanyo PLV-75 | Owners Manual - Page 35
the level, phase and gamma of the selected display colors (except black, white and gray) on the screen, and to replace these colors with other colors if required. The projector lets you replace up to eight colors for each image. There are ten preset images for VIDEO mode and ten preset images for - Sanyo PLV-75 | Owners Manual - Page 36
palette. Gamma adjustment palette. COLOR SELECTION MODE COLOR M. The mode will return to the pointer mode (even if you press the MENU key on the projector or the remote control). (You will need to reselect and re-adjust the color in this case.) MENU The COLOR MANAGEMENT menu will be exited - Sanyo PLV-75 | Owners Manual - Page 37
to ON. Film ···· Effective on 3:2 pulldown video sources. Other icons operates as follows. Reset Reset all adjustment to previous figure. Store To store manually preset image, move a red frame pointer to Store icon and press SELECT button. Image Level Menu will appear. Move a red frame pointer to - Sanyo PLV-75 | Owners Manual - Page 38
adjustment when the AC power cord is disconnected. Background 3 background settings are available in this projector. Select one of the followings when no input source is connected to the projector or no input signal is coming from the connected equipment: Blue . . . . . .blue colored background My - Sanyo PLV-75 | Owners Manual - Page 39
projected image, go to the Logo function and set it to "User". Then the captured image can be displayed when turning on the projector next time. To capture the image, select [Yes]. To cancel For details on PIN code setting, refer to relevant instructions of the PIN Code Lock function on page 42. 39 - Sanyo PLV-75 | Owners Manual - Page 40
This function is used to project the image from a ceiling mounting the projector. Rear When this function is "On," the picture is left/right reversed. lamp power consumption and extends the lamp life. NOTE; This function available on models PLV-80 and PLV-80L. Ceiling Rear Time left until Lamp - Sanyo PLV-75 | Owners Manual - Page 41
remote control. And then while holding down the MENU button, press the IMAGE button number of times corresponding to the remote control code for the projector. To reset the code for the remote control; Slide the Reset Switch to "Reset position" in the compartment lid on back of the remote control - Sanyo PLV-75 | Owners Manual - Page 42
CODE NO. MEMO ON PAGE 59, AND KEEP IT SECURELY. SHOULD THE PIN CODE BE LOST OR FORGOTTEN, THE PROJECTOR CAN NO LONGER BE OPERATED. PIN code lock Security SVGA1 When the projector is locked with the PIN code, the PIN code lock mark appears on the menu bar. Enter a PIN code - Sanyo PLV-75 | Owners Manual - Page 43
counter This function is used to reset the lamp replace counter. When replacing the projection lamp, reset the lamp replace counter by using this function. See page 47 for operation. Factory default This function returns all setting values except for the user logo, Factory default Key lock, PIN code - Sanyo PLV-75 | Owners Manual - Page 44
continues flashing.) After the cooling-off period, the Ready Indicator lights on again and the projector can be turned on by pressing the On/Off button on the service station. When both of the Warning Temp. and Ready indicators are flashing: When the projector detects an internal problem, it - Sanyo PLV-75 | Owners Manual - Page 45
Replace Air Filter properly. Make sure that Air Filter is fully inserted. CAUTION Do not operate a projector with Air Filter removed. Dust may accumulate on LCD or service station for proper cleaning. CLEANING PROJECTION LENS Follow these steps to clean Projection Lens: 1 Turn off a projector, and - Sanyo PLV-75 | Owners Manual - Page 46
the following information to the dealer. ● Model No. of your projector : ● Replacement Lamp Type No. : ● Replacement Lamp Type No. : PLV-75/PLV-75L/PLV-80/PLV-80L POA-LMP99 (for PLV-75/PLV-75L) (Service Parts No. 610 325 2940) POA-LMP98 (for PLV-80/PLV-80L) (Service Parts No. 610 325 2957) 46 - Sanyo PLV-75 | Owners Manual - Page 47
be replaced, i.e., if the LAMP REPLACE INDICATOR lights up, replace the lamp with a new one IMMEDIATELY after the projector has cooled down. ( Follow carefully the instructions in the LAMP REPLACEMENT section of this manual. ) Continuous use of the lamp with the LAMP REPLACE INDICATOR lighted may - Sanyo PLV-75 | Owners Manual - Page 48
. Problem: No power. Try these Solutions ● Plug a projector into your AC outlet. ● Make sure READY Indicator lights. ● Wait 90 seconds after a projector is turned OFF when turning a projector back on. NOTE : After pressing Power ON-OFF button to OFF, make sure a projector works as follows: 1. LAMP - Sanyo PLV-75 | Owners Manual - Page 49
can often correct operating problems yourself. If a projector fails to work properly, see "TROUBLESHOOTING" section on pages 48, 49. To correct failure, try "Solutions". If after following all operating instructions, you find that service is necessary, contact Sanyo Service Station or store where - Sanyo PLV-75 | Owners Manual - Page 50
APPENDIX Computer Input/Video Input Input Input 1 Input 2 Input 3 Computer Input System (1) MODE 1 MODE 2 SVGA 1 SVGA 2 SVGA 3 MENU TREE RGB (PC analog) RGB (Scart) RGB (PC digital) RGB (AV HDCP) Video Y, Pb/Cb, Pr/Cr RGB Video Y, Pb/Cb, Pr/Cr S-video Go to System (1) N/A N/A N/A Go to - Sanyo PLV-75 | Owners Manual - Page 51
Chinese Korean Japanese Quit Store/Reset Blue/My logo/Black Off/Countdown Off/On Off/Default/User Capture Yes/No 0 - 63 0 - 63 0 - 63 0 - 63 Color Gamma Lamp control Remote control On/Off Auto/Normal/Eco Code 1 Security Key lock Code 8 Quit Off Projector Remote Control Quit Pin code lock Lamp - Sanyo PLV-75 | Owners Manual - Page 52
SPECIFICATIONS Basically this projector SXGA 19 SXGA 20 SXGA+ 1 SXGA+ 2 SXGA+ 3 MAC MAC WXGA 1 WXGA 2 WXGA 3 WXGA 4 UXGA1 UXGA2 UXGA3 UXGA4 720p 720p 1035i 1080i 1080i RESOLUTION 1024 x 75.00 80.00 48.36 47.70 48.36 56.16 75.00 81.25 87.50 93.75 45.00 37.50 33.75 33.75 28.125 V-Freq. (Hz) 75.08 75 - Sanyo PLV-75 | Owners Manual - Page 53
45.00 37.50 33.75 33.75 28.125 33.75 28.125 27.00 V- Specifications are subject to change without notice. INDICATORS AND PROJECTOR CONDITION Check the Indicators for projector condition. Indicators LAMP WARNING REPLACE TEMP. yellow red READY green LAMP red Projector Condition The projector - Sanyo PLV-75 | Owners Manual - Page 54
cooling is completed.) The lamp cannot light up. (The lamp has been cooled down enough and the projector is in stand-by mode and ready to be turned on with the POWER ON-OFF button.) The life of the projection lamp draws to an end. Replace the lamp and then reset the Lamp time. The indicator will - Sanyo PLV-75 | Owners Manual - Page 55
126 g) (including batteries) Accessories Owner's Manual AC Power Cord Wireless/Wired Remote Control Transmitter and Batteries Control Cable for Serial port Lens Cover (PLV-75/PLV-80) PIN Code Label ● Specifications are subject to change without notice. ● LCD panels are manufactured to the highest - Sanyo PLV-75 | Owners Manual - Page 56
Class 1 of JBMIA (Japan Business Machine and Information System Industries Association). This projector supports all commands defined by PJLink Class 1 and is verified conformance with PJLink Standard Class 1. SANYO Projector Input INPUT-1 RGB (PC (Analog) RGB (Scart) RGB (PC Digital) RGB (AV - Sanyo PLV-75 | Owners Manual - Page 57
CONFIGURATIONS OF TERMINALS COMPUTER INPUT-1 TERMINALS (ANALOG) Terminal : HDB15-PIN Pin Configuration 54 32 1 10 9 8 7 6 15 14 13 12 11 1 Red Input 9 +5V Power 2 Green Input 10 Ground (Vert.sync.) 3 Blue Input 11 Sense 0 4 Sense 2 12 DDC Data 5 Ground (Horiz.sync.) 13 Horiz. sync. 6 - Sanyo PLV-75 | Owners Manual - Page 58
are sold separately. This feature enables you to use the projector for wide variety of uses. For installation and replacement of the lens, always contact the sales dealer. The projector lens must be installed or replaced by well-trained sales or service engineers. Do not attempt to do by yourself as - Sanyo PLV-75 | Owners Manual - Page 59
NUMBER MEMO Write down the PIN code number in the column below and keep it with this manual securely. If you forgot or lost the number and unable to operate the projector, contact the service station. PIN Code Lock No. Factory default set No: 1 2 3 4* Logo PIN Code Lock No. Factory default set - Sanyo PLV-75 | Owners Manual - Page 60
Printed in Japan Part No. 610 324 1739 (1AA6P1P4949-- M4YA) SANYO Electric Co., Ltd
-
 1
1 -
 2
2 -
 3
3 -
 4
4 -
 5
5 -
 6
6 -
 7
7 -
8
-
9
-
10
-
11
-
12
-
13
-
14
-
15
-
16
-
17
-
18
-
19
-
20
-
21
-
22
-
23
-
24
-
25
-
26
-
27
-
28
-
29
-
30
-
31
-
32
-
33
-
34
-
35
-
36
-
37
-
38
-
39
-
40
-
41
-
42
-
43
-
44
-
45
-
46
-
47
-
48
-
49
-
50
-
51
-
52
-
53
-
54
-
55
-
56
-
57
-
58
-
59
-
60
 |
 |

Multimedia Projector
MODEL
PLV-75/PLV-80
PLV75L/PLV-80L (Lensless)
Owner’s Manual