Sanyo S1070 Instruction Manual, VPC-S1070 - Page 31
Getting Started, Taking your First Photo, Anti-Shake Function, Using Macro Mode, Setting the Flash
 |
UPC - 086483072352
View all Sanyo S1070 manuals
Add to My Manuals
Save this manual to your list of manuals |
Page 31 highlights
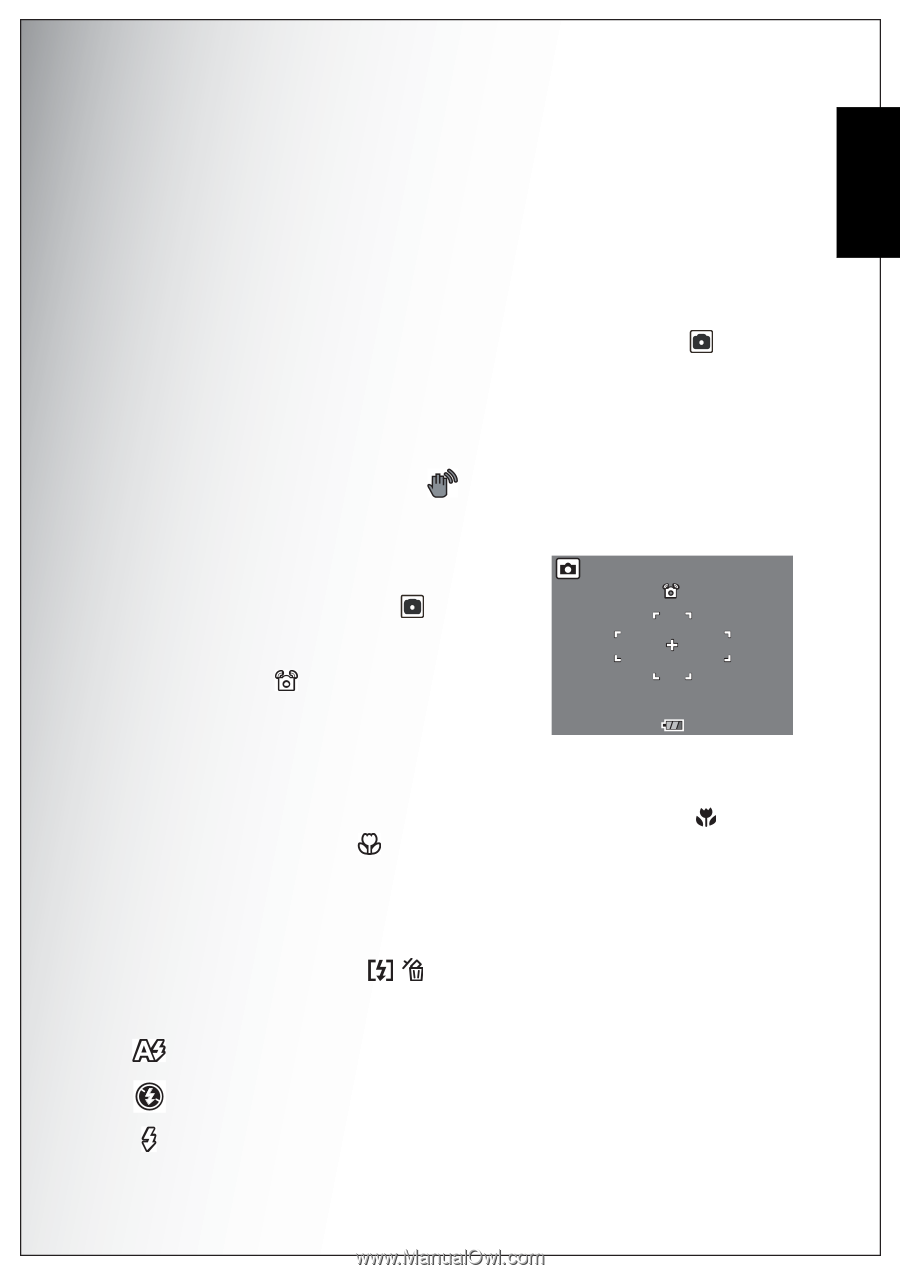
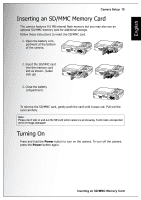
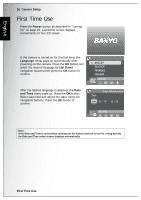
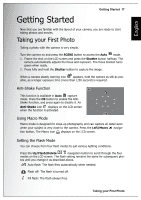
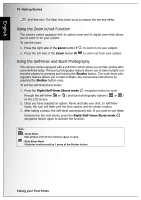
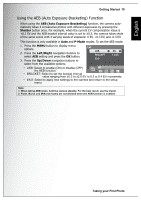
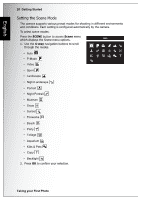
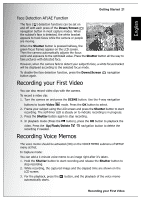
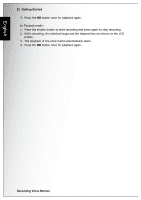
English Getting Started 17 Getting Started Now that you are familiar with the layout of your camera, you are ready to start taking photos and movies. Taking your First Photo Taking a photo with the camera is very simple. Turn the camera on and press the SCENE button to access the Auto mode. 1. Frame the shot on the LCD screen and press the Shutter button halfway. The camera automatically adjusts the focus and exposure. The focus bracket turns green when ready. 2. Press fully and hold the Shutter button to capture the image. When a camera steady warning icon appears, hold the camera as still as possible, as a longer exposure time (more than 1/30 second) is required. Anti-Shake Function This function is available in Auto capture mode. Press the OK button to enable the AntiShake function, and press again to disable it. An Anti-Shake icon displays on the LCD screen when the function is activated. Using Macro Mode Macro mode is designed for close-up photography and can capture all detail even when your subject is very close to the camera. Press the Left/Macro navigation button. The Macro icon displays on the LCD screen. Setting the Flash Mode You can choose from four flash modes to suit various lighting conditions. Press the Up/Flash/Delete navigation button to scroll through the four modes on the LCD screen. The flash setting remains the same for subsequent pho- tos until you change it as described above. Auto flash: The flash fires automatically when needed. Flash off: The flash is turned off. Fill flash: The flash always fires. Taking your First Photo
-
 1
1 -
2
-
3
-
4
-
5
-
6
-
7
-
8
-
9
-
10
-
11
-
12
-
13
-
14
-
15
-
16
-
17
-
18
-
19
-
20
-
21
-
22
-
23
-
24
-
25
-
 26
26 -
 27
27 -
 28
28 -
 29
29 -
 30
30 -
 31
31 -
 32
32 -
 33
33 -
 34
34 -
 35
35 -
 36
36 -
37
-
38
-
39
-
40
-
41
-
42
-
43
-
44
-
45
-
46
-
47
-
48
-
49
-
50
-
51
-
52
-
53
-
54
-
55
-
56
-
57
-
58
-
59
-
60
-
61
-
62
-
63
-
64
-
65
-
66
-
67
 |
 |