Sanyo VPC E2 VPC-E2BL Owners Manual English
Sanyo VPC E2 - Xacti Camcorder - 8.12 MP Manual
 |
UPC - 086483071768
View all Sanyo VPC E2 manuals
Add to My Manuals
Save this manual to your list of manuals |
Sanyo VPC E2 manual content summary:
- Sanyo VPC E2 | VPC-E2BL Owners Manual English - Page 1
INSTRUCTION MANUAL VPC-E2 Digital Movie Camera Important note This manual explains how to safely operate the VPC-E2. Please read these instructions carefully before using the camera. Make sure to read and understand the separate booklet "SAFETY MANUAL". Keep this manual in a safe place for later - Sanyo VPC E2 | VPC-E2BL Owners Manual English - Page 2
found to comply with the limits for a Class B digital device, pursuant to Part 15 of the FCC Rules installed and used in accordance with the instructions, may cause harmful interference to radio Conformity Model number: VPC-E2 Trade Name: SANYO Responsible party: SANYO FISHER COMPANY Address: - Sanyo VPC E2 | VPC-E2BL Owners Manual English - Page 3
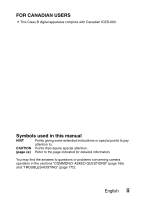
in this manual HINT Points giving some extended instructions or special points to pay attention to. CAUTION Points that require special attention. (page xx) Refer to the page indicated for detailed information. You may find the answers to questions or problems concerning camera operation in - Sanyo VPC E2 | VPC-E2BL Owners Manual English - Page 4
the battery pack and card 1 Insert the battery pack. Lever Battery pack slot 1 Press the latch 1 Push 2 Open Bottom side 2 Insert 2 Insert the SD Memory Card. h An SD Memory Card is not included with your camera. Please purchase a commercially sold card. h In this manual, the SD Memory Card is - Sanyo VPC E2 | VPC-E2BL Owners Manual English - Page 5
sure to first take a test shot to confirm that your camera is set up and ready to go i Sanyo declines any claim for compensation for recorded contents etc. in case of photographing or recording failure due to a chance camera or card flaw. Shooting kVideo clip recording 1 Open the monitor unit, and - Sanyo VPC E2 | VPC-E2BL Owners Manual English - Page 6
view other images, press the [G] or [H] button. h Press the REC/PLAY button. SAVE Arrow buttons PLAY Video clip pattern When you are finished using the camera... Press the ON/OFF button for at least 1 second to turn the - Sanyo VPC E2 | VPC-E2BL Owners Manual English - Page 7
the supplied DVD-ROM (Xacti Software DVD) to burn movies captured with your camera to a DVD, creating your original DVD. Install the application programs Install the following program from the Xacti Software DVD to your computer: Adobe Premiere Elements 4.0 (in this manual, referred to as Premiere - Sanyo VPC E2 | VPC-E2BL Owners Manual English - Page 8
's online service appears. Check the [No thanks !] option button, and then click on the [OK] button. Copy data from your camera to the computer Connect your camera to a computer, and copy the desired data to the computer. 1 Turn on the computer, and use the supplied dedicated USB interface cable to - Sanyo VPC E2 | VPC-E2BL Owners Manual English - Page 9
3 Select "COMPUTER", and press the SET button. h The screen to select the computer connection mode appears. USB CONNECTION CARD READER MTP SCREEN CAPTURE PC CAMERA CANCEL OK 4 Select "CARD READER", and press the SET button. 5 Copy data from your camera to a computer. English viii - Sanyo VPC E2 | VPC-E2BL Owners Manual English - Page 10
SHOOT, PLAY BACK AND SAVE Burn video clips onto a DVD CAUTION Before writing data to a DVD i Please note that in the case of a large amount of data it can take a long time to burn it to DVD. 1 Insert a blank DVD in your computer's DVD drive. 2 Double-click - Sanyo VPC E2 | VPC-E2BL Owners Manual English - Page 11
3 Click on the [New Project] icon. h The [New Project] dialog box appears. "Name" field [OK] button 4 Type a project name in the "Name" field. h Use any name that is easy to understand. 5 Click the [OK] button. h The screen to enter the data to the project appears. [Project] tab [Get Media] tab - Sanyo VPC E2 | VPC-E2BL Owners Manual English - Page 12
SHOOT, PLAY BACK AND SAVE 7 Specify the data. h Select the data by clicking on it. 8 Click the [Open] button. h The selected data appears in the [Organizer] window. h If selecting additional data, click on the [Get Media] tab, and repeat Steps 6 through 8. h When you have finished selecting data, - Sanyo VPC E2 | VPC-E2BL Owners Manual English - Page 13
10 Drag and drop the data you wish to burn to the DVD to the "Timeline/Sceneline" field. h The data to burn to the DVD appears in the "Timeline/Sceneline" field. h To include multiple files, repeat step 10 as necessary. Drop 11 Click the [Create DVD] tab. h "How would you like to share?" appears. [ - Sanyo VPC E2 | VPC-E2BL Owners Manual English - Page 14
SHOOT, PLAY BACK AND SAVE 12 Click the [Disk]. 13 Click the [Burn] button. h Burning to DVD begins. 14 When writing is complete, press the [Done] button. 15 Click the close button. h The dialog box to confirm whether to save the project appears. h If you wish to use the settings for the current - Sanyo VPC E2 | VPC-E2BL Owners Manual English - Page 15
was that? The convenient accessories not only let you immediately view images captured with the camera, but you can also upload images to your computer and create your original DVDs. Read the following explanations to find out how you can fully enjoy your camera's digital movie feature. English xiv - Sanyo VPC E2 | VPC-E2BL Owners Manual English - Page 16
sure that the battery/card compartment cover is completely and securely closed to prevent water from getting inside the camera and damaging it. i Please note that the camera accessories are not waterproof. k Cautions concerning use in water i The waterproof properties of the camera apply to fresh - Sanyo VPC E2 | VPC-E2BL Owners Manual English - Page 17
note that there is a fee for replacing the waterproof seal. k Other cautions i Do not subject the camera to severe jolts, as doing so may deform the battery/card compartment cover or camera body, thus compromising its waterproof capability. If the camera has been subjected to a strong jolt, please - Sanyo VPC E2 | VPC-E2BL Owners Manual English - Page 18
How to use the accessories 13 Media cards that can be used with this camera 15 What "card" means in this manual 15 SPECIAL FEATURES 16 Waterproof capability 16 Movable monitor for any shooting angle 17 Capture still shots while recording a video clip 18 Lots of accessories for optimal use of - Sanyo VPC E2 | VPC-E2BL Owners Manual English - Page 19
Using the flash 62 SHOOT A STILL IMAGE WHILE RECORDING A VIDEO CLIP ..........64 MACRO-PHOTOGRAPHY (ZOOM 66 AFTER USING THE CAMERA IN WATER 67 PLAYBACK PLAYING BACK VIDEO CLIPS AND STILL IMAGES 69 How to save one frame from a video clip as a still image 71 SLIDESHOW PLAYBACK 72 PLAYBACK VOLUME - Sanyo VPC E2 | VPC-E2BL Owners Manual English - Page 20
during video clip recording .......... 91 Compensate for camera shake during still image shooting .......... 91 FOCUS RANGE 94 How to use the manual focus 95 FOCUS MODE 96 LIGHT-MEASURING MODE SETTING 97 ISO SENSITIVITY 98 WHITE BALANCE 99 FACE CHASER 100 HIGH SENSITIVITY MODE 101 DIGITAL - Sanyo VPC E2 | VPC-E2BL Owners Manual English - Page 21
FILE NO. MEMORY 145 INITIALIZING THE CARD MEMORY AND INTERNAL MEMORY .....148 RESETTING THE CAMERA SETTINGS 150 CHECKING THE REMAINING CARD MEMORY 151 Checking the remaining number of images and video recording time 151 For audio recordings 151 CHECKING THE REMAINING BATTERY PACK CHARGE 153 - Sanyo VPC E2 | VPC-E2BL Owners Manual English - Page 22
according to printing instructions (requested images 162 Changing the printer settings 163 „ APPENDICES COMMONLY ASKED QUESTIONS 165 TROUBLESHOOTING 172 Camera 172 Notes regarding the Scene Select feature and filters 182 SPECIFICATIONS 184 Camera 184 Camera connectors 188 Battery life 188 - Sanyo VPC E2 | VPC-E2BL Owners Manual English - Page 23
focus" (manual focus) on page 95 Set the focus to a narrow range • "FOCUS MODE" on page 96 Reduce noise when recording • "NOISE-REDUCTION FUNCTION" on page 137 Reduce video clip flicker • "FLICKER-REDUCTION" on page 139 Set the camera's color/contrast characteristics • "ADJUST THE IMAGE QUALITY" on - Sanyo VPC E2 | VPC-E2BL Owners Manual English - Page 24
85 Suppress camera shake effect • "Compensate for camera shake during video clip recording" on page 91 • "Compensate for camera shake during of a specific area • "LIGHT-MEASURING MODE SETTING" on page 97 Adjust the camera's sensitivity • "ISO SENSITIVITY" on page 98 Change the color of the images - Sanyo VPC E2 | VPC-E2BL Owners Manual English - Page 25
Playback Basic operation Convenient functions Additional functions Getting started viewing images • "PLAYING BACK VIDEO CLIPS AND STILL IMAGES" on page 69 Adjust the speaker volume • "PLAYBACK VOLUME" on page 73 Search for image/ audio files • "Multi-image display" on - Sanyo VPC E2 | VPC-E2BL Owners Manual English - Page 26
PROTECT" on page 107 Format a card • "INITIALIZING THE CARD MEMORY AND INTERNAL MEMORY" on page 148 Delete a part of a video clip and join video clips • "EDITING VIDEO CLIPS" on page 112 Specify the number of prints, index print, and date imprint • "PRINTING INSTRUCTIONS" on page 120 Repair the - Sanyo VPC E2 | VPC-E2BL Owners Manual English - Page 27
" on page 9 in the Xacti Software DVD INSTRUCTION MANUAL Playback • "About video clip files recorded with this camera" on page 8 in the Xacti Software DVD INSTRUCTION MANUAL • "INSTALLING THE APPLICATION SOFTWARE" on page 15 in the Xacti Software DVD INSTRUCTION MANUAL Using as a webcam • "USING - Sanyo VPC E2 | VPC-E2BL Owners Manual English - Page 28
THE INCLUDED ACCESSORIES i Handstrap and soft case (pages 13 and 14): 1 set i Xacti Software DVD (DVDROM) (page 4 in the Xacti Software DVD INSTRUCTION MANUAL): 1 i Li-ion battery pack (pages 23 and 25): 1 i Lithium-ion battery pack charger (page 23): 1 i Dedicated USB interface cable (page 157 - Sanyo VPC E2 | VPC-E2BL Owners Manual English - Page 29
i QUICK GUIDE i SAFETY MANUAL (safety precautions booklet) Please read this booklet carefully before using the camera. English 12 - Sanyo VPC E2 | VPC-E2BL Owners Manual English - Page 30
CHECKING THE INCLUDED ACCESSORIES How to use the accessories k Handstrap 13 English - Sanyo VPC E2 | VPC-E2BL Owners Manual English - Page 31
k Soft case English 14 - Sanyo VPC E2 | VPC-E2BL Owners Manual English - Page 32
ACCESSORIES Media cards that can be used with this camera The type of card that can be inserted into and used with this camera is: i SD Memory Card i SDHC Memory Card What "card" means in this manual i In this manual, SD Memory Cards and SDHC Memory Cards that can be used in this digital camera - Sanyo VPC E2 | VPC-E2BL Owners Manual English - Page 33
, you can also take still photos and make audio recordings. For example, you can snap a still image while recording a video clip, or make just an audio recording. Waterproof capability The camera is equipped to safely be used in water at a temperature of less than 40 ºC (104ºF), at a depth of less - Sanyo VPC E2 | VPC-E2BL Owners Manual English - Page 34
SPECIAL FEATURES Movable monitor for any shooting angle The movable monitor lets you shoot from any angle. Hold the camera high to get a great view of a parade, or swivel the monitor around to snap a photo of yourself. If you swivel the monitor unit to its - Sanyo VPC E2 | VPC-E2BL Owners Manual English - Page 35
Capture still shots while recording a video clip (page 64) Suppose that while you're recording a video clip, there's a scene you'd like to keep as a still photo. Your camera makes it possible to record the still photo without interrupting the video clip recording. 01:17:32 English 18 - Sanyo VPC E2 | VPC-E2BL Owners Manual English - Page 36
for optimal use of your captured images (page 20) Use the accessory cables to view images on a TV or computer. Or connect the camera directly to a printer to make prints of your photos. And with the software in the supplied DVD-ROM (Xacti Software DVD), you can create your original DVDs and CDs. 19 - Sanyo VPC E2 | VPC-E2BL Owners Manual English - Page 37
MAP You can connect the camera to various devices to expand its capabilities. Internet Computer Dedicated USB interface cable Printer Dedicated AV interface cable TV DC adaptor (Optional) AC adaptor (Optional) Commercially available SD Memory Card i Card reader i DPOF-compatible printer - Sanyo VPC E2 | VPC-E2BL Owners Manual English - Page 38
PARTS NAMES Front Flash Lens Speaker Stereo microphone REC/PLAY button Monitor unit To open ON/OFF button Strap holder There are places in the camera where water might accumulate, but this will not affect its waterproof properties. Concerning the drainage holes, see page 67. 21 English - Sanyo VPC E2 | VPC-E2BL Owners Manual English - Page 39
SETUP Rear [ ] button MENU button [ ] button [G] button [W/P] button [T/]] button [H] button SET button Multi-indicator Monitor Tripod stand hole Battery/card compartment cover English 22 - Sanyo VPC E2 | VPC-E2BL Owners Manual English - Page 40
, the CHARGE indicator is lit red. h The recharge time is approx. 90 minutes. 3 When the CHARGE indicator turns off, remove the battery pack from the charger. h If you are finished using the charger, unplug it from the power outlet. Battery charger Battery pack [o] mark CHARGE indicator 23 English - Sanyo VPC E2 | VPC-E2BL Owners Manual English - Page 41
separately sold battery pack before using it in your camera. For charging the battery pack, use the supplied charger. Charge the battery pack if i When the battery pack temperature is high, it may take longer to recharge it. Recharge a battery pack in the following cases i A battery pack which has - Sanyo VPC E2 | VPC-E2BL Owners Manual English - Page 42
THE BATTERY PACK AND CARD Make sure that the battery pack and the card orientation are correct. Install the battery pack 1 Open the battery/card compartment cover. h While gently pressing the lever, open the battery/card compartment cover. Lever 1 Push 2 Open 2 Insert the battery pack - Sanyo VPC E2 | VPC-E2BL Owners Manual English - Page 43
pack...> h Press the latch securing the battery pack, and remove the battery pack. 1 Press the latch 2 Pull out 3 Close the battery/card compartment cover. h Press the PUSH LOCK part to close the cover securely. h At the time of purchase the battery pack is not charged. Be sure to fully charge - Sanyo VPC E2 | VPC-E2BL Owners Manual English - Page 44
INSTALLING THE BATTERY PACK AND CARD CAUTION Close the battery/card compartment cover securely i If the battery/card compartment cover is not closed or is not closed completely, the camera will no longer be waterproof. When closing the battery/card compartment cover, make sure that no foreign object - Sanyo VPC E2 | VPC-E2BL Owners Manual English - Page 45
SETUP Install the card The card can be used after it has been formatted with the camera (page 148). 1 Open the battery/card compartment cover. Card slot 2 Insert the card. h Firmly insert the card until it clicks into place. 1 Open 2 Insert 3 Close the battery/card compartment cover. - Sanyo VPC E2 | VPC-E2BL Owners Manual English - Page 46
from the camera's internal memory. When the camera is turned on with no card installed, the internal memory icon is shown on the monitor to let you know that the images you capture will be saved to the camera's internal memory. Warning concerning battery pack temperature i If the battery pack in - Sanyo VPC E2 | VPC-E2BL Owners Manual English - Page 47
recording. i The user can specify the time elapsed before the power save function is activated (page 143). i When the camera is connected to a computer or printer using the dedicated USB interface cable, the power save function is disabled, and the camera turns off after about 12 hours. English 30 - Sanyo VPC E2 | VPC-E2BL Owners Manual English - Page 48
time settings have not been completed (page 32), the date and time cannot be recorded with the captured images. For this reason, immediately after the camera is turned on, the "Set date and time" screen appears. To have the date and time recorded with the images, please complete this setting before - Sanyo VPC E2 | VPC-E2BL Owners Manual English - Page 49
SETUP DATE AND TIME SETTING The camera will record the date and time an image or audio recording on page 34. Example: To set the clock to 7:30 p.m. on December 24, 2008 1 Turn on the camera (page 30), and press the SET button. h The Clock Set Screen appears. h Follow the procedures below to - Sanyo VPC E2 | VPC-E2BL Owners Manual English - Page 50
DATE AND TIME SETTING 2 Set the date. 1 Select "DATE". 2 Press the SET button. h The Set Date Screen appears. 3 Set the date to "2008/12/24". h The date is set in the following order: Set the year → Set the month → Set the day. h Press the [G] or [H] button to select year, month or day. Press the - Sanyo VPC E2 | VPC-E2BL Owners Manual English - Page 51
to check that the date and time settings are still correct after replacing the battery pack and before shooting or recording of any type (follow step 1). To correct the date and time settings 1 Turn on the camera. 2 Display the Option Setting Menu [E1] (page 129). 3 Select "CLOCK SET" and press the - Sanyo VPC E2 | VPC-E2BL Owners Manual English - Page 52
THE SHOOTING MODE AND PLAYBACK MODE Switch between the shooting mode (for recording) and the playback mode (for viewing your recorded images). 1 Turn on the camera (page 30). 2 Press the REC/PLAY button. h The mode changes. h The mode changes each time the REC/PLAY button is pressed. 668 01:17:32 - Sanyo VPC E2 | VPC-E2BL Owners Manual English - Page 53
's many functions. Select the mode that is suitable for your purposes. Switching between the SIMPLE and NORMAL modes 1 Turn on the camera (page 30). h The previous mode is active. 2 Press the MENU button. h The Menu Screen for the active mode appears. 3 Select the operating mode icon, and - Sanyo VPC E2 | VPC-E2BL Owners Manual English - Page 54
SWITCHING THE OPERATING MODE Accessing/exiting the SIMPLE/NORMAL Mode Menu Screen 1 Set the camera to the shooting or playback mode (page 35). 2 Select the desired operating mode (page 36). 3 If the Menu Screen is not displayed, press the MENU - Sanyo VPC E2 | VPC-E2BL Owners Manual English - Page 55
SETUP Using the SIMPLE Mode Menu 4 Press the [T/]] or [W/P] button to select the item you wish to change, and press the SET button. h The Setting Screen for the selected item appears. Select an item to change Press Description of selected item Select movie and photo size Press S N EXIT OK - Sanyo VPC E2 | VPC-E2BL Owners Manual English - Page 56
SWITCHING THE OPERATING MODE Using the NORMAL Mode Menu 4 Press the [T/]] or [W/P] button to select a tab. h The Menu Screen for the selected tab appears. Press Tab Press 1 RECORDING MENU 1 2 MOVIE PHOTO 3 SCENE SELECT 1 FILTER 2 FLASH 3 SELF-TIMER SN EXIT OK 5 Press the [H] button. - Sanyo VPC E2 | VPC-E2BL Owners Manual English - Page 57
indicator shows the shooting mode(s) for which the selected setting is effective. : This setting is effective during still image shooting. : This setting is effective during video clip recording. : This setting is effective during still image shooting and - Sanyo VPC E2 | VPC-E2BL Owners Manual English - Page 58
SWITCHING THE OPERATING MODE Overview of the SIMPLE Mode Setting Screen SIMPLE Mode Shooting Menu Select movie and 1 photo size 2 3 4 SN EXIT OK 5 41 English - Sanyo VPC E2 | VPC-E2BL Owners Manual English - Page 59
size will be 3264 × 2448 pixels. 6 : The video clip size will be 320 × 240 pixels, and the still 3 Flash (page 62) h Specify how the flash will operate. 9: The camera detects the subject brightness and uses the flash only when necessary. :: The flash battery power indication (page 153) English 42 - Sanyo VPC E2 | VPC-E2BL Owners Manual English - Page 60
SWITCHING THE OPERATING MODE SIMPLE Mode Playback Menu 1 2 3 SN Start slideshow OK 5 4 43 English - Sanyo VPC E2 | VPC-E2BL Owners Manual English - Page 61
(page 72) h Specify the slideshow settings and play the slideshow. 2 Playback volume (page 73) h Adjust the volume for video clip and audio file playback. 3 Delete (page 74) h Delete files. 4 (page 36) h Set to the NORMAL mode. 5 Remaining battery power indication (page 153) SETUP English 44 - Sanyo VPC E2 | VPC-E2BL Owners Manual English - Page 62
SWITCHING THE OPERATING MODE Overview of the NORMAL Mode Setting Screen NORMAL Mode Shooting Menu 1 RECORDING MENU 1 2 MOVIE PHOTO 1 2 3 SCENE SELECT 3 1 FILTER 4 2 FLASH 5 3 SELF-TIMER 6 8 SN EXIT OK 7 45 English - Sanyo VPC E2 | VPC-E2BL Owners Manual English - Page 63
SETUP 1 Video clip settings (page W: Monochrome filter ,: Sepia filter 5 Flash (page 88) k: The camera will detect the subject brightness and use the flash only when necessary. m: [ ] or [ ] button is pressed. 7 Remaining battery power (page 153) 8 S N (page 36) h Set to the SIMPLE mode. English 46 - Sanyo VPC E2 | VPC-E2BL Owners Manual English - Page 64
SWITCHING THE OPERATING MODE 1 RECORDING MENU2 2 MOVIE STABILIZER PHOTO STABILIZER 1 2 3 FOCUS 3 1 FOCUS MODE 4 2 EXP MEASURE 5 3 ISO 6 8 SN EXIT OK 7 47 English - Sanyo VPC E2 | VPC-E2BL Owners Manual English - Page 65
range of 80 cm (31.50 in.) to infinity (normal). -: Set the focus distance manually (manual). +: The camera focuses on the subject within a range of 1 cm (0.39 in.) to 80 cm (31 is the standard output sensitivity. 7 Remaining battery power (page 153) 8 S N (page 36) h Set to the SIMPLE mode. English - Sanyo VPC E2 | VPC-E2BL Owners Manual English - Page 66
SWITCHING THE OPERATING MODE 1 RECORDING MENU3 2 WHITE BALANCE FACE CHASER 1 2 3 HIGH SENSITIVITY 3 1 DIGITAL ZOOM 4 2 REC FOLDER 5 3 7 SN EXIT OK 6 49 English - Sanyo VPC E2 | VPC-E2BL Owners Manual English - Page 67
mode (page 101) 1: Increased sensitivity 2: Normal sensitivity 4 Digital zoom (page 102) Q: Enable the digital zoom. B: Disable the digital zoom. 5 Recording folder (page 103) h Create or select a folder in which to store recorded files. 6 Remaining battery power indication (page 153) 7 S N (page 36 - Sanyo VPC E2 | VPC-E2BL Owners Manual English - Page 68
and play the slideshow. 2 Playback volume (page 73) h Adjust the volume for video clip and audio files playback. 3 Protect (page 107) h File protect setting ( 109) h Reduce the resolution of a still image. 7 Remaining battery power (page 153) 8 S N (page 36) h Set to the SIMPLE mode. 51 English - Sanyo VPC E2 | VPC-E2BL Owners Manual English - Page 69
112) h Edit video clips. 3 Printing instructions (page 120) h Specify the printing instructions (DPOF settings). 4 Select folder (page 77) h Select a folder to play back. 5 Copy (page 126) h Copy files from the card to the internal memory, or vice versa. 6 Remaining battery power indication (page - Sanyo VPC E2 | VPC-E2BL Owners Manual English - Page 70
the fingers of the right hand, from the little finger to the middle finger, around the camera, and hook the index finger above the lens. A finger is blocking the lens or flash. Example 2: Grip the camera by wrapping the fingers of the right hand, from the little finger to the index finger - Sanyo VPC E2 | VPC-E2BL Owners Manual English - Page 71
incorrect focus The following examples are some of the situations where the autofocus function may not work. i Subjects with low contrast, very bright subjects at the center of the image or framing the subject vertically, then re-orient the camera to compose a horizontally framed image. English 54 - Sanyo VPC E2 | VPC-E2BL Owners Manual English - Page 72
examples are some of the situations where the autofocus function may work, but not as desired. i When both near and far the focus on an object at the same distance as the desired subject, then reposition the camera to compose the picture. HINT i Images captured in the still image shooting mode can be - Sanyo VPC E2 | VPC-E2BL Owners Manual English - Page 73
size will also be larger. Select the image quality that is correct for the intended purpose. 1 Display the SIMPLE Mode Shooting Menu (page 37), select the recording size setting, and press the SET button. To watch on TV 8 TV size 8M [4:3] EXIT OK T: The video clip size will be 640 × 480 pixels - Sanyo VPC E2 | VPC-E2BL Owners Manual English - Page 74
setting, and press the SET button. All ranges Automatic focus (people, landscape, etc.) EXIT OK 7: The camera automatically focuses on the subject within a range of 10 cm (3.94 in.) to infinity (normal). 8: The camera focuses on a subject within a range of 1 cm (0.39 in.) to 80 cm (31.50 in.) (super - Sanyo VPC E2 | VPC-E2BL Owners Manual English - Page 75
the image and sound files are recorded on the card installed in the camera or in the camera's internal memory. Taking pictures in backlight conditions... i When taking is flashing red, depending on the camera's internal memory remaining capacity, in some cases the next image can be captured about 2 - Sanyo VPC E2 | VPC-E2BL Owners Manual English - Page 76
VIDEO CLIP RECORDING 1 Turn on the camera (page 30), and set it to the shooting mode (page 35). 2 Press the [ ] button. h Recording begins. h It is not necessary to keep the [ ] button pressed - Sanyo VPC E2 | VPC-E2BL Owners Manual English - Page 77
SIMPLE/SHOOTING SHOOTING SINGLE SHOTS Capture a still image (single-shot). 1 Turn on the camera (page 30), and set it to the shooting mode (page 35). 2 Press the [ ] button. 1 Press the [ ] button halfway. h The autofocus operates, and the image is - Sanyo VPC E2 | VPC-E2BL Owners Manual English - Page 78
shutter speed is slow and the possibility that the image may be blurred due to camera shake becomes high, the camera shake icon may appear on the monitor. In this case, use a tripod to stabilize the camera when shooting, or set the flash operation mode to automatic (page 62). i When shooting - Sanyo VPC E2 | VPC-E2BL Owners Manual English - Page 79
the flash setting, and press the SET button. h The screen to select the flash operation appears. Auto Flash automatically EXIT OK 9: The camera detects the subject brightness and uses the flash only when necessary. :: The flash operates with every image captured regardless of the conditions. ;: The - Sanyo VPC E2 | VPC-E2BL Owners Manual English - Page 80
SHOOTING SINGLE SHOTS CAUTION Do not touch the flash unit when shooting i The flash unit becomes very hot and may cause a burn. Avoid touching the flash unit when shooting. HINT i The flash works only when shooting single-shot still images. 63 English - Sanyo VPC E2 | VPC-E2BL Owners Manual English - Page 81
CLIP You can capture a still image (a single-shot) while recording a video clip. 1 Turn on the camera (page 30), and set it to the shooting mode (page 35). 2 Press the [ ] button. [ ] button [ ] button 3 When you see a scene you'd like to capture as a - Sanyo VPC E2 | VPC-E2BL Owners Manual English - Page 82
clip mode setting (page 79). If you intend to capture a still image while recording a video clip, it is suggested that you take note of the remaining video recording time. About the recording size of still images i The still image shooting size automatically changes to G and the image is captured - Sanyo VPC E2 | VPC-E2BL Owners Manual English - Page 83
/SHOOTING MACRO-PHOTOGRAPHY (ZOOM) Your camera has two zoom functions: optical zoom and digital zoom. 1 Point the camera lens at the subject. 2 Press the mode changes to the digital zoom mode and zooming continues. [T] or [W] button Monitor 3 Take the picture. For video clip recording, see page - Sanyo VPC E2 | VPC-E2BL Owners Manual English - Page 84
wash it with fresh water and dry it completely. 1 Turn off the camera, and close the battery/card compartment cover securely. 2 Wash the camera with fresh water. h Fill a shallow basin with fresh water, and immerse the closed camera for about 5 minutes. Rotate the monitor unit several times to clean - Sanyo VPC E2 | VPC-E2BL Owners Manual English - Page 85
the drainage holes if the camera is not completely dry inside. Take special care not to let water get inside the battery/card compartment. h Do not use a hair dryer or the like to dry the camera. Exposing the camera to high temperatures may cause the camera and/or waterproof seal to become deformed - Sanyo VPC E2 | VPC-E2BL Owners Manual English - Page 86
PLAYBACK SIMPLE/PLAYBACK PLAYING BACK VIDEO CLIPS AND STILL IMAGES 1 Set the camera to the playback mode (page 35). 2 Press the [G] or [H] button to display the image you wish to play back. h Video clips are indicated by a video clip pattern along the left and right sides of the screen. Arrow - Sanyo VPC E2 | VPC-E2BL Owners Manual English - Page 87
SIMPLE/PLAYBACK To do this... Normal forward playback Stop playback Pause To play back one image at a time (singleframe step) Slow playback Forward playback Reverse playback Forward playback Reverse playback To accelerate playback Forward playback Reverse playback Return to normal playback - Sanyo VPC E2 | VPC-E2BL Owners Manual English - Page 88
will always be displayed properly on the monitor or a television.) i Depending on the card, shooting may end even before the possible shooting time indicated. Display the video clip playback point i During video clip playback, press the MENU button for at least 1 second to display a bar showing - Sanyo VPC E2 | VPC-E2BL Owners Manual English - Page 89
" feature. 1 Display the SIMPLE Mode Playback Menu (page 37), select the slideshow setting, and press the SET button. =: Play back all files. 3: Play back video clips and audio files. c: Play back still image files. SLIDESHOW ALL MOVIE PHOTO START 2 Select the type of file to play back, and press - Sanyo VPC E2 | VPC-E2BL Owners Manual English - Page 90
PLAYBACK VOLUME Adjust the playback volume for video clips and audio files. 1 Display the SIMPLE Mode Playback Menu (page 37), select the playback volume setting, and press the SET button. h The volume control - Sanyo VPC E2 | VPC-E2BL Owners Manual English - Page 91
SIMPLE/PLAYBACK DELETING FILES You can delete files if you no longer need them. You can delete the files one at a time, or all at once. 1 Display the SIMPLE Mode Playback Menu (page 37), select the delete c icon, and press the SET button. DELETE SINGLE: Deletes the currently displayed file. - Sanyo VPC E2 | VPC-E2BL Owners Manual English - Page 92
DELETING FILES 3 Select "DELETE", and press the SET button. h The currently displayed file is deleted. h To delete other files, select the files, select "DELETE" and press the SET button. h The Delete Confirmation Screen again appears. To delete the files, select "YES", - Sanyo VPC E2 | VPC-E2BL Owners Manual English - Page 93
the [W/P] button is pressed while the 9-image display is shown, the display changes to the 20-image display. Arrow buttons SET button REC/PLAY button Video Orange frame clip Still image 100 0001 0002 0003 0004 0005 0006 0007 0008 0009 Audio file Image number Folder number English 76 - Sanyo VPC E2 | VPC-E2BL Owners Manual English - Page 94
playback folder If the card contains multiple folders, you can select from which folder you would like to play back. 1 Display the Playback Screen. 2 Press the [W/P] button 3 times. h The screen to select the playback folder appears. h If the [T/]] button is pressed, the camera changes to the 20 - Sanyo VPC E2 | VPC-E2BL Owners Manual English - Page 95
SIMPLE/PLAYBACK Magnifying (zooming in) the image 1 Display the image that you want to magnify. 2 Push the [T/]] button. h Magnification is enabled. h The image is magnified, and the central portion of image is displayed. To magnify: Magnification increases each time the [T/]] button is pressed. - Sanyo VPC E2 | VPC-E2BL Owners Manual English - Page 96
quality of video clips and still images is determined by the recording size (number of pixels). The larger the recording size, the better the image quality size, the file size is also proportionately larger, using up more memory. This menu is also used when making audio recordings. 1 Display - Sanyo VPC E2 | VPC-E2BL Owners Manual English - Page 97
NORMAL/SHOOTING Still images This menu is also used for shooting sequential shots. 1 Display the NORMAL Mode Shooting Menu (page 37), select "PHOTO", and press the SET button. I: Image size is 4000 × 3000 pixels. U: Image size is 3264 × 2448 pixels (low compression). V : Image size is 3264 × 2448 - Sanyo VPC E2 | VPC-E2BL Owners Manual English - Page 98
RECORDING SIZE Sequential shots 1 Display the NORMAL Mode Shooting Menu (page 37), select "PHOTO", and press the SET button. 2 Select R or t, and press the SET button. 3 Press the [ ] button. h Shooting begins. Shooting continues as long as the [ kept pressed. ] button is HINT i The maximum - Sanyo VPC E2 | VPC-E2BL Owners Manual English - Page 99
NORMAL/SHOOTING Audio recording Your camera can make audio recordings and play them back. Audio recording 1 Display the NORMAL Mode Shooting Menu (page 37), select "MOVIE", and press the SET button. 2 - Sanyo VPC E2 | VPC-E2BL Owners Manual English - Page 100
clip whose resolution setting is d exceeds about 7 hours, the recorded file is saved once, and the recording continues in a new file. When recording a video clip whose resolution setting is other than l or d and the file size exceeds 4 GB, the recorded file is saved once, and the recording continues - Sanyo VPC E2 | VPC-E2BL Owners Manual English - Page 101
NORMAL/SHOOTING 2 Play back the recording. To do this... Do this Start playback Press the SET button. Normal playback Pause Press the SET button. Press the [T/]] button. Stop playback Press the [W/P] button. Fast forward During playback, press the [H] button. Each time the [H] button is - Sanyo VPC E2 | VPC-E2BL Owners Manual English - Page 102
and press the SET button. Scene setting Features = Auto The camera makes the optimum settings. a Sports Capture a split-second low-light conditions m: Available n: Not available Shooting mode setting Singleshot Sequential shots Video clip m m m m m m m m m m m m m n m - Sanyo VPC E2 | VPC-E2BL Owners Manual English - Page 103
press the SET button. HINT i When capturing images using the lamp Q, fireworks + or night view portrait / setting, use a tripod or other method to stabilize the camera. i A table showing the limitations for settings corresponding to scene select icons other than = is on page 182. English 86 - Sanyo VPC E2 | VPC-E2BL Owners Manual English - Page 104
FILTERS The filter feature changes image characteristics such as color tones, to apply unique effects to the photographed image. 1 Display the NORMAL Mode Shooting Menu (page 37), select "FILTER", and press the SET button. &: No filter is used (none). %: Skin tones are enhanced in close-up shots ( - Sanyo VPC E2 | VPC-E2BL Owners Manual English - Page 105
37), select "FLASH", and press the SET button. k: The camera detects the subject brightness and uses the flash only when necessary. cause a burn. Avoid touching the flash unit when shooting. HINT i The flash works only when shooting single-shot still images. i By assigning an operation shortcut to - Sanyo VPC E2 | VPC-E2BL Owners Manual English - Page 106
SELF-TIMER Set the delay time before recording starts after the [ ] or [ ] button is pressed. 1 Display the NORMAL Mode Shooting Menu (page 37), select "SELF- TIMER", and press the SET button. N: Turns off the self-timer function. y: The image is captured about 2 seconds after the [ ] button or [ ] - Sanyo VPC E2 | VPC-E2BL Owners Manual English - Page 107
self-timer menu, and press the SET button. i The self-timer is automatically reset to off N after the power save mode is activated and the camera turned off. When x is selected... i When the [ ] button or [ ] button is pressed, the multi-indicator will blink for about 10 seconds, and then the image - Sanyo VPC E2 | VPC-E2BL Owners Manual English - Page 108
93) does not change when the [ ] button is pressed, so this setting is convenient when shooting mostly video clips (video clip field of view display). q: Compensate for unintentional camera motion during video clip recording. The field of view does not change when the [ ] button is pressed, so this - Sanyo VPC E2 | VPC-E2BL Owners Manual English - Page 109
NORMAL/SHOOTING HINT If the motion compensation does not seem to be working... i Due to the mechanical characteristics of this function, it may not be possible for the camera to compensate for violent motion. i If the digital zoom (page 66) is being used, the large magnification factor may make it - Sanyo VPC E2 | VPC-E2BL Owners Manual English - Page 110
recording range is as shown in the recording standby screen. During still image shooting Display during recording standby During video clip recording For p setting For q setting Video clip recording area For ] setting i When the still image shooting resolution is set to [ and the scene select - Sanyo VPC E2 | VPC-E2BL Owners Manual English - Page 111
infinity (total range mode) *: 80 cm (31.50 in.) to infinity (normal mode) -: The focus can be manually set to any distance from 1 cm (0.39 in.) to 8 m (26.25 ft.), as well as to infinity (manual focus). +: 1 cm (0.39 in.) to 80 cm (31.50 in.) (super macro mode: wide end only - Sanyo VPC E2 | VPC-E2BL Owners Manual English - Page 112
distance between the center of the lens and the subject. i In some cases there may be a slight variance between the distance (numerical figure) you set in the manual focus mode and the actual distance. About zoom movement when using the manual focus i If the focus distance is set to 70 cm (27.56 - Sanyo VPC E2 | VPC-E2BL Owners Manual English - Page 113
from 9 different focus points within the shooting area visible on the monitor. When the image is focused, a target mark & appears. Spot focus: The camera focuses on the subject in the center of the monitor. 1 Display the NORMAL Mode Shooting Menu (page 37), select "FOCUS MODE", and press the SET - Sanyo VPC E2 | VPC-E2BL Owners Manual English - Page 114
LIGHT-MEASURING MODE SETTING You can select from 3 types of light-measuring modes. Multi-section light-measuring: The light is modulated after sampling from multiple areas of the entire shooting screen. Center-weighted light-measuring: The light is modulated for the entire image after measuring - Sanyo VPC E2 | VPC-E2BL Owners Manual English - Page 115
button (page 135), you can change the ISO setting from the Shooting Screen. CAUTION Does the image appear to flicker when recording a video clip? i If recording a video clip under fluorescent lights with the ISO sensitivity set to w or higher, a noticeable flicker may appear in the image. English 98 - Sanyo VPC E2 | VPC-E2BL Owners Manual English - Page 116
conditions or change the overall tone of the image, the white balance can be manually set. 1 Display the NORMAL Mode Shooting Menu (page 37), select "WHITE BALANCE", and press the SET button. >: The camera will make the white balance adjustment automatically based on the natural and artificial light - Sanyo VPC E2 | VPC-E2BL Owners Manual English - Page 117
setting automatically changes to =. CAUTION i The face chaser function does not work while the digital zoom is being used. i The face chaser function does not work when zooming in or out. i The face chaser function may not work when the subject's face in the monitor is relatively small or appears - Sanyo VPC E2 | VPC-E2BL Owners Manual English - Page 118
139) is set to "ON", the high sensitivity mode automatically changes to "OFF". i When the shutter speed is reduced to create a bright image, video clip motion will appear uneven during playback. i When shooting in a dark environment, the autofocus and auto exposure may not function effectively. 101 - Sanyo VPC E2 | VPC-E2BL Owners Manual English - Page 119
This setting allows you to specify whether or not the digital zoom is enabled during zoom shooting. 1 Display the NORMAL Mode Shooting Menu (page 37), select "DIGITAL ZOOM", and press the SET button. Q: Digital zoom can be used. B: Digital zoom cannot be used. 2 Select the desired setting, and press - Sanyo VPC E2 | VPC-E2BL Owners Manual English - Page 120
SPECIFY A FOLDER TO SAVE FILES Create or select a recording folder (a folder in which to store recorded files). 1 Display the NORMAL Mode Shooting Menu (page 37), select "REC FOLDER" and press the SET button. h Select "NEW". h Select the desired - Sanyo VPC E2 | VPC-E2BL Owners Manual English - Page 121
TV-SHQ 668 01:17:32 Pointer Exposure compensation bar HINT The exposure compensation setting is canceled in the following cases: i When the pointer is set to the center position. i When the camera is set to the playback mode. i When the standby mode is activated. i After the power is turned off - Sanyo VPC E2 | VPC-E2BL Owners Manual English - Page 122
(page 37), select "SLIDESHOW", and press the SET button. MODE: Specify the file type to play back. ALL: Play back all files. MOVIE: Play back video clips and audio files. PHOTO: Play back still image files. TIME: Adjust the transition speed (the period that an image is displayed before it changes - Sanyo VPC E2 | VPC-E2BL Owners Manual English - Page 123
? i When video clips are played back in a slideshow, the recorded audio track is played back; the BGM is not played. Did you delete a BGM audio file from the camera? i The three BGM audio files that were stored in your camera's internal memory at the time of purchase can be recovered by formatting - Sanyo VPC E2 | VPC-E2BL Owners Manual English - Page 124
the file is locked. PROTECT LOCK EXIT OK CAUTION i Even if the protect mode is set for certain files, they will be deleted if the card is reformatted (page 148). HINT To select a different image in steps 2 and 3... i Press the [G] or [H] button. To cancel the protect mode for a file... i Display - Sanyo VPC E2 | VPC-E2BL Owners Manual English - Page 125
NORMAL/PLAYBACK ROTATE STILL IMAGE Captured still images can be rotated to the correct orientation for viewing. 1 Display the still image you wish to rotate, and display the NORMAL Mode Playback Menu (page 37). 2 Select "ROTATE", and press the SET button. RIGHT: Rotates image clockwise 90 degrees - Sanyo VPC E2 | VPC-E2BL Owners Manual English - Page 126
REDUCE STILL IMAGE SIZE (RESIZE) A captured image can be resized to a smaller size and saved as a separate image. 1 Display the still image whose size you want to change, and display the NORMAL Mode Playback Menu (page 37). 2 Select "RESIZE", and press the SET button. - Sanyo VPC E2 | VPC-E2BL Owners Manual English - Page 127
CORRECTING THE RED-EYE EFFECT AND IMAGE BLUR NORMAL/PLAYBACK Repair the red-eye effect in still images to make the eyes appear more natural, and enhance the contrast of blurry images. 1 Display the image to be modified, and display the NORMAL Mode Playback Menu (page 37). 2 Select "EDIT PHOTO", - Sanyo VPC E2 | VPC-E2BL Owners Manual English - Page 128
the "Red-eye correction not successful" message appears... i The camera was not able to successfully repair the image. i The correction function works to automatically edit flaws that the camera detects in captured images. In some cases, the camera may fail to correct a flaw. Concerning the date and - Sanyo VPC E2 | VPC-E2BL Owners Manual English - Page 129
one separate clip ("joining"). Procedure to cut (extract) a portion of a video clip Specify the frames 1 2 (1, 2) where the video clip is to be cut. A B C J Extract the specified portion. [Two ways to cut the video clip] i Trim away portions A and C, and save portion B. i Delete portion - Sanyo VPC E2 | VPC-E2BL Owners Manual English - Page 130
clip may also be erased. i As the number or size of the video clips increases, the card memory may become full, making it impossible to edit the video clips. In this case, you will need to free some of the memory on the card, either by deleting files that are no longer necessary (page 74), or by - Sanyo VPC E2 | VPC-E2BL Owners Manual English - Page 131
from which you wish to extract a segment. 2 Display the NORMAL Mode Playback Menu (page 37), select "EDIT VIDEO", and press the SET button. EDIT VIDEO CUT JOIN OK 3 Select "CUT" and press the SET button. h The Cutting Screen appears. Start point CUT 00:00:10 SAVE NORMAL/PLAYBACK English - Sanyo VPC E2 | VPC-E2BL Owners Manual English - Page 132
playback, press the [H] button to move forward one frame, or the [G] button to move back one frame. 5 Press the [T/]] button. h The start point of the video clip extract is set, and the screen to specify the end point appears. h Specify the end point of the extract by following the same procedure - Sanyo VPC E2 | VPC-E2BL Owners Manual English - Page 133
the large amount of data can become quite long. To avoid problems caused by the battery pack becoming depleted in the middle of video clip editing, before starting to edit be sure that a sufficiently charged battery pack is installed in the camera, or connect an AC adaptor (sold separately). i It is - Sanyo VPC E2 | VPC-E2BL Owners Manual English - Page 134
be joined. 1 Display the NORMAL Mode Playback Menu (page 37), select "EDIT VIDEO", and press the SET button. EDIT VIDEO CUT JOIN OK 2 Select "JOIN" and press the SET button. h The 6-image playback display for video clips appears. Select a clip SAVE 100 0001 0002 0003 0004 0005 0006 117 - Sanyo VPC E2 | VPC-E2BL Owners Manual English - Page 135
clip will be saved as a new file. The original video clips remain unchanged. OVERWRITE: The original video clips will be deleted. Only the joined video clip will be saved. REVIEW CLIP: Play back the joined video clip before saving it. Select a clip SAVE 100 0001 0002 00:00:30 0003 0004 0005 - Sanyo VPC E2 | VPC-E2BL Owners Manual English - Page 136
the large amount of data can become quite long. To avoid problems caused by the battery pack becoming depleted in the middle of video clip editing, before starting to edit be sure that a sufficiently charged battery pack is installed in the camera, or connect an AC adaptor (sold separately). i It is - Sanyo VPC E2 | VPC-E2BL Owners Manual English - Page 137
NORMAL/PLAYBACK PRINTING INSTRUCTIONS In addition to using your printer to print out still images captured with your camera, as with conventional film, you can have prints made at shops offering digital print services. Moreover, this camera is DPOF-compatible, so you can use the camera to specify - Sanyo VPC E2 | VPC-E2BL Owners Manual English - Page 138
PRINTING INSTRUCTIONS HINT Printing a single frame from a video clip i To print with a printer or have the digital print service shop print out a still image from a video clip, you must first save it (extract still) as a still image (page 71). About the DPOF format i DPOF (Digital Print Order Format - Sanyo VPC E2 | VPC-E2BL Owners Manual English - Page 139
button. h The Date/Copies Print Screen appears. h If "EACH IMAGE" was selected, press the [G] or [H] button to display the desired image to print. h The printing instructions that are currently active for the displayed image are shown. You can press the [G] or [H] button to confirm the printing - Sanyo VPC E2 | VPC-E2BL Owners Manual English - Page 140
PRINTING INSTRUCTIONS 4 Specify whether the date is displayed on the print, and the number of prints. - Sanyo VPC E2 | VPC-E2BL Owners Manual English - Page 141
on one sheet is called an "index print". This is convenient for use as a list of the images you have captured. 1 Display the Printing Instructions Screen (page 120). 2 Select "INDEX". 3 Press the SET button. h The Index Print Screen appears. SET: Specify an index print copy. EXIT: Discontinue the - Sanyo VPC E2 | VPC-E2BL Owners Manual English - Page 142
"ALL CLEAR". 3 Press the SET button. h The Confirm All Clear Screen appears. CANCEL: Clear the printing instructions for all images. EXIT: Cancel the clear procedure and return to the Printing Instructions Screen. ALL CLEAR :2008/12/24 :2 copies CANCEL EXIT OK 4 Select "CANCEL", and press the SET - Sanyo VPC E2 | VPC-E2BL Owners Manual English - Page 143
copy files appears. 4 Select the copy direction. INT MEM CARD: Copy files from the internal memory to the card. CARD INT MEM: Copy files from the card to the internal memory. COPY INT MEM CARD CARD INT MEM OK * If no card is set in the camera, you cannot copy files. NORMAL/PLAYBACK English 126 - Sanyo VPC E2 | VPC-E2BL Owners Manual English - Page 144
background on the screen. COPY SINGLE: Copy one file. COPY ALL: Copy all the files from the copy source to the copy destination. INT MEM CARD COPY SINGLE COPY ALL OK 6 Select the desired type of copy. 1 Press the [G] or [H] button to display the file you wish - Sanyo VPC E2 | VPC-E2BL Owners Manual English - Page 145
a file was recorded with your camera. 1 Display the desired file on the camera monitor. 2 Press the MENU Video clip mode settings 2 Image or sound number 3 Protect setting 4 File size 5 Shooting or recording time 6 Exposure compensation setting 7 Aperture value 8 Shutter speed 9 Remaining battery - Sanyo VPC E2 | VPC-E2BL Owners Manual English - Page 146
OPTION SETTINGS OPTION SETTINGS DISPLAY THE OPTION SETTING MENU The camera settings are executed via the Option Setting Menu. 1 Set the operating mode to the NORMAL mode (page 36). 1 2 Press the MENU button to display the - Sanyo VPC E2 | VPC-E2BL Owners Manual English - Page 147
2 Select "INFO DISPLAY", and press the SET button. SHOW ALL: Display the capture date and playback time (for video clips). DATE & TIME: Display the capture date. COUNTER: Display the video clip playback time. OFF: Do not display the capture date and playback time. INFO DISPLAY SHOW ALL DATE & TIME - Sanyo VPC E2 | VPC-E2BL Owners Manual English - Page 148
. 1 Display the Option Setting Menu [E1] (page 129). 2 Select "STARTUP DISPLAY", and press the SET button. DATE & TIME: The camera's date and time setting is shown. Xacti: The Xacti logo is shown. INDEX: An animated character (penguin) is shown. OFF: No startup display. STARTUP DISPLAY DATE & TIME - Sanyo VPC E2 | VPC-E2BL Owners Manual English - Page 149
taken using the selftimer. KEY SW: Select the sound that is produced when the SET button, MENU button, etc. are pressed. AUDIO GUIDE: Mute or enable the camera's audio help guide. OPERATION VOL: Adjust the volume of the operation sounds. OPERATION BEEP TURN ON/OFF ON SHUTTER D KEY SW A AUDIO - Sanyo VPC E2 | VPC-E2BL Owners Manual English - Page 150
button to select the desired setting, and press the SET button. h The screen to select operation sounds appears. h The respective screen to enable or disable the sound appears. h Press the [T/]] or [W/P] button to select the desired setting, and press - Sanyo VPC E2 | VPC-E2BL Owners Manual English - Page 151
POST-VIEW DISPLAY SETTING Specify the duration that the captured image appears on the monitor (postview) after the [ ] button is pressed. 1 Display the Option Setting Menu [E1] (page 129). 2 Select "POST VIEW", and press the SET button. 1 sec: The post-view image is displayed for 1 second. 2 sec: - Sanyo VPC E2 | VPC-E2BL Owners Manual English - Page 152
ASSIGN FUNCTIONS TO THE ARROW BUTTONS Assign functions (operation shortcuts) to the [G] and [H] buttons when they are pressed when the Shooting Screen is displayed. 1 Display the Option Setting Menu [E1] (page 129). 2 Select "SHORTCUTS", and press the SET button. h The Shortcuts Screen appears. : - Sanyo VPC E2 | VPC-E2BL Owners Manual English - Page 153
4 Press the [T/]] or [W/P] button. h Display the function you wish to assign to the button. SHORTCUTS FLASH 5 Press the SET button. h The selected function is assigned to the button, and you are returned to the Shortcuts Screen. h To assign functions to the other button, repeat steps 3 through 5. - Sanyo VPC E2 | VPC-E2BL Owners Manual English - Page 154
"NOISE REDUCTION", and press the SET button. NOISE REDUCTION MOVIE NR: Set ON/OFF the function to reduce MOVIE NR ON image noise when recording a video PHOTO NR ON clip. PHOTO NR: WIND SOUND NR ON Turn ON/OFF the image noise OK reduction function during still image shooting. WIND SOUND - Sanyo VPC E2 | VPC-E2BL Owners Manual English - Page 155
ADJUST THE IMAGE QUALITY The camera can adjust the image quality as the image is captured. 1 Display the Option Setting Menu [2] (page 129). 2 Select "IMAGE SETTINGS", and press the SET button. NORMAL: Shoot with image quality at normal. VIVID: Color saturation is increased. SOFT: The sharpness is - Sanyo VPC E2 | VPC-E2BL Owners Manual English - Page 156
FLICKER-REDUCTION The flicker-reduction setting reduces the flicker that results when filming video clips under fluorescent lights and the like where the background lighting pulsates at the frequency of the power supply. 1 Display the Option Setting Menu [2] (page - Sanyo VPC E2 | VPC-E2BL Owners Manual English - Page 157
MONITOR BRIGHTNESS Adjust the brightness of the camera's monitor display. Use this adjustment when the monitor image is difficult to view because of ambient lighting. 1 Display the Option Setting Menu [2] (page 129). 2 Select " - Sanyo VPC E2 | VPC-E2BL Owners Manual English - Page 158
SCREEN LANGUAGE You can set the monitor of your camera to display the messages in any one of several languages. 1 Display the Option Setting Menu [2] (page 129). 2 Select "LANGUAGE", and press the SET button. : Japanese - Sanyo VPC E2 | VPC-E2BL Owners Manual English - Page 159
camera's USB/AV terminal. 1 Display the Option Setting Menu [2] (page 129). 2 Select "TV SYSTEM", and press the SET button. h The TV System Screen appears. NTSC: Outputs NTSC video signals. PAL: Outputs PAL video to a TV using the included AV interface cable (page 155) Shooting: Images are displayed - Sanyo VPC E2 | VPC-E2BL Owners Manual English - Page 160
automatically turns off after a specified period of inactivity. The power save function works to conserve the battery pack power when the camera is not being used, or to prevent the battery pack from dying if the camera has accidentally been left on. You can specify the elapsed time (standby time - Sanyo VPC E2 | VPC-E2BL Owners Manual English - Page 161
OPTION SETTINGS 3 Select the desired option, and press the SET button. h The Set Standby Time Screen appears. 4 Press the [T/]] or [W/P] button to set the standby time. [T/]]: Increases the standby time. [W/P]: Decreases the standby time. 5 Press the SET button. 6 Press the MENU button. h The - Sanyo VPC E2 | VPC-E2BL Owners Manual English - Page 162
recorded by the camera. File name (image number) Card A 0001, 0002 ...... 0012, 0013 Replace card Card B 0001, 0002 ...... 0012, 0013 File name (image number) Card A 0001, 0002 ...... 0012, 0013 Replace card Card B 0014, 0015 - Sanyo VPC E2 | VPC-E2BL Owners Manual English - Page 163
B (before replacing) is lower than the highest file number on Card A: the file name of the next recorded image continues from last file name recorded on Card A. Card A 0001, 0002 ..... 0012, 0013 Replace card Card B 0001, 0002, 0014, 0015 ..... 0025, 0026 Previously recorded files When the highest - Sanyo VPC E2 | VPC-E2BL Owners Manual English - Page 164
1 Display the Option Setting Menu [3] (page 129). 2 Select "FILE NO. CONT'D", and press the SET button. ON: The file number memory function is on. OFF: The file number memory function is off. FILE NO. CONT'D ON OFF OK 3 Select the desired setting, and press the SET button. h The selected file - Sanyo VPC E2 | VPC-E2BL Owners Manual English - Page 165
CARD MEMORY AND INTERNAL MEMORY A card must be formatted with this camera: i After purchasing, when used for the first time, or i If it was formatted using a personal computer or another digital camera. The card no card installed, or when the remaining battery charge is low. - Sanyo VPC E2 | VPC-E2BL Owners Manual English - Page 166
may be merely modified and the data itself may not be completely erased from the card. i In some cases it may be possible to recover the data from a reformatted card using special software for that purpose. However, if the camera is used to execute a full format, it will be impossible to recover the - Sanyo VPC E2 | VPC-E2BL Owners Manual English - Page 167
not change the settings, and return to the Option Setting Menu. RESET SETTINGS RESET EXIT OK 3 Select "RESET", and press the SET button. h The camera settings are reset to the factory-preset settings. HINT i Note that the following settings do not change with this procedure: Date and time setting - Sanyo VPC E2 | VPC-E2BL Owners Manual English - Page 168
maximum number of images and recording time for specific cards, please see "Possible No. of Images/Possible Shooting Time/Possible Recording Time" on page 189. Checking the remaining number of images and video recording time 1 Set the camera to the shooting mode Remaining number of images (page - Sanyo VPC E2 | VPC-E2BL Owners Manual English - Page 169
and then delete them (page 74) from the card. i When the remaining number of images or the remaining video recording time is "0", it may be possible to capture a few more images by setting a lower resolution setting (pages 56, 79 and 80), or selecting a different image quality setting. English 152 - Sanyo VPC E2 | VPC-E2BL Owners Manual English - Page 170
right corner of the monitor. h Due to the battery pack characteristics, when the ambient temperature is low, may appear early for an incorrect indication of the remaining charge. Also, depending on the conditions of use of the camera or the ambient conditions (temperature, etc.), the - Sanyo VPC E2 | VPC-E2BL Owners Manual English - Page 171
SETTINGS HINT i If any file is present, you can also check the remaining battery pack charge on the Information Screen (page 128). i Battery life may differ even among battery packs of the same type. i Depending on the usage of the camera (such as the number of times the flash is used, the use of - Sanyo VPC E2 | VPC-E2BL Owners Manual English - Page 172
OTHER DEVICES AND CONNECTIONS CONNECTING TO A TV CONNECTING TO A TV CONNECTING TO A TV To the USB/AV terminal on the camera Supplied dedicated AV interface cable Yellow plug: To the VIDEO input terminal White plug: To the AUDIO input (L) terminal Red plug: To the AUDIO input (R) terminal Switch - Sanyo VPC E2 | VPC-E2BL Owners Manual English - Page 173
is connected to a TV, the images appear either on the camera or the TV. "TV SYSTEM" setting (page 142) NTSC PAL Supplied AV interface cable Not connected Connected Not connected Connected Camera monitor m n m m Recording mode m TV - (Field of - n view 90%) Playback mode - Sanyo VPC E2 | VPC-E2BL Owners Manual English - Page 174
PictBridge MODE Your camera supports the PictBridge function. By connecting the camera directly to a PictBridge-enabled printer, the camera's monitor can be used to select images and initiate printing (PictBridge printing). Use the dedicated USB interface cable to connect the camera to a printer - Sanyo VPC E2 | VPC-E2BL Owners Manual English - Page 175
not operate correctly. If the camera does not operate correctly, disconnect the USB interface cable, turn off the camera, and then reconnect the cable. i During PictBridge printing, the camera's button operation response is slower. i If the camera is powered by the battery pack for printing, make - Sanyo VPC E2 | VPC-E2BL Owners Manual English - Page 176
PRINTING Printing selected images Procedure to select one still image and print it. 1 Complete the printing setup (page 157). 2 Select the one image icon Y, and press the SET button. h The screen to select images for printing appears. 3 Press the [G] or [H] button to display the image you wish to - Sanyo VPC E2 | VPC-E2BL Owners Manual English - Page 177
Printing all images Print all of the images on the card. 1 Complete the print preparations (page 157). 2 Select the all images icon u, and press the SET is not possible if there are more than 999 still images in the card i Delete unwanted images before printing. CONNECTING TO A PRINTER English 160 - Sanyo VPC E2 | VPC-E2BL Owners Manual English - Page 178
PRINTING Making an index print Make an index print of all the images on the card. 1 Complete the print preparations (page 157). 2 Select the index print icon [, and press the SET button. h The Index Print Screen appears. INDEX 100-0022 3 Select " - Sanyo VPC E2 | VPC-E2BL Owners Manual English - Page 179
PRINT EXIT OK HINT i In step 2, if you press the [G] or [H] button, you can view each image and confirm its printing instructions. CAUTION i Requested images printing w is not possible if a printer is used that does not support your camera's DPOF function. CONNECTING TO A PRINTER English 162 - Sanyo VPC E2 | VPC-E2BL Owners Manual English - Page 180
PRINTING Changing the printer settings Images are printed according to settings specified by the camera, such as paper type, size, layout, printing quality, etc. 1 Complete the print preparations (page 157). 2 Select the printer settings icon v, and press the SET button. h The Printer Settings - Sanyo VPC E2 | VPC-E2BL Owners Manual English - Page 181
is connected. i To use printer functions which do not appear on your camera's Printer Settings Screen, select "PRINTER VALUES". i If a function set by the camera is not available in the printer, the camera's printer settings will automatically change to "PRINTER VALUES". CONNECTING TO A PRINTER - Sanyo VPC E2 | VPC-E2BL Owners Manual English - Page 182
pack temporarily lost its power. The ambient temperature is very low. The battery pack life has expired. The remaining battery pack power is low. A recorded file is being saved on the card. The camera has determined that the image is bright enough and the flash is not necessary. Action Place - Sanyo VPC E2 | VPC-E2BL Owners Manual English - Page 183
the self-timer and the exposure compensation are retained even after the camera is turned off. Select the resolution setting according to the intended use part of a photo (trimming). G, t: For printing standard photo (photo service) sizes. [: For photos displayed on a web page, or sent as email attachments - Sanyo VPC E2 | VPC-E2BL Owners Manual English - Page 184
details in the image. The digital zoom, on the other hand, works by magnifying a portion of the image that hits the image sensor and may produce a coarser image. Set the scene select function to the landscape + mode when photographing. Or, set the focus range setting to manual focus -, and set the - Sanyo VPC E2 | VPC-E2BL Owners Manual English - Page 185
be recorded with the images. When capturing an image, devise a way to compensate for a bright subject, for example, by changing the shooting angle. Hold the camera correctly and slowly press the [ ] button halfway to lock the focus. Then press the [ ] button all the way to capture the image. When - Sanyo VPC E2 | VPC-E2BL Owners Manual English - Page 186
edited using my computer? Why is there a motor-like sound during video clip playback? Answer This may happen when trying to play back images stored on a card from a different digital camera. If the subject moves or the camera is moved during recording, a distorted image may sometimes occur. Due to - Sanyo VPC E2 | VPC-E2BL Owners Manual English - Page 187
Please refer to the instruction manual for your printer. Select video clips that have the same resolution and frame rate. Delete unnecessary files, or use a card that has more memory available. Move the lock switch to the unlocked position. Remove the battery pack from the camera, wait a few minutes - Sanyo VPC E2 | VPC-E2BL Owners Manual English - Page 188
's video output to NTSC or PAL. Check the following items: 1 Remove the card and then install it again. 2 Remove the battery pack and then install it again. 3 Install a different card. If "System error" still appears after performing the above steps, then take the camera to the dealer for service - Sanyo VPC E2 | VPC-E2BL Owners Manual English - Page 189
TROUBLESHOOTING Before taking your camera to the repair shop, check the following table for a possible solution to the problem. Camera Power Shooting Problem No power. A blinking temperature warning icon \ is shown, and the camera does not turn on. The camera turns off by itself. An image is not - Sanyo VPC E2 | VPC-E2BL Owners Manual English - Page 190
TROUBLESHOOTING Shooting Problem An image is not captured when the [ ] button or [ ] button is pressed. The flash does not operate. The digital zoom does not work. Cause The maximum number of images that can be captured or the maximum video clip recording time has been reached. The flash off mode - Sanyo VPC E2 | VPC-E2BL Owners Manual English - Page 191
in or out, the zoom movement stops momentarily. There is noise in the captured image. When recording a video clip under fluorescent lights, a noticeable flicker appears in the image. The battery pack is consumed. The optical zoom has moved to the maximum magnification position. The ISO sensitivity - Sanyo VPC E2 | VPC-E2BL Owners Manual English - Page 192
TROUBLESHOOTING Shooting Monitor Problem The \ icon appears, and shooting is not possible. No playback image appears. Cause The camera's internal temperature is high. The camera is not set to the playback mode. Action Discontinue shooting, and wait for the camera to cool down before using it - Sanyo VPC E2 | VPC-E2BL Owners Manual English - Page 193
Problem The image is too dark. The video clip picture is flickering. Cause The flash was blocked by a finger or other object. The subject was too far away. The subject was lit from behind. There is not enough light. The video clip was filmed under fluorescent lighting. Action Hold the camera - Sanyo VPC E2 | VPC-E2BL Owners Manual English - Page 194
TROUBLESHOOTING Viewing images Problem The image is too bright. Red-eye correction was not successful. Cause The forced flash mode is selected. The subject was too bright. The ISO - Sanyo VPC E2 | VPC-E2BL Owners Manual English - Page 195
Problem The image is not in focus. Viewing images Cause The subject is too close to the camera. The focus setting is not correct. The camera moved when the [ ] button was pressed. (camera shake) The focus is not locked properly. The lens is dirty. Action Capture the image with the subject within - Sanyo VPC E2 | VPC-E2BL Owners Manual English - Page 196
TROUBLESHOOTING Problem The colors of the images captured indoors are not correct. Viewing images strap or a finger was blocking the lens. There is no file in the installed card. The playback volume setting on the camera is too low. The TV output setting is not correct. Action Capture the image - Sanyo VPC E2 | VPC-E2BL Owners Manual English - Page 197
is set. Follow the instructions to make the connection correctly. Set the input on the TV to "VIDEO". Not a malfunction. Cancel the protect mode. Reference page 142, 155 - 107 Correctly Make sure that insert the the battery battery pack in pack is the charger. correctly 23 oriented when - Sanyo VPC E2 | VPC-E2BL Owners Manual English - Page 198
approaches the end of its service life. Action Set the audio guide setting to "ON". Depending on the card, the capacity may be less than the specified value. Please refer to the instructions that accompanied the card. Not a safety hazard. If the battery quickly becomes depleted, for example - Sanyo VPC E2 | VPC-E2BL Owners Manual English - Page 199
at l. Resolution: Only G or [ can be selected. Focus range: + cannot be selected. Flash: Fixed at l. Still image NR: Fixed at "OFF". * When recording a video clip in dark surroundings, the shutter speed decreases to 1/15 sec in order to produce a sufficiently bright image. However, when the flicker - Sanyo VPC E2 | VPC-E2BL Owners Manual English - Page 200
TROUBLESHOOTING Filter Setting Cosmetic % Monochrome W Sepia , Remarks Focus range: + cannot be selected. About the scene select function and focus range settings i The scene select function changes - Sanyo VPC E2 | VPC-E2BL Owners Manual English - Page 201
File system) is standard for digital still camera image files to provide interoperability between digital photography devices for the images stored on removable memory cards. However, it is not guaranteed that all devices will support the DCF standard. Video clips: Conforms to ISO-standard MPEG - Sanyo VPC E2 | VPC-E2BL Owners Manual English - Page 202
SPECIFICATIONS Still image shooting mode (recording resolution) Video clip recording mode (recording resolution) White balance Lens Aperture 14.985 fps. Full-auto TTL, manual setting possible Optical 5.0× zoom lens f = 6.3 mm to 31.7 mm (35 mm film camera conversion 38 mm to 190 mm) Autofocus - Sanyo VPC E2 | VPC-E2BL Owners Manual English - Page 203
Exposure control type Light-measuring mode Range Digital zoom Shutter speed Sensitivity Exposure compensation available from the 500 sec.) Sequential shots mode: 1/15 to 1/1,500 sec. (no flash) Video clip recording mode: 1/30 to 1/10,000 sec. (1/15 sec. max.: when scene select function is set to - Sanyo VPC E2 | VPC-E2BL Owners Manual English - Page 204
150,000 pixels Flash working range GN = 3 battery during recording) Dimensions (excluding protrusions) 70.4 (W) × 111.4 (H) × 40.5 (D) mm 2.77 (W) × 4.39 (H) × 1.59 (D) in. (Maximum dimensions) Volume: Approx. 192 cc Weight Approx. 239 g (8.43 oz.) (camera only [without battery pack and card - Sanyo VPC E2 | VPC-E2BL Owners Manual English - Page 205
/PAL TV system (switchable from the Option Setting Menu) USB USB 2.0 High Speed PC camera: USB video class Battery life Shooting Still image shooting mode Approx. 205 images: CIPA standard (when a Sandisk 2 GB SD Memory Card is used) Video clip recording mode Approx. 75 minutes: Recorded in - Sanyo VPC E2 | VPC-E2BL Owners Manual English - Page 206
Possible No. of Images/Possible Shooting Time/ Possible Recording Time Shooting/ recording mode Still image mode Video clip mode Resolution setting I U V ] W t [ R t T ) B l d Internal memory SD Memory Card 2 GB 8 GB 11 images 11 images 16 images 22 images 29 images 67 images 344 images - Sanyo VPC E2 | VPC-E2BL Owners Manual English - Page 207
Multi-indicator status Camera status Multi-indicator Green Connected to Lit computer or printer (USB) Flashing Power save mode activated Slow Red Flashing Fast Orange Lit During self-timer operation Accessing internal memory/card data Connected to TV/ VIDEO (AV) APPENDICES English - Sanyo VPC E2 | VPC-E2BL Owners Manual English - Page 208
SPECIFICATIONS Supplied battery pack charger Part No. Power source Rated output Compatible batteries Ambient Temperature environment Humidity Dimensions Weight VAR-L20N AC 100 to 240 V, 50 to 60 Hz, 10 VA, MAX: 0.1 A DC 4.2 V, 650 mA Supplied or separately sold Lithium-ion battery pack (DB- - Sanyo VPC E2 | VPC-E2BL Owners Manual English - Page 209
Pentium is a registered trademark of Intel Corporation (USA). In this manual, the Microsoft® Windows® 2000 operating system, Microsoft® Windows® Incorporated in the United States and/or other countries. Red Eye software© 2003-2005 FotoNation In Camera Red Eye - covered by U.S. Patent No. 6,407,777. - Sanyo VPC E2 | VPC-E2BL Owners Manual English - Page 210
up and ready to go i Sanyo Electric shall not be held responsible for any problems resulting from the use of this camera. i Sanyo Electric declines all responsibility for damages due to improper use of the camera, failure to adhere to the instructions given in this manual, or repairs or changes done - Sanyo VPC E2 | VPC-E2BL Owners Manual English - Page 211
you snap a picture using the autofocus, the camera automatically adjusts the settings so that the image will be in focus. If you are getting blurred images even when using the autofocus, one or more of the following might be the reason. k How the autofocus works The autofocus is activated when the - Sanyo VPC E2 | VPC-E2BL Owners Manual English - Page 212
] button is gently pressed halfway, the camera's autofocus works by determining the distance between the camera and the subject. Once the subject is the focus distance, the focus can be more accurate. i When photographing a moving subject, press the [ ] - Sanyo VPC E2 | VPC-E2BL Owners Manual English - Page 213
a better picture by using the flash, for example, or changing the exposure compensation setting. Photographing moving subjects (sports mode a) Points: i Match the camera's movement with that of the subject. i Set the zoom to the Wide end (wide-angle). i Don't be too hesitant to press the [ ] button - Sanyo VPC E2 | VPC-E2BL Owners Manual English - Page 214
scenery, it's better to use the optical zoom. Using the digital zoom produces a coarser image. Hold the camera securely, keeping your elbows close to your body and making sure the camera is stable. Taking care to stabilize the camera will increase the likelihood of getting a clear photo. i Don - Sanyo VPC E2 | VPC-E2BL Owners Manual English - Page 215
SANYO Electric Co., Ltd.
-
 1
1 -
 2
2 -
 3
3 -
 4
4 -
 5
5 -
 6
6 -
 7
7 -
8
-
9
-
10
-
11
-
12
-
13
-
14
-
15
-
16
-
17
-
18
-
19
-
20
-
21
-
22
-
23
-
24
-
25
-
26
-
27
-
28
-
29
-
30
-
31
-
32
-
33
-
34
-
35
-
36
-
37
-
38
-
39
-
40
-
41
-
42
-
43
-
44
-
45
-
46
-
47
-
48
-
49
-
50
-
51
-
52
-
53
-
54
-
55
-
56
-
57
-
58
-
59
-
60
-
61
-
62
-
63
-
64
-
65
-
66
-
67
-
68
-
69
-
70
-
71
-
72
-
73
-
74
-
75
-
76
-
77
-
78
-
79
-
80
-
81
-
82
-
83
-
84
-
85
-
86
-
87
-
88
-
89
-
90
-
91
-
92
-
93
-
94
-
95
-
96
-
97
-
98
-
99
-
100
-
101
-
102
-
103
-
104
-
105
-
106
-
107
-
108
-
109
-
110
-
111
-
112
-
113
-
114
-
115
-
116
-
117
-
118
-
119
-
120
-
121
-
122
-
123
-
124
-
125
-
126
-
127
-
128
-
129
-
130
-
131
-
132
-
133
-
134
-
135
-
136
-
137
-
138
-
139
-
140
-
141
-
142
-
143
-
144
-
145
-
146
-
147
-
148
-
149
-
150
-
151
-
152
-
153
-
154
-
155
-
156
-
157
-
158
-
159
-
160
-
161
-
162
-
163
-
164
-
165
-
166
-
167
-
168
-
169
-
170
-
171
-
172
-
173
-
174
-
175
-
176
-
177
-
178
-
179
-
180
-
181
-
182
-
183
-
184
-
185
-
186
-
187
-
188
-
189
-
190
-
191
-
192
-
193
-
194
-
195
-
196
-
197
-
198
-
199
-
200
-
201
-
202
-
203
-
204
-
205
-
206
-
207
-
208
-
209
-
210
-
211
-
212
-
213
-
214
-
215
 |
 |

VPC-E2
INSTRUCTION MANUAL
Digital Movie Camera
Please read these instructions carefully before using the camera.
Make sure to read and understand the separate booklet “SAFETY MANUAL”.
Keep this manual in a safe place for later reference.
Important note
This manual explains how to safely operate the VPC-E2.