Sanyo VPC-SH1BK VPC-SH1 Owners Manual English
Sanyo VPC-SH1BK Manual
 |
View all Sanyo VPC-SH1BK manuals
Add to My Manuals
Save this manual to your list of manuals |
Sanyo VPC-SH1BK manual content summary:
- Sanyo VPC-SH1BK | VPC-SH1 Owners Manual English - Page 1
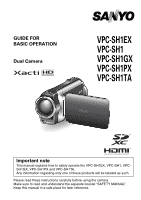
GUIDE FOR BASIC OPERATION Dual Camera VPC-SH1EX VPC-SH1 VPC-SH1GX VPC-SH1PX VPC-SH1TA Important note This manual explains how to safely operate the VPC-SH1EX, VPC-SH1, VPCSH1GX, VPC-SH1PX and VPC-SH1TA. Any information regarding only one of these products will be labeled as such. Please read these - Sanyo VPC-SH1BK | VPC-SH1 Owners Manual English - Page 2
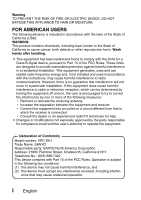
found to comply with the limits for a Class B digital device, pursuant to Part 15 of the FCC Rules installed and used in accordance with the instructions, may cause harmful interference to radio Conformity Model number: VPC-SH1 Trade Name: SANYO Responsible party: SANYO North America Corporation - Sanyo VPC-SH1BK | VPC-SH1 Owners Manual English - Page 3
apply to countries in other areas of the world. Your SANYO product is designed and manufactured with high quality materials and components which can be recycled and/or reused. The symbol mark means that electrical and electronic equipment, batteries and accumulators, at their end-of-life, should be - Sanyo VPC-SH1BK | VPC-SH1 Owners Manual English - Page 4
-time users Please read this manual to familiarize yourself with your camera's operation. ↓ To use the various camera features The Instruction Manual that explains the features in detail can be obtained from our website (page 48). ↓ To use additional features Visit the Sanyo website to learn how to - Sanyo VPC-SH1BK | VPC-SH1 Owners Manual English - Page 5
you wish to use an SD Memory Card, refer to page 12 to install the card in the camera. h An SD Memory Card is not included with your camera. Please purchase a commercially sold card. This camera has an internal memory, so you can shoot and record without an SD Memory Card installed. English - Sanyo VPC-SH1BK | VPC-SH1 Owners Manual English - Page 6
least 1 second to turn the camera on. h If the screen to set the date and time appears, press the MENU button 2 times to cancel it. For how to set the date and time, see page 22. 2 Record. To record a video clip: h Press the [ ] button to begin recording a video clip. h Press the [ ] button again to - Sanyo VPC-SH1BK | VPC-SH1 Owners Manual English - Page 7
your camera is set up and ready to go i Sanyo declines any claim for compensation for recorded contents etc. in case of photographing or recording failure due to a chance camera or the REC/PLAY button. Full-HD 6.5MB OK 100-0006 00:00:05 Orange frame Remaining battery power Indication English vi - Sanyo VPC-SH1BK | VPC-SH1 Owners Manual English - Page 8
h Pressing the MENU button 3 times will return you to the screen in step 2. When you are finished using the camera... Press the ON/OFF button for at least 1 second to turn the camera off. To continue to the next operation... Please confirm that your computer is connected to the Internet. vii English - Sanyo VPC-SH1BK | VPC-SH1 Owners Manual English - Page 9
your recorded video clips onto a DVD Using the supplied CD-ROM (Xacti Software CD), you can store your captured images on a DVD. Install application program 1 Set the supplied CD-ROM in your computer's DVD drive. h The installation window opens. 2 Click on [TotalMedia Extreme for SANYO]. h After - Sanyo VPC-SH1BK | VPC-SH1 Owners Manual English - Page 10
desired files to the computer. 1 Use the supplied dedicated USB interface cable to connect your camera to the computer. 2 Turn on the camera. h The USB Connection Screen appears on the camera's monitor. USB CONNECTION COMPUTER PRINTER CANCEL CANCEL OK Supplied dedicated USB interface cable To USB - Sanyo VPC-SH1BK | VPC-SH1 Owners Manual English - Page 11
to the computer. h The CD-ROM (Xacti Software CD) includes "TotalMedia Extreme for SANYO" with which photo and video files can be imported en bloc. HINT i For information on how to copy all the camera's still image and video clip files at once, please see the support pages at the website below: http - Sanyo VPC-SH1BK | VPC-SH1 Owners Manual English - Page 12
SHOOT, PLAY BACK AND SAVE Burn video clips onto a DVD (for Windows Vista users) Here's how to write your your computer's DVD drive. 2 Double-click the desktop [TotalMedia Extreme for SANYO] icon. h TotalMedia Extreme for SANYO is launched, and the startup page appears. [Create video] icon xi English - Sanyo VPC-SH1BK | VPC-SH1 Owners Manual English - Page 13
3 Click the [Create video] icon. h The TotalMedia Studio screen appears. [New DVD project] English xii - Sanyo VPC-SH1BK | VPC-SH1 Owners Manual English - Page 14
SHOOT, PLAY BACK AND SAVE 4 Click [New DVD project]. h The screen to create a video clip to burn to DVD appears. [Insert video] xiii English - Sanyo VPC-SH1BK | VPC-SH1 Owners Manual English - Page 15
screen to select the video clip file to burn to DVD appears. h Click on the file you wish to burn to DVD. h To select multiple files, keep the [Ctrl] key pressed - Sanyo VPC-SH1BK | VPC-SH1 Owners Manual English - Page 16
SHOOT, PLAY BACK AND SAVE 7 Click the [Design] tab. h The screen to design the title menu that is shown when the DVD is played appears. h Select one of the designs. [Produce] tab xv English - Sanyo VPC-SH1BK | VPC-SH1 Owners Manual English - Page 17
the project will save your settings from steps 5 through 7. h It is recommended that you save the project if you intend to again edit the same video clips that you burned to DVD. English xvi - Sanyo VPC-SH1BK | VPC-SH1 Owners Manual English - Page 18
[n] close button in the upper right corner. h TotalMedia Extreme for SANYO is exited. HINT About software upgrades i For information concerning TotalMedia Extreme upgrades i The version of TotalMedia Extreme that accompanies your camera cannot be used to burn these formats. To purchase a different - Sanyo VPC-SH1BK | VPC-SH1 Owners Manual English - Page 19
5 Double-click the icon for the downloaded program. h Follow the instructions to activate the MPEG-2 Codec. h DVD burning via the TotalMedia Extreme to burn to DVD. United States/Canada Tel: +1-510-979-5599 Web: http://www.arcsoft.com/support/ E-mail Support: http://www.arcsoft.com/public/ - Sanyo VPC-SH1BK | VPC-SH1 Owners Manual English - Page 20
applicable) Language: English, French, Italian, German, Spanish and Dutch China Tel: +86 (0) 571-88210575 Web: http://www.arcsoft.com.cn/support E-Mail Support: [email protected] Hours: M-F 8:30am-5:30pm (Beijing local time) (excluding holidays observed by ArcSoft) Language: Chinese xix English - Sanyo VPC-SH1BK | VPC-SH1 Owners Manual English - Page 21
- Sanyo VPC-SH1BK | VPC-SH1 Owners Manual English - Page 22
ACCESSORIES AND THE CARD 8 Separately sold accessories 8 Media cards that can be used with this camera 9 What "card" means in this manual 9 „ SETUP PARTS NAMES 10 Camera 10 INSTALLING THE CARD 12 CHARGING THE BATTERY 28 „ SHOOTING VIDEO CLIP RECORDING 29 SHOOTING SINGLE SHOTS 30 Using the - Sanyo VPC-SH1BK | VPC-SH1 Owners Manual English - Page 23
MANUAL OBTAINING THE INSTRUCTION MANUAL 48 Contents of the Instruction Manual 48 How to obtain the Instruction Manual 52 „ ABOUT THE EYE-FI TRANSFER FEATURE About the Eye-Fi transfer feature 53 „ APPENDICES COMMONLY ASKED QUESTIONS 54 SPECIFICATIONS 62 Camera 62 Camera connectors 67 Battery - Sanyo VPC-SH1BK | VPC-SH1 Owners Manual English - Page 24
CHECKING THE INCLUDED ACCESSORIES i Handstrap (page 5): 1 * To prevent from dropping the camera, be sure to attach the handstrap. i Xacti Software CD (CD-ROM) (page viii) : 1 i Li-ion battery pack (page 15): 1 i Dedicated AV interface cable (page 44): 1 i Dedicated USB interface cable (page ix - Sanyo VPC-SH1BK | VPC-SH1 Owners Manual English - Page 25
i "SAFETY MANUAL" (safety precautions booklet) Please read this booklet carefully before using the camera. i GUIDE FOR BASIC OPERATION i QUICK GUIDE English 4 - Sanyo VPC-SH1BK | VPC-SH1 Owners Manual English - Page 26
CHECKING THE INCLUDED ACCESSORIES How to use the accessories k Handstrap Strap holder Tripod mounting hole 5 English - Sanyo VPC-SH1BK | VPC-SH1 Owners Manual English - Page 27
k Lens cap 1 2 3 4 1 Push in 2 Pull 5 * Attach as shown in the illustration. English 6 - Sanyo VPC-SH1BK | VPC-SH1 Owners Manual English - Page 28
CHECKING THE INCLUDED ACCESSORIES About the power plug A power plug suitable for the destination country is provided for the AC adaptor. VPC-SH1EX VPC-SH1TA VPC-SH1GX VPC-SH1PX * No power plug is provided for the VPC-SH1. k How to attach 7 English - Sanyo VPC-SH1BK | VPC-SH1 Owners Manual English - Page 29
AND THE CARD Separately sold accessories i Mini HDMI cable VCP-HDMI02 Cable for connecting to the HDMI terminal on the camera. i Lithium-ion Battery Charger VAR-L90 Battery charger for the supplied or separately sold lithium-ion battery pack (DB-L90). i Lithium-ion Battery DB-L90 Same model as - Sanyo VPC-SH1BK | VPC-SH1 Owners Manual English - Page 30
card that can be inserted into and used with this camera are: i SD Memory Card i SDHC Memory Card i SDXC Memory Card What "card" means in this manual i In this manual, SD Memory Cards, SDHC Memory Cards and SDXC Memory Cards that can be used in this dual camera are referred to as "card". 9 English - Sanyo VPC-SH1BK | VPC-SH1 Owners Manual English - Page 31
SETUP SETUP SETUP PARTS NAMES Camera Front Sub-REC buttons [R] button Video recording button [O] button Photo shooting button 1 Insert your hand in the handstrap from the top of the camera. 2 Enfold the camera in the palm of your hand to grip it. 3 Use your thumb to operate the [O] and [R] - Sanyo VPC-SH1BK | VPC-SH1 Owners Manual English - Page 32
PARTS NAMES Rear Monitor Strap holder Multi-indicator Speaker Rear USB/AV terminal HDMI terminal Operation pad SET button [O] button Photo shooting button [R] button Video recording button MENU button Battery cover Operation pad ON/OFF button REC/PLAY button 11 English - Sanyo VPC-SH1BK | VPC-SH1 Owners Manual English - Page 33
format a newly purchased card or one that was used in another device before using it in your camera (page 13). If an unformatted card is used, the card itself may become unusable. Your camera has an internal memory, so you can record without a card installed. Monitor unit 1 Open Card slot SETUP - Sanyo VPC-SH1BK | VPC-SH1 Owners Manual English - Page 34
ON/OFF button (pages 12 and 19). 2 Set the camera to the NORMAL mode (page 27). 3 Press the MENU button. 4 Select the [E] tab, and press the SET button. 5 Select "FORMAT" and press the SET button. i The Format Screen appears. Follow the instructions on the screen to format the card. Shooting without - Sanyo VPC-SH1BK | VPC-SH1 Owners Manual English - Page 35
Please charge the supplied battery pack before using it. Install the battery pack in the camera, and connect the AC adaptor to charge the battery. Power to the camera can also be supplied from a power outlet when the AC adaptor is connected. 1 Open the battery cover. ᶄ ᶃ Battery cover English 14 - Sanyo VPC-SH1BK | VPC-SH1 Owners Manual English - Page 36
CHARGING THE BATTERY PACK 2 Insert the battery pack, then replace the battery cover. Battery pack 15 English - Sanyo VPC-SH1BK | VPC-SH1 Owners Manual English - Page 37
red. When charging is completed, the indicator turns off. h The multi-indicator flashes red if the battery pack is defective or is not installed correctly. Make sure that the battery pack is correctly installed. h The charging time is approx. 180 minutes. To power outlet Multi-indicator English - Sanyo VPC-SH1BK | VPC-SH1 Owners Manual English - Page 38
may flash red and it may not be possible to charge the battery pack. Wait until the battery pack has cooled down before attempting to charge it. Does the battery pack appear swollen? i The lithium-ion battery used in this camera may expand slightly when stored in a hot environment or repeatedly used - Sanyo VPC-SH1BK | VPC-SH1 Owners Manual English - Page 39
temperature has dropped before resuming use. h During video recording, a countdown indicator will show the time starting about 15 seconds before shutdown. When the indicator shows 0 seconds, recording stops. h If the camera is turned off while the temperature is high (that is, while the \ icon is - Sanyo VPC-SH1BK | VPC-SH1 Owners Manual English - Page 40
button for at least 1 second. h If you press the REC/PLAY button for at least 1 second, the camera turns on in the playback mode. h If you briefly press the ON/OFF button, once, the camera will switch to the power save mode. Monitor unit REC/PLAY button ON/OFF button Turning off - Sanyo VPC-SH1BK | VPC-SH1 Owners Manual English - Page 41
when the power save (sleep) mode is active In order to preserve battery pack power, the power save (sleep) function will automatically turn off the camera after about 1 minute of no use during shooting, or about 5 minutes of no use during playback (factory-preset setting). i When the power save - Sanyo VPC-SH1BK | VPC-SH1 Owners Manual English - Page 42
time settings have not been completed (page 22), the date and time cannot be recorded with the captured images. For this reason, immediately after the camera is turned on, the "Set date and time" reminder briefly appears, after which the K icon is shown on the Recording Screen. To have the date - Sanyo VPC-SH1BK | VPC-SH1 Owners Manual English - Page 43
SETUP DATE AND TIME SETTING The camera will record the date and time an image or audio recording on page 24. Example: To set the clock to 7:30 p.m. on December 24, 2010 1 Turn on the camera (page 19), and press the SET button. h The Clock Set Screen appears. h Follow the procedures below to - Sanyo VPC-SH1BK | VPC-SH1 Owners Manual English - Page 44
DATE AND TIME SETTING 3 Set the clock. 1 Select "TIME". 2 Press the SET button. h The Set Time Screen appears. 3 Set the time to "19:30". h The time is set in the following order: Set the hour → Set the minute. h A 24-hour clock is used for the time display. 4 Press the SET button. CLOCK SET TIME - Sanyo VPC-SH1BK | VPC-SH1 Owners Manual English - Page 45
to check that the date and time settings are still correct after replacing the battery pack and before shooting or recording of any type (follow step 1). To correct the date and time settings 1 Turn on the camera. 2 Display the Option Menu 1 (page 28). 3 Select "CLOCK SET" and press the SET button - Sanyo VPC-SH1BK | VPC-SH1 Owners Manual English - Page 46
recording mode (for recording) and the playback mode (for viewing your recorded images). 1 Turn on the camera (page 19). 2 Press the REC/PLAY button. h The mode changes. h The mode changes each 2010.12.25 14:25 100-0006 Ful -HD 10.5MB 00:00:05 OK 25 English - Sanyo VPC-SH1BK | VPC-SH1 Owners Manual English - Page 47
only those functions that are most often used and necessary to operate the camera, while the "NORMAL mode" enables full use of all the camera's many functions. Select the mode that is suitable for your purposes. Select video and photo size SN OK RECORDING MENU - Sanyo VPC-SH1BK | VPC-SH1 Owners Manual English - Page 48
Switching between the SIMPLE and NORMAL modes 1 Turn on the camera (page 19). h The previous mode is active. 2 Press mode to the SIMPLE mode. h Press the MENU button to cancel the Menu Screen. Switch to detailed S N normal menu OK Operating mode icon 1 2 3 Press SET - Sanyo VPC-SH1BK | VPC-SH1 Owners Manual English - Page 49
Menu Screen 1 Set the camera to the recording or playback mode (page 25). 2 Select the desired operating mode (page 27). 3 If the Menu Screen is not displayed, press the MENU button. h The Menu Screen appears. h To cancel the Menu Screen, press the MENU button. Switch to detailed normal menu SN OK - Sanyo VPC-SH1BK | VPC-SH1 Owners Manual English - Page 50
SHOOTING VIDEO CLIP RECORDING 1 Turn on the camera (page 19), and set it to the recording mode (page 25). 2 Press the [ ] button. h Recording begins. h It is not necessary to keep the [ ] button pressed while recording. h When the remaining recording time available for the currently recording clip - Sanyo VPC-SH1BK | VPC-SH1 Owners Manual English - Page 51
SHOOTING SHOOTING SINGLE SHOTS Capture a still image (single-shot). 1 Turn on the camera (page 19), and set it to the recording mode (page 25). [ ] button 2 Press the [ ] button. 1 Press the [ ] button halfway. h The autofocus operates, and the image - Sanyo VPC-SH1BK | VPC-SH1 Owners Manual English - Page 52
can use them as a reference when shooting. If the camera shake icon > appears... (NORMAL mode) i During still image shooting, if the shutter speed is slow and the possibility that the image may be blurred due to camera shake becomes high, the camera shake icon may appear on the monitor. In this - Sanyo VPC-SH1BK | VPC-SH1 Owners Manual English - Page 53
flash setting, and press the SET button. h The screen to select the flash operation appears. Auto flash Flash operates automatically OK 9: The camera detects the subject brightness and uses the flash only when necessary. :: The flash operates with every image captured regardless of the conditions - Sanyo VPC-SH1BK | VPC-SH1 Owners Manual English - Page 54
Shooting Screen. The field of view is easier to see when the Shooting Screen for the specific shooting mode is selected. To select the desired field of view, use the Option Setting Screen to set an operational shortcut (page 48). Video clip recording area 33 English - Sanyo VPC-SH1BK | VPC-SH1 Owners Manual English - Page 55
video clip. 1 Turn on the camera (page 19), and set it to the recording mode (page 25). [ ] button 2 Press the [ ] button. 3 When you see a scene you'd like to capture as a still image, press the [ ] button. [ ] button 4 Press the [ ] button to end the video clip recording. SHOOTING Full-HD - Sanyo VPC-SH1BK | VPC-SH1 Owners Manual English - Page 56
image captured during video clip recording depends on the video clip recording size. Video clip recording size setting Still image recording size !Y + (16:9) "& , (16:9) ) [ (4:3) h It is not possible to capture a still image while recording a video clip at a high recording speed (X, f) or - Sanyo VPC-SH1BK | VPC-SH1 Owners Manual English - Page 57
has two zoom functions: optical zoom and digital zoom. 1 Point the camera lens at the subject. Zoom switch [T/]]/[W/P] 2 Push the [T/]] side again, the mode changes to the digital zoom mode and zooming continues. 3 Take the picture. For video clip recording, see page 29. For shooting single shots - Sanyo VPC-SH1BK | VPC-SH1 Owners Manual English - Page 58
(ZOOM) HINT When recording video clips at a high magnification i When recording video clips at a high magnification, a moving subject or moving camera can cause camera shake, resulting in a distorted playback image. This phenomenon is due to the characteristics of the CMOS sensor and is not - Sanyo VPC-SH1BK | VPC-SH1 Owners Manual English - Page 59
PLAYBACK PLAYBACK PLAYING BACK VIDEO CLIPS AND STILL IMAGES 1 Set the camera to the playback mode (page 25). 2 Select the image to play back. h Toggle files> Toggle the SET button down. Orange frame 2010. 12.25 14:25 Full-HD 10.5MB OK 100-0006 00:00:05 SET button PLAYBACK English 38 - Sanyo VPC-SH1BK | VPC-SH1 Owners Manual English - Page 60
PLAYING BACK VIDEO CLIPS AND STILL IMAGES Video clip playback operation To do this... Do this Normal reverse After pausing playback, toggle the SET button frame step) playback to the left. Slow playback During forward After pausing playback, press and hold the playback SET button to the right - Sanyo VPC-SH1BK | VPC-SH1 Owners Manual English - Page 61
PLAYBACK HINT If the a icon appears on the playback Screen... i The a icon appears when playing back a file that was saved in segments (page 48). English 40 - Sanyo VPC-SH1BK | VPC-SH1 Owners Manual English - Page 62
very large i Therefore, be aware that if the video clip is uploaded to a computer to be played back, the computer may not be able to play back the video fast enough, making it appear jerky. (The video will always be displayed properly on the camera monitor or a television.) i Depending on the card - Sanyo VPC-SH1BK | VPC-SH1 Owners Manual English - Page 63
Menu (page 28), select the slideshow setting, and press the SET button. =: Play back all files. 3: Play back video clips and audio files. c: Play back still image files. SLIDESHOW ALL VIDEO PHOTO START 2 Select the type of file to play back, and press the SET button. h Slideshow playback begins - Sanyo VPC-SH1BK | VPC-SH1 Owners Manual English - Page 64
volume is set, and the display returns to the SIMPLE Mode Playback Menu. 4 VOLUME SETTING HINT The volume can be adjusted during playback i During video clip or audio file playback, if you push the zoom switch toward [T/]] or [W/P], the volume control bar will appear, allowing you to adjust the - Sanyo VPC-SH1BK | VPC-SH1 Owners Manual English - Page 65
TV CONNECTING TO A STANDARD VIDEO INPUT TERMINAL About image output: The image output destination differs depending on the connection cable. Connection cable Image output destination Recording mode Playback Standby Recording mode Dedicated AV Camera monitor NTSC: n PAL: m m n interface - Sanyo VPC-SH1BK | VPC-SH1 Owners Manual English - Page 66
CONNECTING TO A STANDARD VIDEO INPUT TERMINAL * Please affix the core. Core 45 English - Sanyo VPC-SH1BK | VPC-SH1 Owners Manual English - Page 67
permanently damage the connector pins in the terminal socket. i Do not use excessive force when connecting and disconnecting cables. HINT i HDMI, the HDMI logo and High-Definition Multimedia Interface are trademarks or registered trademarks of HDMI Licensing, LLC. English 46 - Sanyo VPC-SH1BK | VPC-SH1 Owners Manual English - Page 68
television, switch the TV input to the terminal to which the camera is connected. i When the camera is connected to a TV, no image appears on the camera's monitor. i The playback method is the same as when viewing images on the camera's monitor. i Use the TV controls to adjust the playback volume - Sanyo VPC-SH1BK | VPC-SH1 Owners Manual English - Page 69
the power plug ABOUT THE SEPARATELY SOLD ACCESSORIES AND THE CARD Separately sold accessories Media cards that can be used with this camera What "card" means in this manual GETTING THE MOST OUT OF YOUR CAMERA High-quality images with "Full High Definition*" Includes SIMPLE mode for quick-and-easy - Sanyo VPC-SH1BK | VPC-SH1 Owners Manual English - Page 70
OBTAINING THE INSTRUCTION MANUAL Turning on the camera when the power save (sleep) mode is active DATE AND STILL IMAGE WHILE RECORDING A VIDEO CLIP MACRO-PHOTOGRAPHY (ZOOM) PLAYBACK PLAYING BACK VIDEO CLIPS AND STILL IMAGES How to save one frame from a video clip as a still image SLIDESHOW PLAYBACK - Sanyo VPC-SH1BK | VPC-SH1 Owners Manual English - Page 71
chaser settings High sensitivity mode setting Digital zoom setting Storage folder setting Exposure compensation Field of view PLAYBACK PLAYBACK MENU 1 Slideshow settings File protect setting Resize Rotate PLAYBACK MENU 2 Correcting the image Editing video clips Printing instructions FILE INFO - Sanyo VPC-SH1BK | VPC-SH1 Owners Manual English - Page 72
THE INSTRUCTION MANUAL „ OTHER DEVICES AND CONNECTIONS CONNECTING TO A TV CONNECTING TO A STANDARD VIDEO INPUT TERMINAL ENJOY HIGHER IMAGE QUALITY Connecting to the HDMI terminal PLAYING BACK ON A TV CONNECTING TO A PRINTER PRINTING „ APPENDICES COMMONLY ASKED QUESTIONS TROUBLESHOOTING Camera Notes - Sanyo VPC-SH1BK | VPC-SH1 Owners Manual English - Page 73
INSTRUCTION MANUAL How to obtain the Instruction Manual The Instruction Manual that explains the camera functions in detail can be obtained from the SANYO website. 1 Insert the supplied Xacti Software CD in your computer's CD drive. 2 On the installation screen, click [Go to Xacti SH1 Web Support - Sanyo VPC-SH1BK | VPC-SH1 Owners Manual English - Page 74
i Automatic halt of Eye-Fi operation when battery is low i AC adaptor connection restrictions (may or may not be supported, depending on the camera) i SSID setup/delete HINT i The Instruction Manual for the Eye-Fi transfer feature can be obtained from the Sanyo website (page 52). * "Adobe Reader" is - Sanyo VPC-SH1BK | VPC-SH1 Owners Manual English - Page 75
Place the camera in your pocket to warm it up before using it. Keep the battery pack in an environment of 10 to 40 °C (50 to 104°F). If a battery becomes depleted quickly even after it was sufficiently charged, it should be assumed that the battery has reached the end of its service life. Please - Sanyo VPC-SH1BK | VPC-SH1 Owners Manual English - Page 76
the multiindicator turns off. Not a malfunction. Capture the image; the camera will determine when the flash is necessary. All settings except the of part of a photo (trimming). +, G: For printing standard photo (photo service) sizes. ,, [: For photos displayed on a web page, or sent as e-mail - Sanyo VPC-SH1BK | VPC-SH1 Owners Manual English - Page 77
minute details in the image. The digital zoom, on the other hand, works by magnifying a portion of the image that hits the image sensor and may produce a coarser image. Set the scene select function to the landscape + mode when photographing. Or, set the focus range setting to manual - Sanyo VPC-SH1BK | VPC-SH1 Owners Manual English - Page 78
be recorded with the images. When capturing an image, devise a way to compensate for a bright subject, for example, by changing the shooting angle. Hold the camera correctly and slowly press the [ ] button halfway to lock the focus. Then press the [ ] button all the way to capture the image. 57 - Sanyo VPC-SH1BK | VPC-SH1 Owners Manual English - Page 79
using my computer? Why is there a motor-like sound during video clip playback? Answer Playback error may occur when trying to play back files that were recorded with a different digital camera. If the subject moves or the camera is moved during recording, a distorted image may sometimes occur. Due - Sanyo VPC-SH1BK | VPC-SH1 Owners Manual English - Page 80
to a TV Answer The volume on the TV is set to the minimum. - Action Adjust the volume on the TV. Normal video (composite video) output: Combines Y (luminance) signal and chrominance signal and outputs the combined signal. HDMI signal: Outputs the Y signal, B-Y signal and R-Y signal separately - Sanyo VPC-SH1BK | VPC-SH1 Owners Manual English - Page 81
. A temporary internal circuitry problem may be the cause. Action Please refer to the instruction manual for your printer. Select video clips that have the same resolution or frame rate. Move the AC adaptor further away from the TV or radio when recharging the battery pack. Delete unnecessary files - Sanyo VPC-SH1BK | VPC-SH1 Owners Manual English - Page 82
to a TV, you can switch the camera's video output to NTSC or PAL. If you have questions about accessories etc., please consult with a dealer near you for advice. Check the following items: 1 Remove the card and then install it again. 2 Remove the battery pack and then install it again. 3 Install - Sanyo VPC-SH1BK | VPC-SH1 Owners Manual English - Page 83
up to 64 GB) Image sensor/ camera effective number of pixels 1/3.6-inch (0.7 cm) CMOS sensor Still images: Approx. 4 million pixels Videos (HD mode): Approx. 3.5 million pixels Videos (SD mode): Approx. 4 million pixels * Video clip files recorded with models VPC-CA65 and VPC-CG65 are in the same - Sanyo VPC-SH1BK | VPC-SH1 Owners Manual English - Page 84
SPECIFICATIONS Still image shooting mode (recording resolution) Video clip recording mode (recording resolution) White balance E: 3648 × 2736 pixels (approx. 10 million pixels). 3: 3584 × 2016 pixels (approx. 7 million pixels, 16:9 aspect ratio). M: 2288 × 1712 pixels (approx. 4 million pixels, - Sanyo VPC-SH1BK | VPC-SH1 Owners Manual English - Page 85
iris Internal ND filter 35 mm film camera conversion Still image shooting: 35 mm to 805 mm (23×) Video clip recording: 35 mm to 1050 mm (30× Advanced Zoom) Programmable AE/Shutter speed priority AE/ Aperture priority AE/Manual exposure control Exposure compensation available (0 ±1.8 EV in - Sanyo VPC-SH1BK | VPC-SH1 Owners Manual English - Page 86
SPECIFICATIONS Sensitivity Minimum subject illumination Image stabilizer Monitor Flash working range Flash modes Focus Self-timer Ambient environment Still image shooting (standard output sensitivity*)/ video clip recording mode: Auto (video clip video clip recording mode: Continuous focus), manual - Sanyo VPC-SH1BK | VPC-SH1 Owners Manual English - Page 87
) ×1 VAR-G11 2.9 W (When using the Li-ion battery during recording) 42.8 (W) × 117.9 (D) × 59.2 (H) mm 1.69 (W) × 4.64 (D) × 2.33 (H) in. (Maximum dimensions) Volumetric capacity: Approx. 190 cc Approx. 204 g (7.2 oz.) (camera only [without battery pack and card]) Approx. 235 g (8.3 oz.) (including - Sanyo VPC-SH1BK | VPC-SH1 Owners Manual English - Page 88
SPECIFICATIONS Camera connectors USB/AV terminal HDMI terminal DC IN (external DC power input) terminal Regrouped jack Audio Stereo output Video output Composite video NTSC color TV system/PAL color TV system (switchable from the Option Screen) USB 2.0 High Speed PC camera: USB video class - Sanyo VPC-SH1BK | VPC-SH1 Owners Manual English - Page 89
life Shooting Playback Still image shooting mode Video clip recording mode Approx. 350 images: CIPA standard (when the camera's internal memory is used) Approx. 110 minutes: Recorded in ! mode Approx. 330 minutes: Monitor on, continuous playback i Until battery pack runs out when using a fully - Sanyo VPC-SH1BK | VPC-SH1 Owners Manual English - Page 90
SPECIFICATIONS Possible No. of Images/Possible Shooting Time/ Possible Recording Time Shooting/ recording mode Resolution setting E 3 M L * Still image mode + t , [ m c ! Y " Video clip & mode x ) X f Audio recording - mode Internal memory SD Memory Card 8 GB 16 GB 15 - Sanyo VPC-SH1BK | VPC-SH1 Owners Manual English - Page 91
recording time of a voice memo exceeds about 13 hours, the recorded file is saved once, and then recording continues in a new file. In the video clip recording mode, when the size of the file being recorded exceeds 4 GB, the recorded file is saved once, and then recording continues in a new - Sanyo VPC-SH1BK | VPC-SH1 Owners Manual English - Page 92
, depending on the different camera operations. Color Multi-indicator status Camera status Multi-indicator Green Lit Flashing Connected to a computer or printer Power save mode active Orange Red Lit Lit Slow Flashing Fast Very fast Connected to a TV Charging Battery charge error or rise in - Sanyo VPC-SH1BK | VPC-SH1 Owners Manual English - Page 93
adaptor Part number Power source Rated output Ambient environment Temperature Humidity Dimensions Weight VAR-G11 AC Approx. 128 g (4.5 oz.) Supplied Li-ion battery pack Model number Voltage Capacity Ambient Temperature environment Humidity Dimensions Weight DB-L90 3.7 V 1,200 mAh 0 - Sanyo VPC-SH1BK | VPC-SH1 Owners Manual English - Page 94
trademark of Eye-Fi, Inc. Red Eye software© 2003-2005 FotoNation In Camera Red Eye - covered by U.S. Patent No. 6,407,777. Other patents Pending. SDXC logo is a trademark. HDMI, the HDMI logo and High-Definition Multimedia Interface are trademarks or registered trademarks of HDMI Licensing, LLC. 73 - Sanyo VPC-SH1BK | VPC-SH1 Owners Manual English - Page 95
up and ready to go i Sanyo Electric shall not be held responsible for any problems resulting from the use of this camera. i Sanyo Electric declines all responsibility for damages due to improper use of the camera, failure to adhere to the instructions given in this manual, or repairs or changes done - Sanyo VPC-SH1BK | VPC-SH1 Owners Manual English - Page 96
SANYO Electric Co., Ltd.
-
 1
1 -
 2
2 -
 3
3 -
 4
4 -
 5
5 -
 6
6 -
 7
7 -
8
-
9
-
10
-
11
-
12
-
13
-
14
-
15
-
16
-
17
-
18
-
19
-
20
-
21
-
22
-
23
-
24
-
25
-
26
-
27
-
28
-
29
-
30
-
31
-
32
-
33
-
34
-
35
-
36
-
37
-
38
-
39
-
40
-
41
-
42
-
43
-
44
-
45
-
46
-
47
-
48
-
49
-
50
-
51
-
52
-
53
-
54
-
55
-
56
-
57
-
58
-
59
-
60
-
61
-
62
-
63
-
64
-
65
-
66
-
67
-
68
-
69
-
70
-
71
-
72
-
73
-
74
-
75
-
76
-
77
-
78
-
79
-
80
-
81
-
82
-
83
-
84
-
85
-
86
-
87
-
88
-
89
-
90
-
91
-
92
-
93
-
94
-
95
-
96
 |
 |
VPC-SH1EX
VPC-SH1
VPC-SH1GX
VPC-SH1PX
VPC-SH1TA
GUIDE FOR
BASIC OPERATION
Dual Camera
Please read these instructions carefully before using the camera.
Make sure to read and understand the separate booklet “SAFETY MANUAL”.
Keep this manual in a safe place for later reference.
Important note
This manual explains how to safely operate the VPC-SH1EX, VPC-SH1, VPC-
SH1GX, VPC-SH1PX and VPC-SH1TA.
Any information regarding only one of these products will be labeled as such.