Sanyo VPC T1060 Owners Manual - Page 32
Erasing Images
 |
UPC - 086483072277
View all Sanyo VPC T1060 manuals
Add to My Manuals
Save this manual to your list of manuals |
Page 32 highlights
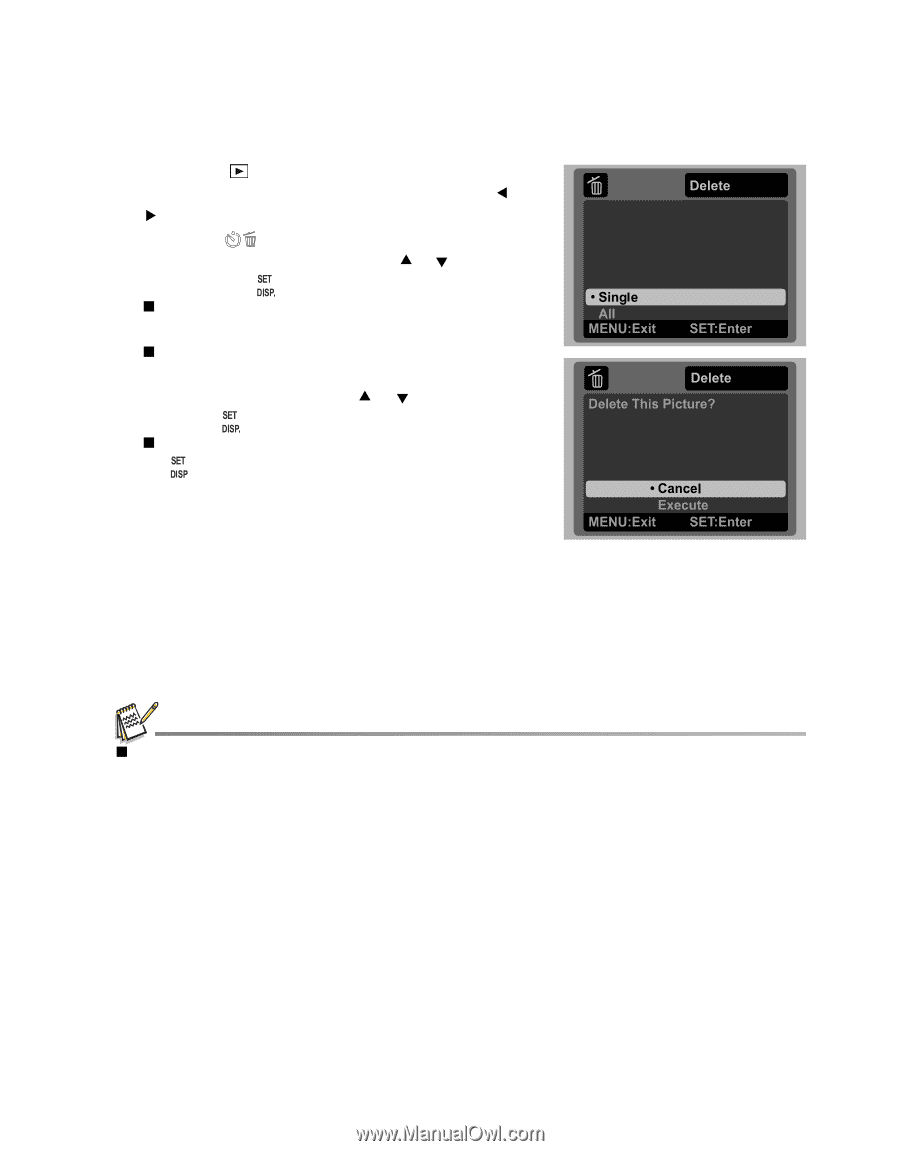
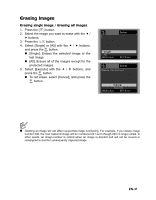
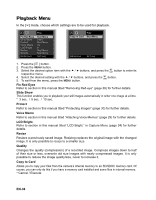
Erasing Images Erasing single image / Erasing all images 1. Press the [ ] button. 2. Select the image you want to erase with the e / f buttons. 3. Press the button. 4. Select [Single] or [All] with the c / d buttons, and press the button. „ [Single]: Erases the selected image or the last image. „ [All]: Erases all of the images except for the protected images. 5. Select [Execute] with the c / d buttons, and press the button. „ To not erase, select [Cancel], and press the button. „ Deleting an image will not affect sequential image numbering. For example, if you delete image number 240, the next captured image will be numbered 241 even though 240 no longer exists. In other words, an image-number is retired when an image is deleted and will not be reused or reassigned to another subsequently captured image. EN-31
-
 1
1 -
2
-
3
-
4
-
5
-
6
-
7
-
8
-
9
-
10
-
11
-
12
-
13
-
14
-
15
-
16
-
17
-
18
-
19
-
20
-
21
-
22
-
23
-
24
-
25
-
26
-
 27
27 -
 28
28 -
 29
29 -
 30
30 -
 31
31 -
 32
32 -
 33
33 -
 34
34 -
 35
35 -
 36
36 -
 37
37 -
38
-
39
-
40
-
41
-
42
-
43
-
44
-
45
-
46
-
47
 |
 |