Sanyo VPC T1060 Owners Manual - Page 38
Setup Menu - free manual
 |
UPC - 086483072277
View all Sanyo VPC T1060 manuals
Add to My Manuals
Save this manual to your list of manuals |
Page 38 highlights
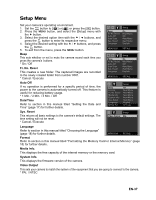
Setup Menu Set your camera's operating environment. 1. Set the button to [ P ] or [ ]; or press the [ ] button. 2. Press the button, and select the [Setup] menu with the f button. 3. Select the desired option item with the c / d buttons, and press the button to enter its respective menu. 4. Select the desired setting with the c / d buttons, and press the button. 5. To exit from the menu, press the button. Beep This sets whether or not to mute the camera sound each time you press the camera's!buttons. * On / Off Fr. No. Reset This creates a new folder. The captured images are recorded to the newly created folder from number 0001. * Cancel / Execute Auto Off If no operation is performed for a specific period of time, the power to the camera is automatically turned off. This feature is useful for reducing battery usage. * 1 Min. / 2 Min. / 3 Min. / Off Date/Time Refer to section in this manual titled "Setting the Date and Time" (page 17) for further details. Sys. Reset This returns all basic settings to the camera's default settings. The time setting will not be reset. * Cancel / Execute Language Refer to section in this manual titled "Choosing the Language" (page 18) for further details. Format Refer to section in this manual titled "Formatting the Memory Card or Internal Memory" (page 18) for further details. Media Info. This displays the free capacity of the internal memory or the memory card. System Info. This displays the firmware version of the camera. Video Output This sets your camera to match the system of the equipment that you are going to connect to the camera. * PAL / NTSC EN-37
-
 1
1 -
2
-
3
-
4
-
5
-
6
-
7
-
8
-
9
-
10
-
11
-
12
-
13
-
14
-
15
-
16
-
17
-
18
-
19
-
20
-
21
-
22
-
23
-
24
-
25
-
26
-
27
-
28
-
29
-
30
-
31
-
32
-
 33
33 -
 34
34 -
 35
35 -
 36
36 -
 37
37 -
 38
38 -
 39
39 -
 40
40 -
 41
41 -
 42
42 -
 43
43 -
44
-
45
-
46
-
47
 |
 |
