Sanyo VPC T1060 Owners Manual - Page 45
Connecting to a PictBridge Compatible Printer
 |
UPC - 086483072277
View all Sanyo VPC T1060 manuals
Add to My Manuals
Save this manual to your list of manuals |
Page 45 highlights
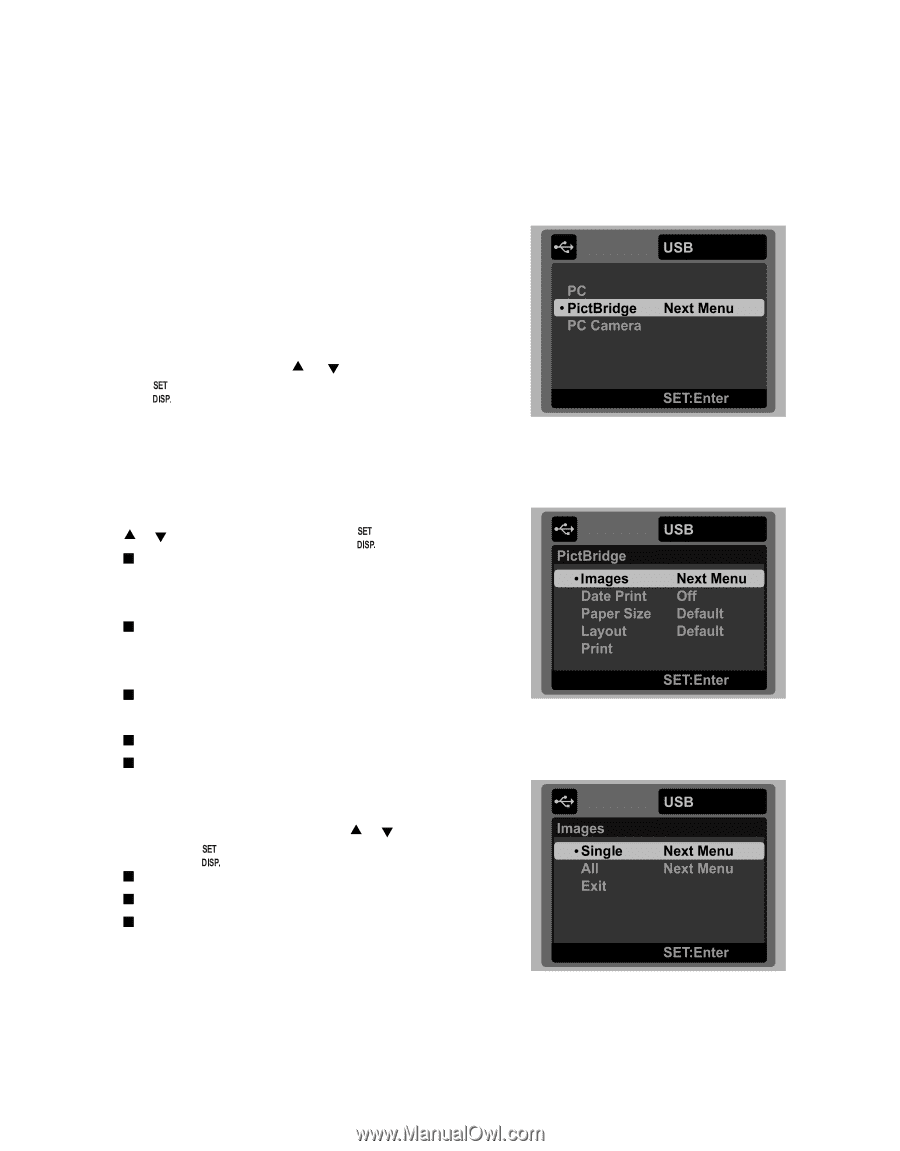
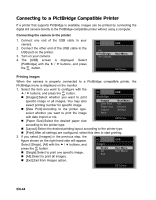
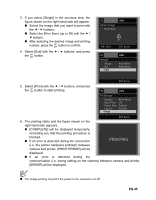
Connecting to a PictBridge Compatible Printer If a printer that supports PictBridge is available, images can be printed by connecting the digital still camera directly to the PictBridge-compatible printer without using a computer. Connecting the camera to the printer 1. Connect one end of the USB cable to your camera. 2. Connect the other end of the USB cable to the USB port on the printer. 3. Turn on your camera. 4. The [USB] screen is displayed. Select [PictBridge] with the c / d buttons, and press the button. Printing images When the camera is properly connected to a PictBridge compatible printer, the PictBridge menu is displayed on the monitor. 1. Select the item you want to configure with the c / d buttons, and press the button. „ [Images]:Select whether you want to print specific image or all images. You may also select printing number for specific image. „ [Date Print]:According to the printer type, select whether you want to print the image with date imprint or not. „ [Paper Size]:Select the desired paper size according to the printer type. „ [Layout]:Select the desired printing layout according to the printer type. „ [Print]:After all settings are configured, select this item to start printing. 2. If you select [Images] in the previous step, the figure shown on the right hand side will appear. Select [Single], [All] with the c / d buttons, and press the button. „ [Single]:Select to print one specific image. „ [All]:Select to print all images. „ [Exit]:Exit from Images option. EN-44
-
 1
1 -
2
-
3
-
4
-
5
-
6
-
7
-
8
-
9
-
10
-
11
-
12
-
13
-
14
-
15
-
16
-
17
-
18
-
19
-
20
-
21
-
22
-
23
-
24
-
25
-
26
-
27
-
28
-
29
-
30
-
31
-
32
-
33
-
34
-
35
-
36
-
37
-
38
-
39
-
 40
40 -
 41
41 -
 42
42 -
 43
43 -
 44
44 -
 45
45 -
 46
46 -
 47
47
 |
 |