Schwinn Tango Tandem Seven IPS Schwinn Owner's Manual - Page 47
Training Wheels
 |
View all Schwinn Tango Tandem Seven IPS manuals
Add to My Manuals
Save this manual to your list of manuals |
Page 47 highlights
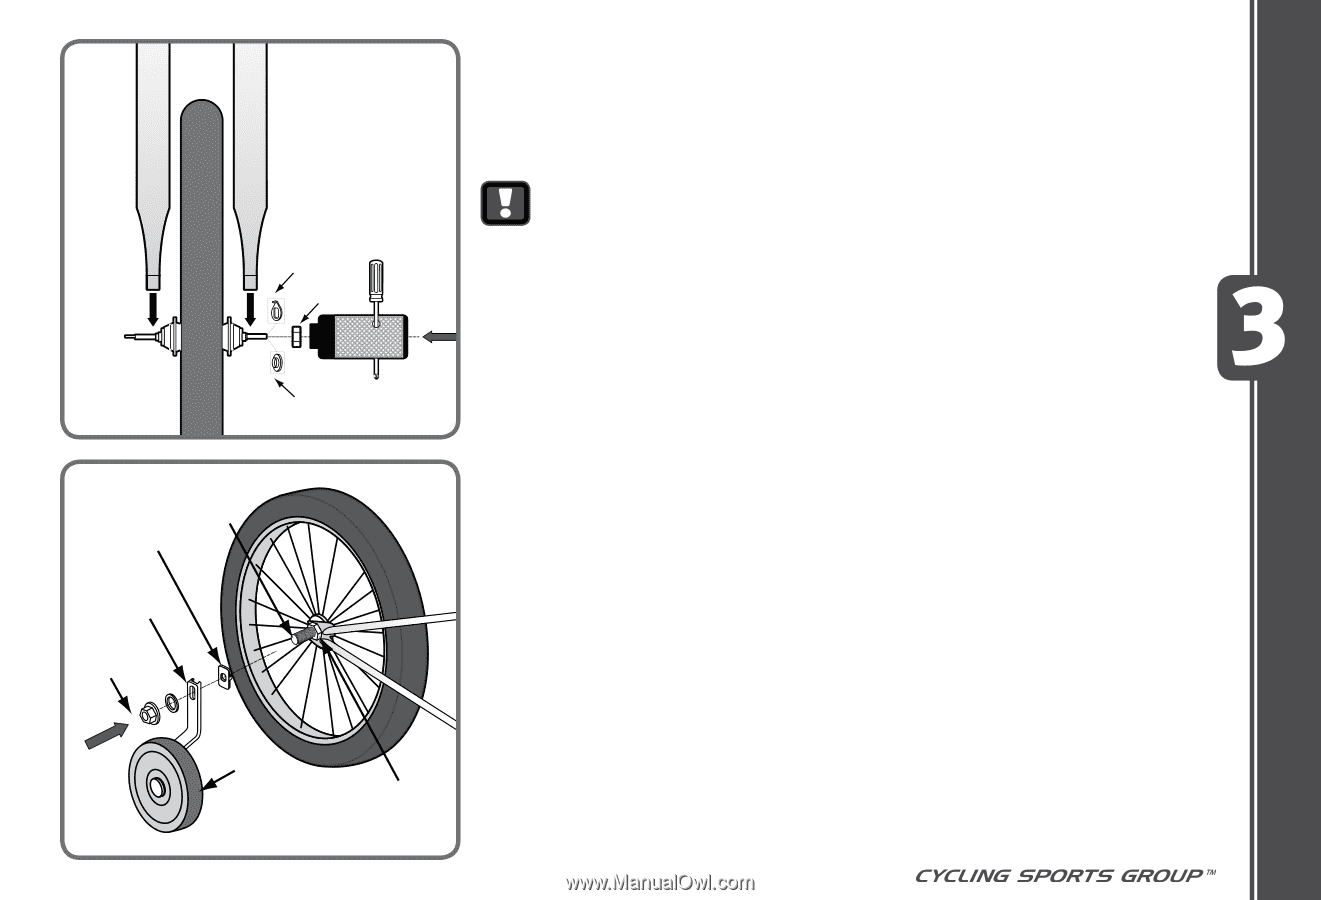
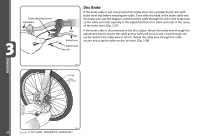
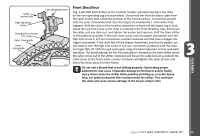
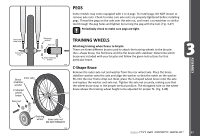
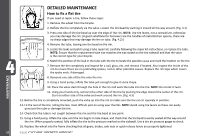
Front/rear drop outs Front/rear hub Brace Inner axle stabilizer washer C-Shaped wheel brace Axle nut Retaining washer Axle nut Step retaining washer PEGS Some models may come equipped with 2 or 4 pegs. To install pegs, DO NOT loosen or remove axle nuts. Check to make sure axle nuts are properly tightened before installing pegs. Thread the pegs on the axle over the axle nut, and insert a screwdriver or similar tool through the peg holes and tighten by turning the peg with the tool. (Fig. 3.47) Periodically check to make sure pegs are tight. TRAINING WHEELS Attaching training wheel brace to bicycle There are three different braces used to attach the training wheels to the bicycle: the c-shape brace, the flat brace and the flat brace with stabilizer. Determine which brace was included with your bicycle and follow the given instructions for that particular brace. 3.47 C-Shape Brace Remove the outer axle nut and washer from the rear wheel axle. Place the brace stabilizer washer onto the axle and align the washer so that the notch on the washer fits into the rear frame drop out. Next, place the C-shaped wheel brace onto the axle and replace the washer and axle nut. Tighten the axle nut securely, making sure that the wheel brace stays in the proper vertical position. The elongated hole on the wheel brace allows the training wheel height to be adjusted for proper fit. (Fig. 3.48) ASSEMBLY Training wheel Inner axle nut DO NOT REMOVE 3.48 ©2010 47
-
 1
1 -
2
-
3
-
4
-
5
-
6
-
7
-
8
-
9
-
10
-
11
-
12
-
13
-
14
-
15
-
16
-
17
-
18
-
19
-
20
-
21
-
22
-
23
-
24
-
25
-
26
-
27
-
28
-
29
-
30
-
31
-
32
-
33
-
34
-
35
-
36
-
37
-
38
-
39
-
40
-
41
-
 42
42 -
 43
43 -
 44
44 -
 45
45 -
 46
46 -
 47
47 -
 48
48 -
 49
49 -
 50
50 -
 51
51 -
 52
52 -
53
-
54
-
55
-
56
-
57
-
58
-
59
-
60
-
61
-
62
-
63
-
64
-
65
-
66
-
67
 |
 |