Schwinn Tango Tandem Seven IPS Schwinn Owner's Manual - Page 55
Drivetrain
 |
View all Schwinn Tango Tandem Seven IPS manuals
Add to My Manuals
Save this manual to your list of manuals |
Page 55 highlights
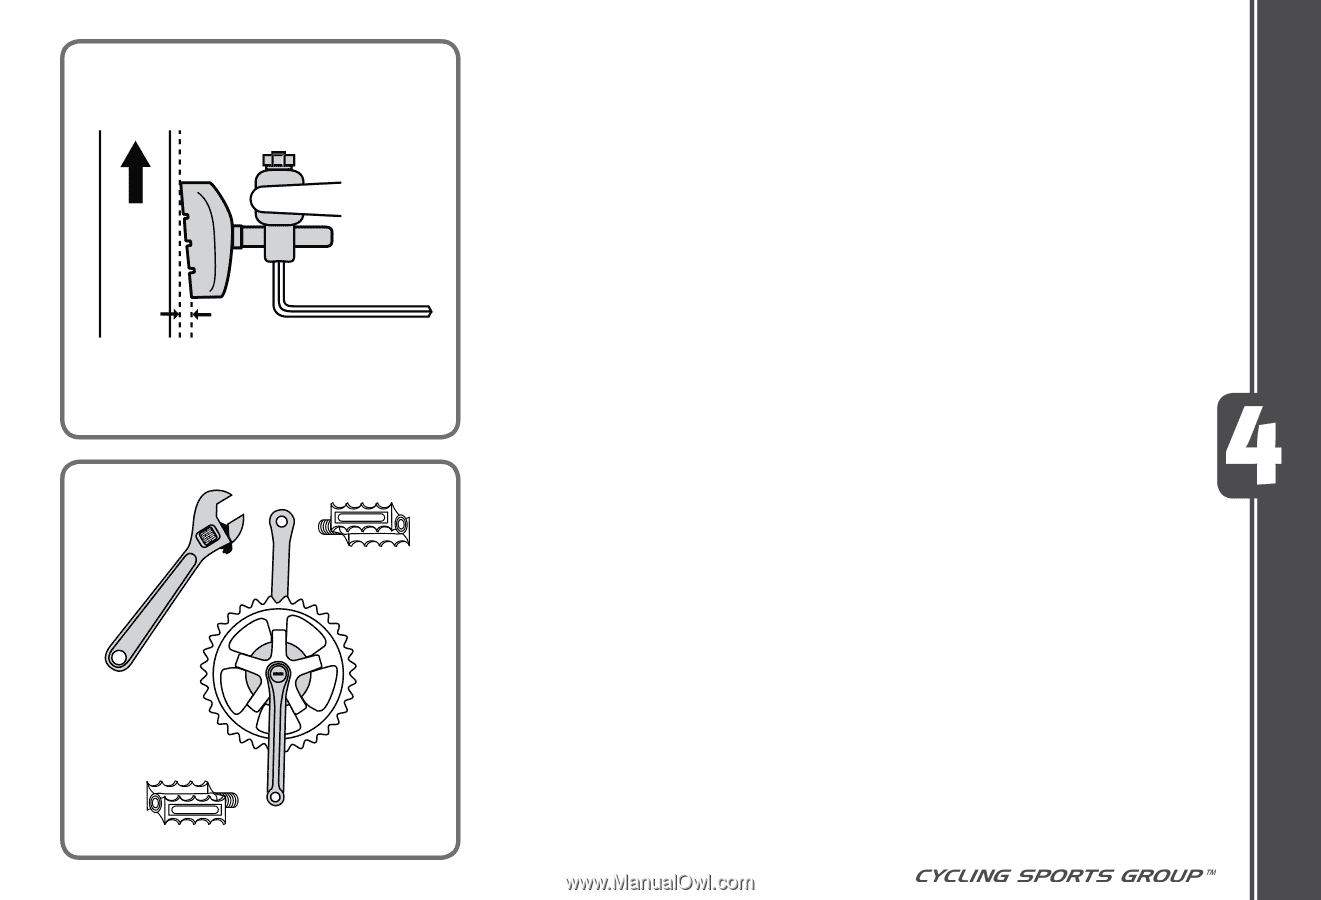
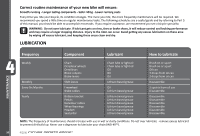
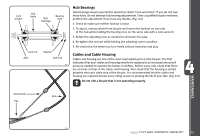
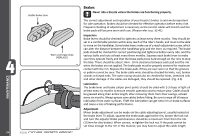
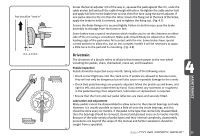
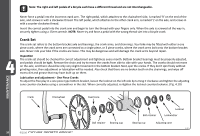
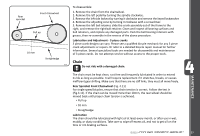
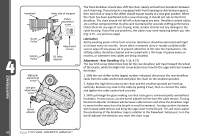
Pad should be "toed-in" 0.5 - 1.0 mm Screw the barrel adjuster 3/4 of the way in, squeeze the pads against the rim, undo the cable anchor bolt and pull the cable through with pliers. Re-tighten the cable anchor bolt and apply full force to the brake lever to test, then fine tune using the barrel adjuster. If one pad is closer to the rim than the other, loosen the fixing nut at the back of the brake, apply the brake to hold it centered, and re-tighten the fixing nut. (Fig. 4.7) Ensure the Brake fixing nut is secured tightly. Failure to do this may cause the brake assembly to dislodge from the frame or fork. Some brakes have a special mechanism which enables you to set the clearance on either side of the rim using a screwdriver. Brake pads should finally be adjusted so that the leading edge of the pad makes first contact with the rim. Some brakes have special curved washers to allow this, but on less complex models it will be necessary to apply a little force to the pad and its mounting. (Fig. 4.8) Drivetrain The drivetrain of a bicycle refers to all parts that transmit power to the rear wheel including the pedals, chain, chainwheel, crank set, and freewheel. 4.8 Pedals inspection Pedals should be inspected every month, taking note of the following areas: • Check correct tightness into the crank arms. If pedals are allowed to become loose, they will not only be dangerous but will also cause irreparable damage to the cranks. • Check that pedal bearings are properly adjusted. Move the pedals up and down, and right to left, and also rotate them by hand. If you detect any looseness or roughness in the pedal bearings then adjustment, lubrication or replacement is required. • Ensure that the front and rear pedal reflectors are clean and securely fitted. Lubrication and adjustment Many pedals cannot be disassembled to allow access to the internal bearings and axle. However, it is usually possible to inject a little oil onto the inside bearings, and this should be done every six months. If the pedal is the type that can be fully disassembled, then the bearings should be removed, cleaned and greased every six to twelve months. Because of the wide variety of pedal types and their internal complexity, disassembly procedures are beyond the scope of this manual and further assistance should be sought from a specialist. 4.9 ©2010 55 MAINTENANCE
-
 1
1 -
2
-
3
-
4
-
5
-
6
-
7
-
8
-
9
-
10
-
11
-
12
-
13
-
14
-
15
-
16
-
17
-
18
-
19
-
20
-
21
-
22
-
23
-
24
-
25
-
26
-
27
-
28
-
29
-
30
-
31
-
32
-
33
-
34
-
35
-
36
-
37
-
38
-
39
-
40
-
41
-
42
-
43
-
44
-
45
-
46
-
47
-
48
-
49
-
 50
50 -
 51
51 -
 52
52 -
 53
53 -
 54
54 -
 55
55 -
 56
56 -
 57
57 -
 58
58 -
 59
59 -
 60
60 -
61
-
62
-
63
-
64
-
65
-
66
-
67
 |
 |