Seagate FreeAgent Desk FreeAgent Desk™ User Guide
Seagate FreeAgent Desk Manual
 |
View all Seagate FreeAgent Desk manuals
Add to My Manuals
Save this manual to your list of manuals |
Seagate FreeAgent Desk manual content summary:
- Seagate FreeAgent Desk | FreeAgent Desk™ User Guide - Page 1
Seagate Manager User Guide For Use With Your FreeAgentTM Drive Seagate Manager User Guide for Use With Your FreeAgent™ Drive 1 - Seagate FreeAgent Desk | FreeAgent Desk™ User Guide - Page 2
including file size, file format, features, and application software. Seagate reserves the right to change, without notice, product offerings or specifications. Seagate Technology LLC 920 Disc Drive Scotts Valley CA 95066 U.S.A. Seagate Manager User Guide for Use With Your FreeAgent™ Drive 2 - Seagate FreeAgent Desk | FreeAgent Desk™ User Guide - Page 3
Contents Getting Started...5 Using the Seagate Status Icon 5 Restoring the Seagate Status Icon 6 FreeAgent Drive Light 7 Managing Your Drives 8 Using the My Drives Window 8 Settings 9 Adjusting the Power Setting 9 Testing Your Drive 10 Updating Your Software 10 Adjust LED Control 11 - Seagate FreeAgent Desk | FreeAgent Desk™ User Guide - Page 4
26 Using the Sync Preview Window 27 Using Automatic Overwrite 28 Seagate SecureTM Storage Devices 35 Unlocking Your Drive 36 Changing the Password for Your Drive 37 Using the Password Hint 37 Erasing Your Drive 40 Index ...43 Seagate Manager User Guide for Use With Your FreeAgent™ Drive - Seagate FreeAgent Desk | FreeAgent Desk™ User Guide - Page 5
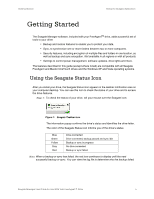
software updates, drive lights and more. The features described in this guide (except where noted) are compatible with all Seagate FreeAgent and Maxtor OneTouch drives and the Windows XP and Vista operating systems. Using the Seagate Status Icon After you install your drive, the Seagate Status icon - Seagate FreeAgent Desk | FreeAgent Desk™ User Guide - Page 6
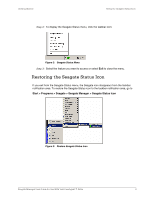
icon disappears from the taskbar notification area. To restore the Seagate Status icon to the taskbar notification area, go to Start > Programs > Seagate > Seagate Manager > Seagate Status Icon Figure 3: Restore Seagate Status Icon Seagate Manager User Guide for Use With Your FreeAgent™ Drive - Seagate FreeAgent Desk | FreeAgent Desk™ User Guide - Page 7
flashing between 90% and 20% illumination 20% illumination Off Fast flashing See "Adjust LED Control" on page 11for information about controlling the lights on the drive. Seagate Manager User Guide for Use With Your FreeAgent™ Drive 7 - Seagate FreeAgent Desk | FreeAgent Desk™ User Guide - Page 8
blue (as shown in Figure 4). • To select a different drive, click the drive icon or partition name. • To access advanced settings for the selected drive, click the Settings button. • For more information, see "Settings" on page 9. Seagate Manager User Guide for Use With Your FreeAgent™ Drive 8 - Seagate FreeAgent Desk | FreeAgent Desk™ User Guide - Page 9
Manager help icon. If you are not able to find the answer to your question, you can click the Customer Support button to go to Seagate's Support website. Note: External drives are automatically detected and listed in the My Drives window. It can take a few seconds for the Seagate Manager software to - Seagate FreeAgent Desk | FreeAgent Desk™ User Guide - Page 10
by default. Step 3: To turn off Software Update, deselect Check for updates automatically. Step 4: To check for updates now, click Check Now. A Software Update window appears to inform you whether your software is up to date or not. Seagate Manager User Guide for Use With Your FreeAgent™ Drive 10 - Seagate FreeAgent Desk | FreeAgent Desk™ User Guide - Page 11
drive. To view the Drive Info for your drive: Step 1: In the My Drives window, select the drive you want information about and click Drive Info. The Drive Information window opens. Step 2: To close the Drive Information window, click OK. Seagate Manager User Guide for Use With Your FreeAgent™ Drive - Seagate FreeAgent Desk | FreeAgent Desk™ User Guide - Page 12
Features The Seagate Manager Backup features allow you to: • Schedule the backup of selected folders • Edit backup settings • Launch an immediate file backup • Use the same backup plan for multiple drives • Restore backed-up files Seagate Manager User Guide for Use With Your FreeAgent™ Drive 12 - Seagate FreeAgent Desk | FreeAgent Desk™ User Guide - Page 13
Backup: Step 1: Click My Drives in the Command panel. The My Drives page opens. Step 2: Select the drive to which you want to back up. Step 3: Click Backup in the Command panel. The Backup window opens. Step 4: Click Simple Backup. Seagate Manager User Guide for Use With Your FreeAgent™ Drive 13 - Seagate FreeAgent Desk | FreeAgent Desk™ User Guide - Page 14
Step 5: Name your Backup Plan, select the folders to be backed up, and click Next. The Backup File Types window opens. Step 6: Select the types of files you want to back up: • All right of a file name that define the file format. Seagate Manager User Guide for Use With Your FreeAgent™ Drive 14 - Seagate FreeAgent Desk | FreeAgent Desk™ User Guide - Page 15
window opens. Go drive. Step 7: Click My Drives in the command panel. The My Drives page opens. Step 8: Select the second drive. Step 9: Click Backup in the command panel. The Backup window opens. Step 10: Click Drive Rotation. Seagate Manager User Guide for Use With Your FreeAgent™ Drive - Seagate FreeAgent Desk | FreeAgent Desk™ User Guide - Page 16
and/or the folder selection(s) and click Next. The Backup File Types window displays your current selections. Step 6: Edit the types of files to be backed up and click Next. The Backup Schedule window displays your current schedule. Seagate Manager User Guide for Use With Your FreeAgent™ Drive 16 - Seagate FreeAgent Desk | FreeAgent Desk™ User Guide - Page 17
have completed editing of your backup settings. If you clicked Next: The Backup Options window opens, showing a list of drives to which this plan backs up. Go to the next step. Step 9: Uncheck any drive in the list to remove that drive from this backup plan and click Finish. Deleting a Backup Plan - Seagate FreeAgent Desk | FreeAgent Desk™ User Guide - Page 18
Click the Seagate Status icon in the Taskbar notification area to display the Seagate Status menu. Step 2: Click View Backup Log to open a text file showing the history of your system backups. Note: The Backup Log is in English only. Seagate Manager User Guide for Use With Your FreeAgent™ Drive 18 - Seagate FreeAgent Desk | FreeAgent Desk™ User Guide - Page 19
Drives in the Command panel. The My Drives page opens. Step 2: Select your drive. Step 3: Click Backup. The Backup window opens. Step 4: Click Restore the most recent version of a backed up file to restore the latest version of a file. Seagate Manager User Guide for Use With Your FreeAgent™ Drive - Seagate FreeAgent Desk | FreeAgent Desk™ User Guide - Page 20
Backing Up and Restoring Folders and Files Managing Backup Settings The Seagate Backup folder on your drive is displayed. Step 5: Browse to the desired file and drag it to the location where you want it restored. Seagate Manager User Guide for Use With Your FreeAgent™ Drive 20 - Seagate FreeAgent Desk | FreeAgent Desk™ User Guide - Page 21
or exclude Select automatic or manual sync Set Sync and Copy & Replace Rules Encrypt synchronized files Note: Make sure all computers participating in the Sync are set to precisely the same time to ensure that Sync works properly. Seagate Manager User Guide for Use With Your FreeAgent™ Drive 21 - Seagate FreeAgent Desk | FreeAgent Desk™ User Guide - Page 22
drive (partition). Step 6: Click Next. The File Types window opens. Step 7: Select the types of files you want to sync. • All file types • Photos, Music,... You can choose to sync any or all of the following: Photos: JPG, GIF, TIFF, ... Seagate Manager User Guide for Use With Your FreeAgent™ Drive - Seagate FreeAgent Desk | FreeAgent Desk™ User Guide - Page 23
Next. The Sync Options window opens. Step 9: Select your Sync options: • Sync Rules: - Sync automatically each time a file changes - Sync manually using the Sync Now button in the Sync window , click Finish. The Sync window opens. Seagate Manager User Guide for Use With Your FreeAgent™ Drive 23 - Seagate FreeAgent Desk | FreeAgent Desk™ User Guide - Page 24
XP My Documents folder (or Vista Personal Folder), the Sync Folders window opens. (b) If you've synchronized your XP My Documents folder (or Vista Personal Folder), the Sync "My Documents" (or Sync "Personal Folder") window opens. Seagate Manager User Guide for Use With Your FreeAgent™ Drive 24 - Seagate FreeAgent Desk | FreeAgent Desk™ User Guide - Page 25
Check Sync Status. The Sync Status window opens. Listed are the names of the computers on which Sync was set up, the date of the last Sync, and the Automatic Sync setting (On or Off). Step 5: Click OK to return to the Sync window. Seagate Manager User Guide for Use With Your FreeAgent™ Drive 25 - Seagate FreeAgent Desk | FreeAgent Desk™ User Guide - Page 26
Sync in the Command panel. The Sync window opens. Step 4: In the Sync window, click the Automatic Sync Off button. Step 5: To sync manually when Automatic Sync is off, • Click Sync Now in the lower right corner of the Sync window. Seagate Manager User Guide for Use With Your FreeAgent™ Drive 26 - Seagate FreeAgent Desk | FreeAgent Desk™ User Guide - Page 27
Manager which file versions to overwrite, add, or delete. Step 7: Click Sync Now to complete the sync. A Sync Progress window informs you of the progress of the sync. Step 8: When the sync is complete, click OK to close the window. Seagate Manager User Guide for Use With Your FreeAgent™ Drive 27 - Seagate FreeAgent Desk | FreeAgent Desk™ User Guide - Page 28
older file versions are always replaced with newer versions. When Automatic Overwrite is off, the Seagate Manager displays the Sync Preview window to allow you to decide whether to overwrite an older file version with a new version. Seagate Manager User Guide for Use With Your FreeAgent™ Drive 28 - Seagate FreeAgent Desk | FreeAgent Desk™ User Guide - Page 29
in all regions or with all products. Figure 8: Security Creating an Encryption Folder Step 1: Click My Drives in the Command panel. Step 2: Select your drive. Step 3: Click Security in the Command panel to open the Security window. Seagate Manager User Guide for Use With Your FreeAgent™ Drive 29 - Seagate FreeAgent Desk | FreeAgent Desk™ User Guide - Page 30
Security Creating an Encryption Folder The Security window opens. Step 4: Click Encryption in the Security window. The Encryption Password window opens. Step 5: Enter and re-enter your Encryption folder as you would into any folder. Seagate Manager User Guide for Use With Your FreeAgent™ Drive 30 - Seagate FreeAgent Desk | FreeAgent Desk™ User Guide - Page 31
Select your drive. Step 3: Click Security in the Command panel. The Security window opens. Step 4: Click Encryption. The Manage Encryption window opens. Step 5: Click Change Password. The first of two Change Password windows opens. Seagate Manager User Guide for Use With Your FreeAgent™ Drive 31 - Seagate FreeAgent Desk | FreeAgent Desk™ User Guide - Page 32
in the Delete Encryption folder window. A Delete Encryption folder warning window makes certain you want to delete the Encryption folder. Step 8: Click Delete. A Delete Encryption folder confirmation window opens. Step 9: Click OK. Seagate Manager User Guide for Use With Your FreeAgent™ Drive 32 - Seagate FreeAgent Desk | FreeAgent Desk™ User Guide - Page 33
Drives in the Command panel. Step 2: Select your drive. Step 3: Click Security in the Command panel. The Security window opens. Step 4: Click Encryption in the Security window. The Manage Encryption window folder - Decrypt Folder Seagate Manager User Guide for Use With Your FreeAgent™ Drive 33 - Seagate FreeAgent Desk | FreeAgent Desk™ User Guide - Page 34
Managing Security Managing an Encryption Folder A Select Destination Directory window opens. Figure 12: Select Destination Directory Step 2: Select a destination and deleted in the Encryption folder and click Delete in the toolbar. Seagate Manager User Guide for Use With Your FreeAgent™ Drive 34 - Seagate FreeAgent Desk | FreeAgent Desk™ User Guide - Page 35
so your entire drive and all the data stored on it are protected from unauthorized access. Figure 14: Seagate Secure logo You can perform these functions using Seagate Manager: • Unlock your drive • Change your drive password Seagate Manager User Guide for Use With Your FreeAgent™ Drive 35 - Seagate FreeAgent Desk | FreeAgent Desk™ User Guide - Page 36
window of Windows Vista. For more information, see "Using Administrative Tools to Format an Erased Seagate Secure Drive" on page 41. Can't Remember Your Seagate Secure Password? There is no way to recover your password if you lose it. Seagate Manager User Guide for Use With Your FreeAgent™ Drive - Seagate FreeAgent Desk | FreeAgent Desk™ User Guide - Page 37
, or delete a password hint, you must enter the 25-character identification code printed on your Seagate Secure drive label. Opening the Set Password Hint Window The Set Password Hint window can be opened from any of three windows: Seagate Manager User Guide for Use With Your FreeAgent™ Drive 37 - Seagate FreeAgent Desk | FreeAgent Desk™ User Guide - Page 38
it with a new password hint. Step 5: Click Overwrite. The Set Password Hint window opens. Step 6: Select a security question from the dropdown list or create a question of your own. Step 7: Enter the answer to the security question. Seagate Manager User Guide for Use With Your FreeAgent™ Drive 38 - Seagate FreeAgent Desk | FreeAgent Desk™ User Guide - Page 39
. Step 5: Click Hint. The Retrieve Password Hint window opens. Step 6: Enter the answer to the security question you selected when you set the password hint and click Show Hint. The Password Hint window displays the password hint. Seagate Manager User Guide for Use With Your FreeAgent™ Drive 39 - Seagate FreeAgent Desk | FreeAgent Desk™ User Guide - Page 40
Drive. When the drive has been erased (this takes only a few moments), the Configure Drive window opens. Configuring an Erased Seagate Secure Drive After you've erased a your drive, you must configure the drive and set a drive password. Seagate Manager User Guide for Use With Your FreeAgent™ Drive - Seagate FreeAgent Desk | FreeAgent Desk™ User Guide - Page 41
a partition so you can continue to use the drive. To use Administrative Tools to manually create a partition: Step 1: Go to Start > Run to open the Run window. Step 2: Type diskmgmt.msc and click OK. The Disk Management window opens. Seagate Manager User Guide for Use With Your FreeAgent™ Drive 41 - Seagate FreeAgent Desk | FreeAgent Desk™ User Guide - Page 42
... The New Partition Wizard opens automatically. Step 4: Follow the steps in the New Partition Wizard to format your Seagate Secure drive and prepare it for use again. Your Seagate Secure drive is now configured and ready for use. Seagate Manager User Guide for Use With Your FreeAgent™ Drive 42 - Seagate FreeAgent Desk | FreeAgent Desk™ User Guide - Page 43
9 erased drive, configuring 40 erased drive, formatting 41 erasing a drive 40 F features, of Seagate Manager software 5 file extensions 23 file system 11 file types, synchronizing 23 files, overwriting older versions 28 folders Seagate Manager User Guide for Use With Your FreeAgent™ Drive 43 - Seagate FreeAgent Desk | FreeAgent Desk™ User Guide - Page 44
13 simple sync, about 21, 22 software, updating 10 Start menu Seagate status icon in 6 status color designation for 5 of drive 5 of sync 25 sync automatic 26 checking status of 25 completing 24 custom 22 simple 22 sync encryption 24 Seagate Manager User Guide for Use With Your FreeAgent™ Drive 44 - Seagate FreeAgent Desk | FreeAgent Desk™ User Guide - Page 45
Index sync preview window 27 sync settings editing 25 synchronizing about 21 folders 21 see also sync T testing drives 10 turning off automatic sync 26 U updating software 10 V volumes 11 Seagate Manager User Guide for Use With Your FreeAgent™ Drive 45
-
 1
1 -
 2
2 -
 3
3 -
 4
4 -
 5
5 -
 6
6 -
 7
7 -
8
-
9
-
10
-
11
-
12
-
13
-
14
-
15
-
16
-
17
-
18
-
19
-
20
-
21
-
22
-
23
-
24
-
25
-
26
-
27
-
28
-
29
-
30
-
31
-
32
-
33
-
34
-
35
-
36
-
37
-
38
-
39
-
40
-
41
-
42
-
43
-
44
-
45
 |
 |
Seagate Manager
User Guide
For Use With Your FreeAgent
TM
Drive