Sealey LED1001 Instruction Manual
Sealey LED1001 Manual
 |
View all Sealey LED1001 manuals
Add to My Manuals
Save this manual to your list of manuals |
Sealey LED1001 manual content summary:
- Sealey LED1001 | Instruction Manual - Page 1
LED1001.V2 Thank you for purchasing a Sealey product. Manufactured to a high standard, this product will, if used according to these instructions, and properly maintained, give you years of trouble INSTRUCTIONS SAFE FOR FUTURE USE. Refer to instruction manual , modify or service the battery pack - Sealey LED1001 | Instruction Manual - Page 2
from purchase date, proof of which is required for any claim. Sealey Group, Kempson Way, Suffolk Business Park, Bury St Edmunds, Suffolk. IP32 7AR 01284 757500 01284 703534 [email protected] www.sealey.co.uk © Jack Sealey Limited Original Language Version LED1001.V2 Issue 1 02/12/20
-
 1
1 -
 2
2
 |
 |

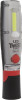
8W COB + 1W LED RECHARGEABLE
INSPECTION LAMP
MODEL NO:
LED1001.V2
Thank you for purchasing a Sealey product. Manufactured to a high standard, this product will, if used according to these instructions,
and properly maintained, give you years of trouble free performance.
1. SAFETY
1.1.
GENERAL SAFETY
9
Ensure the lamp is fully charged before initial use.
8
DO NOT
turn the lamp on when it is being charged.
8
DO NOT
shine directly into your, another person’s or an animal’s eyes.
8
DO NOT
allow children to use the lamp.
8
DO NOT
handle or move the lamp whilst it is being charged.
8
DO NOT
use the lamp if you suspect that the battery or the lamp casing is damaged.
8
DO NOT
leave battery in a discharged state, recharge battery immediately. Before storage, fully recharge the battery, subsequently
recharge the battery at least once every six months of non-use.
1.2.
BATTERY SAFETY
±
WARNING!
To reduce the risk of burns or fire:
8
DO NOT
attempt to open, disassemble, modify or service the battery pack.
8
DO NOT
crush, puncture, short external contacts or dispose of in fire or water.
8
DO NOT
expose to temperatures above 60°C (140°F).
9
Recycle or dispose of used battery as stipulated by local regulation.
9
If the electrolyte in the cells gets on your skin, thoroughly wash with soap and water. If it gets in your eyes, rinse thoroughly with cool
water and seek immediate medical attention.
2.
i
INTRODUCTION
Smooth 90° flex with additional 360° twist function enables the light source to be positioned in any direction. Super bright 8W COB LED provides
up to 1000 lumen output with 120° spread of light, illuminating the whole work area. Includes an additional high power 1W LED directional torch.
Features a swivel hanging hook and rubber covered magnet on the base, which allow hands-free operation. Two high quality 2.6Ah Lithium-ion
batteries for longer life, no memory effect and a much slower discharge than traditional Ni-MH batteries. Type-C charging port. Supplied with Type-C
USB cable.
3.
i
SPECIFICATION
Model No
...........................................................
LED1001.V2
Battery
........................................
3.7V 2.6Ah Lithium-ion (x2)
Charging time
....................................................................
5hr
IP rating
..........................................................................
IP54
LED qty.
........................................................
1 COB + 1 LED
Length
........................................................................
240mm
Lumen output
...............
side(high/low)/top: (1000/500)/100lm
Operating time
..........................
side(high/low)/top: (2/4)/16hr
IMPORTANT WARRANTY INFORMATION
The battery fitted to this lamp is considered to be a consumable item and its ability to accept a charge will reduce over time.
We will provide warranty against mechanical and electrical defect for a period of one year - this
DOES NOT
cover fair wear and tear.
If the battery is not properly charged before first use, or regularly conditioned, its capacity will diminish. Under these circumstances
we will not replace the battery regardless of whether it is less than one year old.
4. OPERATION
4.1.
CHARGING THE LAMP
4.1.1.
Connect the USB lead to the socket on the rear of the lamp. Plug USB lead into a power supply and turn on.
4.1.2.
When the battery has fully charged the four LEDs on the front of the lamp will light green.
4.1.3.
The LEDs will light upon initial switch on to indicate battery charge state. As battery charge decreases LEDs will switch off.
4.2.
OPERATING THE LAMP
4.2.1.
Direct the lens away from your eyes before switching on.
4.2.2.
The lamp ON/OFF/MODE button is located on the front of the lamp. The operation sequence is: one press 50% light, two presses
100% light, three presses torch on, four presses lamp turns off.
4.2.3.
When the battery has approximately 5 to 15 minutes of charge left, the LEDs will flash every 20 seconds as a warning.
LED1001.V2
Issue 1
02/12/20
Original Language Version
© Jack Sealey Limited
Refer to
instruction
manual