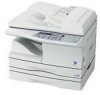
Sharp AL 1655CS AL-1655CS Operation Manual - Page 119

Index, Copy Ratio] Key

Page 119 highlights

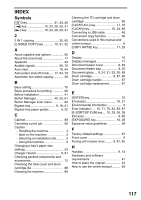
INDEX Symbols [ ] key 31, 33, 36 [ ] key 10, 23, 28, 29, 31 [ ] key 10, 23, 28, 29, 31 2 2 IN 1 copying 35, 65 [2-SIDED COPY] key 10, 31, 32 A About supplies and options 92 About the scan head 17 Appendix 93 Audible signals 66, 70 Auto clear 16, 64 Auto power shut-off mode .... 17, 64, 73 Automatic two-sided copying 30 B Base setting 70 Basic procedure for printing 60 Before installation 41 Button Manager 40, 55, 61 Button Manager scan menu 62 Bypass tray 9, 18, 21 Bypass tray paper guides 9, 22 C Cabinet 89 Canceling a print job 60 Caution - Handling the machine 4 - label on the machine 3 - Selecting an installation site .......... 3 - Using the machine 3 Changing a tray's paper size settings 23 Charger cleaner 9, 91 Checking packed components and accessories 12 Checking the total count and drum cartridge life 88 Cleaning the machine 89 Cleaning the TD cartridge and drum cartridge 90 [CLEAR ALL] key 11, 16 [CLEAR] key 10, 24, 80 Connecting a USB cable 46 Convenient copy function 30 Conventions used in this manual and online manual 6 [COPY RATIO] key 11, 29 D Display 10 Display messages 71 Document feeder cover 9, 83 Document feeder tray 9, 25 Document glass.... 9, 24, 31, 33, 35, 89 Drum cartridge 9, 87, 90 Drum cartridge handle 87 Drum cartridge replacement 87 E [ENTER] key 10 Envelopes 18, 21 Environmental information 5 Error indicator..... 10, 71, 76, 82, 83, 87 [E-SORT/SP.FUN] key ... 10, 33, 35, 38 Exit area 9, 83 [EXPOSURE] key 10, 28 Exposure value guidelines 28 F Factory default settings 67 Front cover 9 Fusing unit release lever ........ 9, 81, 82 H Handles 9, 13 Hardware and software requirements 41 How to place the original 24 How to use the online manual .......... 63 117

  • 1
  • 2
  • 3
  • 4
  • 5
  • 6
  • 7
  • 8
  • 9
  • 10
  • 11
  • 12
  • 13
  • 14
  • 15
  • 16
  • 17
  • 18
  • 19
  • 20
  • 21
  • 22
  • 23
  • 24
  • 25
  • 26
  • 27
  • 28
  • 29
  • 30
  • 31
  • 32
  • 33
  • 34
  • 35
  • 36
  • 37
  • 38
  • 39
  • 40
  • 41
  • 42
  • 43
  • 44
  • 45
  • 46
  • 47
  • 48
  • 49
  • 50
  • 51
  • 52
  • 53
  • 54
  • 55
  • 56
  • 57
  • 58
  • 59
  • 60
  • 61
  • 62
  • 63
  • 64
  • 65
  • 66
  • 67
  • 68
  • 69
  • 70
  • 71
  • 72
  • 73
  • 74
  • 75
  • 76
  • 77
  • 78
  • 79
  • 80
  • 81
  • 82
  • 83
  • 84
  • 85
  • 86
  • 87
  • 88
  • 89
  • 90
  • 91
  • 92
  • 93
  • 94
  • 95
  • 96
  • 97
  • 98
  • 99
  • 100
  • 101
  • 102
  • 103
  • 104
  • 105
  • 106
  • 107
  • 108
  • 109
  • 110
  • 111
  • 112
  • 113
  • 114
  • 115
  • 116
  • 117
  • 118
  • 119
  • 120
  • 121
  • 122
  • 123
  • 124

117
INDEX
Symbols
[
] key
...............................
31, 33, 36
[
] key
....................
10, 23, 28, 29, 31
[
] key
....................
10, 23, 28, 29, 31
2
2 IN 1 copying
.............................
35, 65
[2-SIDED COPY] key
...........
10, 31, 32
A
About supplies and options
..............
92
About the scan head
........................
17
Appendix
..........................................
93
Audible signals
...........................
66, 70
Auto clear
...................................
16, 64
Auto power shut-off mode
....
17, 64, 73
Automatic two-sided copying
............
30
B
Base setting
......................................
70
Basic procedure for printing
.............
60
Before installation
.............................
41
Button Manager
....................
40, 55, 61
Button Manager scan menu
.............
62
Bypass tray
.............................
9, 18, 21
Bypass tray paper guides
.............
9, 22
C
Cabinet
.............................................
89
Canceling a print job
.........................
60
Caution
-
Handling the machine
....................
4
-
label on the machine
.....................
3
-
Selecting an installation site
..........
3
-
Using the machine
.........................
3
Changing a tray
s paper size
settings
.............................................
23
Charger cleaner
............................
9, 91
Checking packed components and
accessories
......................................
12
Checking the total count and drum
cartridge life
......................................
88
Cleaning the machine
.......................
89
Cleaning the TD cartridge and drum
cartridge
...........................................
90
[CLEAR ALL] key
.......................
11, 16
[CLEAR] key
.........................
10, 24, 80
Connecting a USB cable
..................
46
Convenient copy function
.................
30
Conventions used in this manual and
online manual
.....................................
6
[COPY RATIO] key
.....................
11, 29
D
Display
..............................................
10
Display messages
............................
71
Document feeder cover
................
9, 83
Document feeder tray
...................
9, 25
Document glass
....
9, 24, 31, 33, 35, 89
Drum cartridge
........................
9, 87, 90
Drum cartridge handle
......................
87
Drum cartridge replacement
.............
87
E
[ENTER] key
.....................................
10
Envelopes
...................................
18, 21
Environmental information
..................
5
Error indicator
.....
10, 71, 76, 82, 83, 87
[E-SORT/SP.FUN] key... 10, 33, 35, 38
Exit area
.......................................
9, 83
[EXPOSURE] key
.......................
10, 28
Exposure value guidelines
...............
28
F
Factory default settings
....................
67
Front cover
.........................................
9
Fusing unit release lever
........
9, 81, 82
H
Handles
........................................
9, 13
Hardware and software
requirements
....................................
41
How to place the original
..................
24
How to use the online manual
..........
63