Sharp AL 1655CS AL-1655CS Operation Manual - Page 35
SORT COPY, Using the document glass, Press the [E-SORT/SP.FUN] key until - printers
 |
UPC - 074000074712
View all Sharp AL 1655CS manuals
Add to My Manuals
Save this manual to your list of manuals |
Page 35 highlights
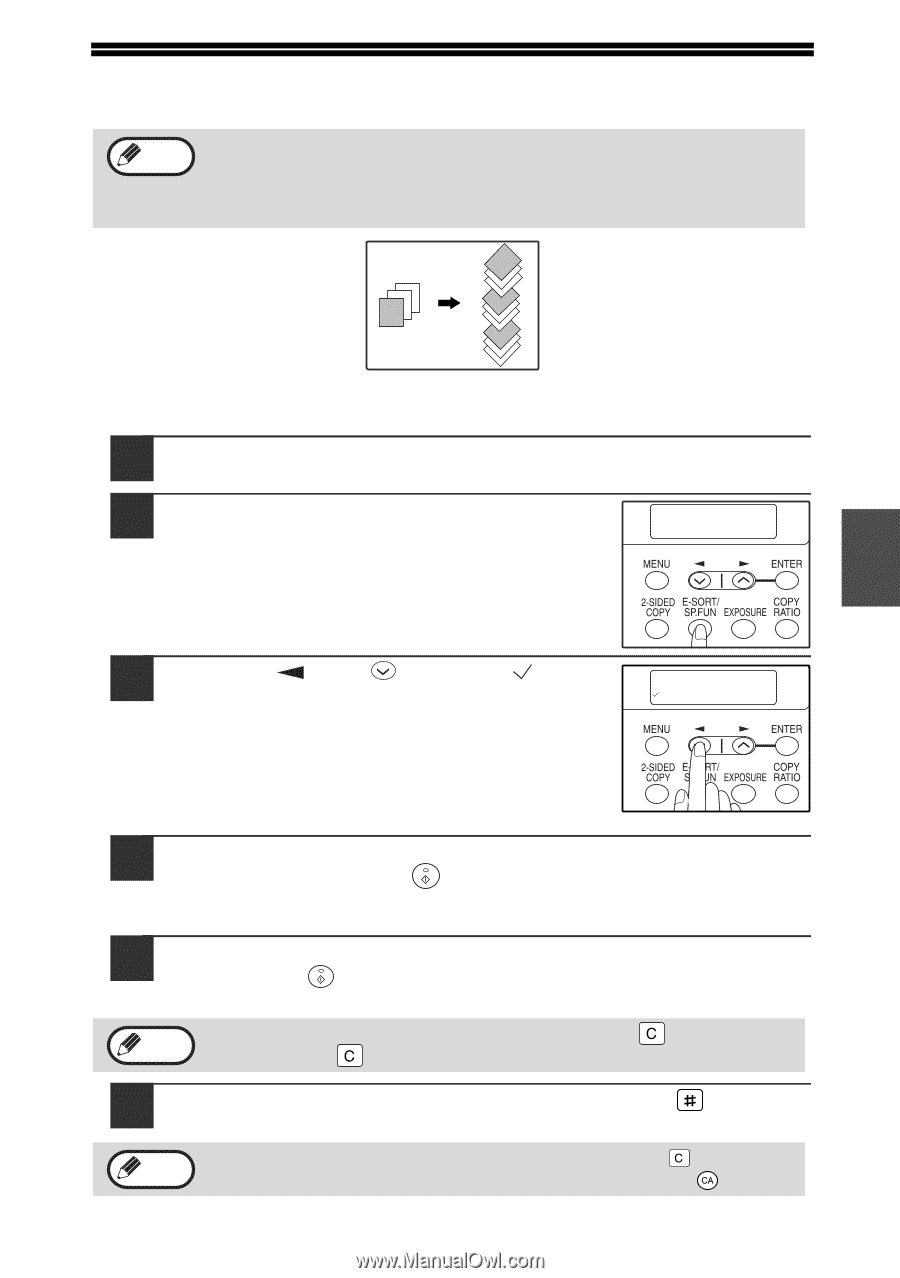
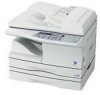
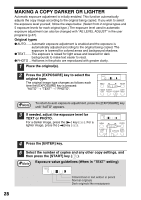
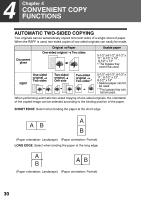
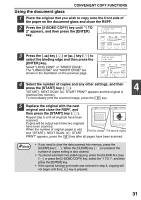
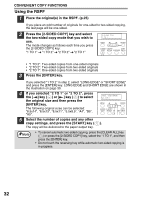
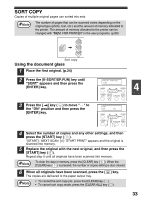
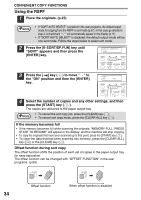
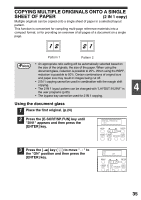
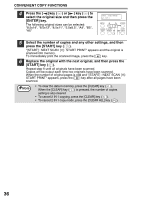
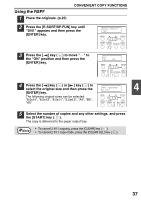
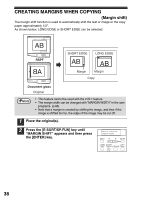
SORT COPY Copies of multiple original pages can sorted into sets. Note The number of pages that can be scanned varies depending on the original type (photo, text, etc.) and the amount of memory allocated to the printer. The amount of memory allocated to the printer can be changed with "MEM. FOR PRINTER" in the user programs. (p.66) 1 2 3 3 2 1 1 2 3 1 2 3 Sort copy Using the document glass 1 Place the first original. (p.24) 2 Press the [E-SORT/SP.FUN] key until "SORT" appears and then press the [ENTER] key. SPECIAL FUNCTION SORT 4 3 Press the [ ] key ( ) to move " " to the "ON" position and then press the [ENTER] key. SORT ON OFF 4 Select the number of copies and any other settings, and then press the [START] key ( ). "[START] : NEXT SCAN [#] : START PRINT" appears and the original is scanned into memory. 5 Replace the original with the next original, and then press the [START] key ( ). Repeat step 5 until all originals have been scanned into memory. Note To clear the data in memory, press the [CLEAR] key ( ). When the [CLEAR] key ( ) is pressed, the number of copies setting is also cleared. 6 When all originals have been scanned, press the [ ] key. The copies are delivered to the paper output tray. Note • To cancel the sort copy job, press the [CLEAR] key ( ). • To cancel sort copy mode, press the [CLEAR ALL] key ( ). 33
-
 1
1 -
2
-
3
-
4
-
5
-
6
-
7
-
8
-
9
-
10
-
11
-
12
-
13
-
14
-
15
-
16
-
17
-
18
-
19
-
20
-
21
-
22
-
23
-
24
-
25
-
26
-
27
-
28
-
29
-
 30
30 -
 31
31 -
 32
32 -
 33
33 -
 34
34 -
 35
35 -
 36
36 -
 37
37 -
 38
38 -
 39
39 -
 40
40 -
41
-
42
-
43
-
44
-
45
-
46
-
47
-
48
-
49
-
50
-
51
-
52
-
53
-
54
-
55
-
56
-
57
-
58
-
59
-
60
-
61
-
62
-
63
-
64
-
65
-
66
-
67
-
68
-
69
-
70
-
71
-
72
-
73
-
74
-
75
-
76
-
77
-
78
-
79
-
80
-
81
-
82
-
83
-
84
-
85
-
86
-
87
-
88
-
89
-
90
-
91
-
92
-
93
-
94
-
95
-
96
-
97
-
98
-
99
-
100
-
101
-
102
-
103
-
104
-
105
-
106
-
107
-
108
-
109
-
110
-
111
-
112
-
113
-
114
-
115
-
116
-
117
-
118
-
119
-
120
-
121
-
122
-
123
-
124
 |
 |