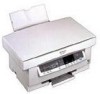
Sharp AL 800 AL-800 AL-840 Operation Manual
Sharp AL 800 - B/W Laser - Copier Manual
 |
UPC - 074000072930
View all Sharp AL 800 manuals
Add to My Manuals
Save this manual to your list of manuals |
Sharp AL 800 manual content summary:
- Sharp AL 800 | AL-800 | AL-840 Operation Manual - Page 1
Address State Zip SERIAL NUMBER City Telephone City Telephone For location of the nearest Sharp Authorized Service, or to obtain product literature, accessories, or supplies, please call 1 - 800 - BE-SHARP For customer assistance, please visit http://www.sharpusa.com on the World Wide Web - Sharp AL 800 | AL-800 | AL-840 Operation Manual - Page 2
PACKED COMPONENTS AND ACCESSORIES 10 UNPACKING 10 REMOVING PROTECTIVE PACKING MATERIALS 11 INSTALLING THE TD CARTRIDGE 12 LOADING COPY PAPER (installing the paper tray) 14 POWER TO COPIER 15 CONNECTING THE INTERFACE CABLE (AL-840 only) 16 POWER ON 17 - Initial settings of operation panel 17 3 MAKING - Sharp AL 800 | AL-800 | AL-840 Operation Manual - Page 3
cover 32 - Cleaning the drum cartridge 32 - When copier is not in use 33 6 COPIER TROUBLE? MISFEED REMOVAL 34 - A. Misfeed in the paper tray 34 - B. Misfeed in the copier 35 - C. Misfeed in the exit area 36 TROUBLESHOOTING 37 - Copy and print quality problems 38 STATUS INDICATORS 41 DISPLAYING - Sharp AL 800 | AL-800 | AL-840 Operation Manual - Page 4
a copier and as a laser printer while the AL-800 can be used only as a copier. This manual describes only the copier features. For description of the printer features, refer to the printer manual. Conventions used in this manual In this manual, the following icons are used to provide the user with - Sharp AL 800 | AL-800 | AL-840 Operation Manual - Page 5
time is approximately 12.5 seconds (normal mode). q Copying speed is 8 copies/min., providing high working efficiency. w High-quality digital image q High-quality copying at 600 dpi is performed. q In addition to the automatic exposure mode, the manual exposure can be adjusted in five steps. q The - Sharp AL 800 | AL-800 | AL-840 Operation Manual - Page 6
scanning mechanism, providing higher reliability. t Printer feature (AL-840 only) 1 q The AL-840 functions both as a digital laser copier and a laser printer. Getting Started y 250-sheet paper tray q The paper tray holds up to 250 sheets of copy paper, providing sufficient capacity for office - Sharp AL 800 | AL-800 | AL-840 Operation Manual - Page 7
PART NAMES Original cover 1 Original table Paper tray Paper guide Getting Started Operation panel Paper release lever Front cover Paper output tray Printer interfaces (AL-840 only) Power switch Power cord socket TD cartridge TD cartridge handle Drum cartridge Drum cartridge handles 6 - Sharp AL 800 | AL-800 | AL-840 Operation Manual - Page 8
(p. 22) u Display Displays the specified copy quantity, zoom copy ratio, user program codes, and error codes. i ON LINE indicator Lights up when the machine is used as a printer. (AL-840 only) The ON LINE indicator is not included in the AL-800. Off: Indicates copying is being performed or an alarm - Sharp AL 800 | AL-800 | AL-840 Operation Manual - Page 9
from a cool place to a warm place, condensation may form inside the copier. Operation in this condition will cause poor copy quality and malfunctions. Leave the copier at room temperature for at least 2 hours before use. Do not install your copier in areas that are: q damp, humid, or very dusty - Sharp AL 800 | AL-800 | AL-840 Operation Manual - Page 10
not drop the copier, subject it to shock or strike it against any object. Do not expose the drum cartridge to direct sunlight. Doing so will damage the surface (green portion) of the drum cartridge, causing smudges on copies. Store spare supplies such as drum cartridges and TD cartridges in a dark - Sharp AL 800 | AL-800 | AL-840 Operation Manual - Page 11
following components and accessories are included. Interface cable 2 (AL-840 only) Operation manual Installation Printer driver CD-ROM (AL-840 only) Power cord Paper tray Copier TD cartridge (in a silver bag) Drum cartridge (installed in copier) q If anything is not included or is damaged - Sharp AL 800 | AL-800 | AL-840 Operation Manual - Page 12
by rotating it in the direction indicated by the arrow. Remove protective material . The screw must be used if the copier has to be moved. (p.45) Store the screw inside the front cover. a b 2 Installation Do not remove with the front cover closed. 2 Remove the tape . 3 Push gently on both sides - Sharp AL 800 | AL-800 | AL-840 Operation Manual - Page 13
material together and remove them. Be careful not to tear the protective paper during removal. de 2 c Installation INSTALLING THE TD CARTRIDGE Be sure to remove the protective paper from the drum cartridge before installing the TD cartridge. 1 Remove the TD car tridge from the bag. Hold the - Sharp AL 800 | AL-800 | AL-840 Operation Manual - Page 14
the handle of the TD cartridge so that the stamped markings on top of the cartridge are facing upward. 2 4 Gently insert the TD cartridge into the copier along the guides in the direction indicated by the arrow. Installation Align the projections on both sides with the guides. 5 Close the front - Sharp AL 800 | AL-800 | AL-840 Operation Manual - Page 15
copier Paper release lever 3 For legal size paper, raise the paper support. Fan the copy paper and place it into the paper tray with the side to be printed facing toward you. Position the paper along the right side of the paper tray. Then adjust the paper guide to the paper width. q The paper - Sharp AL 800 | AL-800 | AL-840 Operation Manual - Page 16
printed LOADING COPY PAPER Paper support Paper guide 2 4 Make sure the paper release lever is pushed back. The paper will be clamped by the paper feed roller inside the copier. Installation When placing special paper or several sheets of paper or when making twosided copies, the paper may not - Sharp AL 800 | AL-800 | AL-840 Operation Manual - Page 17
CONNECTING THE INTERFACE CABLE 2 (AL-840 only) To use the AL-840 as a laser printer, connect it to the parallel interface cable. q Use the parallel interface cable included with the AL-840. q For specifications of the parallel interface, see the printer operation manual. 1 Check that the power - Sharp AL 800 | AL-800 | AL-840 Operation Manual - Page 18
made or power is turned on. The settings of the power save modes can be modified. See page 26, USER 2 PROGRAMS. q The copier will return to the initial settings a preset amount of time after the last copy is made. The preset amount of time (auto clear time) can be changed. See page 26 - Sharp AL 800 | AL-800 | AL-840 Operation Manual - Page 19
copying functions. PAPER For best results, use only paper recommended by SHARP. 3 Type of media Standard paper and Size Letter (8-1/2" x 11") thick paper Legal (8-1/2" x 14 to the copier. Envelopes with bent corners may frequently misfeed. They must be flattened. ** For paper weighing from 28 - Sharp AL 800 | AL-800 | AL-840 Operation Manual - Page 20
of the original is set to the position indicated by the " " mark, as shown.) Original scale mark Print face 6 Gently close the original cover. When copying a book or an original which has been folded or crumpled, press down lightly on the original cover. If the original cover is not securely - Sharp AL 800 | AL-800 | AL-840 Operation Manual - Page 21
when "0" is displayed. q If copying onto special papers, feed one sheet at a time and leave the copy quantity at 0. ZOOM 3 ON LINE q Press the right copy quantity key to set the units digit from 0 to 9. This key will not change the tens digit. q Press the left copy quantity key to set the tens - Sharp AL 800 | AL-800 | AL-840 Operation Manual - Page 22
is not required for most originals in the automatic exposure mode. To adjust the copy density manually or to copy photographs, the exposure level can be adjusted in five steps manually. 1 Set the original and check the copy paper size. 2 Press the exposure mode selector key to select the - Sharp AL 800 | AL-800 | AL-840 Operation Manual - Page 23
enables copy ratio selection from 50% to 200% in 1% increments. 1 Set the original and check the copy paper size. 2 Use the copy ratio display will return to the copy quantity display. q To reset the ratio to 100%, press the copy ratio selector key repeatedly until the 100% indicator lights up. - Sharp AL 800 | AL-800 | AL-840 Operation Manual - Page 24
/2 MIN. ZOOM 3 Set the number of copies using the copy quantity ( , ) keys and press the print ( ) key. 3 Making copies TWO-SIDED COPYING Two-sided copying can be made on this copier. Example: The following two originals will be copied onto both sides of copy paper. Face up or face down First - Sharp AL 800 | AL-800 | AL-840 Operation Manual - Page 25
one sheet at a time. q Curled or wavy copies must be flattened before they are fed. If not, crumpling, paper misfeeds or smudges on copies may result. 3 Making copies 3 Turn the first copy over top to bottom as shown below. Feed the first copy into the paper tray. 4 Press the print ( ) key. ON - Sharp AL 800 | AL-800 | AL-840 Operation Manual - Page 26
clear time) can be changed. TONER SAVE MODE When the machine is used as a computer printer (AL-840 only), the toner save mode which is set as described below does not function. Set the toner save mode using the printer driver. See the printer operation manual. 1 Press the exposure mode selector - Sharp AL 800 | AL-800 | AL-840 Operation Manual - Page 27
indicators ( , , ) blink and "- -" appears in the display. 2 Use the left copy quantity ( ) key to select a user program number (1: auto clear time, 2: preheat mode, 3: auto power shut-off timer, 5: auto power shut-off mode, 9: paper detection mode). The selected number will blink in the left - Sharp AL 800 | AL-800 | AL-840 Operation Manual - Page 28
5 Press the print ( ) key. The right-hand number in the display will be lit steadily and the entered value will be stored. To change the setting or to set another mode, press the clear ( ) key. The copier will return to step 2. 6 Press the light ( ) or dark ( ) key to return to the normal - Sharp AL 800 | AL-800 | AL-840 Operation Manual - Page 29
and the drum cartridge. Be sure to use only genuine SHARP parts and supplies. TD CARTRIDGE REPLACEMENT The TD cartridge replacement required ( ) indicator will light up when toner is needed. For information on purchasing TD cartridges, see SUPPLY PART NUMBERS AND STORAGE on page 44. If copying is - Sharp AL 800 | AL-800 | AL-840 Operation Manual - Page 30
drum cartridge will be needed soon. For information on purchasing drum cartridges, see SUPPLY PART NUMBERS AND STORAGE on page 44. When the indicator begins to blink, the copier will stop operating until the cartridge is replaced. Replace the drum cartridge at this time. 1 Place some scrap paper - Sharp AL 800 | AL-800 | AL-840 Operation Manual - Page 31
to lift it clear of the copier. Dispose of the old drum cartridge in accordance with local regulations. The fusing unit beneath the drum cartridge is hot. Be careful not to touch the fusing unit when removing the drum cartridge. Supplies and user maintenance 5 6 Remove the new drum cartridge - Sharp AL 800 | AL-800 | AL-840 Operation Manual - Page 32
Supplies and user maintenance DRUM CARTRIDGE REPLACEMENT 9 Gently replace the TD cartridge.To install the TD cartridge, see page 12, INSTALLING THE TD CARTRIDGE. 10 Turn on the copier power. While pressing and holding down both the exposure mode selector key and clear ( ) key , close the front - Sharp AL 800 | AL-800 | AL-840 Operation Manual - Page 33
to clean the drum surface. 1 Turn off the copier power. Supplies and user maintenance 2 Remove the TD cartridge. To remove the TD cartridge, see page 28, step 3. 3 Remove the drum cartridge. To remove the drum cartridge, see page 29, DRUM CARTRIDGE REPLACEMENT. Put the drum cartridge down on - Sharp AL 800 | AL-800 | AL-840 Operation Manual - Page 34
as follows. 1 Remove the power cord and the interface cable (AL-840 only) and secure the copier using tape (two locations). Supplies and user maintenance If this copier is not in use for a long time, remove the copy paper from the paper tray and store it in a location that is not humid. If the - Sharp AL 800 | AL-800 | AL-840 Operation Manual - Page 35
This chapter describes misfeed removal and troubleshooting. MISFEED REMOVAL When the misfeed ( ) indicator blinks or blinks in the display, the copier will stop because of a misfeed. First check the misfeed location. Remove the misfed paper following the instructions for each location shown in - Sharp AL 800 | AL-800 | AL-840 Operation Manual - Page 36
ready to shield the light-sensitive part of the drum cartridge from light after it is removed from the copier. q The paper to be used for placing the TD cartridge and drum cartridge may become soiled due to toner, etc. q The paper for placing the drum cartridge must be large enough to cover the - Sharp AL 800 | AL-800 | AL-840 Operation Manual - Page 37
the drum (green portion) of the drum cartridge. Doing so may damage the drum and cause smudges on copies. 6 Remove the misfed paper by grasping the end of the paper nearest you and pulling it gently in a straight line. Copier trouble? 6 7 Replace the drum cartridge. (See page 29, DRUM CARTRIDGE - Sharp AL 800 | AL-800 | AL-840 Operation Manual - Page 38
Copier trouble? Part of images missing. Is drum cartridge clean? Non-standard paper used? Paper misfeeds frequently. Images rub off the copy easily. Paper curled or damp? Pieces of paper inside copier? Paper guide in the paper tray not set properly? Too much paper in the paper tray? TD cartridge - Sharp AL 800 | AL-800 | AL-840 Operation Manual - Page 39
18 - Character The paper may be too dry. Try copying or printing with a - voids different batch of paper. Copier trouble? Image voids TD cartridge or drum along a cartridge not installed paper edge properly. Thank you very much for buying a SHARP laser printer. This manual tells you how to - Sharp AL 800 | AL-800 | AL-840 Operation Manual - Page 40
TROUBLESHOOTING Problem Possible cause Solution Background The paper may be too scatter damp. Copying or printing over uneven surfaces. Missing characters Thank you very much for buying a SHARP laser printer. This manual tells you how to set up, operate and maintain your new printer, and - Sharp AL 800 | AL-800 | AL-840 Operation Manual - Page 41
TROUBLESHOOTING 6 Problem Half of the page is blank.*1 Thank you very much for buying a SHARP laser printer. This manual tells you how to set up, operate and maintain your new printer, and contains advice on how to get the best performance from the printer. The descriptions contained in this - Sharp AL 800 | AL-800 | AL-840 Operation Manual - Page 42
panel or the following alphanumeric codes appear in the display, solve the problem by referring to both the table below and the relevant page. Be sure to use only genuine SHARP parts and supplies. Indication Cause and remedy See page: Steadily Replacement of drum cartridge will be needed 44 - Sharp AL 800 | AL-800 | AL-840 Operation Manual - Page 43
ADJUSTMENT The automatic exposure level can be adjusted to suit your copying needs. 1 Press the exposure mode selector key to select is selected, the two right-hand indicators will light up simultaneously. Copier trouble? 4 Press the exposure selector key. The AUTO indicator will stop blinking - Sharp AL 800 | AL-800 | AL-840 Operation Manual - Page 44
supply Power consumption Overall dimensions Weight Copier dimensions Operating conditions Noise level Digital copying machine, desk-top type Dry, electrostatic transfer Sheets, bound documents Max. 8-1/2" x 14" 8-1/2" x 14" to 3-7/8" x 5-7/8" (Feed copy paper TD and drum cartridges included 18.2" - Sharp AL 800 | AL-800 | AL-840 Operation Manual - Page 45
life and performance of SHARP copiers. Look for the Genuine Supplies label on the toner package. Supply list Supply TD cartridge Drum cartridge Part number AL-80TD* AL-80DR Usable life Approx. 3,000 sheets* Approx. 20,000 sheets * Based on copying onto letter-type paper at 5% toned area (The - Sharp AL 800 | AL-800 | AL-840 Operation Manual - Page 46
INSTRUCTIONS When moving this copier, follow the procedure below. When moving this copier, be sure to remove the TD cartridge from the machine. This prevents toner from spilling inside the machine during shipment. 1 Turn the power switch off and disconnect the power cord. 2 Remove the printer - Sharp AL 800 | AL-800 | AL-840 Operation Manual - Page 47
mode 25, 26 C Cautions 3 Cautions on handling 9 Copier trouble 34 Copying - large original 21 - normal 18 - reduction/enlargement 22 - two-sided 23 Copy paper 18 Copy quantity 20 Copy ratio 22 D Dark key 22 Drum cartridge - indicator 7, 41 - replacement 29 E Enlargement 22 Exposure - Sharp AL 800 | AL-800 | AL-840 Operation Manual - Page 48
11, 45 Special paper 18 Specifications - copier 43 - paper 18 Status indicators 41 Supply - life 44 - part number 44 - storage 44 Toner save mode 25 Total number of copies 41 Troubleshooting 37 Two-sided copying 23 U User maintenance - cabinet 31 - drum cartridge 32 - original cover - Sharp AL 800 | AL-800 | AL-840 Operation Manual - Page 49
in the Operation Manual. This requires user maintenance including replacement of the TD cartridge and drum cartridge, cleaning of the unit and transfer charger, removal of dust and foreign matter, clearing of paper misfeeds, and proper routine and preventive maintenance. Service After Expiration of - Sharp AL 800 | AL-800 | AL-840 Operation Manual - Page 50
Number & Description: AL-800/840 Digital Laser Copier (Be sure to have this information available when you need service for your Product.) Warranty Period for this Product: Three (3) years from date of purchase except for the toner and developer cartridge and the drum cartridge supplied with the - Sharp AL 800 | AL-800 | AL-840 Operation Manual - Page 51
50
-
 1
1 -
 2
2 -
 3
3 -
 4
4 -
 5
5 -
 6
6 -
 7
7 -
8
-
9
-
10
-
11
-
12
-
13
-
14
-
15
-
16
-
17
-
18
-
19
-
20
-
21
-
22
-
23
-
24
-
25
-
26
-
27
-
28
-
29
-
30
-
31
-
32
-
33
-
34
-
35
-
36
-
37
-
38
-
39
-
40
-
41
-
42
-
43
-
44
-
45
-
46
-
47
-
48
-
49
-
50
-
51
 |
 |

FOR YOUR PROTECTION...
To aid in reporting this compact copier in case of loss or theft, please record below the
model number and serial number located on the back of the unit. We also suggest you
record all the information listed and retain for future reference.
MODEL NUMBER
SERIAL NUMBER
DATE OF PURCHASE
Dealer
Address
City
State
Zip
Telephone
Service Station
Address
City
State
Zip
Telephone
For location of the nearest Sharp Authorized Service, or
to
obtain product literature, accessories, or supplies,
please call
1 - 800 - BE-SHARP
For customer assistance, please visit
http://www.sharp-
usa.com
on the World Wide Web or call
1-(630)378-3590.