Sharp CV-P10MX CV-P09LX , CV-P10LC , CV-P10MX , CV-P12LX Operation Manual
Sharp CV-P10MX - 9 500 BTU Portable A C Manual
 |
UPC - 074000662278
View all Sharp CV-P10MX manuals
Add to My Manuals
Save this manual to your list of manuals |
Sharp CV-P10MX manual content summary:
- Sharp CV-P10MX | CV-P09LX , CV-P10LC , CV-P10MX , CV-P12LX Operation Manual - Page 1
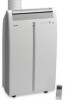
CV-P10LC CV-P10MX PORTABLE TYPE ROOM AIR CONDITIONER INSTALLATION AND OPERATION MANUAL CLIMATISEUR DE CHAMBRE DE TYPE PORTATIF MANUEL D'INSTALLATION ET D'UTILISATION ACONDICIONADOR DE AIRE PARA HABITACIÓN TIPO PORTÁTIL MANUAL DE INSTALACIÓN Y FUNCIONAMIENTO * Plasmacluster is a trademark of SHARP - Sharp CV-P10MX | CV-P09LX , CV-P10LC , CV-P10MX , CV-P12LX Operation Manual - Page 2
- Sharp CV-P10MX | CV-P09LX , CV-P10LC , CV-P10MX , CV-P12LX Operation Manual - Page 3
MEGA COOL OPERATION E-25 • ONE-HOUR OFF TIMER E-25 • TIMER OPERATION E-26 • MAIN UNIT OPERATION E-28 • DRAINAGE E-29 • MAINTENANCE E-30 • BEFORE CALLING FOR SERVICE E-31 Declaration of Conformity SHARP ROOM AIR CONDITIONER CV-P09LX, CV-P12LX, CV-P10LC, CV-P10MX This device complies with Part - Sharp CV-P10MX | CV-P09LX , CV-P10LC , CV-P10MX , CV-P12LX Operation Manual - Page 4
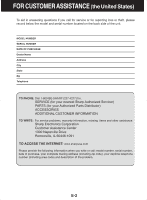
State Zip Telephone TO PHONE: Dial 1-800-BE-SHARP (237-4277) for: SERVICE (for your nearest Sharp Authorized Servicer) PARTS (for your Authorized Parts Distributor) ACCESSORIES ADDITIONAL CUSTOMER INFORMATION TO WRITE: For service problems, warranty information, missing items and other assistance - Sharp CV-P10MX | CV-P09LX , CV-P10LC , CV-P10MX , CV-P12LX Operation Manual - Page 5
CV-P10LC or CV-P10MX Portable Air Conditioner. Be sure to have this information available when you need service for your Product. One (1) year parts and labor from date of purchase. The warranty period continues for a total of five (5) years from date of purchase for the Sealed Cooling System parts - Sharp CV-P10MX | CV-P09LX , CV-P10LC , CV-P10MX , CV-P12LX Operation Manual - Page 6
Dial 1-905-568-7140 for: SERVICE (for your nearest Sharp Authorized Servicer) PARTS (for your Authorized Parts Distributor) ACCESSORIES ADDITIONAL CUSTOMER INFORMATION TO WRITE: For service problems, warranty information, missing items and other assistance: Sharp Electronics of Canada Ltd. Customer - Sharp CV-P10MX | CV-P09LX , CV-P10LC , CV-P10MX , CV-P12LX Operation Manual - Page 7
LCD TV Microwave Oven Air Purifier Portable Air Conditioner Parts & Labour (exceptions noted) 1 year 1 year 1 year 1 year (lamp 90 days) 1 year 1 year (magnetron component-4 additional years) 1 year 1 year To obtain the name and address of the nearest Authorized Sharp Service Centre or Dealer - Sharp CV-P10MX | CV-P09LX , CV-P10LC , CV-P10MX , CV-P12LX Operation Manual - Page 8
to keep in mind when using your air conditioner. WARNINGS FOR USE • Install the air conditioner in accordance with the installation instructions in the latter section of this manual. • Do not modify any part of this product. • Do not insert anything into any part of the unit. • Ensure the power - Sharp CV-P10MX | CV-P09LX , CV-P10LC , CV-P10MX , CV-P12LX Operation Manual - Page 9
room. • The temperature around the drainage hose must not be below freezing point when used. Drained water may freeze inside the hose, causing water inside the unit to overflow into the room. • Do not block the exhaust air outlet with obstacles. Cooling performance may be reduced or stop completely - Sharp CV-P10MX | CV-P09LX , CV-P10LC , CV-P10MX , CV-P12LX Operation Manual - Page 10
will be blown out from the Exhaust air outlet, but this is normal and does not indicate a problem with the unit. • This air conditioner blows the warm air generated by the unit outside the room via the exhaust hose while in cool mode. Accordingly, the same amount of air as that blown out will enter - Sharp CV-P10MX | CV-P09LX , CV-P10LC , CV-P10MX , CV-P12LX Operation Manual - Page 11
air conditioner should be placed on a firm foundation to minimize noise and vibration. For safe and secure positioning, place the unit on a smooth, level floor strong enough to support )B Hose clamp (1) Screw (8) (thickness:1/5") Remote control (1) Battery (2) (AAA.R03) (thickness:2/5") Manual (1) - Sharp CV-P10MX | CV-P09LX , CV-P10LC , CV-P10MX , CV-P12LX Operation Manual - Page 12
Button 8 7 OPERATION Lamp (red) 9 0 8 TIMER Lamp (orange) 0 9 MEGA COOL Lamp (green) 0 0 Air inlet REAR VIEW q q Exhaust air outlet w w Window exhaust adapter e e Exhaust hose r r Remote control hook t t Air filters y u y Drainage nozzle and stopcock u Power supply cord hooks - Sharp CV-P10MX | CV-P09LX , CV-P10LC , CV-P10MX , CV-P12LX Operation Manual - Page 13
CANCEL Button e LOUVERS Button r RESET Button t MEGA COOL Button REMOTE CONTROL DISPLAY y y MODE SYMBOLS : COOL : DEHUMIDIFICATION u p : FAN : VENTILATION i a u MEGA COOL SYMBOL i PLASMACLUSTER SYMBOL o s o FAN SPEED SYMBOLS : AUTO : Manual setting p TEMPERATURE AND TIMER COUNT DOWN - Sharp CV-P10MX | CV-P09LX , CV-P10LC , CV-P10MX , CV-P12LX Operation Manual - Page 14
) and 24" (609mm) inclusive. The window panel cannot be installed in windows less than 22" (559mm) wide, as you will be unable to shut the exhaust cover. (1) Remove the adjustment panel from the window panel, and cut the window panel to the same width as the window. Window panel (2) Open the - Sharp CV-P10MX | CV-P09LX , CV-P10LC , CV-P10MX , CV-P12LX Operation Manual - Page 15
ENGLISH If the inner width of the window is between 24" (609mm) and 36.8" (934mm) inclusive. (1) Open the window sash and place the window panel on the window stool. (2) Slide the adjustment panel to fit the window frame width. (3) Secure the window panel to the stool with 3 screws. Adjustment - Sharp CV-P10MX | CV-P09LX , CV-P10LC , CV-P10MX , CV-P12LX Operation Manual - Page 16
) and 24" (609mm) inclusive. The window panel cannot be installed in windows less than 22" (559mm) high, as you will be unable to shut the exhaust cover. (1) Remove the adjustment panel from the window panel, and cut the window panel to the same height as the window. (2) Open the window sash - Sharp CV-P10MX | CV-P09LX , CV-P10LC , CV-P10MX , CV-P12LX Operation Manual - Page 17
ENGLISH If the inner height of the window is between 24" (609mm) and 36.8" (934mm) inclusive. (1) Open the window sash and place the window panel on the window frame. (2) Slide the adjustment panel to fit the window frame height. (3) Secure the window panel to the window frame with 3 screws. If the - Sharp CV-P10MX | CV-P09LX , CV-P10LC , CV-P10MX , CV-P12LX Operation Manual - Page 18
with container(minimum capacity 31/2 gallons) EXHAUST HOSE Install Remove Installation of the exhaust hose 1 Attach the window exhaust adapter to the exhaust hose. Extend one end of the exhaust hose and insert it into the window exhaust adapter, and turn it (approx. three times) until it - Sharp CV-P10MX | CV-P09LX , CV-P10LC , CV-P10MX , CV-P12LX Operation Manual - Page 19
of the exhaust hose 1 Remove the window exhaust adapter. Pull out and remove the window exhaust adapter by pushing down two "PUSH" markings, and slide and close the exhaust cover in the window panel. 2 Remove the exhaust hose adapter from the unit. Lift up and remove the exhaust hose adapter from - Sharp CV-P10MX | CV-P09LX , CV-P10LC , CV-P10MX , CV-P12LX Operation Manual - Page 20
not attempt to use the air conditioner if the above procedure is impossible, as it is malfunctioning. Disconnect the power plug and request service. LOADING BATTERIES Use two AAA (R03) batteries. 1 Remove the battery cover at the back of the remote control. 2 Insert batteries into the compartment - Sharp CV-P10MX | CV-P09LX , CV-P10LC , CV-P10MX , CV-P12LX Operation Manual - Page 21
button. A beep will sound when the unit receives the signal. • Make sure nothing, such as curtains, blocks the signal receiver window. • The remote control operates up to 23 feet (7 meters) away. CAUTION • Do not expose the signal receiver window to direct sunlight. This may adversely affect its - Sharp CV-P10MX | CV-P09LX , CV-P10LC , CV-P10MX , CV-P12LX Operation Manual - Page 22
MODE 1 Install the exhaust hose (See Page16), turn the drainage nozzle to the CLOSE position, Drainage nozzle and check the drainage nozzle is covered "CLOSE" position with the stopcock. Stopcock 1 Press the MODE button to select COOL mode. COOL DEHUM FAN VENT 32 Press the POWER button to - Sharp CV-P10MX | CV-P09LX , CV-P10LC , CV-P10MX , CV-P12LX Operation Manual - Page 23
mode, the air conditioner dehumidifies the room. Dehumidification with container 1 Remove the exhaust hose (See Page 17) 2 Turn the drainage unit (See Page 29). 1 Press the MODE button to select DEHUMIDIFICATION mode. COOL DEHUM FAN VENT 2 2 Press the power button to start operation. • The - Sharp CV-P10MX | CV-P09LX , CV-P10LC , CV-P10MX , CV-P12LX Operation Manual - Page 24
MODE In this mode, the air conditioner simply circulates the air without cooling it. Install the exhaust hose (See Page16), turn the drainage nozzle to the CLOSE position, and check the drainage nozzle is covered with the stopcock. 1 Press the MODE button to select FAN mode. COOL DEHUM FAN VENT - Sharp CV-P10MX | CV-P09LX , CV-P10LC , CV-P10MX , CV-P12LX Operation Manual - Page 25
attempt to adjust the horizontal louvers manually. • Manual adjustment of the horizontal louvers can cause the unit to malfunction when the remote control is used for adjustment. • When the horizontal louvers are positioned at the lowest position in the COOL or DEHUMIDIFICATION mode for an extended - Sharp CV-P10MX | CV-P09LX , CV-P10LC , CV-P10MX , CV-P12LX Operation Manual - Page 26
ion generator inside the air conditioner will release positive and negative Plasmacluster ions into the room. Approximately the same numbers of posi- tive and negative ions are released into the air. 1 Press the PLASMACLUSTER button during operation. • The remote control will display " ". • The - Sharp CV-P10MX | CV-P09LX , CV-P10LC , CV-P10MX , CV-P12LX Operation Manual - Page 27
air conditioner fan works at extra high speed with a setting temperature of 59°F. 1 Press the MEGA COOL button during cooling mode. • The remote control will display " " . • The temperature display will go off. • The green MEGA COOL CANCEL lamp on the unit will turn off. NOTES: • The ONE-HOUR - Sharp CV-P10MX | CV-P09LX , CV-P10LC , CV-P10MX , CV-P12LX Operation Manual - Page 28
CANCEL button. • The orange TIMER lamp on the unit will turn off. Display shown when you set the unit to turn off 2.5 hours later. NOTES ON TIMER SETTING AND OPERATION • The latest time setting will be memorized and will appear on the remote control display the next time you set the OFF TIMER or - Sharp CV-P10MX | CV-P09LX , CV-P10LC , CV-P10MX , CV-P12LX Operation Manual - Page 29
hours, in 1-hour increments. Point the remote control at the signal receiver window on the unit. 1 Press the ON TIMER button. • The time setting will change as you press the button as follows. 0.5h 1.0h 1.5h 10h 11h 12h 1 Display shown when you set the unit to turn on 6.5 hours later. Hold the - Sharp CV-P10MX | CV-P09LX , CV-P10LC , CV-P10MX , CV-P12LX Operation Manual - Page 30
MAUAXINILUIANRITYOMPOEDREATION Use this mode when the remote control is not available. 1 Press the POWER button on resume operation in the cooling mode, set at 68˚F. The fan speed set to AUTO. TO TURN OFF Press the POWER button again. • The red OPERATION lamp on the unit will turn off. NOTES: • - Sharp CV-P10MX | CV-P09LX , CV-P10LC , CV-P10MX , CV-P12LX Operation Manual - Page 31
. Maximum amount of water that may be drained out is approximately 41/5 pints. • The OPERATION, TIMER and MEGA COOL Hose lamps will be blinking. 7 When drainage water stops running out from the hose, turn the unit off by pressing POWER button. • This will take about one minute. 8 Remove the - Sharp CV-P10MX | CV-P09LX , CV-P10LC , CV-P10MX , CV-P12LX Operation Manual - Page 32
cooling performance may be reduced or stop completely if the insect guard net becomes clogged with dust. Periodically remove the window exhaust adapter from the window panel and clean the insect guard net with a vacuum cleaner or suchlike. Insect guard net MAINTENANCE AFTER AIR CONDITIONER SEASON - Sharp CV-P10MX | CV-P09LX , CV-P10LC , CV-P10MX , CV-P12LX Operation Manual - Page 33
turned on or off, and also during operation. This is the sound of the refrigerant flowing inside the unit. • A low buzzing noise is emitted when the unit is generating Plasmacluster ions. • This air conditioner evaporates water condensed during cooling operation within the unit through the exhaust - Sharp CV-P10MX | CV-P09LX , CV-P10LC , CV-P10MX , CV-P12LX Operation Manual - Page 34
- Sharp CV-P10MX | CV-P09LX , CV-P10LC , CV-P10MX , CV-P12LX Operation Manual - Page 35
F-20 • MODE VENTILATION F-20 • RÉORIENTATION DU FLUX D'AIR F-21 • FONCTIONNEMENT PLASMACLUSTER F-22 • FONCTIONNEMENT EN MÉGAREFROIDISSEMENT • AVANT D'APPELER LE SERVICE APRÈS-VENTE F-29 Déclaration de conformité Climatiseur de chambre de SHARP CV-P09LX, CV-P12LX, CV-P10MX Cet appareil ISM est - Sharp CV-P10MX | CV-P09LX , CV-P10LC , CV-P10MX , CV-P12LX Operation Manual - Page 36
D'ACHAT Nom du Détaillant Adresse Ville Province Code Postal Téléphone POUR TÉLÉPHONER : Composez le 1-905-568-7140 pour : SERVICE (Pour obtenir les coordonnées du Centre de service agréé Sharp le plus proche) PIÈCES (Pour le nom d'un Revendeur de Pièces Agréé) ACCESSOIRES AUTRES INFORMATIONS POUR - Sharp CV-P10MX | CV-P09LX , CV-P10LC , CV-P10MX , CV-P12LX Operation Manual - Page 37
service Sharp ou à un Détaillant autorisé au service Sharp. La garantie de service à domicile peut être offerte, à la discrétion de Sharp, sur tous les téléviseurs Sharp cristaux liquides Four au micro-ondes Magnétoscopes Purificateur d'air Climatiseur portatif Pièces et travail (exceptions notées) - Sharp CV-P10MX | CV-P09LX , CV-P10LC , CV-P10MX , CV-P12LX Operation Manual - Page 38
é ne doit pas être réparé, mais remplacé par un nouveau, obtenu du fabricant du produit. Le remplacement doit être réalisé par un agent de service du fabricant pour éviter tout danger. REMARQUE Brouillage de la radio ou de la télévision Si ce climatiseur de chambre perturbe la réception en radio - Sharp CV-P10MX | CV-P09LX , CV-P10LC , CV-P10MX , CV-P12LX Operation Manual - Page 39
un électricien ou un réparateur qualifié si vous ne comprenez pas tout à fait les instructions de mise à la terre ou si vous doutez que l'appareil soit bien mis à la obstruez pas la bouche d'évacuation de l'air. La capacité de refroidissement pourrait baisser ou disparaître complètement. F-5 - Sharp CV-P10MX | CV-P09LX , CV-P10LC , CV-P10MX , CV-P12LX Operation Manual - Page 40
l'unité s'arrête de fonctionner et les voyants TIMER, OPERATION et MEGA COOL clignotent. Dans ce cas, vidangez l'eau se trouvant à l'intérieur de contribue beaucoup au fonctionnement efficace. Un filtre sale bloque le flux d'air, ce qui pousse votre climatiseur à travailler dur avec une efficacité - Sharp CV-P10MX | CV-P09LX , CV-P10LC , CV-P10MX , CV-P12LX Operation Manual - Page 41
terre avec des caractéristiques nominales satisfaisantes. MIN. 12 po (30 cm) • Il ne doit jamais y avoir d'obstacles autour de l'entrée ou de la sortie d'air de l'unité. • En vue d'une climatisation efficace, prévoyez au moins 12 po (30 cm) d'écart avec le mur. MIN. 12 po (30 cm) COMPRIS - Sharp CV-P10MX | CV-P09LX , CV-P10LC , CV-P10MX , CV-P12LX Operation Manual - Page 42
9 Voyant de mégarefroidissement MEGA COOL (vert) 0 Entrée d'air q q Bouche d'évacuation de l'air w w Adaptateur d'échappement de fen Flexible d'évacuation t r Crochet pour la télécommande y t Filtres à air u y Buse et chantepleure de vidange u Crochets pour le cordon d'alimentation - Sharp CV-P10MX | CV-P09LX , CV-P10LC , CV-P10MX , CV-P12LX Operation Manual - Page 43
t w Touche d'annulation CANCEL e Touche de volets LOUVERS r Touche de réinitialisation RESET t Touche de mégarefroidissement MEGA COOL AFFICHAGE DE LA TÉLÉCOMMANDE y y SYMBOLES DES MODES : FRAIS : DÉSHUMIDIFICATION u p : VENTILATEUR : VENTILATION i a u SYMBOLE DU MÉGAREFROIDISSEMENT - Sharp CV-P10MX | CV-P09LX , CV-P10LC , CV-P10MX , CV-P12LX Operation Manual - Page 44
INSTALLATION DU PANNEAU DE FENÊTRE Installation dans une fenêtre à guillotine (Passez à la page 12 pour l'installation dans une fenêtre à coulisse horizontale.) Trou 1 Attachez les pare-pluie à l'écran pareinsecte. Écran Insérez les trois saillies de chaque pare- pare-insecte pluie dans les - Sharp CV-P10MX | CV-P09LX , CV-P10LC , CV-P10MX , CV-P12LX Operation Manual - Page 45
FRANÇAIS Si la largeur intérieure de la fenêtre se situe entre 24 po (609 mm) et 36,8 po (934 mm) inclusivement. (1) Ouvrez le châssis et placez le panneau de fenêtre sur le seuil de la fenêtre. (2) Faites glisser la plaque d'ajustement pour mettre le panneau à la largeur du cadre de fenêtre. (3) - Sharp CV-P10MX | CV-P09LX , CV-P10LC , CV-P10MX , CV-P12LX Operation Manual - Page 46
INSTALLATION DU PANNEAU DE FENÊTRE Installation dans une fenêtre à coulisse horizontale (Passez à la page 10 pour l'installation dans une fenêtre à guillotine.) 1 Attachez les pare-pluie à l'écran pareinsecte. Insérez les trois saillies de chaque parepluie dans les trous de l'écran pare-insecte. - Sharp CV-P10MX | CV-P09LX , CV-P10LC , CV-P10MX , CV-P12LX Operation Manual - Page 47
FRANÇAIS Si la hauteur intérieure de la fenêtre se situe entre 24 po (609 mm) et 36,8 po (934 mm) inclusivement. (1) Ouvrez le châssis et placez le panneau de fenêtre sur le cadre de fenêtre. (2) Faites glisser la plaque d'ajustement pour mettre le panneau à la hauteur du cadre de fenêtre. (3) - Sharp CV-P10MX | CV-P09LX , CV-P10LC , CV-P10MX , CV-P12LX Operation Manual - Page 48
MONTAGE ET DÉMONTAGE DU FLEXIBLE D'ÉVACUATION Le flexible d'évacuation doit être installé ou détaché selon le mode de fonctionnement. MODE FLEXIBLE D'ÉVACUATION FRAIS, VENTILATEUR, VENTILATION, DÉSHUMIDIFICATION sans réservoir Installer DÉSHUMIDIFICATION avec réservoir (capacité minimum 31/2 - Sharp CV-P10MX | CV-P09LX , CV-P10LC , CV-P10MX , CV-P12LX Operation Manual - Page 49
FRANÇAIS Démontage du flexible d'évacuation 1 Retirez l'adaptateur d'échappement de fenêtre. Pressez les deux marques "PUSH" vers le bas pour extraire l'adaptateur d'échappement de fenêtre, puis fermez la couverture d'échappement sur le panneau de fenêtre en la faisant coulisser. 2 Détachez l' - Sharp CV-P10MX | CV-P09LX , CV-P10LC , CV-P10MX , CV-P12LX Operation Manual - Page 50
CONTRÔLES PRÉALABLES CONTRÔLE DE LA FICHE Ce climatiseur utilise une fiche à fusible. Vérifiez toujours la fiche avant usage. 1 Appuyez sur la touche RESET. 2 Insérez la fiche dans la prise murale. 3 Appuyez sur la touche TEST. Vous entendrez un CLIC si le disjoncteur fonctionne correctement. 4 - Sharp CV-P10MX | CV-P09LX , CV-P10LC , CV-P10MX , CV-P12LX Operation Manual - Page 51
FRANÇAIS VOICI COMMENT UTILISER LA TÉLÉCOMMANDE Pointez la télécommande vers la fenêtre de réception du signal de l'appareil et appuyez sur la touche désirée. L'appareil émet un bip lorsqu'il reçoit le signal. • Assurez-vous que rien, comme des rideaux, ne bloque la fenêtre de réception du signal. - Sharp CV-P10MX | CV-P09LX , CV-P10LC , CV-P10MX , CV-P12LX Operation Manual - Page 52
MODE FRAIS 1 Installez le flexible d'évacuation (voyez page 14), tournez la buse de vidange vers la posiBuse de vidange tion FERMÉE et vérifiez si la buse de vidange est couverte par la chantepleure. Position "FERMÉE" Chantepleure 1 Appuyez sur la touche MODE pour sélectionner le mode FRAIS. - Sharp CV-P10MX | CV-P09LX , CV-P10LC , CV-P10MX , CV-P12LX Operation Manual - Page 53
Dans ce mode de fonctionnement, si le réservoir d'eau est plein, l'appareil s'arrêtera de fonctionner et les voyants TIMER, OPERATION et MEGA COOL clignoteront, selon les conditions ambiantes. Dans un tel cas, vidangez l'eau à l'intérieur de l'appareil (voyez page 27). 1 Appuyez sur la touche MODE - Sharp CV-P10MX | CV-P09LX , CV-P10LC , CV-P10MX , CV-P12LX Operation Manual - Page 54
1 33 Appuyez sur la touche FAN pour régler la vitesse désirée du ventilateur. 3 • Même si les volets d'aération sont fermés et qu'aucun air n'est soufflé dans la pièce, la vitesse du ventilateur pour la ventilation extérieure change. 1 SILENCIEUX FAIBLE FORT 4POUR ÉTEINDRE Appuyez de nouveau - Sharp CV-P10MX | CV-P09LX , CV-P10LC , CV-P10MX , CV-P12LX Operation Manual - Page 55
la même position lors de l'utilisation suivante. REMARQUE • Au mode VENTILATION, la direction HAUT/BAS du débit d'air n'est pas modifiable. Volets d'aération horizontaux DÉBIT D'AIR DE DIRECTION GAUCHE-DROITE Tenez le volet d'aération vertical comme dans le schéma et ajustez la direction du débit - Sharp CV-P10MX | CV-P09LX , CV-P10LC , CV-P10MX , CV-P12LX Operation Manual - Page 56
ère des ions Plasmacluster positifs et négatifs dans la pièce. Une quantité à peu près égale d'ions positifs et négatifs se dégage dans l'air. 1 Appuyez sur la touche PLASMACLUSTER en cours de marche. • La télécommande affiche " ". • Le voyant bleu de PLASMACLUSTER s'allume sur l'appareil. POUR - Sharp CV-P10MX | CV-P09LX , CV-P10LC , CV-P10MX , CV-P12LX Operation Manual - Page 57
• La télécommande affiche " " . • L'affichage de température s'éteint. • Le voyant vert MEGA COOL s'allume sur l'appareil. POUR ANNULER Appuyez de nouveau sur la touche MEGA 1 COOL. • Le fonctionnement en MEGA COOL est également annulé lors d'un changement de mode ou d'une mise hors tension - Sharp CV-P10MX | CV-P09LX , CV-P10LC , CV-P10MX , CV-P12LX Operation Manual - Page 58
FONCTIONNEMENT AVEC MINUTERIE MINUTERIE D'ARRÊT L'unité s'arrête automatiquement suivant votre réglage. Le délai de temporisation peut être réglé entre un minimum d'une demi-heure (30 minutes) et un maximum de 12 heures. Cette fonction est réglable par intervalles d'une demi-heure (30 minutes) - Sharp CV-P10MX | CV-P09LX , CV-P10LC , CV-P10MX , CV-P12LX Operation Manual - Page 59
FRANÇAIS MINUTERIE DE MARCHE L'unité s'arrête automatiquement suivant votre réglage. Le délai de temporisation peut être réglé entre un minimum d'une demi-heure (30 minutes) et un maximum de 12 heures. Cette fonction réglable par intervalles d'une demi-heure (30 minutes) jusqu'à 9,5 heures et par - Sharp CV-P10MX | CV-P09LX , CV-P10LC , CV-P10MX , CV-P12LX Operation Manual - Page 60
FMOONDCETAIOUNXNILEIAMIREENT EN MODE D'UNITE PRINCIPALE Utilisez ce mode si la télécommande n'est pas disponible. 1 Appuyez sur la touche POWER de l'appareil. • Le voyant rouge OPERATION s'allume sur 1 l'appareil. • Si l'appareil n'a pas été débranché depuis sa dernière utilisation, il - Sharp CV-P10MX | CV-P09LX , CV-P10LC , CV-P10MX , CV-P12LX Operation Manual - Page 61
et évacuez l'eau de l'unité dans les cas suivants. Si l'appareil s'arrête de fonctionner et que les voyants TIMER, OPERATION et MEGA COOL clignotent. (Cela indique que le réservoir d'eau dans l'appareil est plein.) 1 Prenez soin d'éteindre l'appareil. 2 Tournez la buse de vidange vers la position - Sharp CV-P10MX | CV-P09LX , CV-P10LC , CV-P10MX , CV-P12LX Operation Manual - Page 62
cordon d'alimentation de la prise murale avant tout entretien. NETTOYAGE DES FILTRES Si le filtre est bouché par la poussière, le débit d'air baisse, ce qui cause une mauvaise capacité de refroidissement. Le filtre doit être nettoyé toutes les deux semaines. Filtres 1 ENLEVEZ LES FILTRES • Tirez - Sharp CV-P10MX | CV-P09LX , CV-P10LC , CV-P10MX , CV-P12LX Operation Manual - Page 63
suivants avant de faire appel au service après-vente. LE CLIMATISEUR NE FONCTIONNE 5 minutes. • Les voyants OPERATION, TIMER et MEGA COOL clignotent-ils ? Le réservoir d'eau dans l'appareil • Le serpentin refroidisseur est-il gelé ? Aucun air ne souffle si le serpentin refroidisseur est gelé. Faites - Sharp CV-P10MX | CV-P09LX , CV-P10LC , CV-P10MX , CV-P12LX Operation Manual - Page 64
- Sharp CV-P10MX | CV-P09LX , CV-P10LC , CV-P10MX , CV-P12LX Operation Manual - Page 65
DIRECCIÓN DE LA CORRIENTE DE AIRE S-21 • FUNCIONAMIENTO DEL PLASMACLUSTER S-22 • FUNCIONAMIENTO MEGA COOL S-23 • FUNCIÓN DE AIRE SHARP CV-P09LX, CV-P12LX, CV-P10LC, CV-P10MX Este dispositivo cumple con la parte 18 de las reglas de la FCC. Organismo responsable: SHARP ELECTRONICS CORPORATION. Sharp - Sharp CV-P10MX | CV-P09LX , CV-P10LC , CV-P10MX , CV-P12LX Operation Manual - Page 66
número del modelo y el número de serie, los cuales se encuentran en la parte posterior de la unidad. NÚMERO DEL MODELO NÚMERO DE SERIE FECHA DE COMPRA Nombre ón de garantía, ítems perdidos y otras ayudas: Sharp Electronics Corporation Customer Assistance Center 1300 Naperville Drive Romeoville, - Sharp CV-P10MX | CV-P09LX , CV-P10LC , CV-P10MX , CV-P12LX Operation Manual - Page 67
Servicio: Qué hacer para obtener servicio: CV-P09LX, CV-P12LX, CV-P10LC o CV-P10MX Acondicionador de aire portátil. Carrousel de uso doméstico localizar al proveedor de servicio autorizado, llame sin cargo al 1-800-BE-SHARP (1-800-237-4277). Flete prepagado,o lleve su producto a un proveedor - Sharp CV-P10MX | CV-P09LX , CV-P10LC , CV-P10MX , CV-P12LX Operation Manual - Page 68
aire. ADVERTENCIAS PARA EL USO • Instale el acondicionador de aire de acuerdo a las instrucciones de instalación que se describen más adelante en este manual PARA EL CABLE DE SUMINISTRO DE ENERGÍA • Este acondicionador de aire utiliza una clavija con un fusible incorporado. Lea las precauciones sobre - Sharp CV-P10MX | CV-P09LX , CV-P10LC , CV-P10MX , CV-P12LX Operation Manual - Page 69
la unidad. El agua puede causar descargas eléctricas o daños al equipo. • Debe de realizarse el drenaje cada vez que mueva el acondicionador de aire. (Vea la página 27) Si queda algo de agua en el depósito, podría derramarse al moverse. • Retire el panel de ventana en caso de - Sharp CV-P10MX | CV-P09LX , CV-P10LC , CV-P10MX , CV-P12LX Operation Manual - Page 70
unidad. Después de que se reinstale la energía, reinicie el acondicionador de aire. Si la energía ha estado desactivada durante menos de tres minutos, aseg ésta se dejará de funcionar y las lámparas TIMER, OPERATION y MEGA COOL parpadearán. En este caso, realice el drenaje para sacar el agua que se - Sharp CV-P10MX | CV-P09LX , CV-P10LC , CV-P10MX , CV-P12LX Operation Manual - Page 71
No coloque nunca obstáculos alrededor del orificio de entrada o de salida de aire de la unidad. • Deje un espacio de por lo menos 12" (30 cm) con respecto a la pared para un acondicionamiento de aire eficaz. MÍN.12" (30 cm) PIEZAS INCLUIDAS MaEnxghuearuasdt ehoeseca( - Sharp CV-P10MX | CV-P09LX , CV-P10LC , CV-P10MX , CV-P12LX Operation Manual - Page 72
) 6 5 Ventana receptora de señal 7 del control remoto 8 6 Botón POWER 9 7 Lámpara OPERATION (roja ) 0 8 Lámpara TIMER (anaranjada ) 0 9 Lámpara MEGA COOL(verde) 0 0 Orificio de entrada de aire PARTE TRASERA q q Orificio de salida de aire de escape w w Adaptador del escape de la - Sharp CV-P10MX | CV-P09LX , CV-P10LC , CV-P10MX , CV-P12LX Operation Manual - Page 73
COOL) ESPAÑOL PANTALLA DE VISUALIZACIÓN DEL CONTROL REMOTO y y SÍMBOLOS DE MODO : ENFRIAR : DESHUMIDIFICACIÓN u p : VENTILADOR : VENTILACIÓN i a u SÍMBOLO DE SUPERENFRIAMIENTO i SÍMBOLO DEL PLASMACLUSTER o s o SÍMBOLOS DE VELOCIDAD DEL VENTILADOR : AUTOMÁTICO : Ajuste manual - Sharp CV-P10MX | CV-P09LX , CV-P10LC , CV-P10MX , CV-P12LX Operation Manual - Page 74
asegurarse de que las "A" cuatro salientes se hayan encajado dentro de los agujeros en el panel de ventana. El lado "A" estará ahora en la parte superior, como se indica en el diagrama. 3 Corte el sello de espuma A (tipo adhesivo) a la longitud adecuada y péguelo en el antepecho de ventana Saliente - Sharp CV-P10MX | CV-P09LX , CV-P10LC , CV-P10MX , CV-P12LX Operation Manual - Page 75
de ventana. Sello de espuma A (tipo adhesivo) Sello de espuma B (tipo adhesivo) 7 Corte el sello de espuma a la longitud apropiada y selle la apertura entre la parte superior y el exterior de la hoja de la ventana. 8 Fije una abrazadera con el tornillo. Sello de espuma Abrazadera S-11 - Sharp CV-P10MX | CV-P09LX , CV-P10LC , CV-P10MX , CV-P12LX Operation Manual - Page 76
para asegurarse de que las cuatro salientes se hayan encajado dentro de los agujeros en el panel de ventana. El lado "A" estará ahora en la parte superior, como se indica en el diagrama, cuando este se instala en la ventana. Saliente "A" Protector contra la lluvia Panel de ventana "A" 3 Corte el - Sharp CV-P10MX | CV-P09LX , CV-P10LC , CV-P10MX , CV-P12LX Operation Manual - Page 77
ESPAÑOL Si la altura interior de la ventana esta entre 24" (609 mm) y 36,8" (934 mm) inclusive. (1) Abra la hoja de la ventana y coloque el panel de ventana sobre el marco. (2) Deslice el panel de ajuste para fijar la altura del marco de la ventana. (3) Fije con 3 tornillos el panel de ventana al - Sharp CV-P10MX | CV-P09LX , CV-P10LC , CV-P10MX , CV-P12LX Operation Manual - Page 78
ventana, y fije el adaptador del escape de la ventana. La superficie del adaptador del escape de la ventana marcado con "TOP" debe estar en la parte superior cuando este se instala en una ventana de guillotina doble. La superficie del adaptador del escape de la ventana marcado con "TOP" debe estar - Sharp CV-P10MX | CV-P09LX , CV-P10LC , CV-P10MX , CV-P12LX Operation Manual - Page 79
ESPAÑOL Desmontaje de la manguera de escape 1 Desmonte el adaptador del escape de la ventana. Al presionar las dos marcas "PUSH", tire y extraiga el adaptador del escape de la ventana, deslice y cierre la cubierta del escape en el panel de ventana. 2 Desmonte el adaptador de la manguera de escape - Sharp CV-P10MX | CV-P09LX , CV-P10LC , CV-P10MX , CV-P12LX Operation Manual - Page 80
REVISIÓN DE LA CLAVIJA DE TOMA DE CORRIENTE Este acondicionador de aire utiliza una clavija de toma de corriente con fusible. Antes dos pilas AAA (R03). 1 Retire la cubierta de las pilas en la parte trasera del control remoto. 2 Introduzca las pilas en el compartimiento, asegúrese de que las - Sharp CV-P10MX | CV-P09LX , CV-P10LC , CV-P10MX , CV-P12LX Operation Manual - Page 81
la señal, producirá un sonido audible. • Asegúrese de que nada, como por ejemplo cortinas, bloquea la ven- tana receptora de señal. • El control remoto funciona hasta a 23 pies (7 metros) de distancia. PRECAUCIÓN • No exponga la ventana receptora de señal a la luz solar directa. Esto puede afectar - Sharp CV-P10MX | CV-P09LX , CV-P10LC , CV-P10MX , CV-P12LX Operation Manual - Page 82
MODO ENFRIAR 1 Instale la manguera de escape (vea la página 14), gire la boquilla de drenaje a la posición Boquilla de drenaje CERRAR y compruebe que la boquilla de Posición "CERRAR" drenaje está cubierta con la llave de paso. Llave de paso 1 Presione el botón MODE para seleccionar el modo - Sharp CV-P10MX | CV-P09LX , CV-P10LC , CV-P10MX , CV-P12LX Operation Manual - Page 83
ESPAÑOL En este modo, el acondicionador de aire deshumidifica la habitación. Deshumidificación con depósito 1 esté lleno, está dejará de funcionar y luego las lámparas TIMER, OPERATION y MEGA COOL parpadearán, dependiendo de la condición de la habitación. En este caso, drene el agua de la - Sharp CV-P10MX | CV-P09LX , CV-P10LC , CV-P10MX , CV-P12LX Operation Manual - Page 84
ÓN Presione nuevamente el botón POWER. • La lámpara roja OPERATION en la unidad se apagará. MODO VENTILACIÓN En este modo, el acondicionador de aire ventila el aire hacia el exterior. Instale la manguera de escape (vea la página 14), gire la boquilla de drenaje a la posición CERRAR y compruebe que - Sharp CV-P10MX | CV-P09LX , CV-P10LC , CV-P10MX , CV-P12LX Operation Manual - Page 85
dirección de la corriente de aire. Deflectores verticales PRECAUCIÓN No trate nunca de graduar manualmente los deflectores horizontales. • Si se ajustan los deflectores horizontales de forma manual, puede suceder que la unidad falle posteriormente al querer manejarla con el control remoto. • Si los - Sharp CV-P10MX | CV-P09LX , CV-P10LC , CV-P10MX , CV-P12LX Operation Manual - Page 86
en la habitación iones plasmacluster positivos y negativos. Se liberan en el aire el mismo número de iones positivos y negativos aproximadamente. 1 Presione el botón PLASMACLUSTER durante el funcionamiento. • En el control remoto se visualiza la indicación " ". • La lámpara azul PLASMACLUSTER de la - Sharp CV-P10MX | CV-P09LX , CV-P10LC , CV-P10MX , CV-P12LX Operation Manual - Page 87
En esta función, el ventilador del acondicionador de aire funciona a una velocidad muy alta con una temperatura ajustada a 59°F. 1 Presione el botón MEGA COOL durante el modo de enfriamiento. • En el control remoto se visualiza la indicación " ". • Desaparece la indicación de temperatura. • La - Sharp CV-P10MX | CV-P09LX , CV-P10LC , CV-P10MX , CV-P12LX Operation Manual - Page 88
máximo de 12 horas. Puede ajustar en incrementos de media hora (30 minutos) hasta 9,5 horas y desde 10 a 12 horas, en incrementos de 1 hora. Apunte el control remoto hacia la célula del receptor de señal en la unidad. 1 Presione el botón OFF TIMER y ajuste la hora como desee. • El ajuste del - Sharp CV-P10MX | CV-P09LX , CV-P10LC , CV-P10MX , CV-P12LX Operation Manual - Page 89
ximo de 12 horas. Puede ajustar en incrementos de media hora (30 minutos) hasta 9,5 horas y desde 10 a 12 horas, en incrementos de 1 hora. Apunte el control remoto hacia la célula del receptor de señal en la unidad. 1 Presione el botón ON TIMER. • El ajuste del tiempo cambiará a medida que presione - Sharp CV-P10MX | CV-P09LX , CV-P10LC , CV-P10MX , CV-P12LX Operation Manual - Page 90
FMUONDCOIAOUNXAILMIAIERNTO DE LA UNIDAD PRINCIPAL Use este modo si no dispone de un control remoto. 1 Presione el botón POWER en la unidad. • La lámpara roja OPERATION de la unidad se iluminará. 1 • Si no se ha desconectado la unidad desde - Sharp CV-P10MX | CV-P09LX , CV-P10LC , CV-P10MX , CV-P12LX Operation Manual - Page 91
y drene el agua que se encuentra dentro de la unidad en los siguientes casos. Si la unidad deja de funcionar y las lámparas TIMER, OPERATION y MEGA COOL parpadean. (Esto indica que el depósito del agua dentro de la unidad está lleno). 1 Asegúrese de desactivar la unidad. 2 Gire la boquilla de - Sharp CV-P10MX | CV-P09LX , CV-P10LC , CV-P10MX , CV-P12LX Operation Manual - Page 92
daños a la unidad. LIMPIEZA DE LA UNIDAD Y DEL CONTROL REMOTO Límpielos con un paño suave y seco o con un agresivas o limpiadores abrasivos sobre ninguna de las partes de la unidad. Para evitar dañar la MANTENIMIENTO DESPUÉS DE UTILIZAR EL ACONDICIONADOR DE AIRE 1 Realice el drenaje para drenar el - Sharp CV-P10MX | CV-P09LX , CV-P10LC , CV-P10MX , CV-P12LX Operation Manual - Page 93
aproximadamente 5 minutos. • ¿Están parpadeando las lámparas OPERATION, TIMER y MEGA COOL? El depósito de agua dentro de la unidad está lleno. Tiene que Verifique si las pilas del control remoto están instaladas con las polaridades alineadas en forma adecuada. EL AIRE EMITIDO TIENE OLOR • El - Sharp CV-P10MX | CV-P09LX , CV-P10LC , CV-P10MX , CV-P12LX Operation Manual - Page 94
- Sharp CV-P10MX | CV-P09LX , CV-P10LC , CV-P10MX , CV-P12LX Operation Manual - Page 95
ESPAÑOL - Sharp CV-P10MX | CV-P09LX , CV-P10LC , CV-P10MX , CV-P12LX Operation Manual - Page 96
R SHARP ELECTRONICS CORPORATION Sharp Plaza, Mahwah, New Jersey 07430-2135 U.S.A SHARP CORPORATION Osaka, Japan R SHARP ELECTRONICS OF CANADA LTD. 335 Britannia Road, East Mississauga, Ontario L4Z 1W9 Canada SHARP CORPORATION Osaka, Japan Printed in Thailand Imprimé en Thaïlande Impreso en
-
 1
1 -
 2
2 -
 3
3 -
 4
4 -
 5
5 -
 6
6 -
 7
7 -
8
-
9
-
10
-
11
-
12
-
13
-
14
-
15
-
16
-
17
-
18
-
19
-
20
-
21
-
22
-
23
-
24
-
25
-
26
-
27
-
28
-
29
-
30
-
31
-
32
-
33
-
34
-
35
-
36
-
37
-
38
-
39
-
40
-
41
-
42
-
43
-
44
-
45
-
46
-
47
-
48
-
49
-
50
-
51
-
52
-
53
-
54
-
55
-
56
-
57
-
58
-
59
-
60
-
61
-
62
-
63
-
64
-
65
-
66
-
67
-
68
-
69
-
70
-
71
-
72
-
73
-
74
-
75
-
76
-
77
-
78
-
79
-
80
-
81
-
82
-
83
-
84
-
85
-
86
-
87
-
88
-
89
-
90
-
91
-
92
-
93
-
94
-
95
-
96
 |
 |
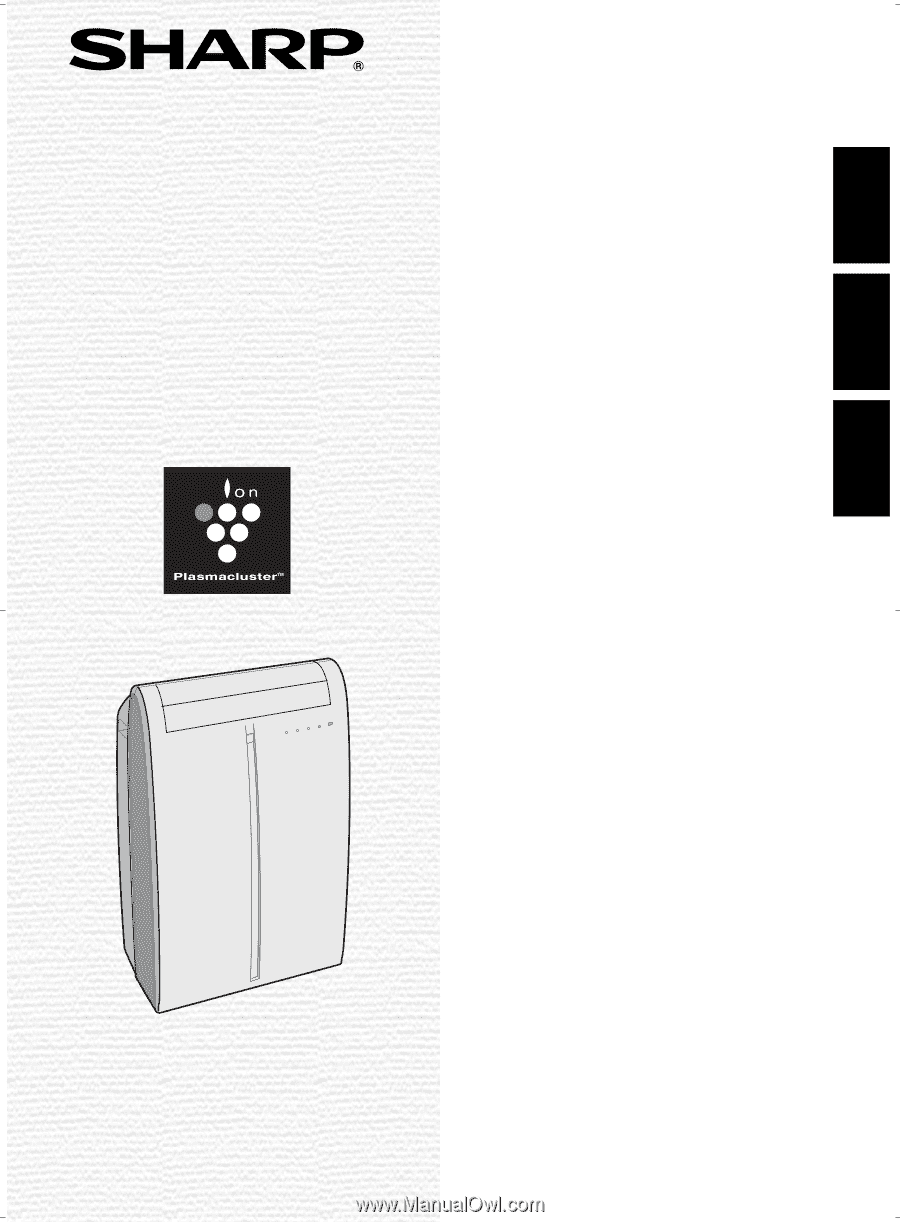
PORTABLE TYPE
ROOM AIR CONDITIONER
INSTALLATION AND OPERATION
MANUAL
CLIMATISEUR DE CHAMBRE
DE TYPE PORTATIF
MANUEL D’INSTALLATION ET
D’UTILISATION
ACONDICIONADOR DE AIRE
PARA HABITACIÓN TIPO
PORTÁTIL
MANUAL DE INSTALACIÓN
Y FUNCIONAMIENTO
* Plasmacluster is a trademark of SHARP
Corporation.
* Plasmacluster est une marque de
commerce de SHARP Corporation.
* Plasmacluster es una marca registrada
de SHARP Corporation.
ENGLISH
CV-P09LX
CV-P12LX
CV-P10LC
CV-P10MX
FRANÇAIS
ESPAÑOL