Sharp CV-P13PX CV-P12PX CV-P13PX CV-PD13PX Operation Manual
Sharp CV-P13PX - Portable Air Conditioner Manual
 |
UPC - 074000662636
View all Sharp CV-P13PX manuals
Add to My Manuals
Save this manual to your list of manuals |
Sharp CV-P13PX manual content summary:
- Sharp CV-P13PX | CV-P12PX | CV-P13PX | CV-PD13PX Operation Manual - Page 1
is a trademark of SHARP Corporation. * Plasmacluster es una marca registrada de SHARP Corporation. PORTABLE TYPE ROOM AIR CONDITIONER INSTALLATION AND OPERATION MANUAL ACONDICIONADOR DE AIRE PARA HABITACIÓN TIPO PORTÁTIL MANUAL DE INSTALACIÓN Y FUNCIONAMIENTO CV-P12PX CV-P13PX CV-PD13PX - Sharp CV-P13PX | CV-P12PX | CV-P13PX | CV-PD13PX Operation Manual - Page 2
- Sharp CV-P13PX | CV-P12PX | CV-P13PX | CV-PD13PX Operation Manual - Page 3
30 • DRAINAGE E-30 • MAINTENANCE E-31 • BEFORE CALLING FOR SERVICE E-32 Declaration of Conformity SHARP ROOM AIR CONDITIONER CV-P12PX,CV-P13PX,CV-PD13PX This device complies with Part 18 of FCC rules. Responsible Party: SHARP ELECTRONICS CORPORATION. Sharp Plaza, Mahwah, New Jersey 07430-2135 TEL - Sharp CV-P13PX | CV-P12PX | CV-P13PX | CV-PD13PX Operation Manual - Page 4
State Zip Telephone TO PHONE: Dial 1-800-BE-SHARP (237-4277) for: SERVICE (for your nearest Sharp Authorized Servicer) PARTS (for your Authorized Parts Distributor) ACCESSORIES ADDITIONAL CUSTOMER INFORMATION TO WRITE: For service problems, warranty information, missing items and other assistance - Sharp CV-P13PX | CV-P12PX | CV-P13PX | CV-PD13PX Operation Manual - Page 5
From Warranty Coverage (If any): Where to Obtain Service: What to Do to Obtain Service: CV-P12PX,CV-P13PX,CV-PD13PX Portable Air Conditioner. Be sure to have this information available when you need service for your Product. One (1) year parts and labor from date of purchase. The warranty period - Sharp CV-P13PX | CV-P12PX | CV-P13PX | CV-PD13PX Operation Manual - Page 6
FOR USE • Install the air conditioner in accordance with the installation instructions in the latter section of this manual. • Do not modify any part of this product. • Do not insert anything into any part of the unit. • Ensure the power supply used has an appropriate voltage rating. Only use - Sharp CV-P13PX | CV-P12PX | CV-P13PX | CV-PD13PX Operation Manual - Page 7
will be blown out from the Exhaust air outlet, but this is normal and does not indicate a problem with the unit. • This air conditioner blows the warm air generated by the unit outside the room via the exhaust hose while in cool mode. Accordingly, the same amount of air as that blown out will enter - Sharp CV-P13PX | CV-P12PX | CV-P13PX | CV-PD13PX Operation Manual - Page 8
air conditioner should be placed on a firm foundation to minimize noise and vibration. For safe and secure positioning, place the unit on a smooth, level floor strong enough to support within reach of a properly rated grounded socket. • Never place any obstacles around the air inlet or outlet of the - Sharp CV-P13PX | CV-P12PX | CV-P13PX | CV-PD13PX Operation Manual - Page 9
Split-ring adapter B 1 (adhesive type) 1 washer 4 Bracket Protective Manual 1 screen 1 1 Window panel assembly Large wood screw 3 Screw Remote control 5 1 Battery 2 (AAA.1.5V) 2 CV-PD13PX Exhaust hose Rain deflector Washer 2 assembly 2 8 Window exhaust Window slider Bolt - Sharp CV-P13PX | CV-P12PX | CV-P13PX | CV-PD13PX Operation Manual - Page 10
Lamp (blue) 0 Air inlet REAR VIEW CV-PD13PX(Dual Duct use) CV-P12PX CV-P13PX CV-PD13PX(Single Duct use) q q Exhaust air outlet w e w Window exhaust adapter e Exhaust hose adapter A r t r Exhaust hose y t Remote control hook p q u i o y Air filter u Exhaust hose adapter B w p i Cover - Sharp CV-P13PX | CV-P12PX | CV-P13PX | CV-PD13PX Operation Manual - Page 11
ENGLISH REMOTE CONTROL 1 2 3 4 5 6 7 8 9 0 q w e r t 1 Transmitter 2 Display 3 POWER Button 4 LIGHTS Button 5 TEMPERATURE Button 6 PLASMACLUSTER Button 7 SLEEP Button 8 MODE Button 9 ON TIMER Button 0 FAN Button q OFF TIMER Button w CANCEL Button e LOUVERS Button r RESET Button t MEGA COOL Button - Sharp CV-P13PX | CV-P12PX | CV-P13PX | CV-PD13PX Operation Manual - Page 12
INSTALL WINDOW PANEL Installation in a double-hung sash window (CV-P12PX, CV-P13PX) 1 Cut the foam seal A to screws to attach the protective screen onto the outside of the window exhaust adapter. Inside 4 Install the rain deflector to the outside of the window panel. Line up the holes on the rain - Sharp CV-P13PX | CV-P12PX | CV-P13PX | CV-PD13PX Operation Manual - Page 13
ENGLISH If the inner width of the window is between 28" (718mm) and 36.5" (927mm) inclusive. (1) Open the window sash and place the window panel on the window stool. (2) Slide the adjustment panel to fit the window frame width. (3) Secure the window panel to the stool with 3 large wood screws. If - Sharp CV-P13PX | CV-P12PX | CV-P13PX | CV-PD13PX Operation Manual - Page 14
WINDOW PANEL Installation in a double-hung sash window (CV-PD13PX) 1 Cut the foam seal A to the proper the protective screens onto the outside of the window exhaust adapter. Window exhaust adapter Inside 4 Install 2 rain deflectors to the outside of the window panel. Line up the holes on the - Sharp CV-P13PX | CV-P12PX | CV-P13PX | CV-PD13PX Operation Manual - Page 15
28"~36.5" Window slider bracket 36.5"~64" Foam seal B 7 Close the window sash securely against the window panel. 8 Attach the bracket with a large wood screw. E-13 Bracket - Sharp CV-P13PX | CV-P12PX | CV-P13PX | CV-PD13PX Operation Manual - Page 16
WINDOW PANEL Installation in a sliding sash window (CV-P12PX, CV-P13PX) 1 Cut the foam seal A to the washers, 4 split-ring washers and 4 nuts to attach the rain deflector onto the window panel. 5 Install the window panel into the window frame. If the inner height of the window is less Cut than - Sharp CV-P13PX | CV-P12PX | CV-P13PX | CV-PD13PX Operation Manual - Page 17
ENGLISH If the inner height of the window is between 28" (718mm) and 36.5" (927mm) inclusive. (1) Open the window sash and place the window panel on the window frame. (2) Slide the adjustment panel to fit the window frame height. (3) Secure the window panel to the window frame with 3 large wood - Sharp CV-P13PX | CV-P12PX | CV-P13PX | CV-PD13PX Operation Manual - Page 18
WINDOW PANEL Installation in a sliding sash window (CV-PD13PX) 1 Cut the foam seal A to the proper washers, 8 split-ring washers and 8 nuts to attach the rain deflector onto the window panel. 5 Install the window panel into the window frame. Cut If the inner height of the window is less than 28 - Sharp CV-P13PX | CV-P12PX | CV-P13PX | CV-PD13PX Operation Manual - Page 19
ENGLISH If the inner height of the window is between 28" (718mm) and 36.5" (927mm) inclusive. (1) Open the window sash and place the window panel on the window frame. (2) Slide the adjustment panel to fit the window frame height. (3) Secure the window panel to the window frame with 3 large wood - Sharp CV-P13PX | CV-P12PX | CV-P13PX | CV-PD13PX Operation Manual - Page 20
AND REMOVAL OF EXHAUST HOSE Installation of the exhaust hose (CV-P12PX, CV-P13PX) 1 Attach the exhaust hose adapters A and B to the exhaust hose. Extend both ends of the exhaust hose and insert them into the exhaust hose adapters A and B respectively, and turn them until they stop. Make - Sharp CV-P13PX | CV-P12PX | CV-P13PX | CV-PD13PX Operation Manual - Page 21
ENGLISH Installation of the exhaust hose (CV-PD13PX) 1 Attach the exhaust hose adapters A and B to the exhaust hoses. Extend both ends of the exhaust hose and insert them into the exhaust hose adapters A and B respectively, and turn them until they stop. Attach the other exhaust hose adapters A and - Sharp CV-P13PX | CV-P12PX | CV-P13PX | CV-PD13PX Operation Manual - Page 22
INSTALLATION AND REMOVAL OF EXHAUST HOSE NOTICE: If the dual-duct type unit is used as single-duct type one, please refer to the following instructions: 1 Attach the grille and the cover to the unit. Open the baffle and remove it. Insert the 2 projections on the grille into the 2 holes on - Sharp CV-P13PX | CV-P12PX | CV-P13PX | CV-PD13PX Operation Manual - Page 23
ENGLISH Removal of the exhaust hose 1 Remove the exhaust hose adapter A. Remove the exhaust hose adapter A from the window exhaust adapter. Exhaust hose adapter A 2 Remove the exhaust hose adapter from the unit. Lift up and remove the exhaust hose adapter from the unit by pushing down on the two - Sharp CV-P13PX | CV-P12PX | CV-P13PX | CV-PD13PX Operation Manual - Page 24
is now ready for use. TEST RESET Do not attempt to use the air conditioner if the above procedure cannot be performed. Disconnect the power plug and call for service. LOADING BATTERIES Use two AAA (R03) batteries. 1 Remove the battery cover at the back of the remote control. 2 Insert batteries - Sharp CV-P13PX | CV-P12PX | CV-P13PX | CV-PD13PX Operation Manual - Page 25
ENGLISH HOW TO USE THE REMOTE CONTROL Point the remote control towards the units signal receiver window and press the desired button. A beep will sound when the unit receives the signal. • Make sure nothing, such as curtains, blocks the signal receiver window. • The remote control operates up to 23 - Sharp CV-P13PX | CV-P12PX | CV-P13PX | CV-PD13PX Operation Manual - Page 26
OFF Press the POWER button again. • The red OPERATION lamp on the unit will turn off. DEHUMIDIFICATION MODE In this mode, the air conditioner dehumidifies the room. Ensure that the stopcock is securely attached the drainpipe. 1 Press the MODE button to select DEHUMIDIFICATION mode. COOL DEHUM - Sharp CV-P13PX | CV-P12PX | CV-P13PX | CV-PD13PX Operation Manual - Page 27
OFF Press the POWER button again. • The red OPERATION lamp on the unit will turn off. VENTILATION MODE In this mode, the air conditioner ventilates the air to outdoors. Ensure that the stopcock is securely attached the drainpipe. 1 Press the MODE button to select VENT mode. COOL DEHUM FAN VENT - Sharp CV-P13PX | CV-P12PX | CV-P13PX | CV-PD13PX Operation Manual - Page 28
FLOW DIRECTION Hold the vertical louver as shown in the diagram and adjust the air flow direction. Vertical louvers CAUTION Never attempt to adjust the horizontal louvers manually. • Manual adjustment of the horizontal louvers can cause the unit to malfunction when the remote control is used for - Sharp CV-P13PX | CV-P12PX | CV-P13PX | CV-PD13PX Operation Manual - Page 29
unit will turn off. NOTES: • Use of the PLASMACLUSTER function will be memorized and it will be activated the next time you turn on the air conditioner. • To turn off the PLASMACLUSTER Lamp, press the LIGHTS button. • PLASMACLUSTER operation cannot be set during VENTILATION mode. E-27 - Sharp CV-P13PX | CV-P12PX | CV-P13PX | CV-PD13PX Operation Manual - Page 30
MEGA COOL OPERATION In this operation, the air conditioner fan works at extra high speed with a setting temperature of 59°F. 1 Press the MEGA COOL button during cooling mode. • The remote control will display " " . • The - Sharp CV-P13PX | CV-P12PX | CV-P13PX | CV-PD13PX Operation Manual - Page 31
TIMER OPERATION ENGLISH ON TIMER 1 Press the ON TIMER button. • The time setting will change as you press the button as follows. Hold the button down to speed through the settings. 0.5h 1.0h 1.5h 10h 11h 12h 1 CANCEL • The orange TIMER lamp on the unit will light. • The time setting will count - Sharp CV-P13PX | CV-P12PX | CV-P13PX | CV-PD13PX Operation Manual - Page 32
MAIN UNIT OPERATION Use this mode when the remote control is not available. 1 1 Press the POWER button on the unit. • The red OPERATION lamp on the unit will light. • If the unit has not been unplugged since it was last operated, it will resume operation at its last settings. • If the unit has - Sharp CV-P13PX | CV-P12PX | CV-P13PX | CV-PD13PX Operation Manual - Page 33
the electrical insulation. Never use harsh chemicals or abrasive cleaners on any part of the unit. To avoid damaging the unit, do not use hot water (120°F/50°C or hotter) when cleaning. MAINTENANCE AFTER AIR CONDITIONER SEASON 1 Perform drainage to drain out water within the unit. 2 Operate the - Sharp CV-P13PX | CV-P12PX | CV-P13PX | CV-PD13PX Operation Manual - Page 34
points before calling for a service. AIR CONDITIONER DOES NOT OPERATE AT ALL Is the exhaust hose too long? For efficient operation, make the hose as short as possible. The exhaust hose must not be twisted batteries are installed with the polarities properly aligned. THE DISCHARGED AIR HAS AN ODOR
-
 1
1 -
 2
2 -
 3
3 -
 4
4 -
 5
5 -
 6
6 -
 7
7 -
8
-
9
-
10
-
11
-
12
-
13
-
14
-
15
-
16
-
17
-
18
-
19
-
20
-
21
-
22
-
23
-
24
-
25
-
26
-
27
-
28
-
29
-
30
-
31
-
32
-
33
-
34
 |
 |

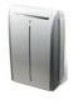
PORTABLE TYPE
ROOM AIR CONDITIONER
INSTALLATION AND OPERATION
MANUAL
ACONDICIONADOR DE AIRE
PARA HABITACIÓN TIPO
PORTÁTIL
MANUAL DE INSTALACIÓN
Y FUNCIONAMIENTO
* Plasmacluster is a trademark of
SHARP Corporation.
* Plasmacluster
es una marca reg-
istrada de SHARP Corporation.
ENGLISH
ESPAÑOL
CV-P12PX
CV-P13PX
CV-PD13PX