Sharp CV10NH CV-10NH Operation Manual
Sharp CV10NH - 10,000 BTU Portable Air Conditioner Manual
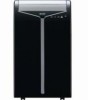 |
UPC - 074000662377
View all Sharp CV10NH manuals
Add to My Manuals
Save this manual to your list of manuals |
Sharp CV10NH manual content summary:
- Sharp CV10NH | CV-10NH Operation Manual - Page 1
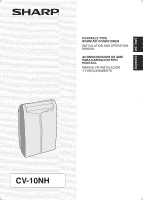
ENGLISH ESPAÑOL PORTABLE TYPE ROOM AIR CONDITIONER INSTALLATION AND OPERATION MANUAL ACONDICIONADOR DE AIRE PARA HABITACIÓN TIPO PORTÁTIL MANUAL DE INSTALACIÓN Y FUNCIONAMIENTO CV-10NH - Sharp CV10NH | CV-10NH Operation Manual - Page 2
- Sharp CV10NH | CV-10NH Operation Manual - Page 3
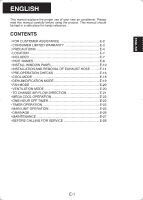
E-7 • PART NAMES E-8 • INSTALL WINDOW PANEL E-10 • INSTALLATION AND REMOVAL OF EXHAUST HOSE .........E-14 • PRE-OPERATION CHECKS E-16 • COOL MODE E-18 • DEHUMIDIFICATION MODE E-19 • FAN MODE E-20 • VENTILATION MODE E-20 • TO CHANGE AIR FLOW DIRECTION E-21 • MEGA COOL OPERATION E-22 - Sharp CV10NH | CV-10NH Operation Manual - Page 4
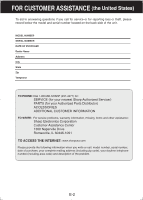
State Zip Telephone TO PHONE: Dial 1-800-BE-SHARP (237-4277) for: SERVICE (for your nearest Sharp Authorized Servicer) PARTS (for your Authorized Parts Distributor) ACCESSORIES ADDITIONAL CUSTOMER INFORMATION TO WRITE: For service problems, warranty information, missing items and other assistance - Sharp CV10NH | CV-10NH Operation Manual - Page 5
Service: CV-10NH Portable Air Conditioner. Be sure to have this information available when you need service for your Product. One (1) year parts and labor from date of purchase. The warranty period continues for a total of five (5) years from date of purchase for the Sealed Cooling System parts - Sharp CV10NH | CV-10NH Operation Manual - Page 6
in mind when using your air conditioner. WARNINGS FOR USE • Install the air conditioner in accordance with the installation instructions in the latter section of this manual. • Do not modify any part of this product. • Do not insert anything into any part of the unit. • Ensure the power supply used - Sharp CV10NH | CV-10NH Operation Manual - Page 7
out into the room. • The temperature around the drainage hose must not be below freezing point when used. Drained water may freeze inside the hose, causing water inside the unit to overflow into the room. • Do not block the exhaust air outlet with obstacles. Cooling performance may be reduced or stop - Sharp CV10NH | CV-10NH Operation Manual - Page 8
a problem with the unit. • This air conditioner blows the warm air generated by the unit outside the room via the exhaust hose while in cool mode. Accordingly, the same amount of air as that blown out will enter the room from outside through any openings into the room. • When cooling operation is - Sharp CV10NH | CV-10NH Operation Manual - Page 9
ENGLISH LOCATION • The air conditioner should be placed on a firm foundation to minimize noise and vibration. For safe and secure positioning, place the unit on a smooth, level floor strong enough to support the unit. • The unit has casters to aid placement, but it should only be rolled on smooth, fl - Sharp CV10NH | CV-10NH Operation Manual - Page 10
control signal receiver 4 window 5 5 POWER Button 6 6 OPERATION Lamp (red) 7 7 TIMER Lamp (orange) 8 9 8 MEGA COOL Lamp (green) 9 9 Air inlet 9 REAR VIEW 0 0 Exhaust air outlet q q Window exhaust adapter w w Exhaust hose e e Remote control hook r t r Air filters y t Drainage - Sharp CV10NH | CV-10NH Operation Manual - Page 11
Button 0 CANCEL Button q LOUVERS Button w RESET Button e MEGA COOL Button REMOTE CONTROL DISPLAY r r MODE SYMBOLS : COOL : DEHUMIDIFICATION t u : FAN : VENTILATION i t MEGA COOL SYMBOL y FAN SPEED SYMBOLS y o : AUTO Quiet : Manual setting Low High u TEMPERATURE AND TIMER COUNT DOWN - Sharp CV10NH | CV-10NH Operation Manual - Page 12
all three projections on each rain Insect guard guard into the holes in the insect guard net. net Side "A" will now be at the top, as indicated in the diagram. Projection Rain guard "A" 2 Attach the guard combined above to the window panel Push the insect guard net firmly to ensure that its four - Sharp CV10NH | CV-10NH Operation Manual - Page 13
panel to the adjustment panel. (2) Open the window sash and place the window panel on the window stool. (3) Slide the adjustment and extension panels to fit the window frame width. (4) Secure the window panel to the window stool with 4 screws. Extension panel 36.8"~48" 5 Cut the foam seals - Sharp CV10NH | CV-10NH Operation Manual - Page 14
sliding sash window (See page 10 for installation in a double-hung window.) 1 Connect the rain guards to the insect guard net. Insert all three projections on each rain guard into the holes in the insect guard net. Side "A" will now be at the top, as indicated in the diagram. Insect guard net Hole - Sharp CV10NH | CV-10NH Operation Manual - Page 15
to the adjustment panel. (2) Open the window sash and place the window panel on the window frame. (3) Slide the adjustment and extension panels to fit the window frame height. (4) Secure the window panel to the window frame with 4 screws. Adjustment panel Extension panel 24"~36.8" 36.8"~48" 5 Cut - Sharp CV10NH | CV-10NH Operation Manual - Page 16
-hung sash window. Surface of window exhaust adapter marked "TOP" should be on the window frame side when it is installed in a sliding sash window. Window exhaust adapter Extend Exhaust hose Projection Hole "TOP" The exhaust hose should be as short as possible for operational efficiency; however - Sharp CV10NH | CV-10NH Operation Manual - Page 17
of the exhaust hose 1 Remove the window exhaust adapter. Pull out and remove the window exhaust adapter by pushing down two "PUSH" markings, and slide and close the exhaust cover in the window panel. 2 Remove the exhaust hose adapter from the unit. Lift up and remove the exhaust hose adapter from - Sharp CV10NH | CV-10NH Operation Manual - Page 18
RESET Do not attempt to use the air conditioner if the above procedure cannot be performed. Disconnect the power plug and call for service. LOADING BATTERIES Use two AAA (R03) batteries. 1 Remove the battery cover at the back of the remote control. 2 Insert batteries into the compartment, making - Sharp CV10NH | CV-10NH Operation Manual - Page 19
HOW TO USE THE REMOTE CONTROL Point the remote control towards the units signal receiver window and press the desired button. A beep will sound when the unit receives the signal. • Make sure nothing, such as curtains, blocks the signal receiver window. • The remote control operates up to 23 feet - Sharp CV10NH | CV-10NH Operation Manual - Page 20
COOL MODE Drainage nozzle "CLOSE" position Stopcock Install the exhaust hose (See Page14), turn the drainage nozzle to the CLOSE position, and check the drainage COOL mode. COOL DEHUM FAN VENT 2 Press the POWER button to start operation. 2 • The red OPERATION lamp on the unit will light. - Sharp CV10NH | CV-10NH Operation Manual - Page 21
the exhaust hose (See Page 14), turn the drainage nozzle to the CLOSE position, and check that the drainage nozzle is covered with the stopcock. In this operation, the water tank inside the unit may become full, the unit will stop operating and the TIMER, OPERATION and MEGA COOL lamps will blink. In - Sharp CV10NH | CV-10NH Operation Manual - Page 22
LOW HIGH 3 TO TURN OFF Press the POWER button again. • The red OPERATION lamp on the unit will turn off. VENTILATION MODE In this mode, the air conditioner ventilates the air to outdoors. Install the exhaust hose (See Page 14), turn the drainage nozzle to the CLOSE position, and check the - Sharp CV10NH | CV-10NH Operation Manual - Page 23
the vertical louver as shown in the diagram and adjust the air flow direction. Vertical louvers CAUTION Never attempt to adjust the horizontal louvers manually. • Manual adjustment of the horizontal louvers can cause the unit to malfunction when the remote control is used for adjustment. • When the - Sharp CV10NH | CV-10NH Operation Manual - Page 24
OPERATION In this operation, the air conditioner fan works at extra high speed with a setting temperature of 59°F. 1 Press the MEGA COOL button during cooling mode. • The remote control will display " " . • The temperature display will go off. • The green MEGA COOL lamp on the unit will light - Sharp CV10NH | CV-10NH Operation Manual - Page 25
increments and from 10 to 12 hours, in 1-hour increments. Point the remote control at the signal receiver window on the unit. 1 Press • The orange TIMER lamp on the unit will light. • The unit will emit a beep when it receives setting, the unit will operate using the most recent setting. TO CANCEL TIMER - Sharp CV10NH | CV-10NH Operation Manual - Page 26
a maximum of 12 hours. Up to 9.5 hours, you can set in half-hour (30-minutes) increments and from 10 to 12 hours, in 1-hour increments. Point the remote control at the signal receiver window on the unit. 1 Press the OFF TIMER button and set the time as desired. • The time setting will change as you - Sharp CV10NH | CV-10NH Operation Manual - Page 27
MAIN UNIT OPERATION Use this mode when the remote control is not available. 1 Press the POWER button on the unit. • The red OPERATION lamp on the unit will 1 light. • If the unit has not been unplugged since it was last operated, it will resume operation at its last settings. • If the unit has - Sharp CV10NH | CV-10NH Operation Manual - Page 28
the hose during operation. Drain grommet Hose 6 Press the POWER button on the unit twice. • The water will drain out through the drainage hose. Maximum amount of water that may be drained out is approximately 41/5 pints. • The OPERATION, TIMER and MEGA COOL lamps will be blinking. 7 When drainage - Sharp CV10NH | CV-10NH Operation Manual - Page 29
if the insect guard net becomes clogged with dust. Periodically remove the window exhaust adapter from the window panel and clean the insect guard net with a vacuum cleaner. Insect guard net MAINTENANCE AFTER AIR CONDITIONER SEASON 1 Perform drainage to drain out water within the unit. (See Page - Sharp CV10NH | CV-10NH Operation Manual - Page 30
air conditioner evaporates water condensed during cooling operation within the unit through the exhaust air outlet. Although water flowing sound way be heard, this is normal. • An audible gurgling sound may be heard for about a minute upon starting AUXILIARY mode. This is sound of running drainage - Sharp CV10NH | CV-10NH Operation Manual - Page 31
S-10 • INSTALACIÓN Y DESMONTAJE DE LA MANGUERA DE ESCAPE S-14 • REVISIONES ANTES DE INICIAR EL FUNCIONAMIENTO S-16 • MODO ENFRIAR S-18 • MODO DESHUMIDIFICACIÓN S-19 • MODO VENTILADOR S-20 • MODO VENTILACIÓN S-20 • CAMBIO DE LA DIRECCIÓN DE LA CORRIENTE DE AIRE S-21 • FUNCIONAMIENTO MEGA COOL - Sharp CV10NH | CV-10NH Operation Manual - Page 32
número del modelo y el número de serie, los cuales se encuentran en la parte posterior de la unidad. NÚMERO DEL MODELO NÚMERO DE SERIE FECHA DE COMPRA Nombre ón de garantía, ítems perdidos y otras ayudas: Sharp Electronics Corporation Customer Assistance Center 1300 Naperville Drive Romeoville, - Sharp CV10NH | CV-10NH Operation Manual - Page 33
aplica): Donde obtener Servicio: Qué hacer para obtener servicio: CV-10NH Acondicionador de aire portátil. Carrousel de uso doméstico (asegúrese de localizar al proveedor de servicio autorizado, llame sin cargo al 1-800-BE-SHARP (1-800-237-4277). Flete prepagado,o lleve su producto a un proveedor - Sharp CV10NH | CV-10NH Operation Manual - Page 34
aire. ADVERTENCIAS PARA EL USO • Instale el acondicionador de aire de acuerdo a las instrucciones de instalación que se describen más adelante en este manual de un fusible adecuado. • Si sucede algo anormal con el acondicionador de aire (por ej. se detecta olor a quemado), apáguelo inmediatamente y - Sharp CV10NH | CV-10NH Operation Manual - Page 35
la unidad. El agua puede causar descargas eléctricas o daños al equipo. • Debe de realizarse el drenaje cada vez que mueva el acondicionador de aire. (Vea la página 26) Si queda algo de agua en el depósito, podría derramarse al moverse. • Retire el panel de ventana en caso de - Sharp CV10NH | CV-10NH Operation Manual - Page 36
aire y lo enciende inmediatamente después, deje que pasen tres minutos para que el compresor reanude el enfriamiento. Hay un dispositivo electr de la unidad, ésta se dejará de funcionar y las lámparas TIMER, OPERATION y MEGA COOL parpadearán. En este caso, realice el drenaje para sacar el agua que se - Sharp CV10NH | CV-10NH Operation Manual - Page 37
obstáculos alrededor del orificio de entrada o de salida de aire de la unidad. • Deje un espacio de por lo menos 12" (30 cm) manguera (1) Tornillo (8) (espesor: 1/5") Control remoto (1) Pila (2) (AAA.R03) (espesor: 2/5") Manual (1) HERRAMIENTAS SUGERIDAS PARA LA INSTALACIÓN - Sharp CV10NH | CV-10NH Operation Manual - Page 38
4 Ventana receptora de señal del 4 control remoto 5 5 Botón POWER 6 6 Lámpara OPERATION (roja ) 7 7 Lámpara TIMER (anaranjada ) 8 9 8 Lámpara MEGA COOL(verde) 9 9 Orificio de entrada de aire 9 PARTE TRASERA 0 0 Orificio de salida de aire de escape q q Adaptador del escape de - Sharp CV10NH | CV-10NH Operation Manual - Page 39
de superenfriamiento (MEGA COOL) PANTALLA DE VISUALIZACIÓN DEL CONTROL REMOTO r SÍMBOLOS DE MODO r : ENFRIAR : DESHUMIDIFICACIÓN t u : VENTILADOR : VENTILACIÓN t SÍMBOLO DE SUPERENFRIAMIENTO i y SÍMBOLOS DE VELOCIDAD DEL VENTILADOR : AUTOMÁTICO : Ajuste manual - Sharp CV10NH | CV-10NH Operation Manual - Page 40
se hayan encajado dentro "A" de los agujeros en el panel de ventana. El lado "A" estará ahora en la parte superior, como se indica en el diagrama. 3 Corte el sello de espuma A (tipo adhesivo) a la longitud 24" Cubierta del escape Cortar Panel de ajuste Panel de ventana Antepecho de ventana S-10 - Sharp CV10NH | CV-10NH Operation Manual - Page 41
de ventana. Sello de espuma A (tipo adhesivo) Sello de espuma B (tipo adhesivo) 7 Corte el sello de espuma a la longitud apropiada y selle la apertura entre la parte superior y el exterior de la hoja de la ventana. 8 Fije una abrazadera con el tornillo. Sello de espuma Abrazadera S-11 - Sharp CV10NH | CV-10NH Operation Manual - Page 42
Instalación en una ventana de hoja corredera (Vea la página 10 para obtener información sobre la instalación enuna ventana de guillotina de los agujeros en el panel de ventana. El lado "A" estará ahora en la parte superior, como se indica en el diagrama, cuando este se instala en la ventana. - Sharp CV10NH | CV-10NH Operation Manual - Page 43
ESPAÑOL Si la altura interior de la ventana esta entre 24" (609 mm) y 36,8" (934 mm) inclusive. (1) Abra la hoja de la ventana y coloque el panel de ventana sobre el marco. (2) Deslice el panel de ajuste para fijar la altura del marco de la ventana. (3) Fije con 3 tornillos el panel de ventana al - Sharp CV10NH | CV-10NH Operation Manual - Page 44
, y fije el adaptador del escape de la ventana. La superficie del adaptador del escape de la ventana marcado con "TOP" debe estar en la parte superior cuando este se instala en una ventana de guillotina doble. La superficie del adaptador del escape de la ventana marcado con "TOP" debe - Sharp CV10NH | CV-10NH Operation Manual - Page 45
ESPAÑOL Desmontaje de la manguera de escape 1 Desmonte el adaptador del escape de la ventana. Al presionar las dos marcas "PUSH", tire y extraiga el adaptador del escape de la ventana, deslice y cierre la cubierta del escape en el panel de ventana. 2 Desmonte el adaptador de la manguera de escape - Sharp CV10NH | CV-10NH Operation Manual - Page 46
El disyuntor se activará, se suministra energía y el acondicionador de aire estará listo para iniciar el funcionamiento. REINICIO (RESET) PRUEBA ( pilas AAA (R03). 1 Retire la cubierta de las pilas en la parte trasera del control remoto. 2 Introduzca las pilas en el compartimiento, asegúrese de que - Sharp CV10NH | CV-10NH Operation Manual - Page 47
la señal, producirá un sonido audible. • Asegúrese de que nada, como por ejemplo cortinas, bloquea la ven-tana receptora de señal. • El control remoto funciona hasta a 23 pies (7 metros) de distancia. PRECAUCIÓN • No exponga la ventana receptora de señal a la luz solar directa. Esto puede afectar - Sharp CV10NH | CV-10NH Operation Manual - Page 48
el modo ENFRIAR. ENFRIAR DESHUMIDIFICACIÓN VENTILADOR VENTILACIÓN 2 2 Presione el botón POWER para iniciar el funcionamiento. 3 • La lámpara roja OPERATION de la unidad se iluminará. 3 Presione el botón TEMP para ajustar la temperatura deseada. 1 • La temperatura puede ajustarse dentro del - Sharp CV10NH | CV-10NH Operation Manual - Page 49
ÓN En este modo, el acondicionador de aire deshumidifica la habitación. Ensure that the interior de la unidad esté lleno, está dejará de funcionar y luego las lámparas TIMER, OPERATION y MEGA COOL parpadearán, dependiendo de la condición de la habitación. En este caso, drene el agua de - Sharp CV10NH | CV-10NH Operation Manual - Page 50
ventilador deseada. SILENCIOSA BAJA ALTA 3 DESACTIVACIÓN Presione nuevamente el botón POWER. • La lámpara roja OPERATION en la unidad se apagará. MODO VENTILACIÓN En este modo, el acondicionador de aire ventila el aire hacia el exterior. Instale la manguera de escape (vea la página 14), gire la - Sharp CV10NH | CV-10NH Operation Manual - Page 51
dirección de la corriente de aire. Deflectores verticales PRECAUCIÓN No trate nunca de graduar manualmente los deflectores horizontales. • Si se ajustan los deflectores horizontales de forma manual, puede suceder que la unidad falle posteriormente al querer manejarla con el control remoto. • Si los de - Sharp CV10NH | CV-10NH Operation Manual - Page 52
aire funciona a una velocidad muy alta con una temperatura ajustada a 59°F. 1 Presione el botón MEGA COOL durante el modo de enfriamiento. • En el control la unidad al presionar el botón POWER. ANULAR • La lámpara roja OPERATION y la lámpara jada TIMER se apagarán. anaran- NOTAS: • La funci - Sharp CV10NH | CV-10NH Operation Manual - Page 53
media hora (30 minutos) a un máximo de 12 horas. Puede ajustar en incrementos de media hora (30 minutos) hasta 9,5 horas y desde 10 a 12 horas, en incrementos de 1 hora. Apunte el control remoto hacia la célula del receptor de señal en la unidad. 1 Presione el botón ON TIMER. • El ajuste del tiempo - Sharp CV10NH | CV-10NH Operation Manual - Page 54
media hora (30 minutos) a un máximo de 12 horas. Puede ajustar en incrementos de media hora (30 minutos) hasta 9,5 horas y desde 10 a 12 horas, en incrementos de 1 hora. Apunte el control remoto hacia la célula del receptor de señal en la unidad. 1 Presione el botón OFF TIMER y ajuste la hora como - Sharp CV10NH | CV-10NH Operation Manual - Page 55
FUNCIONAMIENTO DE LA UNIDAD PRINCIPAL Use este modo si no dispone de un control remoto. 1 Presione el botón POWER en la unidad. • La lámpara roja OPERATION de la unidad se iluminará. 1 • Si no se ha desconectado la unidad desde la última vez que estuvo en funcionamiento, la operación se - Sharp CV10NH | CV-10NH Operation Manual - Page 56
siguientes casos. Si la unidad deja de funcionar y las lámparas TIMER, OPERATION y MEGA COOL parpadean. (Esto indica que el depósito del agua dentro de la unidad la boquilla de drenaje y vuelva a colocar la llave de paso. • Guarde la abrazadera de manguera y la arandela de drenaje en caso de que - Sharp CV10NH | CV-10NH Operation Manual - Page 57
la unidad. ESPAÑOL LIMPIEZA DE LA UNIDAD Y DEL CONTROL REMOTO Límpielos con un paño suave y seco o con un agresivas o limpiadores abrasivos sobre ninguna de las partes de la unidad. Para evitar dañar MANTENIMIENTO DESPUÉS DE UTILIZAR EL ACONDICIONADOR DE AIRE 1 Realice el drenaje para drenar el - Sharp CV10NH | CV-10NH Operation Manual - Page 58
menos de 3 minutos cuando reinició el acondicionador de aire, un dispositivo de protección puede hacer que se cierre el compresor, evitando el enfriamiento durante aproximadamente 5 minutos. • ¿Están parpadeando las lámparas OPERATION, TIMER y MEGA COOL? El depósito de agua dentro de la unidad - Sharp CV10NH | CV-10NH Operation Manual - Page 59
ESPAÑOL - Sharp CV10NH | CV-10NH Operation Manual - Page 60
ESPAÑOL SHARP ELECTRONICS CORPORATION Sharp Plaza, Mahwah, New Jersey 07430-2135 U.S.A SHARP CORPORATION S-31 Printed in Thailand TINSEA541JBRZ 07M- TH 1
-
 1
1 -
 2
2 -
 3
3 -
 4
4 -
 5
5 -
 6
6 -
 7
7 -
8
-
9
-
10
-
11
-
12
-
13
-
14
-
15
-
16
-
17
-
18
-
19
-
20
-
21
-
22
-
23
-
24
-
25
-
26
-
27
-
28
-
29
-
30
-
31
-
32
-
33
-
34
-
35
-
36
-
37
-
38
-
39
-
40
-
41
-
42
-
43
-
44
-
45
-
46
-
47
-
48
-
49
-
50
-
51
-
52
-
53
-
54
-
55
-
56
-
57
-
58
-
59
-
60
 |
 |
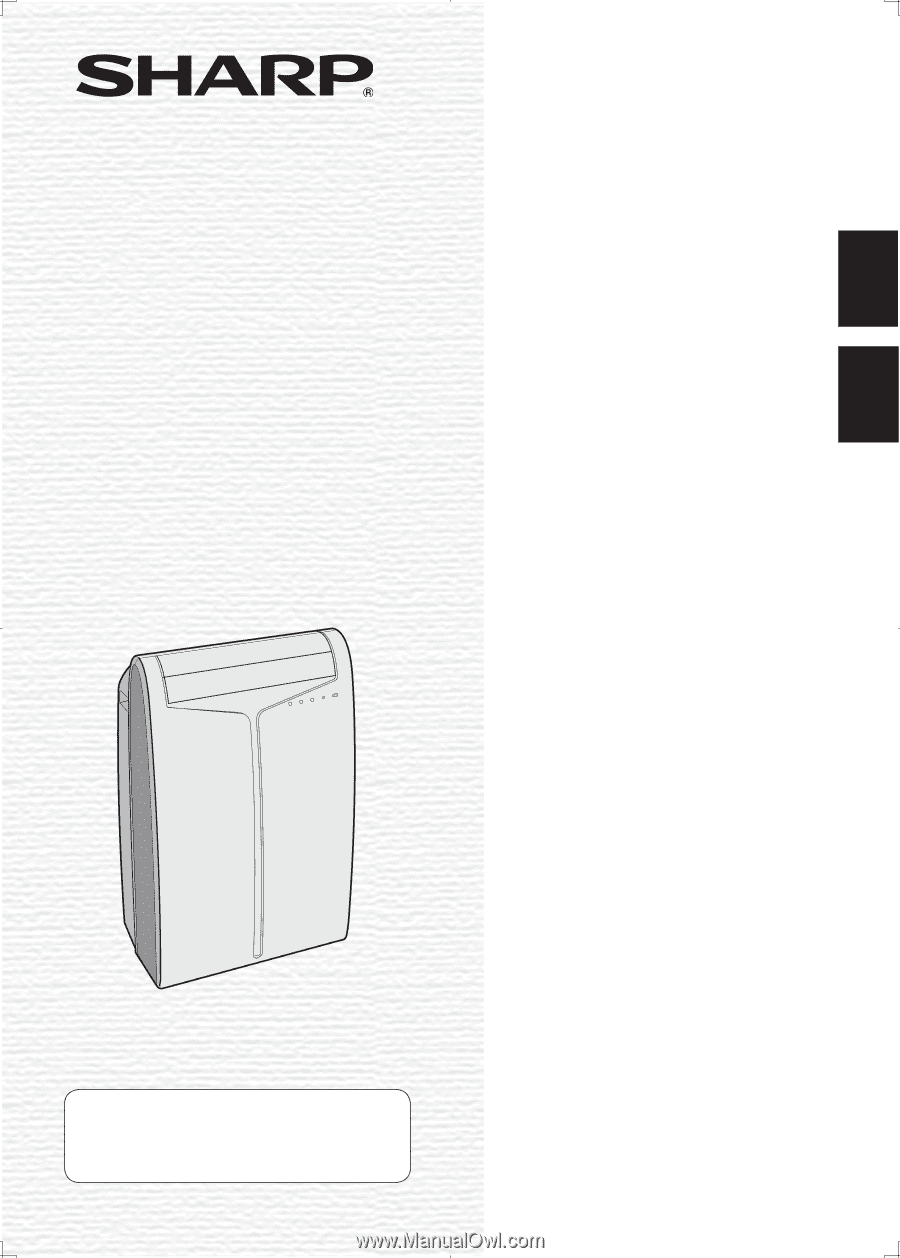
PORTABLE TYPE
ROOM AIR CONDITIONER
INSTALLATION AND OPERATION
MANUAL
ACONDICIONADOR DE AIRE
PARA HABITACIÓN TIPO
PORTÁTIL
MANUAL DE INSTALACIÓN
Y FUNCIONAMIENTO
ENGLISH
CV-10NH
ESPAÑOL