Sharp DX-B350P DX-B350P DX-B450P Operation Manual - Page 105
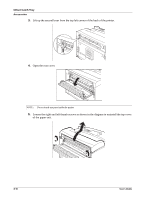
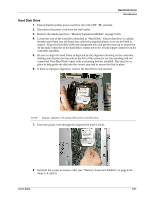
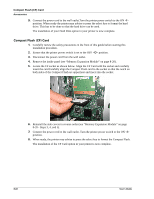
Secure the screws at both ends of the bottom of the Offset Catch Tray., Pull out the extension tray.
 |
View all Sharp DX-B350P manuals
Add to My Manuals
Save this manual to your list of manuals |
Page 105 highlights
Offset Catch Tray Accessories 6. Insert the right and left tabs of the Offset Catch Tray into the holes at the top of the printer (1) and put it down to the top of the printer slowly (2). 7. Secure the screws at both ends of the bottom of the Offset Catch Tray. 8. Pull out the extension tray. 9. Close the rear cover. User's Guide 8-17
-
 1
1 -
2
-
3
-
4
-
5
-
6
-
7
-
8
-
9
-
10
-
11
-
12
-
13
-
14
-
15
-
16
-
17
-
18
-
19
-
20
-
21
-
22
-
23
-
24
-
25
-
26
-
27
-
28
-
29
-
30
-
31
-
32
-
33
-
34
-
35
-
36
-
37
-
38
-
39
-
40
-
41
-
42
-
43
-
44
-
45
-
46
-
47
-
48
-
49
-
50
-
51
-
52
-
53
-
54
-
55
-
56
-
57
-
58
-
59
-
60
-
61
-
62
-
63
-
64
-
65
-
66
-
67
-
68
-
69
-
70
-
71
-
72
-
73
-
74
-
75
-
76
-
77
-
78
-
79
-
80
-
81
-
82
-
83
-
84
-
85
-
86
-
87
-
88
-
89
-
90
-
91
-
92
-
93
-
94
-
95
-
96
-
97
-
98
-
99
-
 100
100 -
 101
101 -
 102
102 -
 103
103 -
 104
104 -
 105
105 -
 106
106 -
 107
107 -
 108
108 -
 109
109 -
 110
110 -
111
-
112
-
113
-
114
-
115
-
116
-
117
-
118
-
119
-
120
-
121
-
122
-
123
-
124
-
125
-
126
-
127
-
128
-
129
-
130
-
131
-
132
-
133
-
134
-
135
-
136
-
137
-
138
-
139
-
140
-
141
-
142
-
143
-
144
-
145
-
146
 |
 |
User’s Guide
8-17
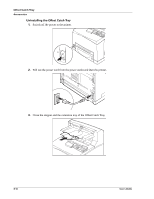
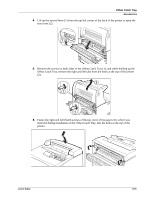
Offset Catch Tray
Accessories
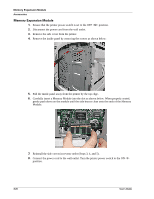
6.
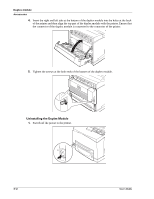
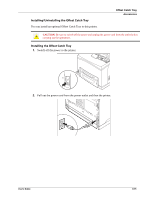
Insert the right and left tabs of the Offset Catch Tray into the holes at the top of the printer
(1) and put it down to the top of the printer slowly (2).
7.
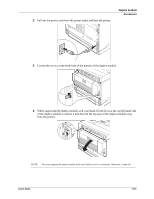
Secure the screws at both ends of the bottom of the Offset Catch Tray.
8.
Pull out the extension tray.
9.
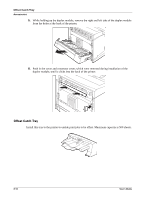
Close the rear cover.