Sharp DX-B350P DX-B350P DX-B450P Operation Manual - Page 23
Replacing the Toner Cartridge
 |
View all Sharp DX-B350P manuals
Add to My Manuals
Save this manual to your list of manuals |
Page 23 highlights
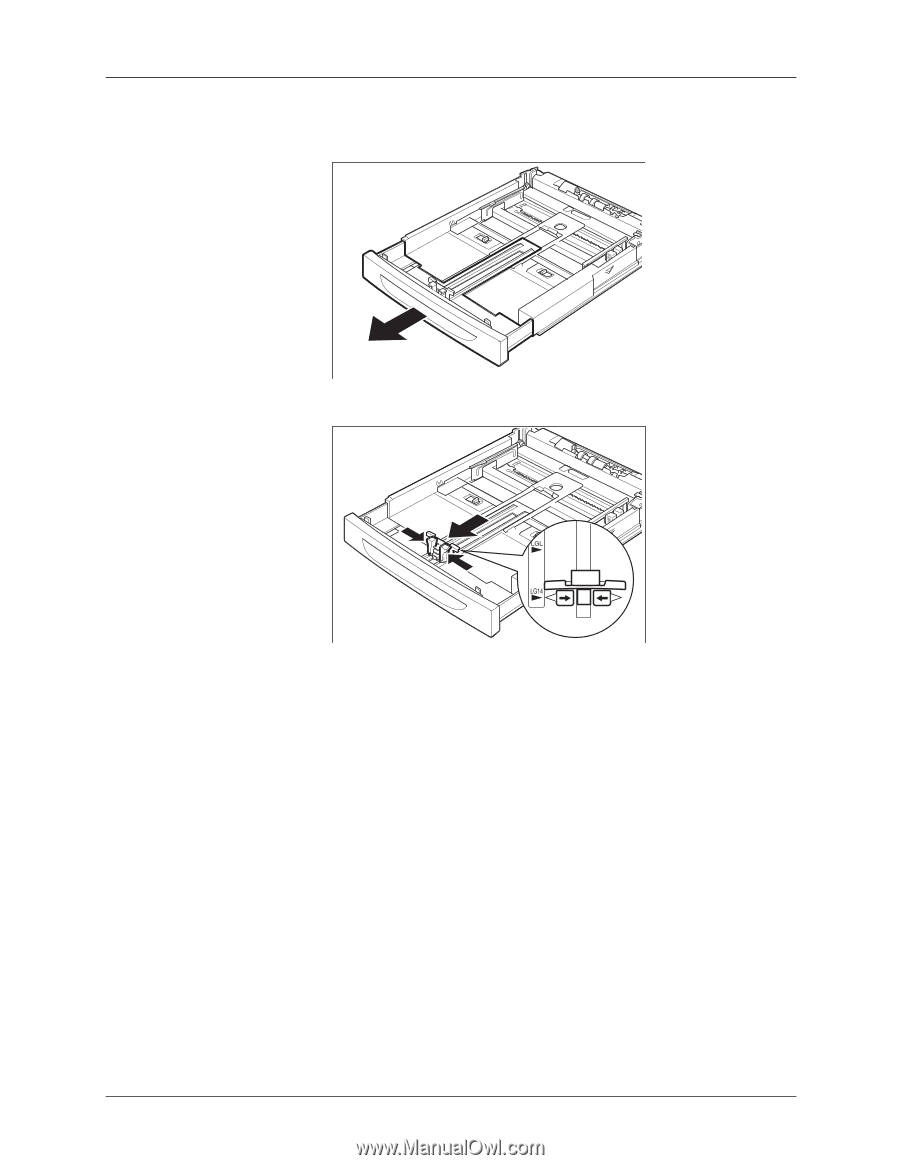
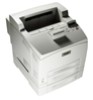
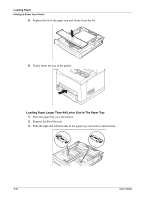
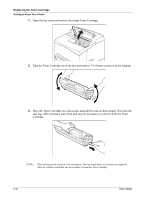
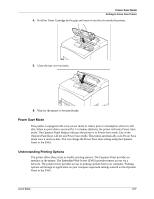
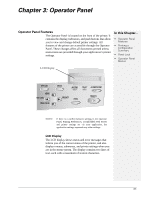
Replacing the Toner Cartridge Getting to Know Your Printer 4. Grasp the front of the paper tray and extend it until the right and left lock tabs in the paper tray move inwards and lock automatically. 5. Squeeze the length guide and slide it to the desired paper size. 6. Squeeze the right width guide and slide it to the desired paper size. 7. Load the paper with the side to be printed facing up and with all 4 corners aligned. 8. Close the lid of the paper tray. 9. Push the paper tray firmly into the printer. Replacing the Toner Cartridge The Toner Cartridge should be replaced when it reaches the end of its print life. The Toner Cartridge prints up to 18K (DX-B350P)/ 21K (DX-B450P) images. The printer will produce a warning on the Operator Panel to inform you when the remaining toner amount is low. You can press START/STOP to continue printing with low toner. When installing the Toner Cartridge, take note of the following: • Do not subject it to direct sunlight or strong light. • Do not touch the surface of the photosensitive drum. • Do not stand or place the Toner Cartridge upside down. The drum might get damaged. User's Guide 2-15
-
 1
1 -
2
-
3
-
4
-
5
-
6
-
7
-
8
-
9
-
10
-
11
-
12
-
13
-
14
-
15
-
16
-
17
-
 18
18 -
 19
19 -
 20
20 -
 21
21 -
 22
22 -
 23
23 -
 24
24 -
 25
25 -
 26
26 -
 27
27 -
 28
28 -
29
-
30
-
31
-
32
-
33
-
34
-
35
-
36
-
37
-
38
-
39
-
40
-
41
-
42
-
43
-
44
-
45
-
46
-
47
-
48
-
49
-
50
-
51
-
52
-
53
-
54
-
55
-
56
-
57
-
58
-
59
-
60
-
61
-
62
-
63
-
64
-
65
-
66
-
67
-
68
-
69
-
70
-
71
-
72
-
73
-
74
-
75
-
76
-
77
-
78
-
79
-
80
-
81
-
82
-
83
-
84
-
85
-
86
-
87
-
88
-
89
-
90
-
91
-
92
-
93
-
94
-
95
-
96
-
97
-
98
-
99
-
100
-
101
-
102
-
103
-
104
-
105
-
106
-
107
-
108
-
109
-
110
-
111
-
112
-
113
-
114
-
115
-
116
-
117
-
118
-
119
-
120
-
121
-
122
-
123
-
124
-
125
-
126
-
127
-
128
-
129
-
130
-
131
-
132
-
133
-
134
-
135
-
136
-
137
-
138
-
139
-
140
-
141
-
142
-
143
-
144
-
145
-
146
 |
 |