Sharp DX-B350P DX-B350P DX-B450P Operation Manual - Page 47
Windows Operations, Installing PCL5e and PostScript 3 Drivers
 |
View all Sharp DX-B350P manuals
Add to My Manuals
Save this manual to your list of manuals |
Page 47 highlights
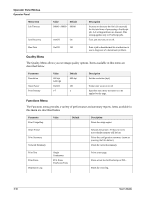
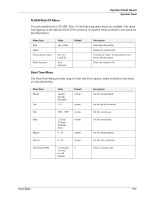
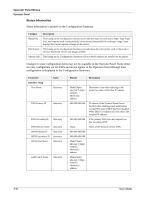
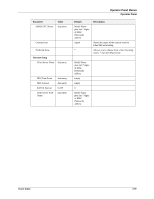
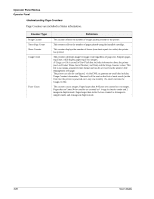
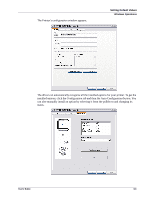
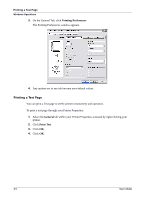
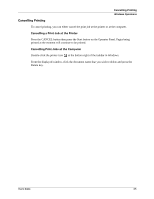
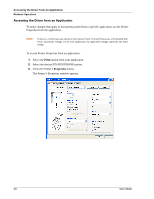
Chapter 4: Windows Operations This chapter describes features of the Windows Driver. The driver allows you set default settings for all print jobs as well as print settings for individual print jobs. Similar features may be available in the Operator Panel or EWS. If there is a conflict between settings in the Operator Panel, Printing Preferences (default driver settings), or Embedded Web Server and printer settings set via your application for individual print jobs, the application settings supersede any other setting. Installing PCL5e and PostScript 3 Drivers The Sharp Installation CD installs the PCL6 printer driver which is the best driver choice for most users. PCL5e and PostScript 3 are also provided on the installation CD and can be installed as follows: 1. Place the Sharp Installation CD into your CD drive. 2. From the Control Panel, select Printers and Faxes. 3. Right-click in the printer list and select Add Printer. The Add Printer Wizard appears. 4. Click Next. The Local or Network Printer screen appears. 5. Select Local printer attached to this computer and deselect Automatically detect and install my Plug and Play printer. 6. Click Next. The Select a Printer Port screen appears. 7. Select Use the following port and select the port from the pulldown list. 8. Click Next. The Install Printer Software screen appears. 9. Select Have Disk... An Install From Disk dialog appears. In this Chapter... • Installing PCL5e and PostScript 3 Drivers • Setting Default Values • Printing a Test Page • Cancelling Printing • Accessing the Driver from an Application • Navigating the Printer Properties Window • Saved Settings • Main Tab • Paper Tab • Advanced Tab • Job Handling Tab • Watermark Tab 4-1
-
 1
1 -
2
-
3
-
4
-
5
-
6
-
7
-
8
-
9
-
10
-
11
-
12
-
13
-
14
-
15
-
16
-
17
-
18
-
19
-
20
-
21
-
22
-
23
-
24
-
25
-
26
-
27
-
28
-
29
-
30
-
31
-
32
-
33
-
34
-
35
-
36
-
37
-
38
-
39
-
40
-
41
-
 42
42 -
 43
43 -
 44
44 -
 45
45 -
 46
46 -
 47
47 -
 48
48 -
 49
49 -
 50
50 -
 51
51 -
 52
52 -
53
-
54
-
55
-
56
-
57
-
58
-
59
-
60
-
61
-
62
-
63
-
64
-
65
-
66
-
67
-
68
-
69
-
70
-
71
-
72
-
73
-
74
-
75
-
76
-
77
-
78
-
79
-
80
-
81
-
82
-
83
-
84
-
85
-
86
-
87
-
88
-
89
-
90
-
91
-
92
-
93
-
94
-
95
-
96
-
97
-
98
-
99
-
100
-
101
-
102
-
103
-
104
-
105
-
106
-
107
-
108
-
109
-
110
-
111
-
112
-
113
-
114
-
115
-
116
-
117
-
118
-
119
-
120
-
121
-
122
-
123
-
124
-
125
-
126
-
127
-
128
-
129
-
130
-
131
-
132
-
133
-
134
-
135
-
136
-
137
-
138
-
139
-
140
-
141
-
142
-
143
-
144
-
145
-
146
 |
 |