Sharp DX-B350P DX-B350P DX-B450P Operation Manual - Page 64
Font Substitution
 |
View all Sharp DX-B350P manuals
Add to My Manuals
Save this manual to your list of manuals |
Page 64 highlights
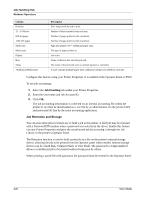
Advanced Tab Windows Operations To create an overlay: 1. Access your printer's properties from your application. 2. Select the Advanced tab within your Printer Properties. 3. Click Overlay Options. The Overlay Window appears. 4. Check Create Overlay and enter a name for the overlay. 5. Click OK to close the Overlay window. 6. Click OK to close the printer properties. 7. Click Print in the print dialog and the overlay will be created. 8. Click OK. Using Overlays After overlays have been created you can select the desired overlay from the Overlay Options list. Then you can define when an overlay should be printed, either All Pages, First Page Only, or All But First Page. The Remove button deletes the selected overlay from the list. To use an overlay after they have been created: 1. Open any document in any application. 2. Select File>Print within that application. 3. Select the DX-B350P or DX-B450P printer. 4. Click Properties. 5. Select the Advanced tab. 6. Click Overlay Options. The Overlay Window appears. 7. Select the desired Overlay. Overlay options are: All Pages, First Page Only, and All Pages but First Page. 8. Click OK to close the Overlay window. 9. Click Print in the print dialog and the document will be printed with the overlay added to every page. Font Substitution This feature allows you to substitute TrueType fonts with printer fonts. You can also set the TrueType font output type. To set font substitution: 1. Access your printer's properties from your application. 2. Select the Advanced tab within your Printer Properties. 4-18 User's Guide
-
 1
1 -
2
-
3
-
4
-
5
-
6
-
7
-
8
-
9
-
10
-
11
-
12
-
13
-
14
-
15
-
16
-
17
-
18
-
19
-
20
-
21
-
22
-
23
-
24
-
25
-
26
-
27
-
28
-
29
-
30
-
31
-
32
-
33
-
34
-
35
-
36
-
37
-
38
-
39
-
40
-
41
-
42
-
43
-
44
-
45
-
46
-
47
-
48
-
49
-
50
-
51
-
52
-
53
-
54
-
55
-
56
-
57
-
58
-
 59
59 -
 60
60 -
 61
61 -
 62
62 -
 63
63 -
 64
64 -
 65
65 -
 66
66 -
 67
67 -
 68
68 -
 69
69 -
70
-
71
-
72
-
73
-
74
-
75
-
76
-
77
-
78
-
79
-
80
-
81
-
82
-
83
-
84
-
85
-
86
-
87
-
88
-
89
-
90
-
91
-
92
-
93
-
94
-
95
-
96
-
97
-
98
-
99
-
100
-
101
-
102
-
103
-
104
-
105
-
106
-
107
-
108
-
109
-
110
-
111
-
112
-
113
-
114
-
115
-
116
-
117
-
118
-
119
-
120
-
121
-
122
-
123
-
124
-
125
-
126
-
127
-
128
-
129
-
130
-
131
-
132
-
133
-
134
-
135
-
136
-
137
-
138
-
139
-
140
-
141
-
142
-
143
-
144
-
145
-
146
 |
 |