Sharp LC-40LE830U LC-40LE830U LC-46LE830U LC-52LE830U LC-60LE830U Opera - Page 34
Input Terminal Setting, Menu Design - z setup numbers
 |
UPC - 074000373099
View all Sharp LC-40LE830U manuals
Add to My Manuals
Save this manual to your list of manuals |
Page 34 highlights
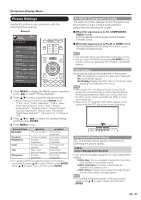
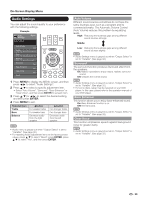
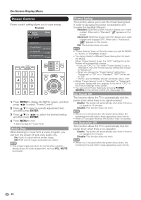
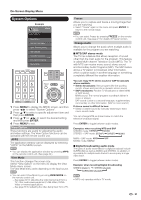
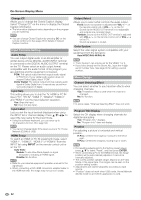
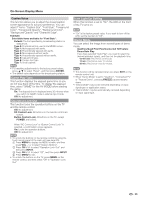
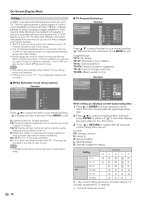
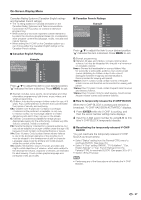
On-Screen Display Menu Change CC Allows you to change the Closed Caption display. Select "Change CC" on the menu to display the Closed Caption information. • The information displayed varies depending on the program you are watching. • You can change Closed Caption by pressing CC on the remote control unit. See page 23 for details of Closed Caption function. Input Terminal Setting Audio Setup You can output digital audio to an AV amplifier or similar device whose DIGITAL AUDIO INPUT terminal is connected to the DIGITAL AUDIO OUTPUT terminal on the TV. Please select an audio output format compatible with the audio format of the program you are watching and the equipment connected. PCM: The optical output terminal outputs audio signal in PCM form. If your digital audio system does not support Dolby Digital, select "PCM". Dolby Digital: The optical output terminal outputs audio signal in Dolby Digital form. It reproduces sound from surround program of digital. Input Skip This setting allows you to skip the TV, HDMI or PC IN Input ("TV", "PC IN", "HDMI 1", "HDMI 2", "HDMI 3" and "HDMI 4") on the Input Selection operation. Yes: Skips the input. No: Does not skip input. Input Label Lets you set the input terminal displayed when using the INPUT list or channel display. Press a/b/c/d to select the new name for the input mode. • Using the software keyboard, you can enter up to 10 characters for text. (See page 64.) • You cannot change labels if the input source is TV, Home Network (DLNA) or USB. HDMI Setup To watch an HDMI or PC IN equipment image, select "HDMI 1", "HDMI 2", "HDMI 3" or "HDMI 4" from the INPUT list using INPUT on the remote control unit or on the TV. Auto View: Enable: To use View Mode based on signal recognition, including an HDMI signal. Disable: No function. • Refer to your external equipment operation manual for the signal type. • When connecting a DVI-HDMI conversion adapter/cable to the HDMI terminal, the image may not come in clearly. Output Select Allows you to select what controls the audio output. Fixed: Sound via speaker is adjusted with VOLk/l on the remote control unit or VOLl/k on the TV. Sound via the AUDIO OUT terminal is not adjustable and outputs at a consistent level. Variable: Sound via the AUDIO OUT terminal is adjusted with VOLk/l on the remote control unit or VOLl/k on the TV. Sound via speaker is muted. Color System Select the video signal system compatible with your equipment from the list below: Auto/NTSC/PAL-M/PAL-N • "Color System" can only be set for the VIDEO 1 or 2. • If you have already set the Secret No., input the 4-digit secret number here. See page 35 for setting a secret number. Menu Design Channel Selecting Effect You can select whether to use transition effects when changing channels. Yes: A transition effect is used when the channel is changed. No: No function. • In some cases, "Channel Selecting Effect" does not work. Program Title Display Select the CH display when changing channels for digital broadcasting. Yes: "Program Info." displays. No: "Program Info." does not display. Position For adjusting a picture's horizontal and vertical position. H-Pos.: Centers the image by moving it to the left or right. V-Pos.: Centers the image by moving it up or down. • For resetting adjustments to the factory preset values, press a/b to select "Reset", and then press ENTER. • When connecting a PC to the HDMI terminal, the image position will be automatically adjusted. It cannot be manually adjusted. • The screen position variable ranges depend on the View Mode or the signal type. The ranges can be seen on the position-setting screen. • Adjustments are stored separately according to input source. • "Position" does not work when USB mode, Home Network (DLNA) mode or an Internet application is used. 32
-
 1
1 -
2
-
3
-
4
-
5
-
6
-
7
-
8
-
9
-
10
-
11
-
12
-
13
-
14
-
15
-
16
-
17
-
18
-
19
-
20
-
21
-
22
-
23
-
24
-
25
-
26
-
27
-
28
-
 29
29 -
 30
30 -
 31
31 -
 32
32 -
 33
33 -
 34
34 -
 35
35 -
 36
36 -
 37
37 -
 38
38 -
 39
39 -
40
-
41
-
42
-
43
-
44
-
45
-
46
-
47
-
48
-
49
-
50
-
51
-
52
-
53
-
54
-
55
-
56
-
57
-
58
-
59
-
60
-
61
-
62
-
63
-
64
-
65
-
66
-
67
-
68
-
69
-
70
-
71
-
72
-
73
-
74
-
75
-
76
-
77
-
78
-
79
-
80
-
81
-
82
-
83
-
84
-
85
-
86
 |
 |
