Sharp MX-B557F MX-B557F User Manual
Sharp MX-B557F Manual
 |
View all Sharp MX-B557F manuals
Add to My Manuals
Save this manual to your list of manuals |
Sharp MX-B557F manual content summary:
- Sharp MX-B557F | MX-B557F User Manual - Page 1
MX-B557F/MX-B707F User's Guide Machine type(s): 7465 Models: 496, 896 - Sharp MX-B557F | MX-B557F User Manual - Page 2
Universal paper settings...20 Loading the 550‑sheet tray...20 Loading the 2100‑sheet tray...23 Loading the multipurpose feeder...28 Linking trays...29 Paper support 30 Supported paper sizes...30 Supported paper types...33 Supported paper weights...34 Printing...37 Printing from a computer...37 - Sharp MX-B557F | MX-B557F User Manual - Page 3
Contents 3 Printing from a mobile device...37 Printing from a flash drive...38 Supported flash drives and file types...39 Configuring confidential jobs...40 Printing confidential and other held jobs...40 Printing a font sample list...41 Canceling a print job... - Sharp MX-B557F | MX-B557F User Manual - Page 4
73 Paper...81 Copy...84 Fax...87 E-mail...91 FTP...97 USB Drive...101 Network/Ports...106 Security...118 Reports...125 Help...126 Troubleshooting...126 Printing the Menu Settings Page...127 Securing the printer 128 Locating the security slot...128 Erasing printer memory...128 Erasing printer hard - Sharp MX-B557F | MX-B557F User Manual - Page 5
in the staple, hole punch finisher 158 Troubleshooting 161 Network connection problems...161 Hardware options problems...163 Issues with supplies...163 Paper feed problems...164 Printing problems...167 Faxing problems...188 Scanning problems...191 Contacting your dealer...195 Notices...196 Index - Sharp MX-B557F | MX-B557F User Manual - Page 6
Safety information 6 Safety information Conventions Note: A note identifies information that could help you. Warning: A warning identifies something that could damage the product hardware or software. CAUTION: A caution indicates a potentially hazardous situation that could injure you. Different - Sharp MX-B557F | MX-B557F User Manual - Page 7
or electrical shock results. Inspect the power cord regularly for signs of such problems. Remove the power cord from the electrical outlet before inspecting it. CAUTION used to move the hardware options must have a surface able to support the dimensions of the options. • Keep the printer in an - Sharp MX-B557F | MX-B557F User Manual - Page 8
other than those specified in the User's Guide may result in hazardous radiation exposure. service representative. This product uses a printing process that heats the print media, and the heat may cause the media to release emissions. You must understand the section in your operating instructions - Sharp MX-B557F | MX-B557F User Manual - Page 9
Learning about the printer 9 Learning about the printer Selecting a location for the printer When selecting a location for the printer, leave enough room to open trays, covers, and doors and to install hardware options. • Set up the printer near an electrical outlet. CAUTION-POTENTIAL INJURY: To - Sharp MX-B557F | MX-B557F User Manual - Page 10
printer or MFP may require a caster base, furniture, or other feature to prevent instability causing possible injury. For more information on supported configurations, contact the place where you purchased the printer. CAUTION-TIPPING HAZARD: To reduce the risk of equipment instability, load each - Sharp MX-B557F | MX-B557F User Manual - Page 11
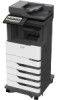
Learning about the printer 11 Basic model 1 Automatic document feeder (ADF) tray 2 ADF bin 3 Standard bin 4 Multipurpose feeder 5 Standard 550‑sheet tray 6 Control panel 7 ADF - Sharp MX-B557F | MX-B557F User Manual - Page 12
, then you cannot use an optional 550‑sheet tray. • A maximum of two optional 550‑sheet trays may be configured with the printer. • The printer supports only one finisher at a time. Note: Some options may not be available. For more information, contact the place where you purchased the printer. - Sharp MX-B557F | MX-B557F User Manual - Page 13
Learning about the printer 13 Attaching cables CAUTION-SHOCK HAZARD: To avoid the risk of electrical shock, do not set up this product or make any electrical or cabling connections, such as the power cord, fax feature, or telephone, during a lightning storm. CAUTION-POTENTIAL INJURY: To avoid the - Sharp MX-B557F | MX-B557F User Manual - Page 14
1 Obtain a copy of the software installer package. • From our website. • From the place where you purchased the printer. 2 Run the installer, and then follow the instructions. - Sharp MX-B557F | MX-B557F User Manual - Page 15
Setting up and using the home screen applications 15 Setting up and using the home screen applications Using the home screen Note: Your home screen may vary depending on your home screen customization settings, administrative setup, and active embedded solutions. Touch 1 Copy 2 E‑mail 3 Settings - Sharp MX-B557F | MX-B557F User Manual - Page 16
Setting up and using the home screen applications 16 Touch To 11 App Profiles Access application profiles. 12 Scan Profiles Scan and save documents directly to the computer. 13 FTP Scan and save documents directly to an FTP server. 14 Bookmarks Organize all bookmarks. 15 Change Language - Sharp MX-B557F | MX-B557F User Manual - Page 17
the network domain name. • If necessary, select the Authentication type for FTP and SMB. To limit access to the bookmark, enter a PIN. Note: The application supports the following file types: PDF, JPEG, TIFF, and HTML-based web pages. Other file types such as DOCX and XLXS are - Sharp MX-B557F | MX-B557F User Manual - Page 18
Setting up and using the home screen applications 18 Creating folders 1 Open a web browser, and then type the printer IP address in the address field. Notes: • View the printer IP address on the printer home screen. The IP address appears as four sets of numbers separated by periods, such as 123. - Sharp MX-B557F | MX-B557F User Manual - Page 19
Setting up and using the home screen applications 19 3 From the Contact Groups section, add a group name. Note: You can assign one or more contacts to the group. 4 Apply the changes. Editing contacts or groups 1 Open a web browser, and then type the printer IP address in the address field. Notes: - Sharp MX-B557F | MX-B557F User Manual - Page 20
all other trays closed until needed. 1 Remove the tray. Note: To avoid paper jams, do not remove trays while the printer is busy. 2 Adjust the guides to match the size of the paper that you are loading. Note: Use the indicators on the bottom of the tray to position the - Sharp MX-B557F | MX-B557F User Manual - Page 21
Loading paper and specialty media 21 3 Flex, fan, and align the paper edges before loading. 4 Load the paper stack with the printable side facedown, and then make sure that the side guides fit snugly against the paper. - Sharp MX-B557F | MX-B557F User Manual - Page 22
Loading paper and specialty media 22 • Do not slide paper into the tray. • To avoid paper jams, make sure that the stack height is below the maximum paper fill indicator. • Load letterhead depending on whether an optional staple finisher is installed or not. Without an optional staple finisher - Sharp MX-B557F | MX-B557F User Manual - Page 23
HAZARD: To reduce the risk of equipment instability, load each tray separately. Keep all other trays closed until needed. 1 Pull out the tray. 2 Adjust the guides. Loading A5‑size paper a Pull up and slide the width - Sharp MX-B557F | MX-B557F User Manual - Page 24
Loading paper and specialty media 24 b Squeeze and slide the length guide to the position for A5 until it clicks into place. c Remove the A5 length guide from its holder. d Insert the guide into its designated slot, and then press until it clicks into place. - Sharp MX-B557F | MX-B557F User Manual - Page 25
‑, letter‑, legal‑, Oficio‑, and folio‑size paper a Pull up and slide the width guide to the correct position for the size of the paper being loaded. b If the A5 length guide is still attached, then remove it. If the guide is not attached, then proceed to step d on page 26. c Place the A5 - Sharp MX-B557F | MX-B557F User Manual - Page 26
Loading paper and specialty media 26 d Squeeze, and then slide the length guide to the correct position for the size of the paper being loaded. 3 Flex, fan, and align the paper edges before loading. 4 Load the paper stack - Sharp MX-B557F | MX-B557F User Manual - Page 27
Loading paper and specialty media 27 Without an optional staple finisher With an optional staple finisher Two‑sided printing Two‑sided printing • When loading prepunched paper, make sure that the holes on the long edge of the paper are against the right side of the tray. One‑sided printing - Sharp MX-B557F | MX-B557F User Manual - Page 28
Loading paper and specialty media 28 Loading the multipurpose feeder 1 Open the multipurpose feeder. 2 Adjust the guide to match the size of the paper that you are loading. 3 Flex, fan, and align the paper edges before loading. 4 Load paper with the printable - Sharp MX-B557F | MX-B557F User Manual - Page 29
. One‑sided printing Two‑sided printing • Load envelopes with the flap side down and against the left side of the paper guide. Warning-Potential Damage: Do not use envelopes with stamps, clasps, snaps, windows, coated linings, or self‑stick adhesives. 5 From the control panel, set the paper - Sharp MX-B557F | MX-B557F User Manual - Page 30
Paper support 30 Paper support Supported paper sizes Paper sizes supported by the printer Paper size Standard or Optional optional 550‑sheet 2100‑sheet tray tray Multipurpose feeder Two‑sided printing A4 210 x 297 mm (8.3 x 11.7 - Sharp MX-B557F | MX-B557F User Manual - Page 31
Paper support 31 Paper size Standard or Optional optional 550‑sheet 2100‑sheet tray tray wider than 101.6 mm (4.5 in.) may crease. This paper type must be tested for acceptability. Paper sizes supported by the output options or finishers Paper size A4 210 x 297 mm (8.3 x 11.7 in.) A5 LEF 210 - Sharp MX-B557F | MX-B557F User Manual - Page 32
Paper support 32 Paper size Offset stacker 4‑bin mailbox Staple finisher Stack Staple Statement 140 x 216 mm (5.5 x 8.5 in.) Executive 184 x 267 mm (7.3 x 10.5 in.) Letter 216 x 279 - Sharp MX-B557F | MX-B557F User Manual - Page 33
98.4 x 162 mm (3.9 x 6.4 in.) to 176 x 250 mm (6.9 x 9.8 in.) X X X Staple, hole punch finisher Stack Staple Hole punch X X X Supported paper types Paper types supported by the printer Paper type Plain paper Standard or Optional optional 550‑sheet 2100‑sheet tray tray Multipurpose - Sharp MX-B557F | MX-B557F User Manual - Page 34
Preprinted Colored paper X X X X X X Light X X X X X X Heavy X X X X X X Rough/Cotton X X X X X X Custom type [x] X X X X X X Supported paper weights Paper weights supported by the printer Paper type and weight Standard or Optional optional 2100‑sheet 550 - Sharp MX-B557F | MX-B557F User Manual - Page 35
Paper support 35 Paper type and weight Standard or Optional optional 2100‑sheet lb bond envelopes are limited to 25% cotton content. Multipurpose feeder Two‑sided printing X Paper weights supported by the output options or finishers Paper type and weight Plain paper or Bond 60-176 g/m² - Sharp MX-B557F | MX-B557F User Manual - Page 36
Paper support Paper type and weight Offset stacker 4‑bin Staple finisher mailbox Stack Staple Card stock X X 203 g/m² grain long (125‑lb bond) Card stock 199 g/m² grain long ( - Sharp MX-B557F | MX-B557F User Manual - Page 37
a mobile device using Google Cloud Print Google Cloud PrintTM is a printing service that allows you to print to any Google Cloud Print‑ready printer. Before both devices are connected to the same subnet. • This application is supported only in some Apple devices. 1 From your mobile device, select a - Sharp MX-B557F | MX-B557F User Manual - Page 38
38 3 Select a printer. If necessary, adjust the settings. 4 Print the document. Printing from a mobile device using Wi‑Fi Direct® Wi‑Fi Direct® is a printing service that lets you print to any Wi‑Fi Direct‑ready printer. Note: Make sure that the mobile device is connected to the printer wireless - Sharp MX-B557F | MX-B557F User Manual - Page 39
, reading, or writing from the memory device. Supported flash drives and file types Flash drives Notes: - The printer supports high‑speed USB flash drives with full‑speed standard . - USB flash drives must support the File Allocation Table system (FAT16/32). Many flash - Sharp MX-B557F | MX-B557F User Manual - Page 40
Set the expiration time for confidential print jobs. Note: Confidential held jobs are stored in the printer until they are released or deleted manually. Repeat Job Expiration Set the expiration time for a repeat print job. Note: Repeat held jobs are stored in the printer memory for reprinting - Sharp MX-B557F | MX-B557F User Manual - Page 41
Printing 41 7 From the printer home screen, release the print job. • For confidential print jobs, navigate to: Held jobs > select your user name > Confidential > enter the PIN > select the print job > configure the settings > Print • For other print jobs, navigate to: Held jobs > select your user - Sharp MX-B557F | MX-B557F User Manual - Page 42
. • Load an original document faceup. For multiple‑page documents, make sure to align the leading edge before loading. • Make sure to adjust the ADF guides to match the width of the paper that you are loading. • Use the scanner glass for single‑page documents, book pages, small items (such as - Sharp MX-B557F | MX-B557F User Manual - Page 43
Copying 43 Copying on letterhead 1 Load an original document into the ADF tray or on the scanner glass. 2 From the home screen, touch Copy, and then specify the size of the original document. 3 Touch Copy to, and then select the tray that contains the specialty media. If you are loading the - Sharp MX-B557F | MX-B557F User Manual - Page 44
Copying 44 Copying multiple pages onto a single sheet 1 Load an original document into the ADF tray or on the scanner glass. 2 From the home screen, touch Copy > Pages per Side. 3 Adjust the settings. 4 Copy the document. Creating a copy shortcut 1 From the home screen, touch Copy. 2 Configure - Sharp MX-B557F | MX-B557F User Manual - Page 45
. • Load an original document faceup. For multiple‑page documents, make sure to align the leading edge before loading. • Make sure to adjust the ADF guides to match the width of the paper that you are loading. • Use the scanner glass for single‑page documents, book pages, small items (such as - Sharp MX-B557F | MX-B557F User Manual - Page 46
E-mailing 46 Sending an e-mail Using the control panel 1 Load an original document into the ADF tray or on the scanner glass. 2 From the home screen, touch E-mail, and then enter the needed information. Note: You can also enter the recipient using the address book or shortcut number. 3 If - Sharp MX-B557F | MX-B557F User Manual - Page 47
Faxing 47 Faxing Setting up the printer to fax Notes: • The following connection methods are applicable only in some countries or regions. • During the initial printer setup, clear the fax function check box and any other function that you plan to set up later, and then select Continue. • If the - Sharp MX-B557F | MX-B557F User Manual - Page 48
Faxing 48 3 From the Fax Server E‑mail Settings section, configure the settings. Note: To use the SMTP server setting for e‑mail, enable Use E‑mail SMTP Server. 4 Click Save. Setting up fax using a standard telephone line CAUTION-SHOCK HAZARD: To avoid the risk of electrical shock, do not set up - Sharp MX-B557F | MX-B557F User Manual - Page 49
set the printer to receive faxes automatically (set Auto Answer to On) or manually (set Auto Answer to Off). • If you want to receive faxes with an answering machine Note: If you subscribe to a distinctive ring service, then make sure that you set the correct ring pattern for the printer - Sharp MX-B557F | MX-B557F User Manual - Page 50
Faxing 50 Connected to different wall jacks 1 Connect one end of the telephone cable to the line port of the printer. 2 Connect the other end of the cable to an active analog wall jack. Notes: • If you have only one telephone number on your line, then set the printer to receive faxes - Sharp MX-B557F | MX-B557F User Manual - Page 51
Faxing 51 CAUTION-SHOCK HAZARD: To avoid the risk of electrical shock, do not use the fax feature during a lightning storm. CAUTION-POTENTIAL INJURY: To reduce the risk of fire, use only a 26 AWG or larger telecommunications (RJ-11) cord when connecting this product to the public switched - Sharp MX-B557F | MX-B557F User Manual - Page 52
Faxing 52 Connecting the printer to a non‑RJ11 wall jack 1 Connect one end of the telephone cable to the line port of the printer. 2 Connect the other end of the cable to the RJ11 adapter, and then connect the adapter to the wall jack. 3 If you want to connect another device with a non‑RJ11 - Sharp MX-B557F | MX-B557F User Manual - Page 53
Faxing 53 Connecting the printer to a wall jack in Germany The German wall jack has two kinds of ports. The N ports are for fax machines, modems, and answering machines. The F port is for telephones. Connect the printer to any of the N ports. 1 Connect one end of the telephone cable to the line - Sharp MX-B557F | MX-B557F User Manual - Page 54
Faxing 54 Connecting to a distinctive ring service A distinctive ring service lets you have multiple telephone numbers on one make sure to align the leading edge before loading. • Make sure to adjust the ADF guides to match the width of the paper that you are loading. • Use the scanner glass for - Sharp MX-B557F | MX-B557F User Manual - Page 55
Faxing 55 Sending a fax Using the control panel 1 Load the original document into the ADF tray or on the scanner glass. 2 From the home screen, touch Fax, and then enter the needed information. 3 If necessary, configure other fax settings. 4 Send the fax job. Using the computer Note: Make sure - Sharp MX-B557F | MX-B557F User Manual - Page 56
Faxing 56 3 Touch Resolution, and then adjust the setting. 4 Send the fax. Adjusting the fax darkness 1 Load an original document into the ADF tray or on the scanner glass. 2 From the home screen, touch Fax, and then enter the needed information. 3 Touch Darkness, and then adjust the setting. 4 - Sharp MX-B557F | MX-B557F User Manual - Page 57
. • Load an original document faceup. For multiple‑page documents, make sure to align the leading edge before loading. • Make sure to adjust the ADF guides to match the width of the paper that you are loading. • Use the scanner glass for single‑page documents, book pages, small items (such as - Sharp MX-B557F | MX-B557F User Manual - Page 58
Scanning 58 Scanning to a flash drive 1 Load an original document into the ADF tray or on the scanner glass. 2 Insert the flash drive. 3 Touch Scan to USB and adjust the settings if necessary. Note: If the USB Drive screen does not appear, then touch USB Drive on the home screen. 4 Scan the - Sharp MX-B557F | MX-B557F User Manual - Page 59
Scanning 59 Scanning to a fax server 1 Load an original document into the ADF tray or on the scanner glass. 2 From the home screen, touch Scan Center, and then from the list of destinations, select Fax. 3 Select a fax destination. Note: To create a fax destination, touch Create Fax. 4 Scan the - Sharp MX-B557F | MX-B557F User Manual - Page 60
Understanding the printer menus 60 Understanding the printer menus Menu map Device Print Paper Copy Fax E‑mail FTP USB Drive Network/Ports Security Reports • Preferences • Eco‑Mode • Remote Operator Panel • Notifications • Power Management • Layout • Setup • Quality • Job Accounting • XPS • - Sharp MX-B557F | MX-B557F User Manual - Page 61
Troubleshooting • Print All Guides • Mono Quality Guide • Connection Guide • Copy Guide • E‑mail Guide • Fax Guide Print Quality Test Pages • Information Guide • Media Guide • Moving Guide • Print Quality Guide • Scan Guide • Supplies Guide Current Date and Time Manually Set Date and Time - Sharp MX-B557F | MX-B557F User Manual - Page 62
Understanding the printer menus 62 Menu item Description Screen Brightness 20-100% (90*) Adjust the brightness of the display. Flash Drive Access Enabled* Disabled Enable access to the flash drive. Allow Background Removal Off On* Specify whether background removal is allowed. Allow - Sharp MX-B557F | MX-B557F User Manual - Page 63
Understanding the printer menus 63 Menu item Description Print Pages per Side Off* 2 pages per side 3 pages per side 4 pages per side 6 pages per side 9 pages per side 12 pages per side 16 pages per side Print multiple page images on one side of a sheet of paper. Print Toner Darkness 1-10 (8*) - Sharp MX-B557F | MX-B557F User Manual - Page 64
Understanding the printer menus 64 Menu item Description VNC Password Specify the password to connect to the VNC client server. Note: This menu item appears only if Authentication Type is set to Standard Authentication. Note: An asterisk (*) next to a value indicates the factory default - Sharp MX-B557F | MX-B557F User Manual - Page 65
Understanding the printer menus 65 Menu item Description E‑mail Alerts Setup E‑mail Setup Primary SMTP Gateway Configure an SMTP server to send e‑mail to a group of predefined e-mail addresses when certain events occur on the printer. Primary SMTP Gateway Port (25*) Secondary SMTP Gateway - Sharp MX-B557F | MX-B557F User Manual - Page 66
Understanding the printer menus 66 Menu item Description Error Prevention Auto Reboot Max Auto Reboots 1-20 (2*) Set the number of automatic reboots that the printer can perform. Error Prevention Auto Reboot Auto Reboot Window 1-525600 seconds (720*) Set the time before the printer performs - Sharp MX-B557F | MX-B557F User Manual - Page 67
Understanding the printer menus 67 Menu item Description Timeouts Hibernate Timeout Disabled 1 hour 2 hours 3 hours 6 hours 1 day 2 days 3 days* 1 week 2 weeks 1 month Set the time before the printer turns off. Timeouts Hibernate Timeout on Connection Hibernate Do Not Hibernate* Set Hibernate - Sharp MX-B557F | MX-B557F User Manual - Page 68
Understanding the printer menus 68 Restore Factory Defaults Menu item Restore Settings Restore all settings Restore printer settings Restore network settings Restore fax settings Restore app settings Maintenance Description Restore the printer factory default settings. Configuration Menu Menu - Sharp MX-B557F | MX-B557F User Manual - Page 69
Paper Set the paper source that the user fills when a prompt to load paper appears. Tray Configuration Envelope Prompts Auto* Multipurpose Feeder Manual Envelope Set the paper source that the user fills when a prompt to load envelope appears. Tray Configuration Action for Prompts Prompt user - Sharp MX-B557F | MX-B557F User Manual - Page 70
Emulations Emulator Security Disable Printer Message Access Off On* Disable access to printer message during emulation. Fax Configuration Fax Low Power Support Disable Sleep Permit Sleep Auto* Set fax to enter Sleep mode whenever the printer determines that it should. Fax Configuration Fax - Sharp MX-B557F | MX-B557F User Manual - Page 71
menu when sending quick copy jobs. Device Operations Enable Optional Parallel Port Off* On Enable the optional parallel port. Scanner Configuration Scanner Manual Registration Print Quick Test Print a Quick Test target page. Note: Make sure that the margin spacing on the target page is uniform - Sharp MX-B557F | MX-B557F User Manual - Page 72
the printer memory or hard disk was last sanitized. Note: Hard Disk Last Sanitized appears only when a hard disk is installed. Out of Service Erase Clear all information on non‑volatile memory and Sanitize all information on nonvolatile memory information on the hard disk. Erase all printer and - Sharp MX-B557F | MX-B557F User Manual - Page 73
Understanding the printer menus 73 Visible Home Screen Icons Menu Copy E-mail Fax Status/Supplies Job Queue Change Language Shortcut Center Address Book Bookmarks Held Jobs USB FTP Scan Profiles App Profiles Scan Center Card Copy Description Specify which icons to show on the home screen. - Sharp MX-B557F | MX-B557F User Manual - Page 74
Understanding the printer menus 74 Menu item Description Blank Pages Print Do Not Print* Print blank pages that are included in a print job. Collate Off (1,1,1,2,2,2) On (1,2,1,2,1,2)* Keep the pages of a print job stacked in sequence, particularly when printing multiple copies of the job. - Sharp MX-B557F | MX-B557F User Manual - Page 75
Understanding the printer menus 75 Setup Menu item Description Printer Language PCL Emulation PS Emulation* Set the printer language. Note: Setting a printer language default does not prevent a software program from sending print jobs that use another printer language. Job Waiting Off* On - Sharp MX-B557F | MX-B557F User Manual - Page 76
Understanding the printer menus 76 Menu item Description Pixel Boost Off* Fonts Horizontally Vertically Both directions Enable more pixels to print in clusters for clarity, in order to enhance text and images. Toner Darkness 1 to 10 (8*) Determine the lightness or darkness of text images. - Sharp MX-B557F | MX-B557F User Manual - Page 77
Understanding the printer menus 77 Menu item Description Log Action at Near Full None* E‑mail Current Log E‑mail & Delete Current Log E‑mail & Delete Oldest Log Post Current Log Post & Delete Current Log Post & Delete Oldest Log Delete Current Log Delete Oldest Log Delete All But Current Delete - Sharp MX-B557F | MX-B557F User Manual - Page 78
Understanding the printer menus 78 PDF Menu item Description Scale To Fit Off* On Scale the page content to fit the selected paper size. Annotations Print Do Not Print* Specify whether to print annotations in the PDF. Print PDF Error Off On* Enable the printing of PDF error. Note: An - Sharp MX-B557F | MX-B557F User Manual - Page 79
the symbol set for each font name. Note: A symbol set is a set of alphabetic and numeric characters, punctuation, and special symbols. Symbol sets support the different languages or specific programs such as math symbols for scientific text. Pitch 0.08-100 (10*) Specify the pitch for fixed or - Sharp MX-B557F | MX-B557F User Manual - Page 80
the printer to perform a line feed after a carriage return control command. Tray Renumber Assign MP Feeder Assign Tray [x] Assign Manual Paper Assign Manual Envelope View Factory Defaults Restore Defaults • Configure the printer to work with a different print driver or custom application that uses - Sharp MX-B557F | MX-B557F User Manual - Page 81
Paper Tray Configuration Menu item Description Default Source Tray [x] (1*) Multipurpose Feeder Manual Paper Manual Envelope Set the paper source for all print jobs. Paper Size/Type Tray [x] Multipurpose Feeder Manual Paper Manual Envelope Specify the paper size or paper type loaded in each - Sharp MX-B557F | MX-B557F User Manual - Page 82
configures the multipurpose feeder as the automatic paper source. • Manual sets the multipurpose feeder only for manual-feed print jobs. • First configures the multipurpose feeder shorter than the maximum width supported. Note: An asterisk (*) next to a value indicates the factory default setting. - Sharp MX-B557F | MX-B557F User Manual - Page 83
Understanding the printer menus 83 Custom Scan Sizes Menu item Custom Scan Size [x] Scan Size Name Width 1-8.5 inches (8.5*) 25.4-215.9 mm (215.9*) Height 1-25 inches (11*) 25.4-635 mm (279.4*) Orientation Portrait* Landscape 2 scans per side Off* On Description Assign a scan size name and - Sharp MX-B557F | MX-B557F User Manual - Page 84
Understanding the printer menus 84 Copy Copy Defaults Menu item Description Content Type Text Text/Photo* Photo Graphics Improve the output result based on the content of the original document. Content Source Black and White Laser* Color Laser Inkjet Photo/Film Magazine Newspaper Press - Sharp MX-B557F | MX-B557F User Manual - Page 85
Understanding the printer menus 85 Menu item Description Collate Off [1,1,1,2,2,2] On [1,2,1,2,1,2]* Print multiple copies in sequence. "Copy from" Size Set the paper size of the original document. Note: Letter is the U.S. factory default setting. A4 is the international factory default - Sharp MX-B557F | MX-B557F User Manual - Page 86
the shadow detail in the original document. Scan Edge to Edge Off* On Scan the original document from edge to edge. Sharpness 1-5 (3*) Adjust the sharpness of the scanned image. Note: An asterisk (*) next to a value indicates the factory default setting. Admin Controls Menu item Transparency - Sharp MX-B557F | MX-B557F User Manual - Page 87
Understanding the printer menus 87 Menu item Description Allow Save as Shortcut Off On* Save copy settings as a shortcut. Adjust ADF Skew Off On* Set the printer to adjust the skewed images from documents that are scanned from the ADF. Sample copy Off* On Print a sample copy to check the - Sharp MX-B557F | MX-B557F User Manual - Page 88
Background Detection (Content‑based*) Level (0*) Mirror Image (Off*) Negative Image (Off*) Shadow Detail (0*) Scan Edge to Edge (Off*) Sharpness (3*) Temperature (0*) Admin Controls Automatic Redial (5*) Redial Frequency (3 minutes*) Enable ECM (On*) Enable Fax Scans (On*) Driver to Fax - Sharp MX-B557F | MX-B557F User Manual - Page 89
Understanding the printer menus 89 Menu item Description Fax Receive Settings Fax Job Waiting (None*) Rings to Answer (3*) Auto Reduction (On*) Paper Source (Auto*) Sides (Off*) Separator Sheets (None*) Separator Sheet Source(Tray 1*) Output Bin(Standard Bin*) Fax Footer (Off*) Fax Footer Time - Sharp MX-B557F | MX-B557F User Manual - Page 90
Understanding the printer menus 90 Menu item Description Fax Log Settings Transmission Log Frequency (Always*) Transmission Log Action Print (On*) E‑mail (Off*) E‑mail Logs To Receive Error Log (Print Never*) Auto Print Logs (On*) Log Paper Source (Tray 1*) Logs Display (Remote Fax Name*) Enable - Sharp MX-B557F | MX-B557F User Manual - Page 91
Understanding the printer menus 91 Menu item Description Fax Server E‑mail Settings Configure the fax server e‑mail settings. Use E‑mail SMTP Server (On*) Primary SMTP Gateway Primary SMTP Gateway Port Secondary SMTP Gateway Secondary SMTP Gateway Port SMTP Timeout (30 seconds*) Reply - Sharp MX-B557F | MX-B557F User Manual - Page 92
Understanding the printer menus 92 Menu item Description Secondary SMTP Gateway Type the server IP address or host name of your secondary or backup SMTP server. Secondary SMTP Gateway Port 1-65535 (25*) Enter the server port number of your secondary or backup SMTP server. SMTP Timeout 5-30 - Sharp MX-B557F | MX-B557F User Manual - Page 93
. PDF Version (1.5*) Notes: Archival Version (A‑1a*) Highly Compressed (Off*) Secure (Off*) Archival (PDF/A) (Off*) • Archival Version and Archival (PDF/A) are supported only when PDF Version is set to 1.4. • Highly Compressed appears only when hard disk is installed. Content Type Text Text - Sharp MX-B557F | MX-B557F User Manual - Page 94
Understanding the printer menus 94 Menu item Description Color Black and White Gray Color* Auto Set the printer to capture file content in color or in mono. Resolution 75 dpi 150 dpi* 200 dpi 300 dpi 400 dpi 600 dpi Set the resolution of the scanned image. Darkness 1-9 (5*) Adjust the - Sharp MX-B557F | MX-B557F User Manual - Page 95
the shadow detail in the scanned image. Scan Edge to Edge Off* On Scan the original document from edge to edge. Sharpness 1-5 (3*) Adjust the sharpness in the scanned image. Temperature ‑4 to 4 (0*) Generate a bluer or redder output of the original document. Blank Pages Blank Page Removal - Sharp MX-B557F | MX-B557F User Manual - Page 96
Understanding the printer menus 96 Menu item Description Limit Destinations Limit sending of e‑mail only to the specified list of domain name. Note: Use a comma to separate each domain. Send Me a Copy Never appears* On by Default Off by Default Always On Send a copy of the e‑mail to yourself. - Sharp MX-B557F | MX-B557F User Manual - Page 97
Understanding the printer menus 97 Menu item Description Scan Preview Off On* Show a scan preview of the original document. Note: This menu item appears only when a hard disk is installed. Allow Save as Shortcut Off On* Save an e‑mail address as a shortcut. E‑mail Images Sent As Attachment* - Sharp MX-B557F | MX-B557F User Manual - Page 98
Understanding the printer menus 98 Menu item Description PDF Settings PDF Version (1.5*) Archival Version (A‑1a*) Highly Compressed (Off*) Secure (Off*) Archival (PDF/A) (Off*) Configure the PDF settings for the scanned image. Note: Highly Compressed appears only when a hard disk is installed. - Sharp MX-B557F | MX-B557F User Manual - Page 99
Understanding the printer menus 99 Menu item Description Sides Off* Long Edge Short Edge Specify the orientation when scanning on both sides of the document. File Name Specify the file name of the scanned image. Note: An asterisk (*) next to a value indicates the factory default setting. - Sharp MX-B557F | MX-B557F User Manual - Page 100
shadow detail in the scanned image. Scan Edge to Edge Off* On Allow edge‑to‑edge scanning of the original document. Sharpness 1-5 (3*) Adjust the sharpness in the scanned image. Temperature ‑4 to 4 (0*) Generate a bluer or redder output of the original document. Blank Pages Blank Page Removal - Sharp MX-B557F | MX-B557F User Manual - Page 101
Version (1.5*) Notes: Archival Version (A‑1a*) Highly Compressed (Off*) Secure (Off*) Archival (PDF/A) (Off*) • Archival Version and Archival (PDF/A) are supported only when PDF Version is set to 1.4. • Highly Compressed appears only when a hard disk is installed. Note: An asterisk (*) next to - Sharp MX-B557F | MX-B557F User Manual - Page 102
Understanding the printer menus 102 Menu item Description Content Type Text Text/Photo* Graphics Photo Improve the output result based on the content type of the original document. Content Source Black and White Laser* Color Laser Inkjet Photo/Film Magazine Newspaper Press Other Improve the - Sharp MX-B557F | MX-B557F User Manual - Page 103
Understanding the printer menus 103 Advanced Imaging Menu item Description Color Balance Cyan (0*) Magenta (0*) Yellow (0*) Adjust the color intensity for cyan, magenta, and yellow. Color Dropout Color Dropout (None*) Default Red Threshold (128*) Default Green Threshold (128*) Default Blue - Sharp MX-B557F | MX-B557F User Manual - Page 104
Understanding the printer menus 104 Menu item Description Sharpness 1-5 (3*) Adjust the sharpness in the scanned image. Temperature ‑4 to 4 (0*) Generate a bluer or redder output of the original document. Blank Pages Blank Page Removal (Remove*) Blank Page Sensitivity (5*) Set - Sharp MX-B557F | MX-B557F User Manual - Page 105
Understanding the printer menus 105 Menu item Description Paper Source Tray [x] (1*) Multipurpose Feeder Manual Paper Manual Envelope Set the paper source for the print job. Collate (1,1,1) (2,2,2) (1,2,3) (1,2,3)* Keep the pages of a print job stacked in sequence, particularly when printing - Sharp MX-B557F | MX-B557F User Manual - Page 106
Understanding the printer menus 106 Menu item Description Separator Sheet Source Tray [x] (1*) Multipurpose Feeder Specify the paper source for the separator sheet. Blank Pages Do Not Print* Print Print blank pages in a print job. Note: An asterisk (*) next to a value indicates the factory - Sharp MX-B557F | MX-B557F User Manual - Page 107
Understanding the printer menus 107 Menu item Description Enable LLDP Off* On Enable Link Layer Discovery Protocol (LLDP) in the printer. Note: An asterisk (*) next to a value indicates the factory default setting. Wireless Note: This menu is available only in printers connected to a Wi‑Fi - Sharp MX-B557F | MX-B557F User Manual - Page 108
printer menus 108 Menu item IPv6 Enable IPv6 (On*) Enable DHCPv6 (Off*) Stateless Address Autoconfiguration (On*) DNS Server Address Manually Assigned IPv6 Address Manually Assigned IPv6 Router Address Prefix (64*) All IPv6 Addresses All IPv6 Router Addresses Network Address PCL SmartSwitch Off On - Sharp MX-B557F | MX-B557F User Manual - Page 109
Configure the IPv6 settings. Enable IPv6 (On*) Enable DHCPv6 (Off*) Stateless Address Autoconfiguration (On*) DNS Server Address Manually Assigned IPv6 Address Manually Assigned IPv6 Router Address Prefix (64*) All IPv6 Addresses All IPv6 Router Addresses Network Address UAA LAA Specify - Sharp MX-B557F | MX-B557F User Manual - Page 110
update Allow the DHCP and BOOTP clients to update the NTP settings of the printer. NTP server On* Off Zero Configuration Name Specify a service name for the zero configuration network. Enable Auto IP Off* On Assign an IP address automatically. DNS Server Address Specify the current Domain Name - Sharp MX-B557F | MX-B557F User Manual - Page 111
Understanding the printer menus 111 Menu item Description Restricted Server List Options Specify the access option for IP addresses that are not in the list. Block All Ports* Block Printing Only Block Printing and HTTP Only MTU 256-1500 Ethernet (1500*) Specify a maximum transmission unit (MTU - Sharp MX-B557F | MX-B557F User Manual - Page 112
Understanding the printer menus 112 Menu item Description SNMP Version 3 Enabled Off On* Set Read/Write Credentials User Name Password Set Read‑only Credentials User Name Password Authentication Hash MD5 SHA1* Minimum Authentication Level No Authentication, No Privacy Authentication, No Privacy - Sharp MX-B557F | MX-B557F User Manual - Page 113
Understanding the printer menus 113 Menu item Description Proposed Authentication Method SHA1 SHA256* SHA512 Set the authentication method. Note: This menu item appears only when Base Configuration is set to Compatibility. IKE SA Lifetime (Hours) 1 2 4 8 24* Specify the IKE SA expiry period. - Sharp MX-B557F | MX-B557F User Manual - Page 114
Understanding the printer menus 114 Menu item Description LPD Banner Page Off* On Print a banner page for all LPD print jobs. Note: A banner page is the first page of a print job used as a separator of print jobs and to identify the originator of the print job request. LPD Trailer Page Off* On - Sharp MX-B557F | MX-B557F User Manual - Page 115
Understanding the printer menus 115 ThinPrint Menu item Description Enable ThinPrint Off* On Print using ThinPrint. Port Number 4000-4999 (4000*) Set the port number for the ThinPrint server. Bandwidth (bits/sec) 100-1000000 (0*) Set the speed to transmit data in a ThinPrint environment. - Sharp MX-B557F | MX-B557F User Manual - Page 116
Understanding the printer menus 116 Restrict external network access Menu item Description Restrict external network access Off* On Restrict access to network sites. External network address Specify the network addresses with restricted access. E‑mail address for notification Specify an e‑ - Sharp MX-B557F | MX-B557F User Manual - Page 117
Understanding the printer menus 117 Menu item Description SSID Specify the service set identifier (SSID) of the Wi‑Fi network. Preferred Channel Number Auto 1-11 (6*) Show the PSK on the Network Setup Page. Set PSK Set the - Sharp MX-B557F | MX-B557F User Manual - Page 118
Understanding the printer menus 118 Security Login Methods Manage Permissions Menu item Function Access Access Address Book in Apps Modify Address Book Manage Shortcuts Create Profiles Manage Bookmarks Flash Drive Print Flash Drive Scan Copy Function Color Dropout E‑mail Function Fax Function FTP - Sharp MX-B557F | MX-B557F User Manual - Page 119
menus 119 Menu item Device Management Remote Management Firmware Updates Apps Configuration Operator Panel Lock Import / Export All Settings Out of Service Erase Apps New Apps Scan Center Scan Center Custom [x] Description Control access to the printer management options. Control access to - Sharp MX-B557F | MX-B557F User Manual - Page 120
Understanding the printer menus 120 Security Audit Log Menu item Description Enable Audit Off* On Record the events in the secure audit log and remote syslog. Enable Remote Syslog Off* On Send audit logs to a remote server. Remote Syslog Server Specify the remote syslog server. Remote - Sharp MX-B557F | MX-B557F User Manual - Page 121
Understanding the printer menus 121 Menu item Description Severity of Events to Log 0 ‑ Emergency 1 ‑ Alert 2 ‑ Critical 3 ‑ Error 4 ‑ Warning* 5 ‑ Notice 6 ‑ Informational 7 ‑ Debug Specify the priority level cutoff for logging messages and events. Remote Syslog Non‑Logged Events Off* On - Sharp MX-B557F | MX-B557F User Manual - Page 122
Understanding the printer menus 122 Menu item Description Digitally Sign Exports Off* On Add a digital signature to each exported log file. Clear Log Delete all audit logs. Export Log Syslog (RFC 5424) Syslog (RFC 3164) CSV Export a security log to a flash drive. Note: An asterisk (*) next - Sharp MX-B557F | MX-B557F User Manual - Page 123
Understanding the printer menus 123 Menu item Description Repeat Job Expiration Off* 1 Hour 4 Hours 24 Hours 1 Week Set the expiration time for a print job that you want to repeat. Verify Job Expiration Off* 1 Hour 4 Hours 24 Hours 1 Week Set the expiration time that the printer prints a copy - Sharp MX-B557F | MX-B557F User Manual - Page 124
Understanding the printer menus 124 Erase Temporary Data Files Menu item Description Stored in onboard memory Off* On Delete all files stored on the printer memory. Stored on hard disk 1 Pass Erase* 3 Pass Erase 7 Pass Erase Delete all files stored on the printer hard disk. Note: This menu - Sharp MX-B557F | MX-B557F User Manual - Page 125
Understanding the printer menus 125 Menu item Description Minimum Password Length 0-32 Specify the password length. Note: An asterisk (*) next to a value indicates the factory default setting. Reports Menu Settings Page Menu item Menu Settings Page Description Print a report that contains - Sharp MX-B557F | MX-B557F User Manual - Page 126
Guides Connection Guide Copy Guide E‑mail Guide Fax Guide Information Guide Media Guide Mono Quality Guide Moving Guide Print Quality Guide Supplies Guide Description Prints all the guides issues Provides information about ordering supplies Troubleshooting Menu item Print Quality Test Pages - Sharp MX-B557F | MX-B557F User Manual - Page 127
Understanding the printer menus 127 Printing the Menu Settings Page From the home screen, touch Settings > Reports > Menu Settings Page. - Sharp MX-B557F | MX-B557F User Manual - Page 128
offline, and then touch Next. 4 Start the operation. Erasing printer hard disk memory 1 From the home screen, touch Settings > Device > Maintenance > Out of Service Erase. 2 Select the Sanitize all information on hard disk check box, and then touch ERASE. 3 Select a method to erase data. 4 Start the - Sharp MX-B557F | MX-B557F User Manual - Page 129
screen, touch Settings > Security > Disk Encryption > Start encryption. 2 Follow the instructions on the display. Notes: • To avoid loss of data, do not turn off a different department or location. • The printer is serviced by someone from outside your organization. • The printer is removed from - Sharp MX-B557F | MX-B557F User Manual - Page 130
Securing the printer 130 Disposing of a printer hard disk • Degaussing-Flushes the hard disk with a magnetic field that erases stored data • Crushing-Physically compresses the hard disk to break component parts and render them unreadable • Milling-Physically shreds the hard disk into small metal - Sharp MX-B557F | MX-B557F User Manual - Page 131
the printer to a Wi‑Fi network 1 From the home screen, navigate to: Settings > Network/Ports > Wireless 2 Select Setup On Printer Panel and then follow the instructions on the display. Note: For Wi‑Fi‑network‑ready printer models, a prompt for Wi‑Fi network setup appears during initial setup. - Sharp MX-B557F | MX-B557F User Manual - Page 132
, see the documentation that came with your access point. • A wireless network adapter is installed in your printer. For more information, see the instructions that came with the adapter. Using the Push Button method 1 From the control panel, navigate to: Settings > Network/Ports > Wireless > Wi‑Fi - Sharp MX-B557F | MX-B557F User Manual - Page 133
the Wi‑Fi network 1 From the home screen, touch Settings > Network/Ports > Network Overview > Active Adapter > Standard Network. 2 Follow the instructions on the display. Cleaning printer parts Cleaning the printer CAUTION-SHOCK HAZARD: To avoid the risk of electrical shock when cleaning the - Sharp MX-B557F | MX-B557F User Manual - Page 134
Maintaining the printer 134 2 Using a damp, soft, lint-free cloth, wipe the following areas: • ADF glass • ADF glass pad • Scanner glass • Scanner glass pad - Sharp MX-B557F | MX-B557F User Manual - Page 135
Maintaining the printer 135 3 Open door E. 4 Using a damp, soft, lint-free cloth, wipe the following areas: • ADF glass pad in door E • ADF glass in door E 5 Close door E, and then close the scanner cover. - Sharp MX-B557F | MX-B557F User Manual - Page 136
Maintaining the printer 136 Ordering parts and supplies To order parts and supplies, contact the place where you purchased the printer. Note: All life estimates for printer supplies assume printing on letter‑ or A4‑size plain paper. Checking the status of parts and supplies 1 From the home screen - Sharp MX-B557F | MX-B557F User Manual - Page 137
Maintaining the printer 137 2 Remove the used toner cartridge. 3 Unpack the new toner cartridge, and then shake it to redistribute the toner. - Sharp MX-B557F | MX-B557F User Manual - Page 138
the full footprint of the printer. • Any cart used to move the hardware options must have a surface able to support the dimensions of the options. • Keep the printer in an upright position. • Avoid severe jarring movements. • Make sure that your fingers are not under the - Sharp MX-B557F | MX-B557F User Manual - Page 139
Maintaining the printer 139 Shipping the printer When shipping the printer, use the original packaging or contact the place where you purchased the printer. Saving energy and paper Configuring the power save mode settings Sleep mode 1 From the home screen, touch Settings > Device > Power - Sharp MX-B557F | MX-B557F User Manual - Page 140
the maximum paper fill indicator. • Do not slide paper into the tray. Load paper as shown in the illustration. • Make sure that the paper guides are positioned correctly and are not pressing tightly against the paper or envelopes. • Push the tray firmly into the printer after loading paper. Use - Sharp MX-B557F | MX-B557F User Manual - Page 141
Clearing jams 141 • Flex, fan, and align the paper edges before loading. • Do not use paper that has been cut or trimmed by hand. • Do not mix paper sizes, weights, or types in the same tray. • Make sure that the paper size and type are set correctly on the computer or printer control panel. • - Sharp MX-B557F | MX-B557F User Manual - Page 142
Clearing jams 142 Jam locations 1 Automatic document feeder 2 Standard, finisher, or output option bin 3 Door A 4 Multipurpose feeder 5 Trays 6 Door C 7 Finisher or output option rear door • Door H • Door N • Door P - Sharp MX-B557F | MX-B557F User Manual - Page 143
Clearing jams 143 Paper jam in trays 1 Remove the tray. 2 Remove the jammed paper. Note: Make sure that all paper fragments are removed. 3 Insert the tray. Paper jam in door A 1 Open door A. Warning-Potential Damage: To prevent damage from electrostatic discharge, touch any exposed metal frame of - Sharp MX-B557F | MX-B557F User Manual - Page 144
. Warning-Potential Damage: Do not expose the imaging unit to direct light for more than 10 minutes. Extended exposure to light may cause print quality problems. Warning-Potential Damage: Do not touch the photoconductor drum. Doing so may affect the quality of future print jobs. - Sharp MX-B557F | MX-B557F User Manual - Page 145
Clearing jams 145 4 Pull out the duplex unit. 5 Remove the jammed paper. Note: Make sure that all paper fragments are removed. 6 Insert the duplex unit. - Sharp MX-B557F | MX-B557F User Manual - Page 146
Clearing jams 146 7 Insert the imaging unit. 8 Insert the toner cartridge. 9 Close the door. Paper jam in door C 1 Open door C. CAUTION-HOT SURFACE: The inside of the printer might be hot. To reduce the risk of injury from a hot component, allow the surface to cool before touching it. Warning- - Sharp MX-B557F | MX-B557F User Manual - Page 147
Clearing jams 147 Note: Make sure that all paper fragments are removed. • Fuser area • Below the fuser area • Duplex area 3 Close the door. Paper jam in the standard bin Remove the jammed paper. Note: Make sure that all paper fragments are removed. - Sharp MX-B557F | MX-B557F User Manual - Page 148
Clearing jams 148 Paper jam in the multipurpose feeder 1 Remove paper from the multipurpose feeder. 2 Remove the jammed paper. Note: Make sure that all paper fragments are removed. 3 Flex, fan, and align the paper edges before loading. - Sharp MX-B557F | MX-B557F User Manual - Page 149
Clearing jams 149 4 Reload paper. Paper jam in the automatic document feeder 1 Remove all original documents from the ADF tray. 2 Open door D. Warning-Potential Damage: To prevent damage from electrostatic discharge, touch any exposed metal frame of the printer before accessing or touching - Sharp MX-B557F | MX-B557F User Manual - Page 150
Clearing jams 150 5 Open the scanner cover. 6 Open door E. 7 Remove the jammed paper. Note: Make sure that all paper fragments are removed. 8 Close door E, and then close the scanner cover. - Sharp MX-B557F | MX-B557F User Manual - Page 151
Clearing jams 151 Paper jam in the 4‑bin mailbox Paper jam in door N 1 Open door N. 2 Remove the jammed paper. Note: Make sure that all paper fragments are removed. 3 Close the door. Paper jam in the mailbox bin Remove the jammed paper. Note: Make sure that all paper fragments are removed. - Sharp MX-B557F | MX-B557F User Manual - Page 152
Clearing jams 152 Paper jam in the offset stacker or staple finisher Paper jam in door H 1 Open door H. 2 Remove the jammed paper. Note: Make sure that all paper fragments are removed. - Sharp MX-B557F | MX-B557F User Manual - Page 153
Clearing jams 153 3 Close the door. Paper jam in the offset stacker or staple finisher bin Remove the jammed paper. Note: Make sure that all paper fragments are removed. - Sharp MX-B557F | MX-B557F User Manual - Page 154
Clearing jams 154 Paper jam in the staple, hole punch finisher Paper jam in door P 1 Open door P. 2 Remove the jammed paper. Note: Make sure that all paper fragments are removed. 3 Close the door. Paper jam in the staple, hole punch finisher bin Remove the jammed paper. Note: Make sure that all - Sharp MX-B557F | MX-B557F User Manual - Page 155
Clearing jams 155 Staple jam in the staple finisher 1 Open door F. - Sharp MX-B557F | MX-B557F User Manual - Page 156
Clearing jams 156 2 Remove the staple cartridge holder. 3 Remove the loose staples. - Sharp MX-B557F | MX-B557F User Manual - Page 157
Clearing jams 157 4 Press the staples against the metal bracket. Note: If the staples are at the rear of the cartridge, then shake the cartridge downward to bring the staples near the metal bracket. 5 Insert the staple cartridge holder until it clicks into place. 6 Close the door. - Sharp MX-B557F | MX-B557F User Manual - Page 158
Clearing jams 158 Staple jam in the staple, hole punch finisher 1 Depending on the staple jam location, open either door F or door G. 2 Remove the staple cartridge holder. - Sharp MX-B557F | MX-B557F User Manual - Page 159
Clearing jams 159 3 Remove the loose staples. 4 Press the staples against the metal bracket. Note: If the staples are at the rear of the cartridge, then shake the cartridge downward to bring the staples near the metal bracket. - Sharp MX-B557F | MX-B557F User Manual - Page 160
Clearing jams 160 5 Insert the staple cartridge holder until it clicks into place. 6 Close the door. - Sharp MX-B557F | MX-B557F User Manual - Page 161
Troubleshooting Troubleshooting Network connection problems Cannot open Embedded Web Server Action Step 1 Check .123.123.123. Is the printer IP address correct? Step 3 Check if you are using a supported browser: • Internet Explorer version 11 or later • Microsoft Edge • Safari version 6 or later - Sharp MX-B557F | MX-B557F User Manual - Page 162
types" on page 39. Go to step 4. Is the flash drive supported? Step 4 a Check if the USB port is enabled. For more information, see "Enabling the USB port" on page 162. b Remove, and then insert the flash drive. The problem is solved. Does the printer recognize the flash drive? No Wait for - Sharp MX-B557F | MX-B557F User Manual - Page 163
Troubleshooting 163 Checking the printer connectivity 1 From the home screen, touch Settings > the network cable may be malfunctioning. Contact your administrator for assistance. Hardware options problems Defective flash detected Contact your dealer. Not enough free space in flash memory for - Sharp MX-B557F | MX-B557F User Manual - Page 164
Troubleshooting 164 To accept any and all of these risks and to proceed on envelopes with high moisture content can seal the flaps. b Send the print job. Yes Go to step 2. No The problem is solved. Does the envelope seal when printing? Step 2 a Make sure that the paper type is set to Envelope. - Sharp MX-B557F | MX-B557F User Manual - Page 165
Troubleshooting Action Step 3 a Reduce the number of pages to print. b Print the document. Are the pages collated correctly? Yes The problem is solved. Tray linking does not work Action Yes Step 1 The problem is a Check if the trays contain the same paper size and paper type. solved. b - Sharp MX-B557F | MX-B557F User Manual - Page 166
Troubleshooting 166 Paper frequently jams Action Yes Step 1 a Remove the tray. b Check if paper is loaded correctly. Go to step 2. Notes: • Make sure that the paper guides it. b Print the document. Contact your dealer. The problem is solved. Do paper jams occur frequently? Jammed pages are - Sharp MX-B557F | MX-B557F User Manual - Page 167
Before solving the problem, print the Print Quality Test Pages. From the control panel, navigate to Settings > Troubleshooting > Print Quality supported toner cartridge. Note: If the cartridge is not supported, then install a supported one. b Print the document. Yes Go to step 2. No The problem - Sharp MX-B557F | MX-B557F User Manual - Page 168
Troubleshooting 168 Action Yes Step 2 Go to step 3. a Turn off the printer, wait for about 10 seconds, and then turn on the printer. b Reduce toner darkness. From the control panel, navigate to: Settings > Print > Quality > Toner Darkness c Print the document. No The problem is solved. Is - Sharp MX-B557F | MX-B557F User Manual - Page 169
and supported toner cartridge. Note: If the cartridge is not supported, then install a supported one. b Print the document. Yes Go to step 2. No The problem is Before solving the problem, print the Print Quality Test Pages. From the control panel, navigate to Settings > Troubleshooting > Print - Sharp MX-B557F | MX-B557F User Manual - Page 170
Troubleshooting 170 Action Step 1 a Check if the printer is using a genuine and supported toner cartridge. Note: If the cartridge is not supported, then install a supported one. b Print the document. Yes Go to step 2. No The problem is solved. Is the paper folded or wrinkled? Step 2 a Load - Sharp MX-B557F | MX-B557F User Manual - Page 171
and supported toner cartridge. Note: If the toner cartridge is not supported, then install a supported one. b Print the document. Go to step 3. The problem is solving the problem, print the Print Quality Test Pages. From the control panel, navigate to Settings > Troubleshooting > Print Quality - Sharp MX-B557F | MX-B557F User Manual - Page 172
Troubleshooting 172 Action Step 1 a Adjust the paper guides to the correct position for the paper loaded. b Print the document. Yes The problem supported toner cartridge. Note: If the cartridge is not supported, then install a supported one. b Print the document. Yes Go to step 2. No The problem - Sharp MX-B557F | MX-B557F User Manual - Page 173
Troubleshooting 173 Action Yes Step 2 Go to step 3. a Turn off the printer, wait for about 10 seconds, and then turn on the printer. b Increase toner darkness. From the control panel, navigate to: Settings > Print > Quality > Toner Darkness c Print the document. No The problem is solved. - Sharp MX-B557F | MX-B557F User Manual - Page 174
the problem, print the Print Quality Test Pages. From the control panel, navigate to Settings > Troubleshooting > Print Quality Test Pages. For non‑touch‑screen printer models, press to navigate through the settings. Action Step 1 a Check if the printer is using a genuine and supported toner - Sharp MX-B557F | MX-B557F User Manual - Page 175
is solved. Is the paper curled? Print crooked or skewed Note: Before solving the problem, print the Print Quality Test Pages. From the control panel, navigate to Settings > Troubleshooting > Print Quality Test Pages. For non‑touch‑screen printer models, press to navigate through the settings - Sharp MX-B557F | MX-B557F User Manual - Page 176
Troubleshooting 176 Action Yes Step 1 Go to step 2. a Adjust the guides in the tray to the correct position for the paper loaded. b Print the document. No The problem is solved. Is the print crooked or skewed? Step 2 a Check if the paper loaded is supported. Note: If paper is not - Sharp MX-B557F | MX-B557F User Manual - Page 177
then install a supported one. b Print the document. Yes No Contact your dealer. The problem is solved. Are text or images cut off? Toner easily rubs off Note: Before solving the problem, print the Print Quality Test Pages. From the control panel, navigate to Settings > Troubleshooting > Print - Sharp MX-B557F | MX-B557F User Manual - Page 178
Before solving the problem, print the Print Quality Test Pages. From the control panel, navigate to Settings > Troubleshooting > Print Quality supported toner cartridge. Note: If the cartridge is not supported, then install a supported one. b Print the document. Yes Go to step 2. No The problem - Sharp MX-B557F | MX-B557F User Manual - Page 179
a supported one. b Print the document. Yes No Contact your dealer. The problem is solved. Do vertical light bands appear on prints? Vertical white lines Note: Before solving the problem, print the Print Quality Test Pages. From the control panel, navigate to Settings > Troubleshooting > Print - Sharp MX-B557F | MX-B557F User Manual - Page 180
a supported one. b Print the document. Yes No Contact your dealer. The problem is solved. Do vertical dark bands appear on prints? Vertical dark lines Note: Before solving the problem, print the Print Quality Test Pages. From the control panel, navigate to Settings > Troubleshooting > Print - Sharp MX-B557F | MX-B557F User Manual - Page 181
Troubleshooting Action Step 1 Using a blank sheet of paper, make a two‑sided copy using the ADF. Yes Go to step 2. Do vertical dark lines or streaks appear on prints? Step 2 Using a damp, soft, lint-free cloth, wipe the following areas: • ADF glass Go to step 3. 181 No Go to step 3. The problem - Sharp MX-B557F | MX-B557F User Manual - Page 182
Troubleshooting 182 Action Step 4 a Load paper from a fresh package. Note: Paper absorbs moisture due to high humidity. Store paper in its original wrapper until you use it. b Print the document. Do vertical dark lines or streaks appear on prints? Yes No Contact your dealer. The problem is - Sharp MX-B557F | MX-B557F User Manual - Page 183
Troubleshooting Action Step 2 The print job may contain a formatting error or invalid data. • Delete the print job, and then send it again. • For PDF files, generate a new file, and then print the documents. Yes The problem is solved. Are the documents printed? Step 3 The problem is If you are - Sharp MX-B557F | MX-B557F User Manual - Page 184
Troubleshooting Action Step 3 a Depending on your operating system, specify the print resolution from the Remove held jobs. Go to step 8. Is the printer printing slow? 184 No The problem is solved. The problem is solved. The problem is solved. The problem is solved. The problem is solved. - Sharp MX-B557F | MX-B557F User Manual - Page 185
Troubleshooting 185 Action Step 8 a Make sure that the printer is not overheating. Notes the printer is on. b Resolve any error messages that appear on the display. c Print the document. The problem is solved. Is the document printed? Step 3 a Check if the ports are working and if the cables are - Sharp MX-B557F | MX-B557F User Manual - Page 186
Troubleshooting 186 Action Step 5 a Remove, and then reinstall the print driver. b Print the document. Is the document printed? Yes The problem is solved. No Contact your dealer. The printer is not responding Action Step 1 Check if the power cord is connected to the electrical outlet. Yes - Sharp MX-B557F | MX-B557F User Manual - Page 187
Troubleshooting Action Yes Step 7 The problem is Turn off the printer, wait for about 10 trays are linked. For more information, see "Linking trays" on page 29. b Print the document. The problem is solved. Is the document printed from the correct tray? 187 No Contact your dealer. No Load the - Sharp MX-B557F | MX-B557F User Manual - Page 188
Troubleshooting Faxing problems Cannot send or receive faxes Action Step 1 Resolve any error messages that appear on the display. Yes The problem is solved. Can you send or receive a fax? Step 2 The problem is Make sure that the cable connections for the following equipment solved. are secure - Sharp MX-B557F | MX-B557F User Manual - Page 189
Troubleshooting Action Yes Step 5 The problem is Check if the printer is connected to an analog phone service or to solved. the correct digital connector. • If you are using an Integrated Services for Digital Network (ISDN) telephone service, then connect to an analog telephone port of an - Sharp MX-B557F | MX-B557F User Manual - Page 190
Troubleshooting Can receive but not send faxes Action Step 1 Load the original document properly into the ADF tray or on the scanner glass. Yes The problem number that you want to dial. • Dial the telephone number manually. The problem is solved. Can you send faxes? Can send but not receive - Sharp MX-B557F | MX-B557F User Manual - Page 191
are no print quality defects. a From the control panel, touch Settings > Troubleshooting > Print Quality Test Pages. b Correct any print quality defects. For more information, see "Print quality is poor" on page 167. Yes The problem is solved. Is the fax print quality satisfactory? Step 2 The - Sharp MX-B557F | MX-B557F User Manual - Page 192
Troubleshooting Partial copies of document or photo Action Yes Step 1 The problem is a Make sure that the document or photo is loaded facedown on solved. the upper left corner of the scanner glass. b Copy the document or photo. Is the document or photo copied correctly? Step 2 The problem - Sharp MX-B557F | MX-B557F User Manual - Page 193
Troubleshooting 193 Scan job was not successful Action Yes Step 1 The problem is Check the cable connections. solved. a Make sure that the Ethernet or USB cable is securely connected to the computer and the printer. b Resend the scan job. Is the scan job successful? Step 2 The problem - Sharp MX-B557F | MX-B557F User Manual - Page 194
Troubleshooting 194 Scanner does not respond Action Step 1 a Check if the power cord is connected properly to the printer and the electrical outlet. Yes The problem > Maintenance > Configuration Menu > Scanner Configuration > Scanner Manual Registration. 2 In the Print Quick Test menu, touch - Sharp MX-B557F | MX-B557F User Manual - Page 195
Troubleshooting 195 3 Place the Print Quick Test page on the ADF tray. 4 Touch Front ADF dealer Before contacting your dealer, make sure to have the following information: • Printer problem • Error message • Printer model type and serial number Visit the place where you purchased your printer - Sharp MX-B557F | MX-B557F User Manual - Page 196
Notices 196 Notices Product information Product name: DIGITAL MULTIFUNCTIONAL SYSTEM MX-B557F/MX-B707F Machine type: 7465 Model(s): 496, 896 Edition notice May 2020 The be replaced by the user include toner cartridges. Be sure to use only SHARP-specified products for the toner cartridges. - Sharp MX-B557F | MX-B557F User Manual - Page 197
Genuine Supplies which are designed, engineered, and tested to maximize the life and performance of Sharp products. Look for the Genuine Supplies label on the toner package. GENUINE SUPPLIES Hot surface notice Hinweis zum GS-Zeichen Modell 496, 896 Gerätetyp - Sharp MX-B557F | MX-B557F User Manual - Page 198
to consumers may be labeled with the recycling mark with the remark "please recycle waste batteries" on the product package, the label, or the product manual. Enclosed please find the waste dry cell batteries recycle logo with the remark. Please give the - Sharp MX-B557F | MX-B557F User Manual - Page 199
Notices 199 waste dry cell batteries to a company who has the waste dry cell batteries recycle logo and provides the recycle service in order to have the appropriate process for the waste dry cell batteries. BSMI battery notice Taiwan RoHS information Applies to Printer, Laser Printer, - Sharp MX-B557F | MX-B557F User Manual - Page 200
Notices 單元 鉛 汞 鎘 (Pb) (Hg) (Cd) 六價鉻 (Cr+6) PBB) 備考 1 2 Static sensitivity notice 200 PBDE) This symbol identifies static-sensitive parts. Do not touch the areas near these symbols without first touching a metal surface in an area away from the symbol. To prevent damage from - Sharp MX-B557F | MX-B557F User Manual - Page 201
is never any human access to laser radiation above a Class I level during normal operation, user maintenance, or prescribed service conditions. The printer has a non-serviceable printhead assembly that contains a laser with the following specifications: Class: IIIb (3b) AlGaAs Nominal output power - Sharp MX-B557F | MX-B557F User Manual - Page 202
Notices 202 Mode Description Power consumption (Watts) Copy The product is generating hard‑copy output from hard‑copy original documents. 750 (7465-496); 900 (7465-896) Scan The product is scanning hard‑copy documents. 84 (7465-496); 86 (7465-896) Ready The product is waiting for a print - Sharp MX-B557F | MX-B557F User Manual - Page 203
printing both sides of paper automatically without turning over the paper manually. If the machine is equipped with the automated duplex printing be provided to your telephone company. This equipment uses the RJ-11C Universal Service Order Code (USOC) jack. A plug and jack used to connect this - Sharp MX-B557F | MX-B557F User Manual - Page 204
trouble with this equipment, for repair or warranty information, contact your point of purchase. If the equipment is causing harm to the telephone network, the telephone company may request that you disconnect the equipment until the problem is resolved. This equipment contains no user serviceable - Sharp MX-B557F | MX-B557F User Manual - Page 205
special conditions for the Facsimile User Instructions. The grant of a telepermit for services. This equipment shall not be set up to make automatic calls to the Telecom "111" Emergency Service number within any 30 minute period for any single manual call initiation, and • The equipment shall go on - Sharp MX-B557F | MX-B557F User Manual - Page 206
Notices 206 Lexmark International, Inc. LEX-M14-002 A18-0046001 Verwendung dieses Produkts in Deutschland Für dieses Produkt muss ein deutscher Billing Tone Filter zur Zählzeichenübertragung (Teilenummer 80D1888) für jede Leitung installiert werden, über die in Deutschland Zeitsteuertakte ü - Sharp MX-B557F | MX-B557F User Manual - Page 207
toutes les interférences, y compris les celles qui peuvent entraîner un fonctionnement indésirable. Afin de prévenir les interférences radio des services sous licence et pour réduire le risque d'interférences nuisibles aux systèmes de satellites mobiles utilisant les mêmes canaux, cet appareil est - Sharp MX-B557F | MX-B557F User Manual - Page 208
and, if not installed and used in accordance with the instruction manual, may cause harmful interference to radio communications. Operation of information statement should be directed to: Director of Lexmark Technology & Services Lexmark International, Inc. 740 West New Circle Road Lexington, KY - Sharp MX-B557F | MX-B557F User Manual - Page 209
Notices 209 Japanese VCCI notice Korean KC statement European Community (EC) directives conformity This product is in conformity with the protection requirements of EC Council directive 2014/53/EU on the approximation and harmonization of the laws of the Member States relating to radio - Sharp MX-B557F | MX-B557F User Manual - Page 210
Notices 210 AT BE BG CH CY CZ DE DK EE EL ES FI FR HR HU IE IS IT LI LT LU LV MT NL NO PL PT RO SE SI SK TR UK EU statement of radio transmitter operational frequency bands and maximum RF power This radio product transmits in either the 2.4GHz (2.412-2.472 GHz in - Sharp MX-B557F | MX-B557F User Manual - Page 211
to reflect such. The Environmentally Friendly Use Period is valid only when the product is operated under the conditions defined in the product manual. Taiwan NCC RF notice statements NCC 5.25 ~ 5.35 BSMI EMC notice Warning to user: This is a Class A ITE. In a residential area, this product - Sharp MX-B557F | MX-B557F User Manual - Page 212
Notices 212 Avis de conformité aux normes de l'industrie du Canada Cet appareil numérique de classe A est conforme aux exigences de la norme canadienne relative aux équipements pouvant causer des interférences NMB-003. CCC EMC notice Notice to users of Class A products in Brazil Este produto não - Sharp MX-B557F | MX-B557F User Manual - Page 213
the SMTP server for fax 47 connecting printer to distinctive ring service 54 connecting the mobile device to the printer wireless network 132 adding 18 deleting 19 editing 19 control panel using 14 copy troubleshooting partial copies of documents or photos 192 poor copy quality 192 - Sharp MX-B557F | MX-B557F User Manual - Page 214
deleting groups 19 different paper sizes, copying 42 distinctive ring service, fax enabling 54 documents scanning to a fax server 59 documents line connection 48 fax speaker configuring the settings 131 fax troubleshooting cannot receive faxes 190 cannot send faxes 190 cannot send or - Sharp MX-B557F | MX-B557F User Manual - Page 215
126 Network Overview 106 Notifications 64 Out of Service Erase 72 PCL 79 PDF 78 PostScript 78 Settings 124 TCP/IP 109 ThinPrint 115 Tray Configuration 81 Troubleshooting 126 Universal Setup 82 USB 115 Visible Home Screen Icons supported 33 partial copies of documents or photos 192 - Sharp MX-B557F | MX-B557F User Manual - Page 216
from the printer control panel 41 print jobs not printed 185 print quality cleaning the scanner 133 Print Quality Test Pages 126 print quality troubleshooting blank pages 167 crooked or skewed print 175 dark print 167 fine lines are not printed correctly 169 folded or wrinkled paper 169 - Sharp MX-B557F | MX-B557F User Manual - Page 217
paper sizes 30 supported paper types 33 supported paper weights 34 T telecommunication notices 206 temperature around the printer 200 toner cartridge ordering 136 replacing 136 toner darkness adjusting 187 tray linking does not work 165 trays loading 20 troubleshooting cannot open - Sharp MX-B557F | MX-B557F User Manual - Page 218
Index 218 unlinking trays 29 USB cable 13 USB port 13 enabling 162 using the ADF copying 42 using the automatic document feeder (ADF) 42, 45, 54, 57 using the control panel 14 using the home screen 15 using the scanner glass 42, 45, 54, 57 copying 42 V verify print jobs 40 printing 40
-
 1
1 -
 2
2 -
 3
3 -
 4
4 -
 5
5 -
 6
6 -
 7
7 -
8
-
9
-
10
-
11
-
12
-
13
-
14
-
15
-
16
-
17
-
18
-
19
-
20
-
21
-
22
-
23
-
24
-
25
-
26
-
27
-
28
-
29
-
30
-
31
-
32
-
33
-
34
-
35
-
36
-
37
-
38
-
39
-
40
-
41
-
42
-
43
-
44
-
45
-
46
-
47
-
48
-
49
-
50
-
51
-
52
-
53
-
54
-
55
-
56
-
57
-
58
-
59
-
60
-
61
-
62
-
63
-
64
-
65
-
66
-
67
-
68
-
69
-
70
-
71
-
72
-
73
-
74
-
75
-
76
-
77
-
78
-
79
-
80
-
81
-
82
-
83
-
84
-
85
-
86
-
87
-
88
-
89
-
90
-
91
-
92
-
93
-
94
-
95
-
96
-
97
-
98
-
99
-
100
-
101
-
102
-
103
-
104
-
105
-
106
-
107
-
108
-
109
-
110
-
111
-
112
-
113
-
114
-
115
-
116
-
117
-
118
-
119
-
120
-
121
-
122
-
123
-
124
-
125
-
126
-
127
-
128
-
129
-
130
-
131
-
132
-
133
-
134
-
135
-
136
-
137
-
138
-
139
-
140
-
141
-
142
-
143
-
144
-
145
-
146
-
147
-
148
-
149
-
150
-
151
-
152
-
153
-
154
-
155
-
156
-
157
-
158
-
159
-
160
-
161
-
162
-
163
-
164
-
165
-
166
-
167
-
168
-
169
-
170
-
171
-
172
-
173
-
174
-
175
-
176
-
177
-
178
-
179
-
180
-
181
-
182
-
183
-
184
-
185
-
186
-
187
-
188
-
189
-
190
-
191
-
192
-
193
-
194
-
195
-
196
-
197
-
198
-
199
-
200
-
201
-
202
-
203
-
204
-
205
-
206
-
207
-
208
-
209
-
210
-
211
-
212
-
213
-
214
-
215
-
216
-
217
-
218
 |
 |

DIGITAL MULTIFUNCTIONAL
SYSTEM
MX-B557F
User's Guide
Machine type(s):
7465
Models:
496, 896