Sharp MX-M200D Operation Manual - Page 23
Changing The Paper Size Setting Of A Tray - fax
 |
View all Sharp MX-M200D manuals
Add to My Manuals
Save this manual to your list of manuals |
Page 23 highlights
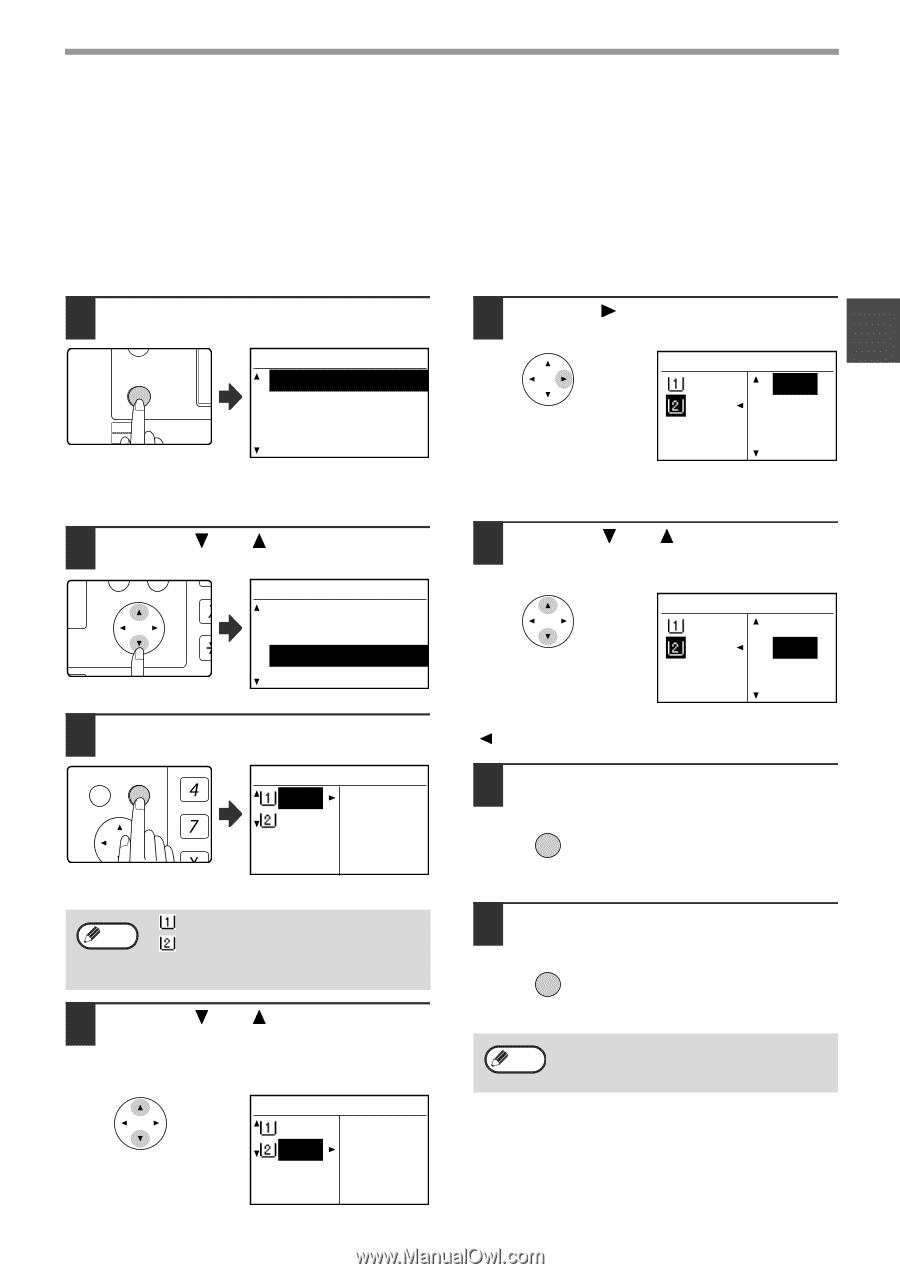
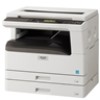
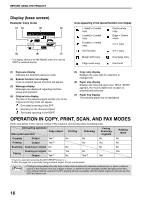
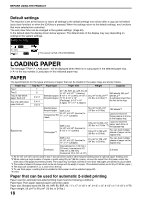
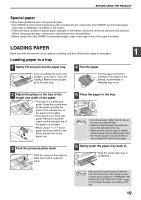
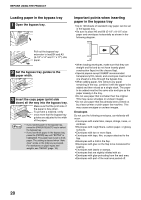
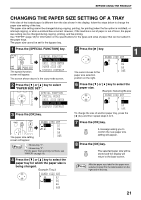
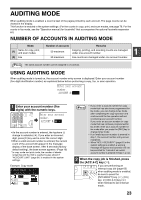
BEFORE USING THE PRODUCT CHANGING THE PAPER SIZE SETTING OF A TRAY If the size of the loaded paper is different from the size shown in the display, follow the steps below to change the paper size setting of the tray. The paper size setting cannot be changed during copying, printing, fax printing (when the fax option is installed), or interrupt copying, or when a misfeed has occurred. However, if the machine is out of paper or out of toner, the paper size setting can be changed during copying, printing, and fax printing. See "PAPER" (page 18) for information on the specifications for the types and sizes of paper that can be loaded in the paper trays. The paper size cannot be set for the bypass tray. 1 Press the [SPECIAL FUNCTION] key. ON LINE DATA SPECIAL FUNCTION LINE DATA COPY EXPOSURE PAPER SE SCAN COLOUR MODE RESOLUT The special function screen will appear. SPECIAL FUNCTION SPECIAL MODES ORIG. SIZE ENTER PAPER SIZE SET DISPLAY CONTRAST The screen shown above is the copy mode screen. 2 Press the [ ] or [ ] key to select "PAPER SIZE SET". PQ SPECIAL FUNCTION SPECIAL MODES ED COPY ORIG. SIZE ENTER LEX SCAN LEX SCAN PAPER SIZE SET ACC DISPLAY CONTRAST 3 Press the [OK] key. 5 Press the [ ] key. 1 The cursor moves to the paper size selection position on the right. PAPER SIZE SET A4 A3 A3 B4 A4 A4R 6 Press the [ ] or [ ] key to select the paper size. Example: Selecting B4 size PAPER SIZE SET A4 A3 A3 B4 A4 A4R To change the size of another paper tray, press the [ ] key and then repeat steps 4 to 6. BACK OK GHI PQRS PY AN The paper size setting screen will appear. PAPER SIZE SET A4 A3 A3 B4 A4 A4R Note : Shows tray "1". : Shows tray "2". For the paper trays and tray numbers, see "PAPER" on page 18. 4 Press the [ ] or [ ] key to select the paper tray for which the paper size is being changed. Example: Tray 2 PAPER SIZE SET A4 A3 A3 B4 A4 A4R 7 Press the [OK] key. OK A message asking you to confirm the new paper size setting will appear. 8 Press the [OK] key. OK The selected paper size will be stored and the display will return to the base screen. Note Affix the paper size label for the paper size selected in step 6 to the label position on the right end of the tray. 21
-
 1
1 -
2
-
3
-
4
-
5
-
6
-
7
-
8
-
9
-
10
-
11
-
12
-
13
-
14
-
15
-
16
-
17
-
 18
18 -
 19
19 -
 20
20 -
 21
21 -
 22
22 -
 23
23 -
 24
24 -
 25
25 -
 26
26 -
 27
27 -
 28
28 -
29
-
30
-
31
-
32
-
33
-
34
-
35
-
36
-
37
-
38
-
39
-
40
-
41
-
42
-
43
-
44
-
45
-
46
-
47
-
48
-
49
-
50
-
51
-
52
-
53
-
54
-
55
-
56
-
57
-
58
-
59
-
60
-
61
-
62
-
63
-
64
-
65
-
66
-
67
-
68
-
69
-
70
-
71
-
72
-
73
-
74
-
75
-
76
-
77
-
78
-
79
-
80
-
81
-
82
-
83
-
84
-
85
-
86
-
87
-
88
-
89
-
90
-
91
-
92
-
93
-
94
-
95
-
96
-
97
-
98
-
99
-
100
 |
 |