Sharp MX-M200D Operation Manual - Page 71
Erasing Shadows Around The, Edges Of A Copy
 |
View all Sharp MX-M200D manuals
Add to My Manuals
Save this manual to your list of manuals |
Page 71 highlights
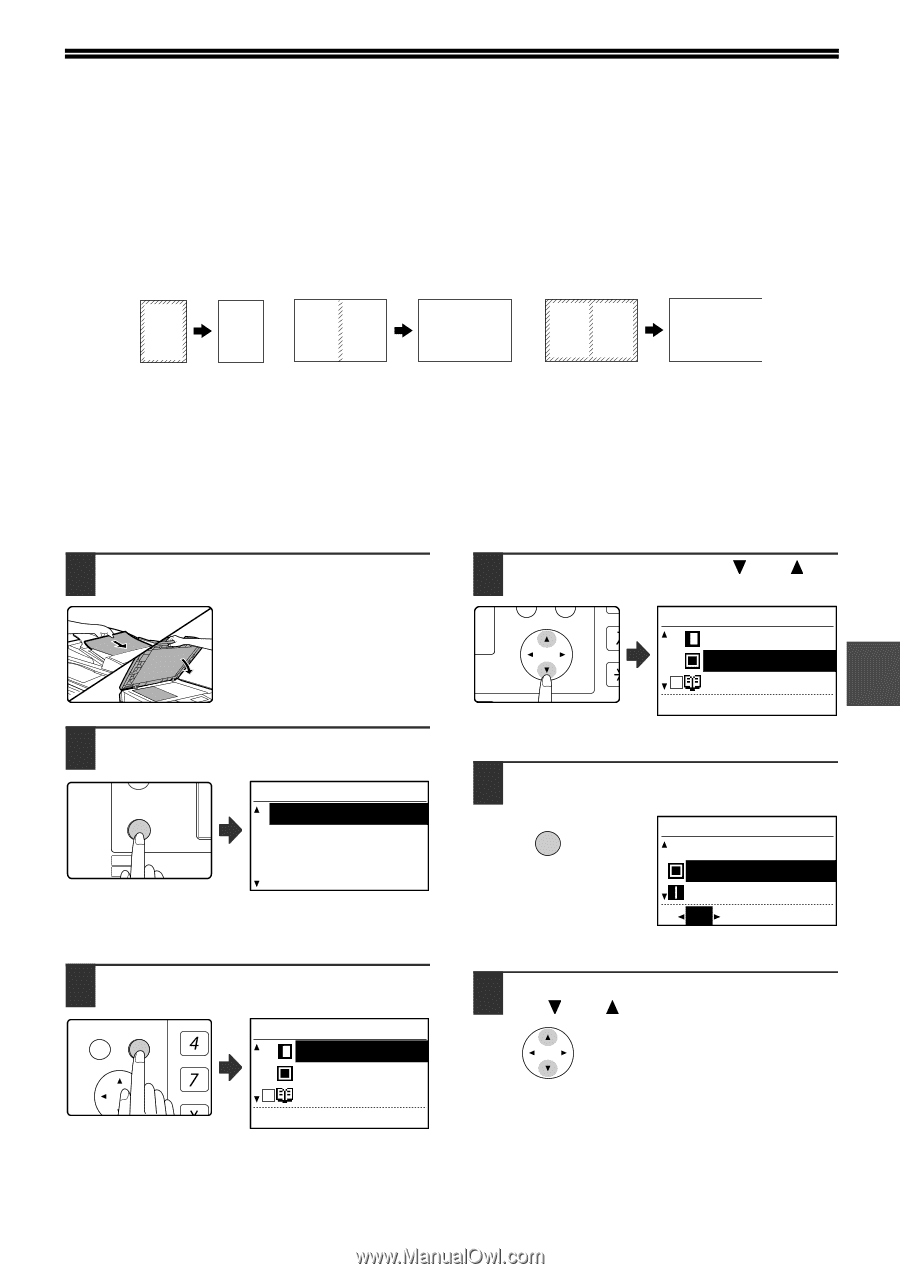
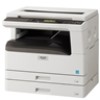
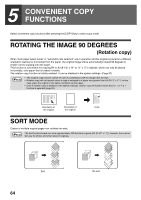
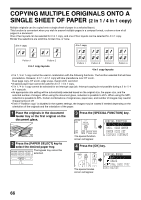
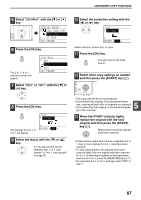
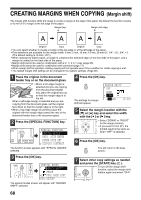
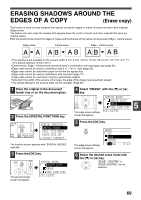
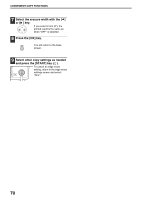
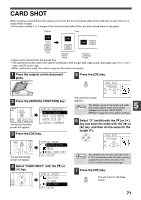
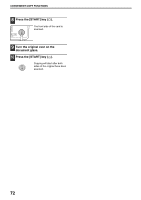
ERASING SHADOWS AROUND THE EDGES OF A COPY (Erase copy) This feature is used to erase shadows that appear around the edges of copies of books and other thick originals. (Edge erase) The feature can also erase the shadow that appears down the centre of books and other originals that open up. (Centre erase) Both the shadow lines around the edges of copies and the shadow at the centre can be erased. (Edge + Centre erase) Edge erase AA Centre erase AB AB Edge + Centre erase AB AB • Five selections are available for the erasure width: 0 mm, 5 mm, 10 mm, 15 mm, 20 mm (0", 1/4", 1/2", 3/4", 1"). (The default setting is 10 mm (1/2").) • Centre erase / Edge + Centre erase cannot be used in combination with dual page copy (page 62). • Edge erase cannot be used in combination with 2 in 1 / 4 in 1 copy (page 66). • Edge erase cannot be used when paper is fed from the bypass tray. • Edge erase cannot be used in combination with card shot (page 71). • Edge erase cannot be used when copying a special size original. • Note that if the width of the erasure is too large, the edge of the image may be partially erased. • The default setting for the erasure width can be changed. (Page 86) 1 Place the original in the document feeder tray or on the document glass. 2 Press the [SPECIAL FUNCTION] key. ON LINE DATA SPECIAL FUNCTION LINE DATA COPY EXPOSURE PAPER SE SCAN COLOUR MODE RESOLUT SPECIAL FUNCTION SPECIAL MODES ORIG. SIZE ENTER PAPER SIZE SET DISPLAY CONTRAST The function screen appears with "SPECIAL MODES" selected. 3 Press the [OK] key. BACK OK GHI PQRS PY AN The special modes screen will appear. SPECIAL MODES MARGIN SHIFT ERASE DUAL PAGE COPY [OK]:ADJUST 4 Select "ERASE" with the [ ] or [ ] key. PQ SPECIAL MODES MARGIN SHIFT ED COPY LEX SCAN LEX SCAN 5 ERASE DUAL PAGE COPY ACC The edge erase settings [OK]:ADJUST screen will appear. 5 Press the [OK] key. OK The edge erase settings screen will appear. ERASE OFF EDGE CENTRE 10 mm (0~20) 6 Select the desired erase mode with the [ ] or [ ] key. "EDGE", "CENTRE" or "EDGE+CENTRE" can be selected. 69
-
 1
1 -
2
-
3
-
4
-
5
-
6
-
7
-
8
-
9
-
10
-
11
-
12
-
13
-
14
-
15
-
16
-
17
-
18
-
19
-
20
-
21
-
22
-
23
-
24
-
25
-
26
-
27
-
28
-
29
-
30
-
31
-
32
-
33
-
34
-
35
-
36
-
37
-
38
-
39
-
40
-
41
-
42
-
43
-
44
-
45
-
46
-
47
-
48
-
49
-
50
-
51
-
52
-
53
-
54
-
55
-
56
-
57
-
58
-
59
-
60
-
61
-
62
-
63
-
64
-
65
-
 66
66 -
 67
67 -
 68
68 -
 69
69 -
 70
70 -
 71
71 -
 72
72 -
 73
73 -
 74
74 -
 75
75 -
 76
76 -
77
-
78
-
79
-
80
-
81
-
82
-
83
-
84
-
85
-
86
-
87
-
88
-
89
-
90
-
91
-
92
-
93
-
94
-
95
-
96
-
97
-
98
-
99
-
100
 |
 |