Sharp MX-M200D Operation Manual - Page 88
Copy Settings
 |
View all Sharp MX-M200D manuals
Add to My Manuals
Save this manual to your list of manuals |
Page 88 highlights
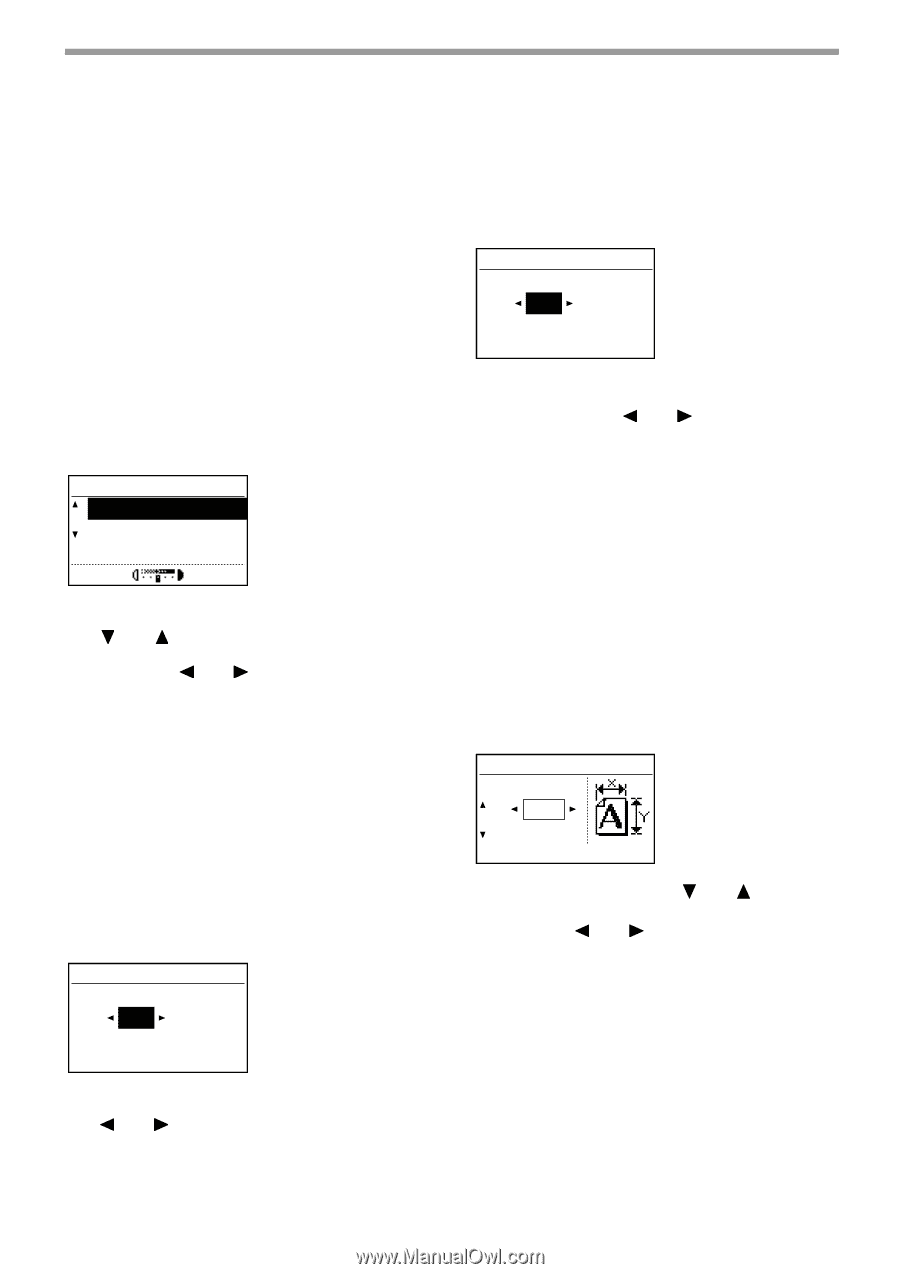
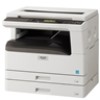
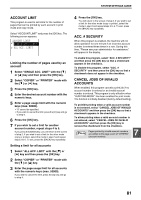
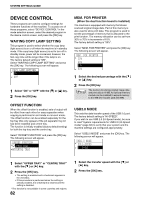
SYSTEM SETTINGS GUIDE COPY SETTINGS These programs are used to enable various copy functions. To access one of these programs, select "COPIER" in the mode selection screen, select the desired program in the copy settings screen, and press the [OK] key. EXPOSURE ADJUST This program is used to adjust the exposure level when "AUTO" is used for the exposure mode. The auto exposure level can be set separately for the document glass and the SPF. One of five levels can be selected, with the left end of the scale the lightest level and the right end of the scale the darkest level. The factory default setting is the middle level. Select "EXPOSURE ADJUST" and press the [OK] key. The following screen will appear. EXPOSURE ADJUST PLATEN SPF/RSPF 1 Select "PLATEN" or "SPF/RSPF" with the [ ] or [ ] key. 2 Press the [ ] or [ ] key to adjust the exposure. 3 Repeat steps 1 and 2 to adjust the other exposure. 4 Press the [OK] key. MARGIN DEFAULT (When the dual function board is installed) This is used to set the default margin width. The factory default setting is "10 mm (1/2 inch)". Select "MARGIN DEFAULT" and press the [OK] key. The following screen will appear. MARGIN DEFAULT mm (0~20) 1 Adjust the default margin width with the [ ] or [ ] key. The width can be set from 0 to 20 mm in increments of 5 mm (0" to 1" in increments of 1/4"). 2 Press the [OK] key. 86 ERASE ADJUST (When the dual function board is installed) This is used to set the default erasure width. The factory default setting is "10 mm (1/2 inch)". Select "ERASE ADJUST" and press the [OK] key. The following screen will appear. ERASE ADJUST mm (0~20) 1 Adjust the edge erase and centre erase width with the [ ] or [ ] key. The edge erase width and the centre erase width share the same default value, which can be set from 0 to 20 mm in increments of 5 mm (0" to 1" in increments of 1/4"). 2 Press the [OK] key. CARD SHOT DEFAULT (When the dual function board is installed) This program is used to set the default dimensions that appear when the card shot size entry screen is displayed. The factory default settings are 86 mm (3-3/8") for the width (X) and 54 mm (2-1/8") for the length (Y). Select "CARD SHOT DEFAULT" and press the [OK] key. The following screen will appear. CARD SHOT DEFAULT SIZE(mm) X: Y: 1 Select X or Y with the [ ] or [ ] key and adjust the corresponding default value with the [ ] or [ ] key. 2 Press the [OK] key. DEFAULT TRAY SET This program is used to set which tray is selected by default. Trays that appear for selection will vary depending on the optional trays that have been installed. The factory default setting is "TRAY 1".
-
 1
1 -
2
-
3
-
4
-
5
-
6
-
7
-
8
-
9
-
10
-
11
-
12
-
13
-
14
-
15
-
16
-
17
-
18
-
19
-
20
-
21
-
22
-
23
-
24
-
25
-
26
-
27
-
28
-
29
-
30
-
31
-
32
-
33
-
34
-
35
-
36
-
37
-
38
-
39
-
40
-
41
-
42
-
43
-
44
-
45
-
46
-
47
-
48
-
49
-
50
-
51
-
52
-
53
-
54
-
55
-
56
-
57
-
58
-
59
-
60
-
61
-
62
-
63
-
64
-
65
-
66
-
67
-
68
-
69
-
70
-
71
-
72
-
73
-
74
-
75
-
76
-
77
-
78
-
79
-
80
-
81
-
82
-
 83
83 -
 84
84 -
 85
85 -
 86
86 -
 87
87 -
 88
88 -
 89
89 -
 90
90 -
 91
91 -
 92
92 -
 93
93 -
94
-
95
-
96
-
97
-
98
-
99
-
100
 |
 |