Sharp MX-M450N Operation Manual - Page 108
Special Papers
 |
View all Sharp MX-M450N manuals
Add to My Manuals
Save this manual to your list of manuals |
Page 108 highlights
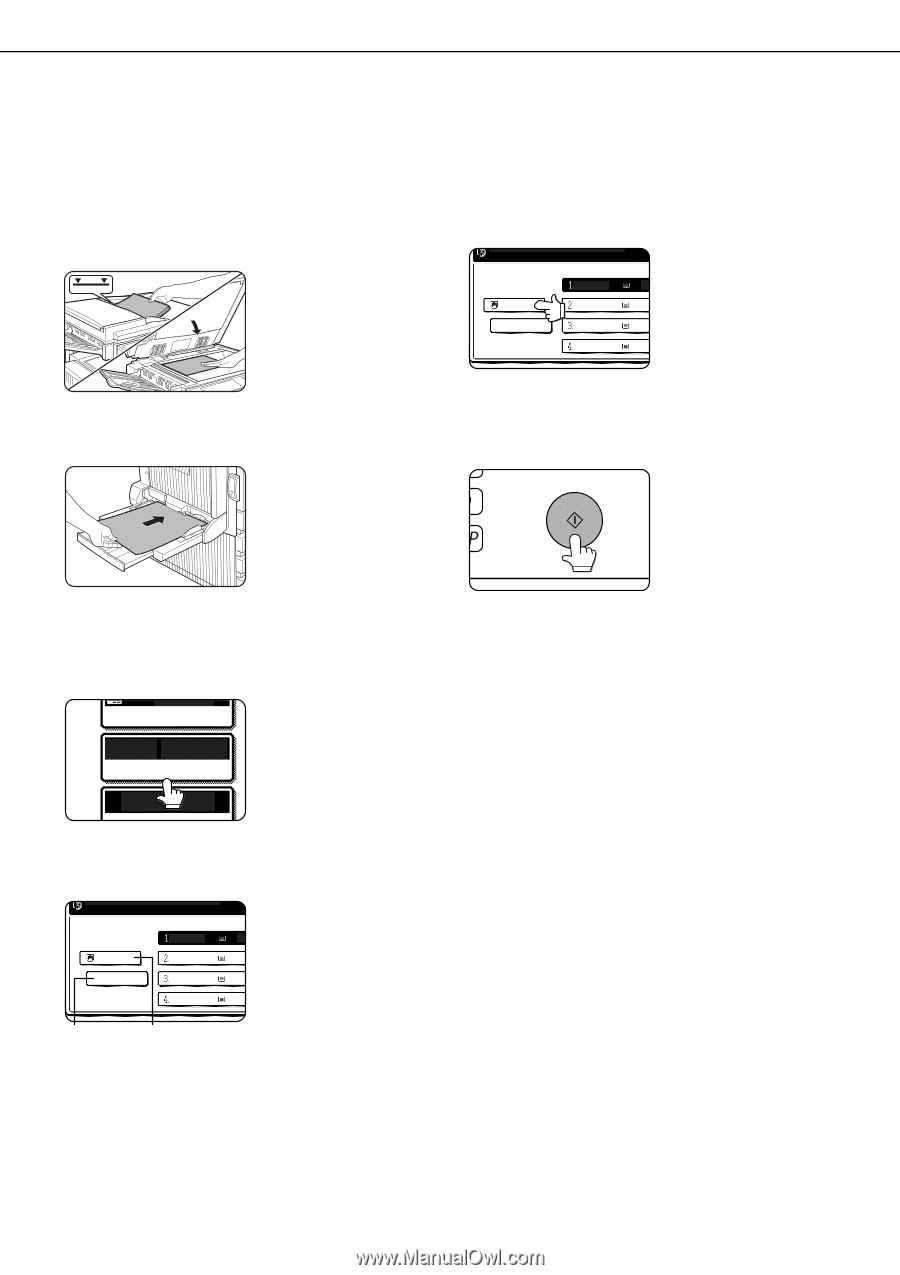
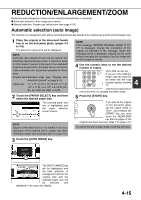
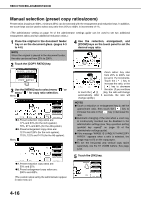
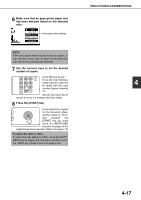
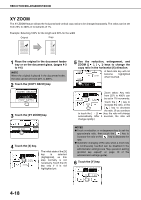
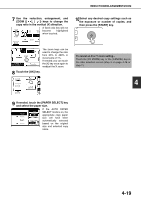
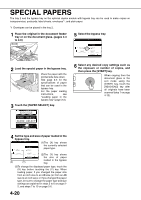
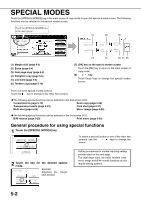
SPECIAL PAPERS The tray 2 and the bypass tray on the optional duplex module with bypass tray can be used to make copies on transparencies, postcards, label sheets, envelopes*1, and plain paper. *1 Envelopes can be placed in the tray 2. 1 Place the original in the document feeder tray or on the document glass. (pages 4-3 to 4-6) 5 Select the bypass tray. READY TO SCAN FOR COPY 81/2x11 P 81/2 x11 11x17 P PLAIN 11x17 P 81/2 x11 P 2 Load the special paper in the bypass tray. Place the paper with the printed side face down. See page 2-3 for the specifications of paper that can be used in the bypass tray. For the paper loading instructions, see "Loading paper in the bypass tray" (page 3-3). 3 Touch the [PAPER SELECT] key. AUTO 4 EXPOSURE AUTO 81/2x11 PAPER SELECT 100% COPY 4 Set the type and size of paper loaded in the bypass tray. READY TO SCAN FOR COPY (1)The (X) key shows 81/2 x11 81/2x11 11x17 the currently selected P paper type. P PLAIN 11x17 81/2 x11 (X) (Y) P (2)The (Y) key shows P the size of paper loaded in the bypass tray. (3)To change the displayed paper type, touch the (X) key before touching the (Y) key. When loading paper, if you changed the paper size from an inch size to an AB size (or from an AB size to an inch size), or if you changed the paper type, be sure to change the paper type and size settings as explained in steps 5 to 6 on page 25, and steps 7 to 10 on page 2-6. 4-20 6 Select any desired copy settings such as the exposure or number of copies, and then press the [START] key. When copying from the document glass in the sort mode using the [START] key, touch the [READ-END] key after all originals have been scanned (step 7 on page 4-12).
-
 1
1 -
2
-
3
-
4
-
5
-
6
-
7
-
8
-
9
-
10
-
11
-
12
-
13
-
14
-
15
-
16
-
17
-
18
-
19
-
20
-
21
-
22
-
23
-
24
-
25
-
26
-
27
-
28
-
29
-
30
-
31
-
32
-
33
-
34
-
35
-
36
-
37
-
38
-
39
-
40
-
41
-
42
-
43
-
44
-
45
-
46
-
47
-
48
-
49
-
50
-
51
-
52
-
53
-
54
-
55
-
56
-
57
-
58
-
59
-
60
-
61
-
62
-
63
-
64
-
65
-
66
-
67
-
68
-
69
-
70
-
71
-
72
-
73
-
74
-
75
-
76
-
77
-
78
-
79
-
80
-
81
-
82
-
83
-
84
-
85
-
86
-
87
-
88
-
89
-
90
-
91
-
92
-
93
-
94
-
95
-
96
-
97
-
98
-
99
-
100
-
101
-
102
-
 103
103 -
 104
104 -
 105
105 -
 106
106 -
 107
107 -
 108
108 -
 109
109 -
 110
110 -
 111
111 -
 112
112 -
 113
113 -
114
-
115
-
116
-
117
-
118
-
119
-
120
-
121
-
122
-
123
-
124
-
125
-
126
-
127
-
128
-
129
-
130
-
131
-
132
-
133
-
134
-
135
-
136
-
137
-
138
-
139
-
140
-
141
-
142
-
143
-
144
-
145
-
146
-
147
-
148
-
149
-
150
-
151
-
152
-
153
-
154
-
155
-
156
-
157
-
158
-
159
-
160
-
161
-
162
-
163
-
164
-
165
-
166
-
167
-
168
-
169
-
170
-
171
-
172
-
173
-
174
-
175
-
176
-
177
-
178
-
179
-
180
-
181
-
182
-
183
-
184
-
185
-
186
-
187
-
188
-
189
-
190
-
191
-
192
-
193
-
194
-
195
-
196
-
197
-
198
-
199
-
200
 |
 |