Sharp MX-M450N Operation Manual - Page 111
Margin shift, Set the shift amount as needed and touch
 |
View all Sharp MX-M450N manuals
Add to My Manuals
Save this manual to your list of manuals |
Page 111 highlights
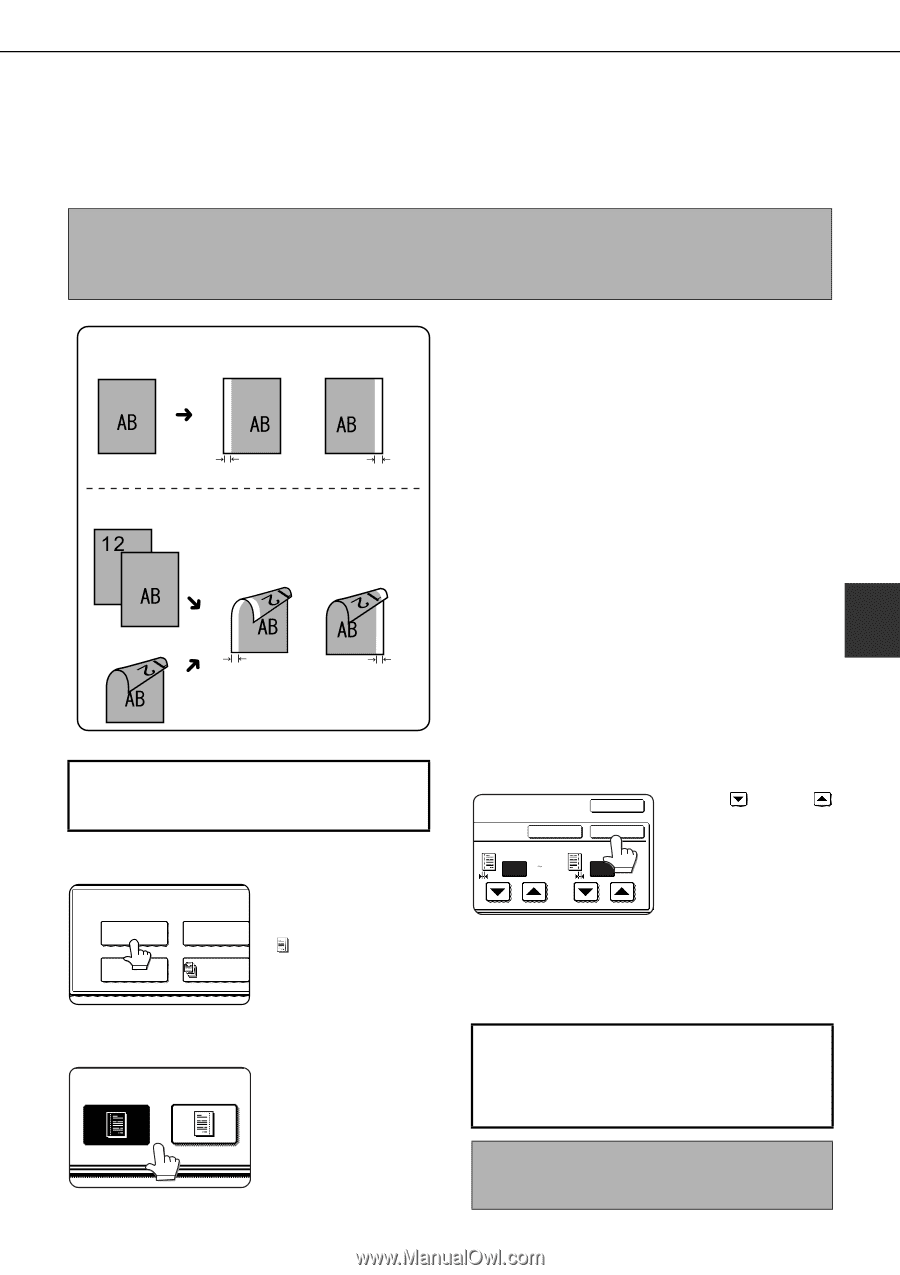
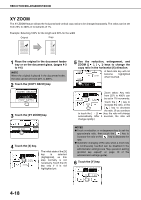
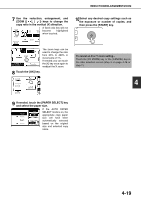
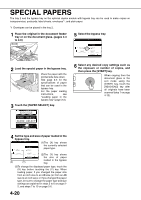
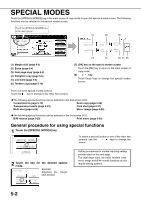
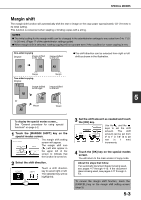
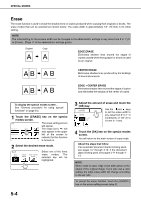
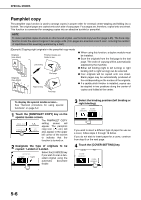
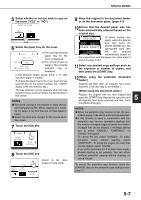
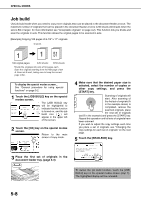
SPECIAL MODES Margin shift The margin shift function will automatically shift the text or image on the copy paper approximately 1/2" (10 mm) in its initial setting. This function is convenient when stapling or binding copies with a string. NOTES ● The initial setting for the margin width can be changed in the administrator settings to any value from 0 to 1" (0 to 20 mm). (Page 17 of the administrator settings guide) ● When margin shift is selected, rotating copying will not operate even if the condition for rotate copying is met. One-sided copying Original Image shifted to the right Image shifted to the left ●The shift direction can be selected from right or left shift as shown in the illustration. Margin Two-sided copying Original Image shifted to the right Margin Image shifted to the left 5 Or Margin Margin To display the special modes screen... See "General procedure for using special functions" on page 5-2. 1 Touch the [MARGIN SHIFT] key on the special modes screen. SPECIAL MODES The margin shift setting screen will appear. MARGIN SHIFT The margin shift icon ERASE ( ) will also appear in PAMPHLET COPY JOB the upper left of the BUILD screen to indicate that the function is turned on. 2 Select the shift direction. RIGHT LEFT Touch a shift direction key to select right or left. The selected key will be highlighted. 3 Set the shift amount as needed and touch the [OK] key. Use the and the OK keys to set the shift CANCEL SIDE 1 1/2 (0 1) inch OK SIDE 2 1/2 (0 1) inch amount. The shift amount can be set from 0" to 1" in 1/8" (0 to 20 mm in 1 mm) increments. 4 Touch the [OK] key on the special modes screen. You will return to the main screen of copy mode. About the steps that follow If an automatic document feeder is being used, see pages 4-7 through 4-10. If the document glass is being used, see pages 4-11 through 413. To cancel the margin shift function, touch the [CANCEL] key on the margin shift setting screen (step 3). 5-3
-
 1
1 -
2
-
3
-
4
-
5
-
6
-
7
-
8
-
9
-
10
-
11
-
12
-
13
-
14
-
15
-
16
-
17
-
18
-
19
-
20
-
21
-
22
-
23
-
24
-
25
-
26
-
27
-
28
-
29
-
30
-
31
-
32
-
33
-
34
-
35
-
36
-
37
-
38
-
39
-
40
-
41
-
42
-
43
-
44
-
45
-
46
-
47
-
48
-
49
-
50
-
51
-
52
-
53
-
54
-
55
-
56
-
57
-
58
-
59
-
60
-
61
-
62
-
63
-
64
-
65
-
66
-
67
-
68
-
69
-
70
-
71
-
72
-
73
-
74
-
75
-
76
-
77
-
78
-
79
-
80
-
81
-
82
-
83
-
84
-
85
-
86
-
87
-
88
-
89
-
90
-
91
-
92
-
93
-
94
-
95
-
96
-
97
-
98
-
99
-
100
-
101
-
102
-
103
-
104
-
105
-
 106
106 -
 107
107 -
 108
108 -
 109
109 -
 110
110 -
 111
111 -
 112
112 -
 113
113 -
 114
114 -
 115
115 -
 116
116 -
117
-
118
-
119
-
120
-
121
-
122
-
123
-
124
-
125
-
126
-
127
-
128
-
129
-
130
-
131
-
132
-
133
-
134
-
135
-
136
-
137
-
138
-
139
-
140
-
141
-
142
-
143
-
144
-
145
-
146
-
147
-
148
-
149
-
150
-
151
-
152
-
153
-
154
-
155
-
156
-
157
-
158
-
159
-
160
-
161
-
162
-
163
-
164
-
165
-
166
-
167
-
168
-
169
-
170
-
171
-
172
-
173
-
174
-
175
-
176
-
177
-
178
-
179
-
180
-
181
-
182
-
183
-
184
-
185
-
186
-
187
-
188
-
189
-
190
-
191
-
192
-
193
-
194
-
195
-
196
-
197
-
198
-
199
-
200
 |
 |