Sharp MX-M450N Operation Manual - Page 135
Card shot, Touch the [CARD SHOT] key in the special
 |
View all Sharp MX-M450N manuals
Add to My Manuals
Save this manual to your list of manuals |
Page 135 highlights
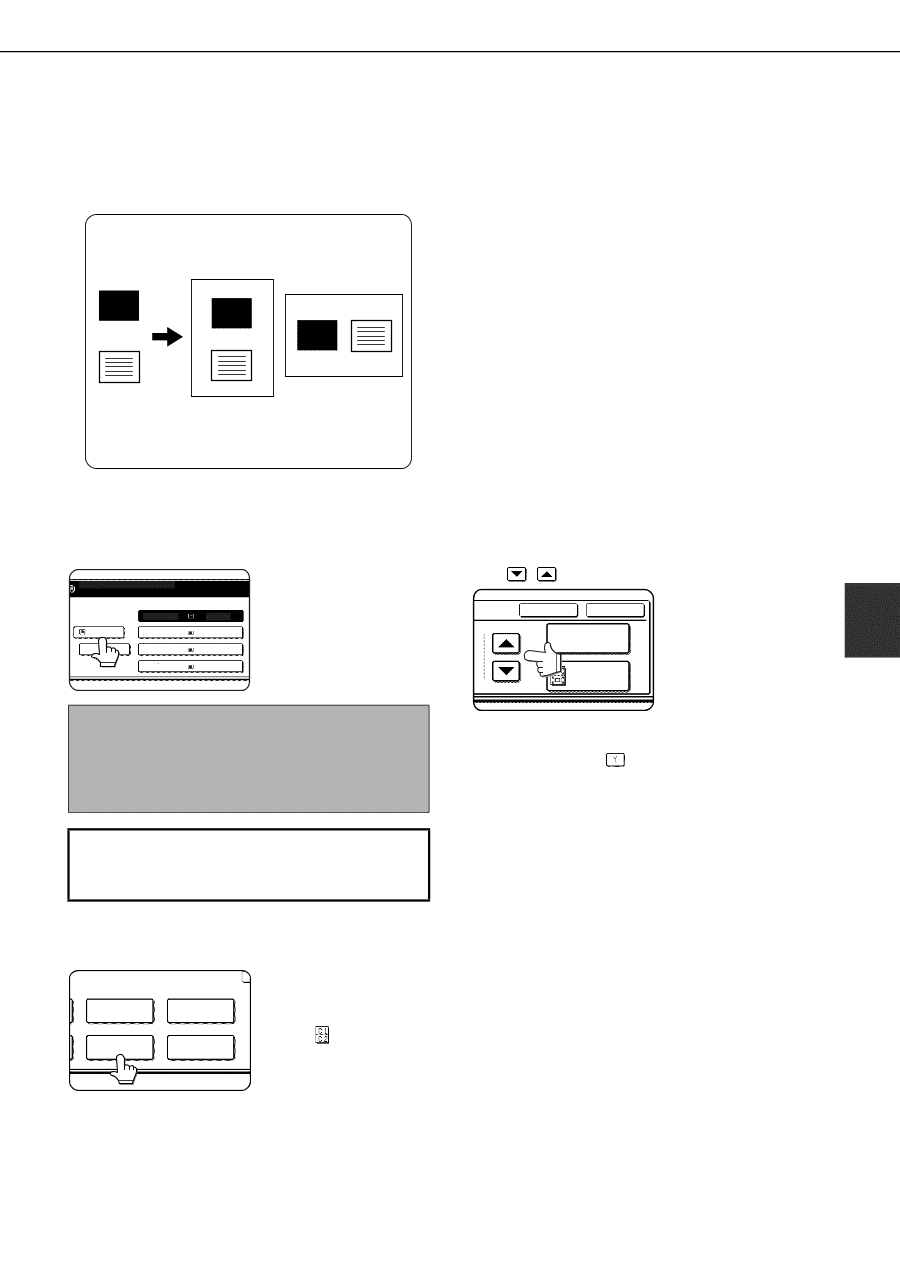
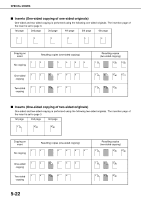
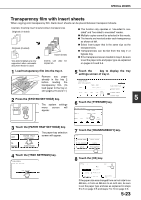
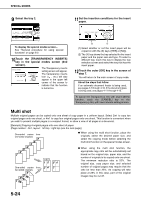
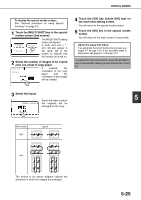
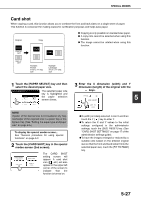
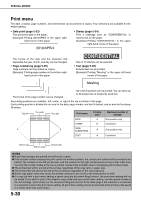
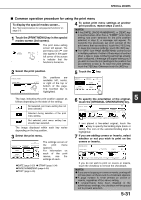
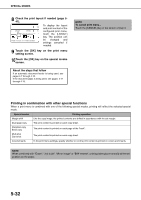
SPECIAL MODES Card shot When copying a card, this function allows you to combine the front and back sides on a single sheet of paper. This function is convenient for making copies for certification purposes and helps save paper. Original CARD Front of card Copy CARD CARD ● Copying is only possible on standard size paper. ● A copy ratio cannot be selected when using this function. ● The image cannot be rotated when using this function. Back of card Example: Portrait 8-1/2" x 11" (A4) size Example: Landscape 8-1/2" x 11" (A4) size 1 Touch the [PAPER SELECT] key and then select the desired paper size. READY TO SCAN FOR COPY. 81/2x11 PLAIN 1. 81/2x11 2. 11x17 3. 11x17 4. 81/2x11 PLAIN PLAIN PLAIN PLAIN The selected paper size key is highlighted and the paper selection screen closes. NOTE If paper of the desired size is not loaded in any tray, load paper of the required size in a paper tray or the bypass tray. (See "Setting the paper type and paper size" on page 2-5.) To display the special modes screen... See "General procedure for using special functions" on page 5-2. 2 Touch the [CARD SHOT] key in the special modes screen (2nd screen). TRANSPARENCY INSERTS CARD SHOT MULTI SHOT MIRROR IMAGE The CARD SHOT setting screen will appear. A card shot icon ( , etc.) will also appear in the upper left corner of the screen to indicate that the function is turned on. 3 Enter the X dimension (width) and Y dimension (length) of the original with the keys. CANCEL OK 5 SIZE RESET FIT TO PAGE ●X (width) is initially selected. Enter X and then touch the Y ( ) key to enter Y. ●To return the X and Y values to the initial settings configured in the administrator settings, touch the [SIZE RESET] key. (See "CARD SHOT SETTINGS" on page 17 of the administrator settings guide). ●To have the images enlarged or reduced by a suitable ratio based on the entered original size so that the front and back sides fit into the selected paper size, touch the [FIT TO PAGE] key. 5-27
-
 1
1 -
2
-
3
-
4
-
5
-
6
-
7
-
8
-
9
-
10
-
11
-
12
-
13
-
14
-
15
-
16
-
17
-
18
-
19
-
20
-
21
-
22
-
23
-
24
-
25
-
26
-
27
-
28
-
29
-
30
-
31
-
32
-
33
-
34
-
35
-
36
-
37
-
38
-
39
-
40
-
41
-
42
-
43
-
44
-
45
-
46
-
47
-
48
-
49
-
50
-
51
-
52
-
53
-
54
-
55
-
56
-
57
-
58
-
59
-
60
-
61
-
62
-
63
-
64
-
65
-
66
-
67
-
68
-
69
-
70
-
71
-
72
-
73
-
74
-
75
-
76
-
77
-
78
-
79
-
80
-
81
-
82
-
83
-
84
-
85
-
86
-
87
-
88
-
89
-
90
-
91
-
92
-
93
-
94
-
95
-
96
-
97
-
98
-
99
-
100
-
101
-
102
-
103
-
104
-
105
-
106
-
107
-
108
-
109
-
110
-
111
-
112
-
113
-
114
-
115
-
116
-
117
-
118
-
119
-
120
-
121
-
122
-
123
-
124
-
125
-
126
-
127
-
128
-
129
-
 130
130 -
 131
131 -
 132
132 -
 133
133 -
 134
134 -
 135
135 -
 136
136 -
 137
137 -
 138
138 -
 139
139 -
 140
140 -
141
-
142
-
143
-
144
-
145
-
146
-
147
-
148
-
149
-
150
-
151
-
152
-
153
-
154
-
155
-
156
-
157
-
158
-
159
-
160
-
161
-
162
-
163
-
164
-
165
-
166
-
167
-
168
-
169
-
170
-
171
-
172
-
173
-
174
-
175
-
176
-
177
-
178
-
179
-
180
-
181
-
182
-
183
-
184
-
185
-
186
-
187
-
188
-
189
-
190
-
191
-
192
-
193
-
194
-
195
-
196
-
197
-
198
-
199
-
200
 |
 |