Sharp MX-M450N Operation Manual - Page 140
Printing in combination with other special functions
 |
View all Sharp MX-M450N manuals
Add to My Manuals
Save this manual to your list of manuals |
Page 140 highlights
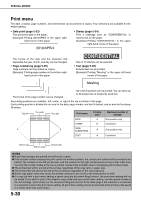
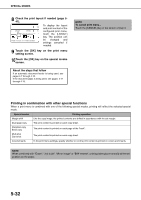
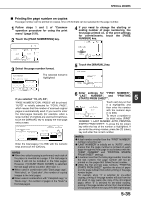
SPECIAL MODES 8 Check the print layout if needed (page 541). OK LAYOUT CANCEL OK 2-SIDED ORIGINAL TYPE 2 S WHEN COPYING ON COVERS/INSERTS To display the layout and print content of the configured print menu, touch the [LAYOUT] key. The position can be changed and settings canceled if needed. 9 Touch the [OK] key on the print menu setting screen. 10Touch the [OK] key on the special modes screen. About the steps that follow If an automatic document feeder is being used, see pages 4-7 through 4-10. If the document glass is being used, see pages 4-11 through 4-13. NOTE To cancel print menu... Touch the [CANCEL] key in the screen of step 3. Printing in combination with other special functions When a print menu is combined with one of the following special modes, printing will reflect the selected special mode. Special modes Printing operation Margin shift Like the copy image, the printed contents are shifted in accordance with the set margin. Dual page copy The print content is printed on each copy sheet. Pamphlet copy Book copy The print content is printed on each page of the "book". Multi shot Card shot The print content is printed on each copy sheet. Covers/inserts In the print menu settings, specify whether or not the print content is printed on covers and inserts. NOTE When combined with "Erase", "Job build", "Mirror image" or "B/W reverse", printing takes place normally at the set position on the paper. 5-32
-
 1
1 -
2
-
3
-
4
-
5
-
6
-
7
-
8
-
9
-
10
-
11
-
12
-
13
-
14
-
15
-
16
-
17
-
18
-
19
-
20
-
21
-
22
-
23
-
24
-
25
-
26
-
27
-
28
-
29
-
30
-
31
-
32
-
33
-
34
-
35
-
36
-
37
-
38
-
39
-
40
-
41
-
42
-
43
-
44
-
45
-
46
-
47
-
48
-
49
-
50
-
51
-
52
-
53
-
54
-
55
-
56
-
57
-
58
-
59
-
60
-
61
-
62
-
63
-
64
-
65
-
66
-
67
-
68
-
69
-
70
-
71
-
72
-
73
-
74
-
75
-
76
-
77
-
78
-
79
-
80
-
81
-
82
-
83
-
84
-
85
-
86
-
87
-
88
-
89
-
90
-
91
-
92
-
93
-
94
-
95
-
96
-
97
-
98
-
99
-
100
-
101
-
102
-
103
-
104
-
105
-
106
-
107
-
108
-
109
-
110
-
111
-
112
-
113
-
114
-
115
-
116
-
117
-
118
-
119
-
120
-
121
-
122
-
123
-
124
-
125
-
126
-
127
-
128
-
129
-
130
-
131
-
132
-
133
-
134
-
 135
135 -
 136
136 -
 137
137 -
 138
138 -
 139
139 -
 140
140 -
 141
141 -
 142
142 -
 143
143 -
 144
144 -
 145
145 -
146
-
147
-
148
-
149
-
150
-
151
-
152
-
153
-
154
-
155
-
156
-
157
-
158
-
159
-
160
-
161
-
162
-
163
-
164
-
165
-
166
-
167
-
168
-
169
-
170
-
171
-
172
-
173
-
174
-
175
-
176
-
177
-
178
-
179
-
180
-
181
-
182
-
183
-
184
-
185
-
186
-
187
-
188
-
189
-
190
-
191
-
192
-
193
-
194
-
195
-
196
-
197
-
198
-
199
-
200
 |
 |