Sharp MX-M450N Operation Manual - Page 141
Printing the date on copies, Touch the [DATE] key.
 |
View all Sharp MX-M450N manuals
Add to My Manuals
Save this manual to your list of manuals |
Page 141 highlights
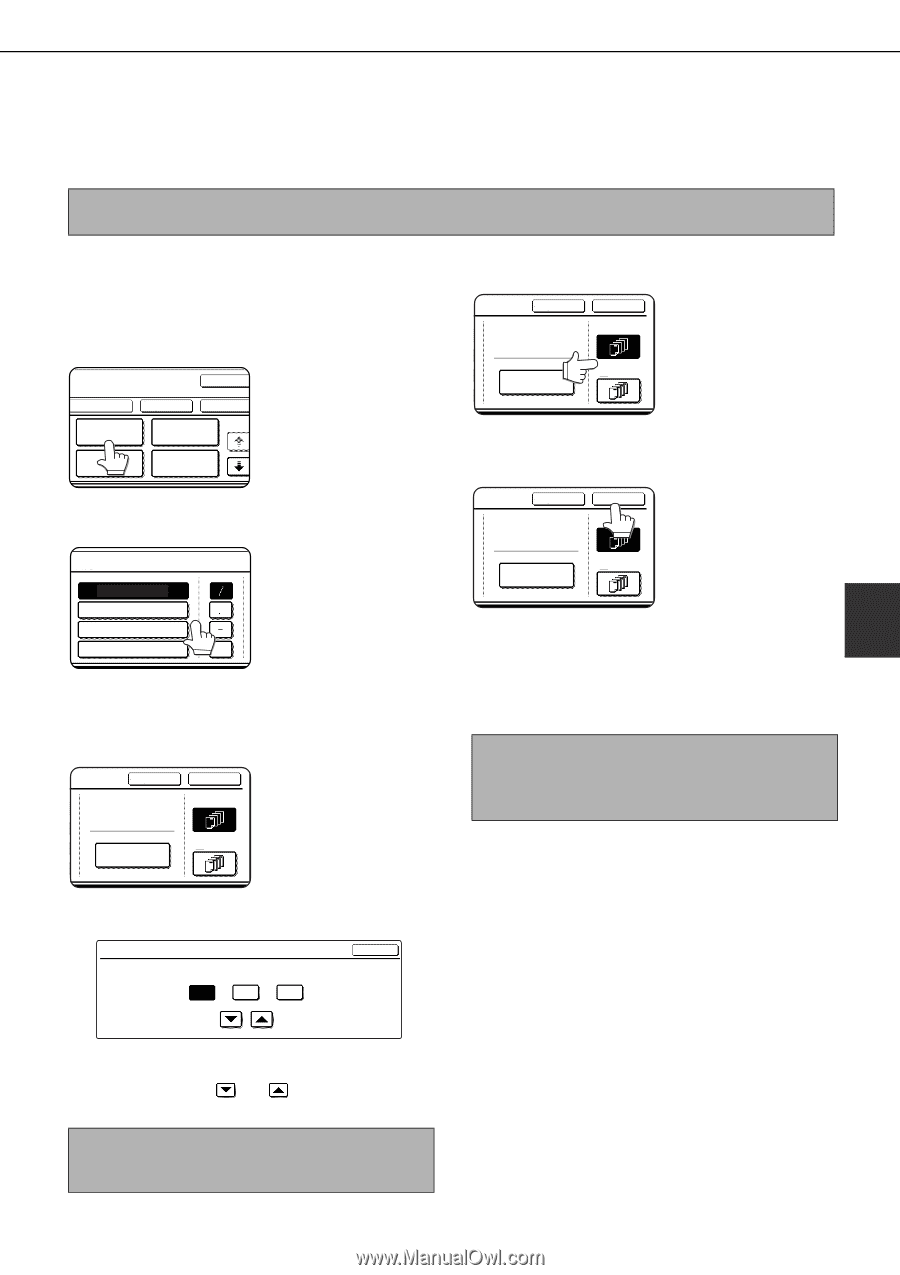
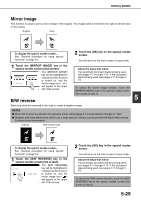
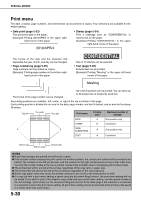
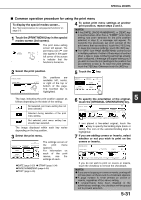
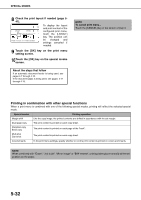
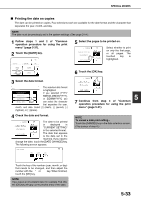
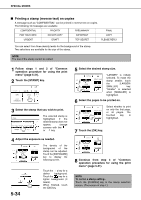
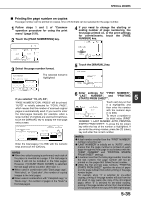
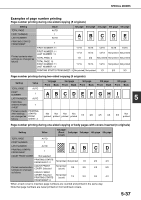
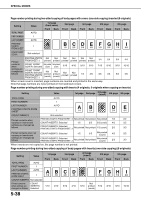
SPECIAL MODES ■ Printing the date on copies The date can be printed on copies. Four selections each are available for the date format and the character that separates the year, month, and day. NOTE The date must be previously set in the system settings. (See page 2-14.) 1 Follow steps 1 and 2 of "Common operation procedure for using the print menu" (page 5-31). 2 Touch the [DATE] key. LAYOUT CANCEL DATE STAMP PAGE NUMBERING TEXT OK OK 1/2 3 Select the date format. The selected date format DATE is highlighted. YYYY/MM/DD If you selected [YYYY/ MM/DD/YYYY MM/DD], [MM/DD/YYYY], DD/MM/YYYY or [DD/MM/YYYY], you MM DD, YYYY can select the character that separates the year, month, and date. Select [/] (slash), [.] (period), [-] (hyphen), or [ ] (space). 4 Check the date and format. CANCEL OK The date to be printed CURRENT SETTING 2010/APR/04 FIRST PAGE is displayed in "CURRENT SETTING" in the selected format. DATE CHANGE ALL PAGES The date that appears is the date set in the machine. If you need to change the date, touch the [DATE CHANGE] key. The following screen appears. DATE CHANGE OK YEAR MONTH DAY 2010 04 04 5 Select the pages to be printed on. CANCEL CURRENT SETTING 2010/APR/04 DATE CHANGE OK FIRST PAGE ALL PAGES Select whether to print on only the first page, or all pages. The touched key is highlighted. 6 Touch the [OK] key. CANCEL CURRENT SETTING 2010/APR/04 DATE CHANGE OK FIRST PAGE ALL PAGES 5 7 Continue from step 4 of "Common operation procedure for using the print menu" (page 5-31). NOTE To cancel a date print setting... Touch the [CANCEL] key in the date selection screen. (The screen of step 6.) Touch the key of the number (year, month, or day) that needs to be changed, and then adjust the number with the or key. When finished, touch the [OK] key. NOTE If you select a non-existent date (for example, Feb. 30), the [OK] key will gray out to prevent entry of the date. 5-33
-
 1
1 -
2
-
3
-
4
-
5
-
6
-
7
-
8
-
9
-
10
-
11
-
12
-
13
-
14
-
15
-
16
-
17
-
18
-
19
-
20
-
21
-
22
-
23
-
24
-
25
-
26
-
27
-
28
-
29
-
30
-
31
-
32
-
33
-
34
-
35
-
36
-
37
-
38
-
39
-
40
-
41
-
42
-
43
-
44
-
45
-
46
-
47
-
48
-
49
-
50
-
51
-
52
-
53
-
54
-
55
-
56
-
57
-
58
-
59
-
60
-
61
-
62
-
63
-
64
-
65
-
66
-
67
-
68
-
69
-
70
-
71
-
72
-
73
-
74
-
75
-
76
-
77
-
78
-
79
-
80
-
81
-
82
-
83
-
84
-
85
-
86
-
87
-
88
-
89
-
90
-
91
-
92
-
93
-
94
-
95
-
96
-
97
-
98
-
99
-
100
-
101
-
102
-
103
-
104
-
105
-
106
-
107
-
108
-
109
-
110
-
111
-
112
-
113
-
114
-
115
-
116
-
117
-
118
-
119
-
120
-
121
-
122
-
123
-
124
-
125
-
126
-
127
-
128
-
129
-
130
-
131
-
132
-
133
-
134
-
135
-
 136
136 -
 137
137 -
 138
138 -
 139
139 -
 140
140 -
 141
141 -
 142
142 -
 143
143 -
 144
144 -
 145
145 -
 146
146 -
147
-
148
-
149
-
150
-
151
-
152
-
153
-
154
-
155
-
156
-
157
-
158
-
159
-
160
-
161
-
162
-
163
-
164
-
165
-
166
-
167
-
168
-
169
-
170
-
171
-
172
-
173
-
174
-
175
-
176
-
177
-
178
-
179
-
180
-
181
-
182
-
183
-
184
-
185
-
186
-
187
-
188
-
189
-
190
-
191
-
192
-
193
-
194
-
195
-
196
-
197
-
198
-
199
-
200
 |
 |