Sharp MX-M450N Operation Manual - Page 34
LOADING PAPER, Loading paper in paper tray 1, Changing the paper size in paper tray 1
 |
View all Sharp MX-M450N manuals
Add to My Manuals
Save this manual to your list of manuals |
Page 34 highlights
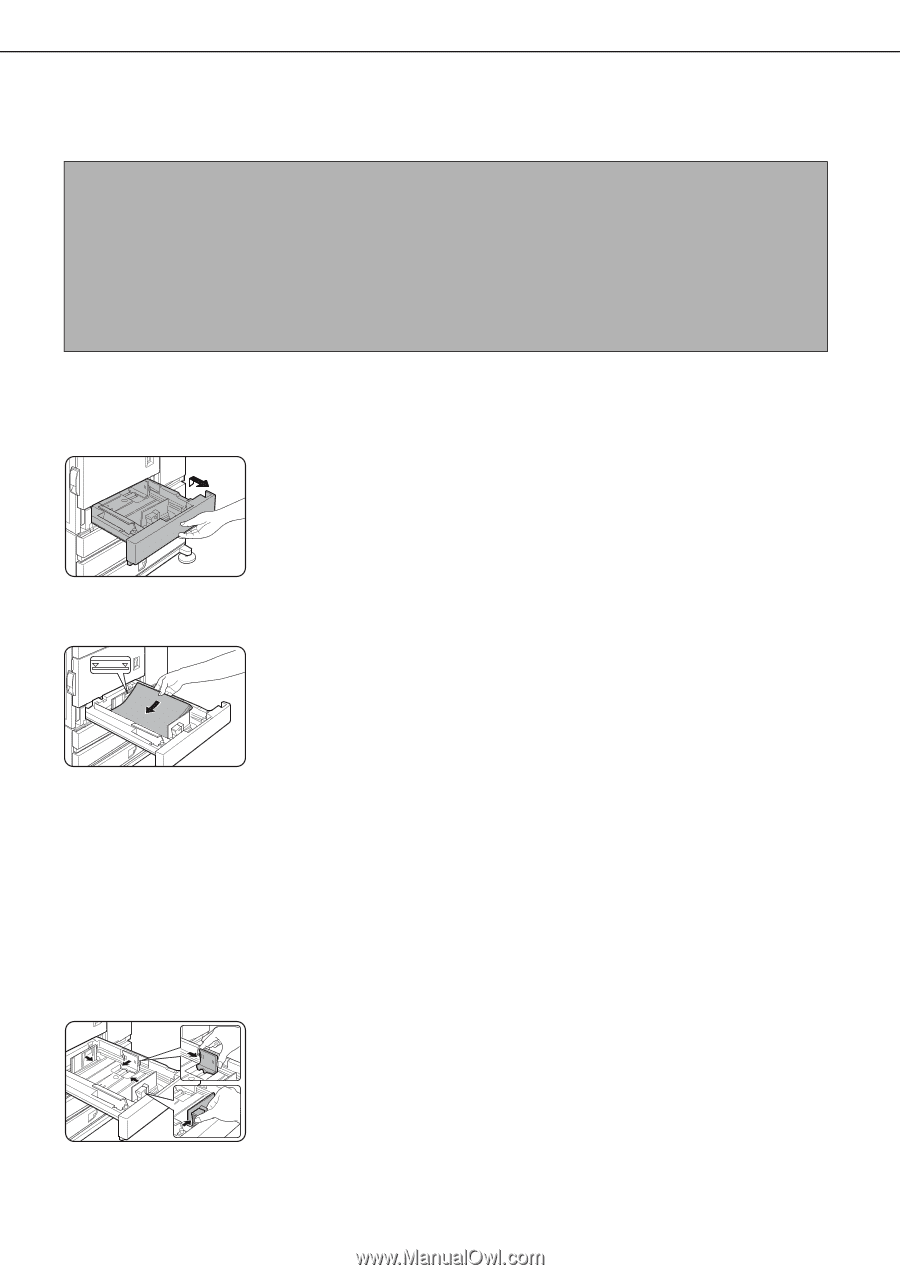
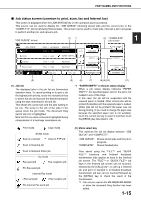
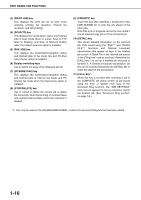
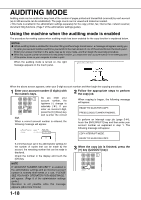
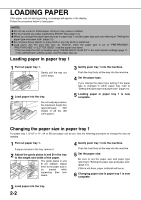
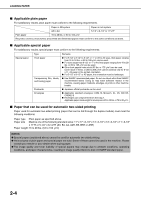
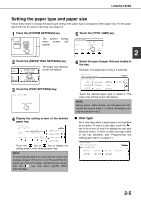
LOADING PAPER If the paper runs out during printing, a message will appear in the display. Follow the procedure below to load paper. NOTES ● Do not use curled or folded paper. Doing so may cause a misfeed. ● For best results use paper supplied by SHARP. (See page 2-4.) ● When you change the paper type and size in paper tray 1, set the paper type and size referring to "Setting the paper type and paper size" (page 2-5). ● Do not place heavy objects or press hard on any tray which is pulled out. ● Load paper with the print side face up. However, when the paper type is set to "PRE-PRINTED", "PRE-PUNCHED" or "LETTER HEAD", load the paper face down*. * If the two-sided function is disabled using "DISABLING OF DUPLEX" in the administrator settings (page 11 of the administrator settings guide), load the paper face up. Loading paper in paper tray 1 1 Pull out paper tray 1. Gently pull the tray out until it stops. 2 Load paper into the tray. Do not load paper above the maximum height line (approximately 500 sheets of 20 lbs. (80 g/m2) paper). 3 Gently push tray 1 into the machine. Push the tray firmly all the way into the machine. 4 Set the paper type. If you change the paper type setting if the paper type is changed in either paper tray, refer to "Setting the paper type and paper size" (page 2-5). 5 Loading paper in paper tray 1 is now complete. Changing the paper size in paper tray 1 For paper tray 1, 8-1/2" x 11", A4 or B5 size paper can be set. Use the following procedure to change the size as needed. 1 Pull out paper tray 1. If paper remains in the tray, remove it. 2 Adjust the guide plates A and B in the tray to the length and width of the paper. The guide plates A and B are slidable. Adjust them to the paper size to be loaded while squeezing their lock levers. 4 Gently push tray 1 into the machine. Push the tray firmly all the way into the machine. 5 Set the paper size. Be sure to set the paper size and paper type referring to "Setting the paper type and paper size" (page 2-5). If this is not done, paper misfeeds will occur. 6 Changing paper size in paper tray 1 is now complete. 3 Load paper into the tray. 2-2
-
 1
1 -
2
-
3
-
4
-
5
-
6
-
7
-
8
-
9
-
10
-
11
-
12
-
13
-
14
-
15
-
16
-
17
-
18
-
19
-
20
-
21
-
22
-
23
-
24
-
25
-
26
-
27
-
28
-
 29
29 -
 30
30 -
 31
31 -
 32
32 -
 33
33 -
 34
34 -
 35
35 -
 36
36 -
 37
37 -
 38
38 -
 39
39 -
40
-
41
-
42
-
43
-
44
-
45
-
46
-
47
-
48
-
49
-
50
-
51
-
52
-
53
-
54
-
55
-
56
-
57
-
58
-
59
-
60
-
61
-
62
-
63
-
64
-
65
-
66
-
67
-
68
-
69
-
70
-
71
-
72
-
73
-
74
-
75
-
76
-
77
-
78
-
79
-
80
-
81
-
82
-
83
-
84
-
85
-
86
-
87
-
88
-
89
-
90
-
91
-
92
-
93
-
94
-
95
-
96
-
97
-
98
-
99
-
100
-
101
-
102
-
103
-
104
-
105
-
106
-
107
-
108
-
109
-
110
-
111
-
112
-
113
-
114
-
115
-
116
-
117
-
118
-
119
-
120
-
121
-
122
-
123
-
124
-
125
-
126
-
127
-
128
-
129
-
130
-
131
-
132
-
133
-
134
-
135
-
136
-
137
-
138
-
139
-
140
-
141
-
142
-
143
-
144
-
145
-
146
-
147
-
148
-
149
-
150
-
151
-
152
-
153
-
154
-
155
-
156
-
157
-
158
-
159
-
160
-
161
-
162
-
163
-
164
-
165
-
166
-
167
-
168
-
169
-
170
-
171
-
172
-
173
-
174
-
175
-
176
-
177
-
178
-
179
-
180
-
181
-
182
-
183
-
184
-
185
-
186
-
187
-
188
-
189
-
190
-
191
-
192
-
193
-
194
-
195
-
196
-
197
-
198
-
199
-
200
 |
 |