Sharp MX-M450N Operation Manual - Page 54
REMOVING AN ORIGINAL MISFEED, Removing a misfed original from the automatic document feeder
 |
View all Sharp MX-M450N manuals
Add to My Manuals
Save this manual to your list of manuals |
Page 54 highlights
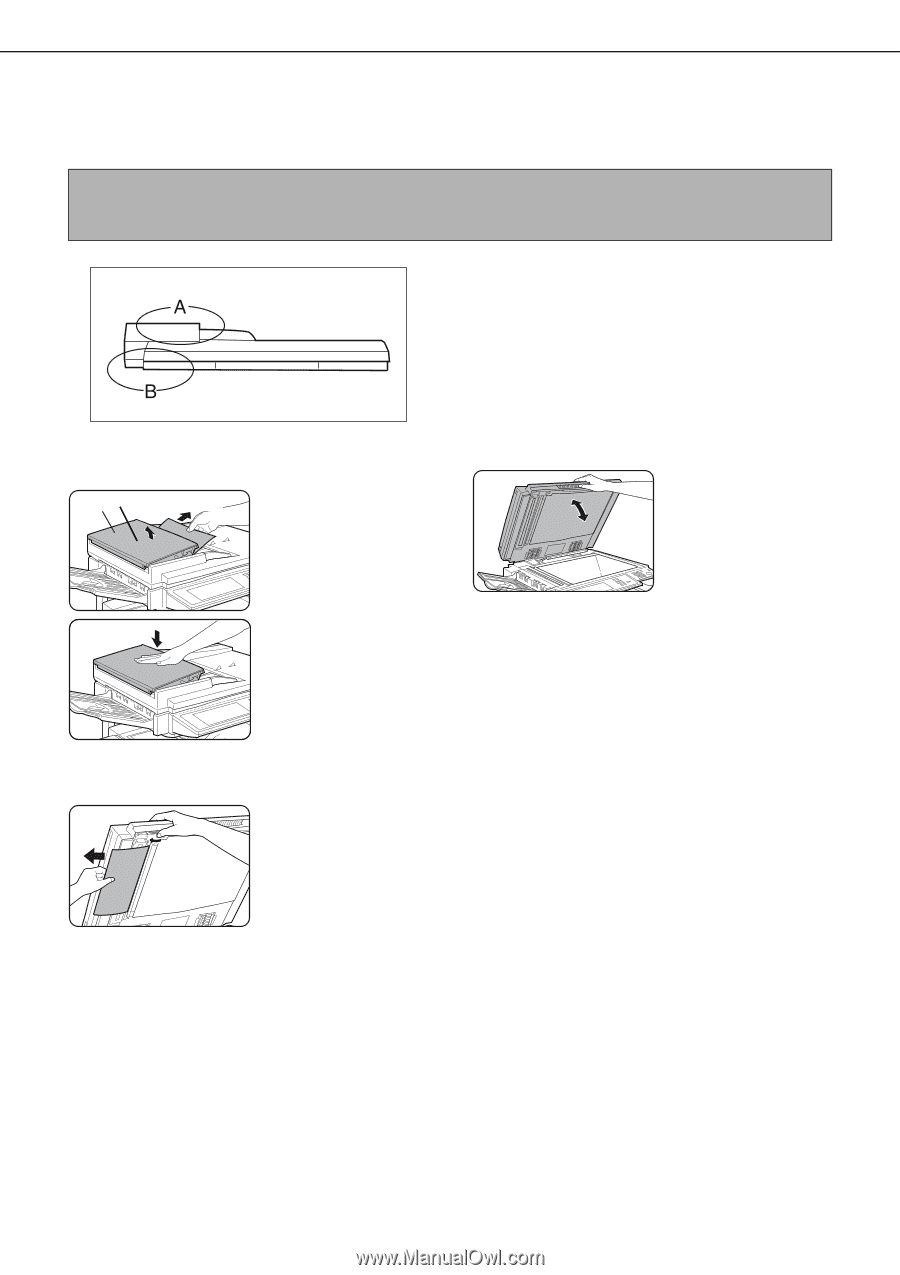
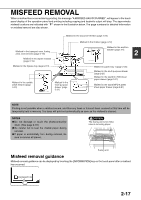
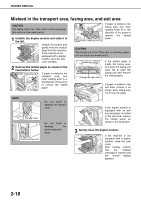
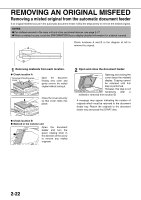
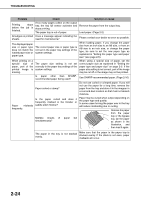
REMOVING AN ORIGINAL MISFEED Removing a misfed original from the automatic document feeder If an original misfeed occurs in the automatic document feeder, follow the steps below to remove the misfed original. NOTES ● For misfeed removal in the main unit and other peripheral devices, see page 2-17 ● When a misfeed occurs, touch the [INFORMATION] key to display detailed information for misfeed removal. Check locations A and B in the diagram at left to remove the original. 1 Removing misfeeds from each location. ● Check location A Document feeding area cover Open the document feeding area cover and gently remove the misfed original without tearing it. Close the cover securely so that cover clicks into place. 2 Open and close the document feeder. Opening and closing the cover clears the misfeed display. Copying cannot be resumed until this step is performed. However, this step is not necessary after a misfeed is removed from location B. A message may appear indicating the number of originals which must be returned to the document feeder tray. Return the originals to the document feeder tray and press the [START] key. ● Check location B ● Misfeed in the transfer unit Open the document feeder and turn the green rotating knob in the direction of the arrow to remove any misfed originals. 2-22
-
 1
1 -
2
-
3
-
4
-
5
-
6
-
7
-
8
-
9
-
10
-
11
-
12
-
13
-
14
-
15
-
16
-
17
-
18
-
19
-
20
-
21
-
22
-
23
-
24
-
25
-
26
-
27
-
28
-
29
-
30
-
31
-
32
-
33
-
34
-
35
-
36
-
37
-
38
-
39
-
40
-
41
-
42
-
43
-
44
-
45
-
46
-
47
-
48
-
 49
49 -
 50
50 -
 51
51 -
 52
52 -
 53
53 -
 54
54 -
 55
55 -
 56
56 -
 57
57 -
 58
58 -
 59
59 -
60
-
61
-
62
-
63
-
64
-
65
-
66
-
67
-
68
-
69
-
70
-
71
-
72
-
73
-
74
-
75
-
76
-
77
-
78
-
79
-
80
-
81
-
82
-
83
-
84
-
85
-
86
-
87
-
88
-
89
-
90
-
91
-
92
-
93
-
94
-
95
-
96
-
97
-
98
-
99
-
100
-
101
-
102
-
103
-
104
-
105
-
106
-
107
-
108
-
109
-
110
-
111
-
112
-
113
-
114
-
115
-
116
-
117
-
118
-
119
-
120
-
121
-
122
-
123
-
124
-
125
-
126
-
127
-
128
-
129
-
130
-
131
-
132
-
133
-
134
-
135
-
136
-
137
-
138
-
139
-
140
-
141
-
142
-
143
-
144
-
145
-
146
-
147
-
148
-
149
-
150
-
151
-
152
-
153
-
154
-
155
-
156
-
157
-
158
-
159
-
160
-
161
-
162
-
163
-
164
-
165
-
166
-
167
-
168
-
169
-
170
-
171
-
172
-
173
-
174
-
175
-
176
-
177
-
178
-
179
-
180
-
181
-
182
-
183
-
184
-
185
-
186
-
187
-
188
-
189
-
190
-
191
-
192
-
193
-
194
-
195
-
196
-
197
-
198
-
199
-
200
 |
 |