Sharp MX-M450N Operation Manual - Page 93
CHECKING THE SIZE OF A PLACED ORIGINAL, Manually setting the scanning size
 |
View all Sharp MX-M450N manuals
Add to My Manuals
Save this manual to your list of manuals |
Page 93 highlights
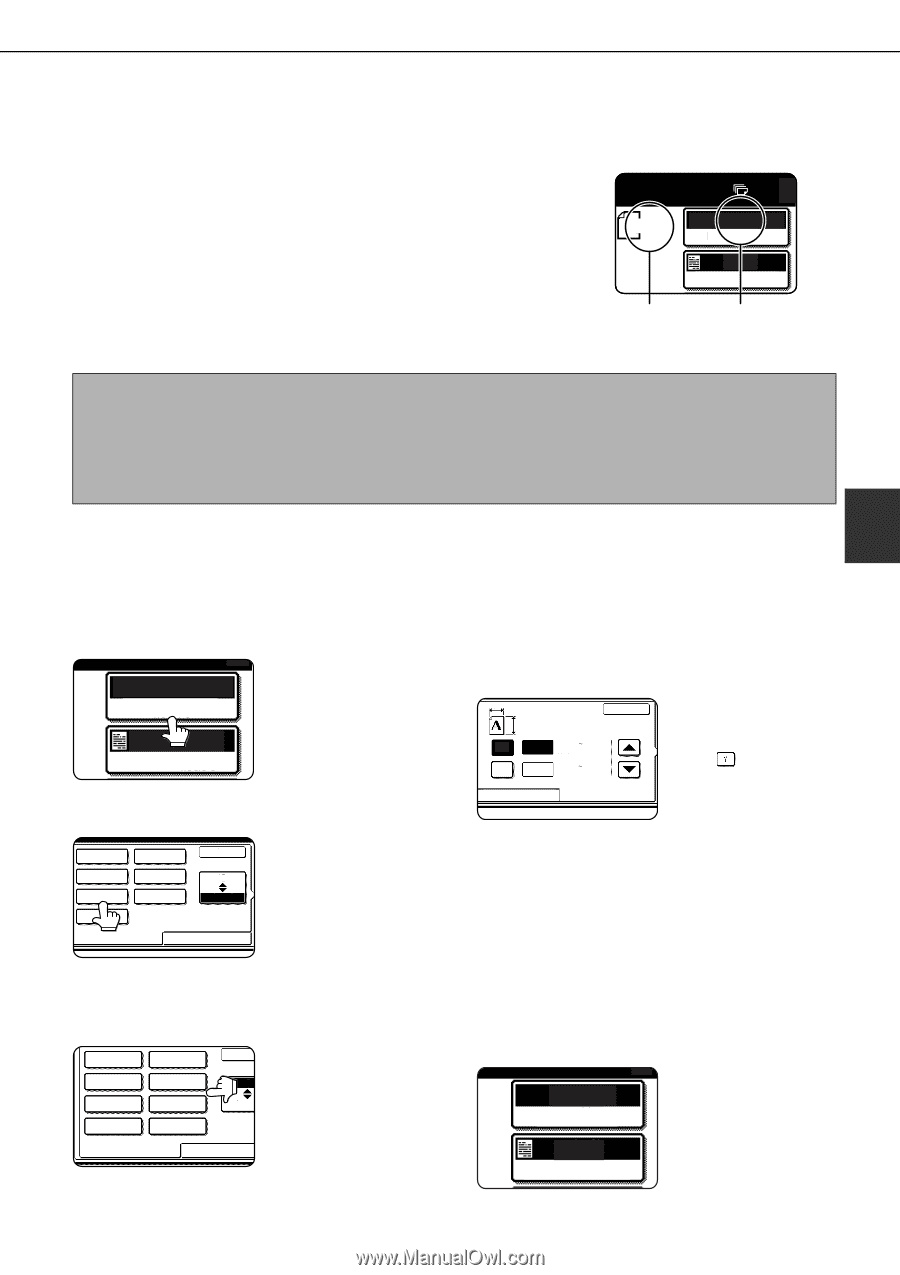
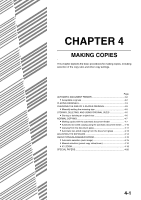
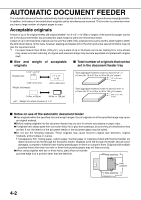
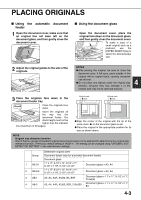
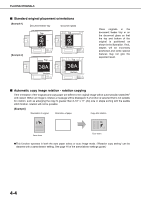
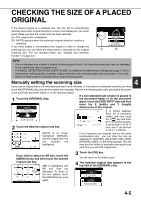
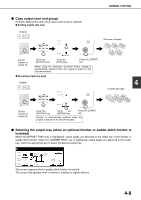
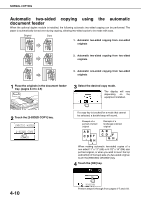
CHECKING THE SIZE OF A PLACED ORIGINAL If the placed original is a standard size, the size will be automatically detected (automatic original detection function) and displayed in the touch panel. Make sure that the correct size has been detected. (A) : The original size is displayed. (B) : [AUTO] appears when the automatic original detection function is operating. If you have loaded a non-standard size original or wish to change the scanning size, you can follow the steps below to manually set the original scanning size. (For the standard sizes, see "Original size detection function" on page 4-3.) 81/2x11 (A) 0 AUTO ORIGINAL AUTO EXPOSURE (B) NOTE If a non-standard size original is loaded (including special sizes), the closest standard size may be displayed, or the original size may not appear at all. If "CANCEL DETECTION AT DOCUMENT GLASS" is enabled in the administrator settings (see page 11 of the administrator settings guide), automatic original detection at the document glass will not operate. In this case, follow the steps below to manually set the original scanning size. Manually setting the scanning size 4 If you load an original that is not a standard size (such as an AB size), or if the size is not detected correctly, you must touch the [ORIGINAL] key and set the original size manually. Perform the following steps after placing the document in the automatic document feeder or on the document glass. If a non-standard size original is placed in 1 0 Touch the [ORIGINAL] key. the document feeder or on the document glass, touch the [SIZE INPUT] tab and then enter the X (width) and Y (length) AUTO dimensions of the original. ORIGINAL X OK X is initially selected. Y Enter the X dimension AUTO EXPOSURE X 17 (2 1/2 17) inch Y 11 5/8 (2 1/2 inch 11 5/8) (width) and then touch the Y( ) key and enter the Y dimension (length). 2 Touch the desired original size key. STANDARD SIZE SIZE INPUT X can be from 2-1/2 to 17 inch, and Y can be from 2-1/2 to 11-5/8 inch. 5 8X 1/2 1/2 5 8 R X 1/2 1/2 81/2X11 81/2X13 81/2X14 11X17 OK [AUTO] is no longer highlighted. [MANUAL] AB and the original size key INCH you touched are If you frequently use originals that are the same non-standard size, you can store the size as explained in "STORING, DELETING, AND USING ORIGINAL SIZES" on the following page. This will 81/2X11R highlighted. save you the trouble of manually entering the size STANDARD SIZE SIZE INPUT each time you use that original size. If you wish to select an AB size, touch the [AB/INCH] key and then touch the desired original size key. A5 A4 A5R A4R B5 B4 B5R A3 STANDARD SIZE OK AB INCH SIZE INPUT [AB] is highlighted and AB size keys are displayed. To return to the inch palette, touch the [AB/INCH] key once again. 3 Touch the [OK] key. You will return to the initial screen. The selected original size appears in the 4 0 top half of the [ORIGINAL] key. A4 ORIGINAL AUTO EXPOSURE 4-5
-
 1
1 -
2
-
3
-
4
-
5
-
6
-
7
-
8
-
9
-
10
-
11
-
12
-
13
-
14
-
15
-
16
-
17
-
18
-
19
-
20
-
21
-
22
-
23
-
24
-
25
-
26
-
27
-
28
-
29
-
30
-
31
-
32
-
33
-
34
-
35
-
36
-
37
-
38
-
39
-
40
-
41
-
42
-
43
-
44
-
45
-
46
-
47
-
48
-
49
-
50
-
51
-
52
-
53
-
54
-
55
-
56
-
57
-
58
-
59
-
60
-
61
-
62
-
63
-
64
-
65
-
66
-
67
-
68
-
69
-
70
-
71
-
72
-
73
-
74
-
75
-
76
-
77
-
78
-
79
-
80
-
81
-
82
-
83
-
84
-
85
-
86
-
87
-
 88
88 -
 89
89 -
 90
90 -
 91
91 -
 92
92 -
 93
93 -
 94
94 -
 95
95 -
 96
96 -
 97
97 -
 98
98 -
99
-
100
-
101
-
102
-
103
-
104
-
105
-
106
-
107
-
108
-
109
-
110
-
111
-
112
-
113
-
114
-
115
-
116
-
117
-
118
-
119
-
120
-
121
-
122
-
123
-
124
-
125
-
126
-
127
-
128
-
129
-
130
-
131
-
132
-
133
-
134
-
135
-
136
-
137
-
138
-
139
-
140
-
141
-
142
-
143
-
144
-
145
-
146
-
147
-
148
-
149
-
150
-
151
-
152
-
153
-
154
-
155
-
156
-
157
-
158
-
159
-
160
-
161
-
162
-
163
-
164
-
165
-
166
-
167
-
168
-
169
-
170
-
171
-
172
-
173
-
174
-
175
-
176
-
177
-
178
-
179
-
180
-
181
-
182
-
183
-
184
-
185
-
186
-
187
-
188
-
189
-
190
-
191
-
192
-
193
-
194
-
195
-
196
-
197
-
198
-
199
-
200
 |
 |